
Exclusive Pre-Order Tutorial
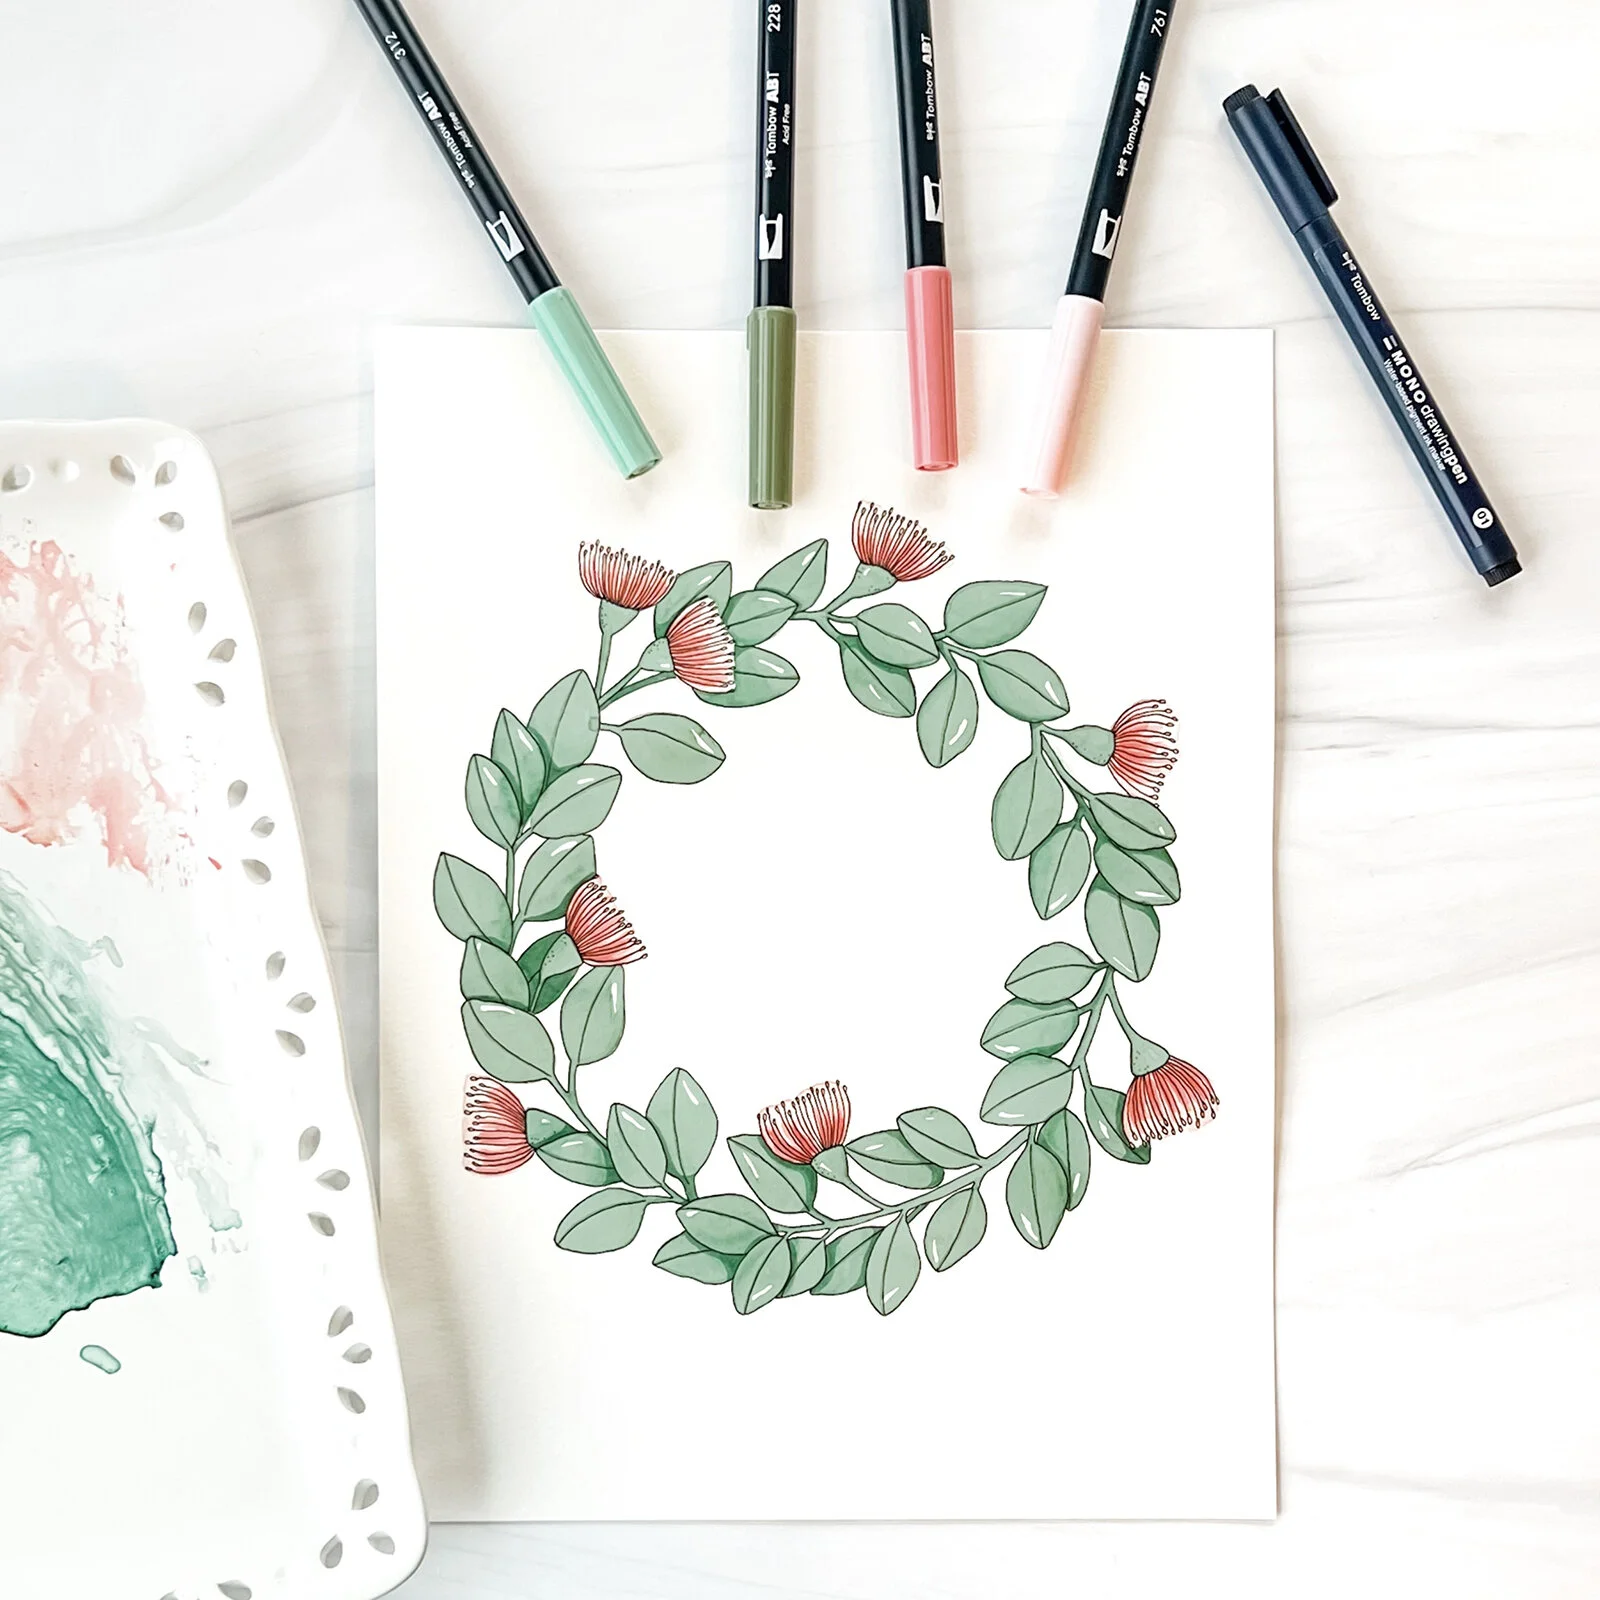
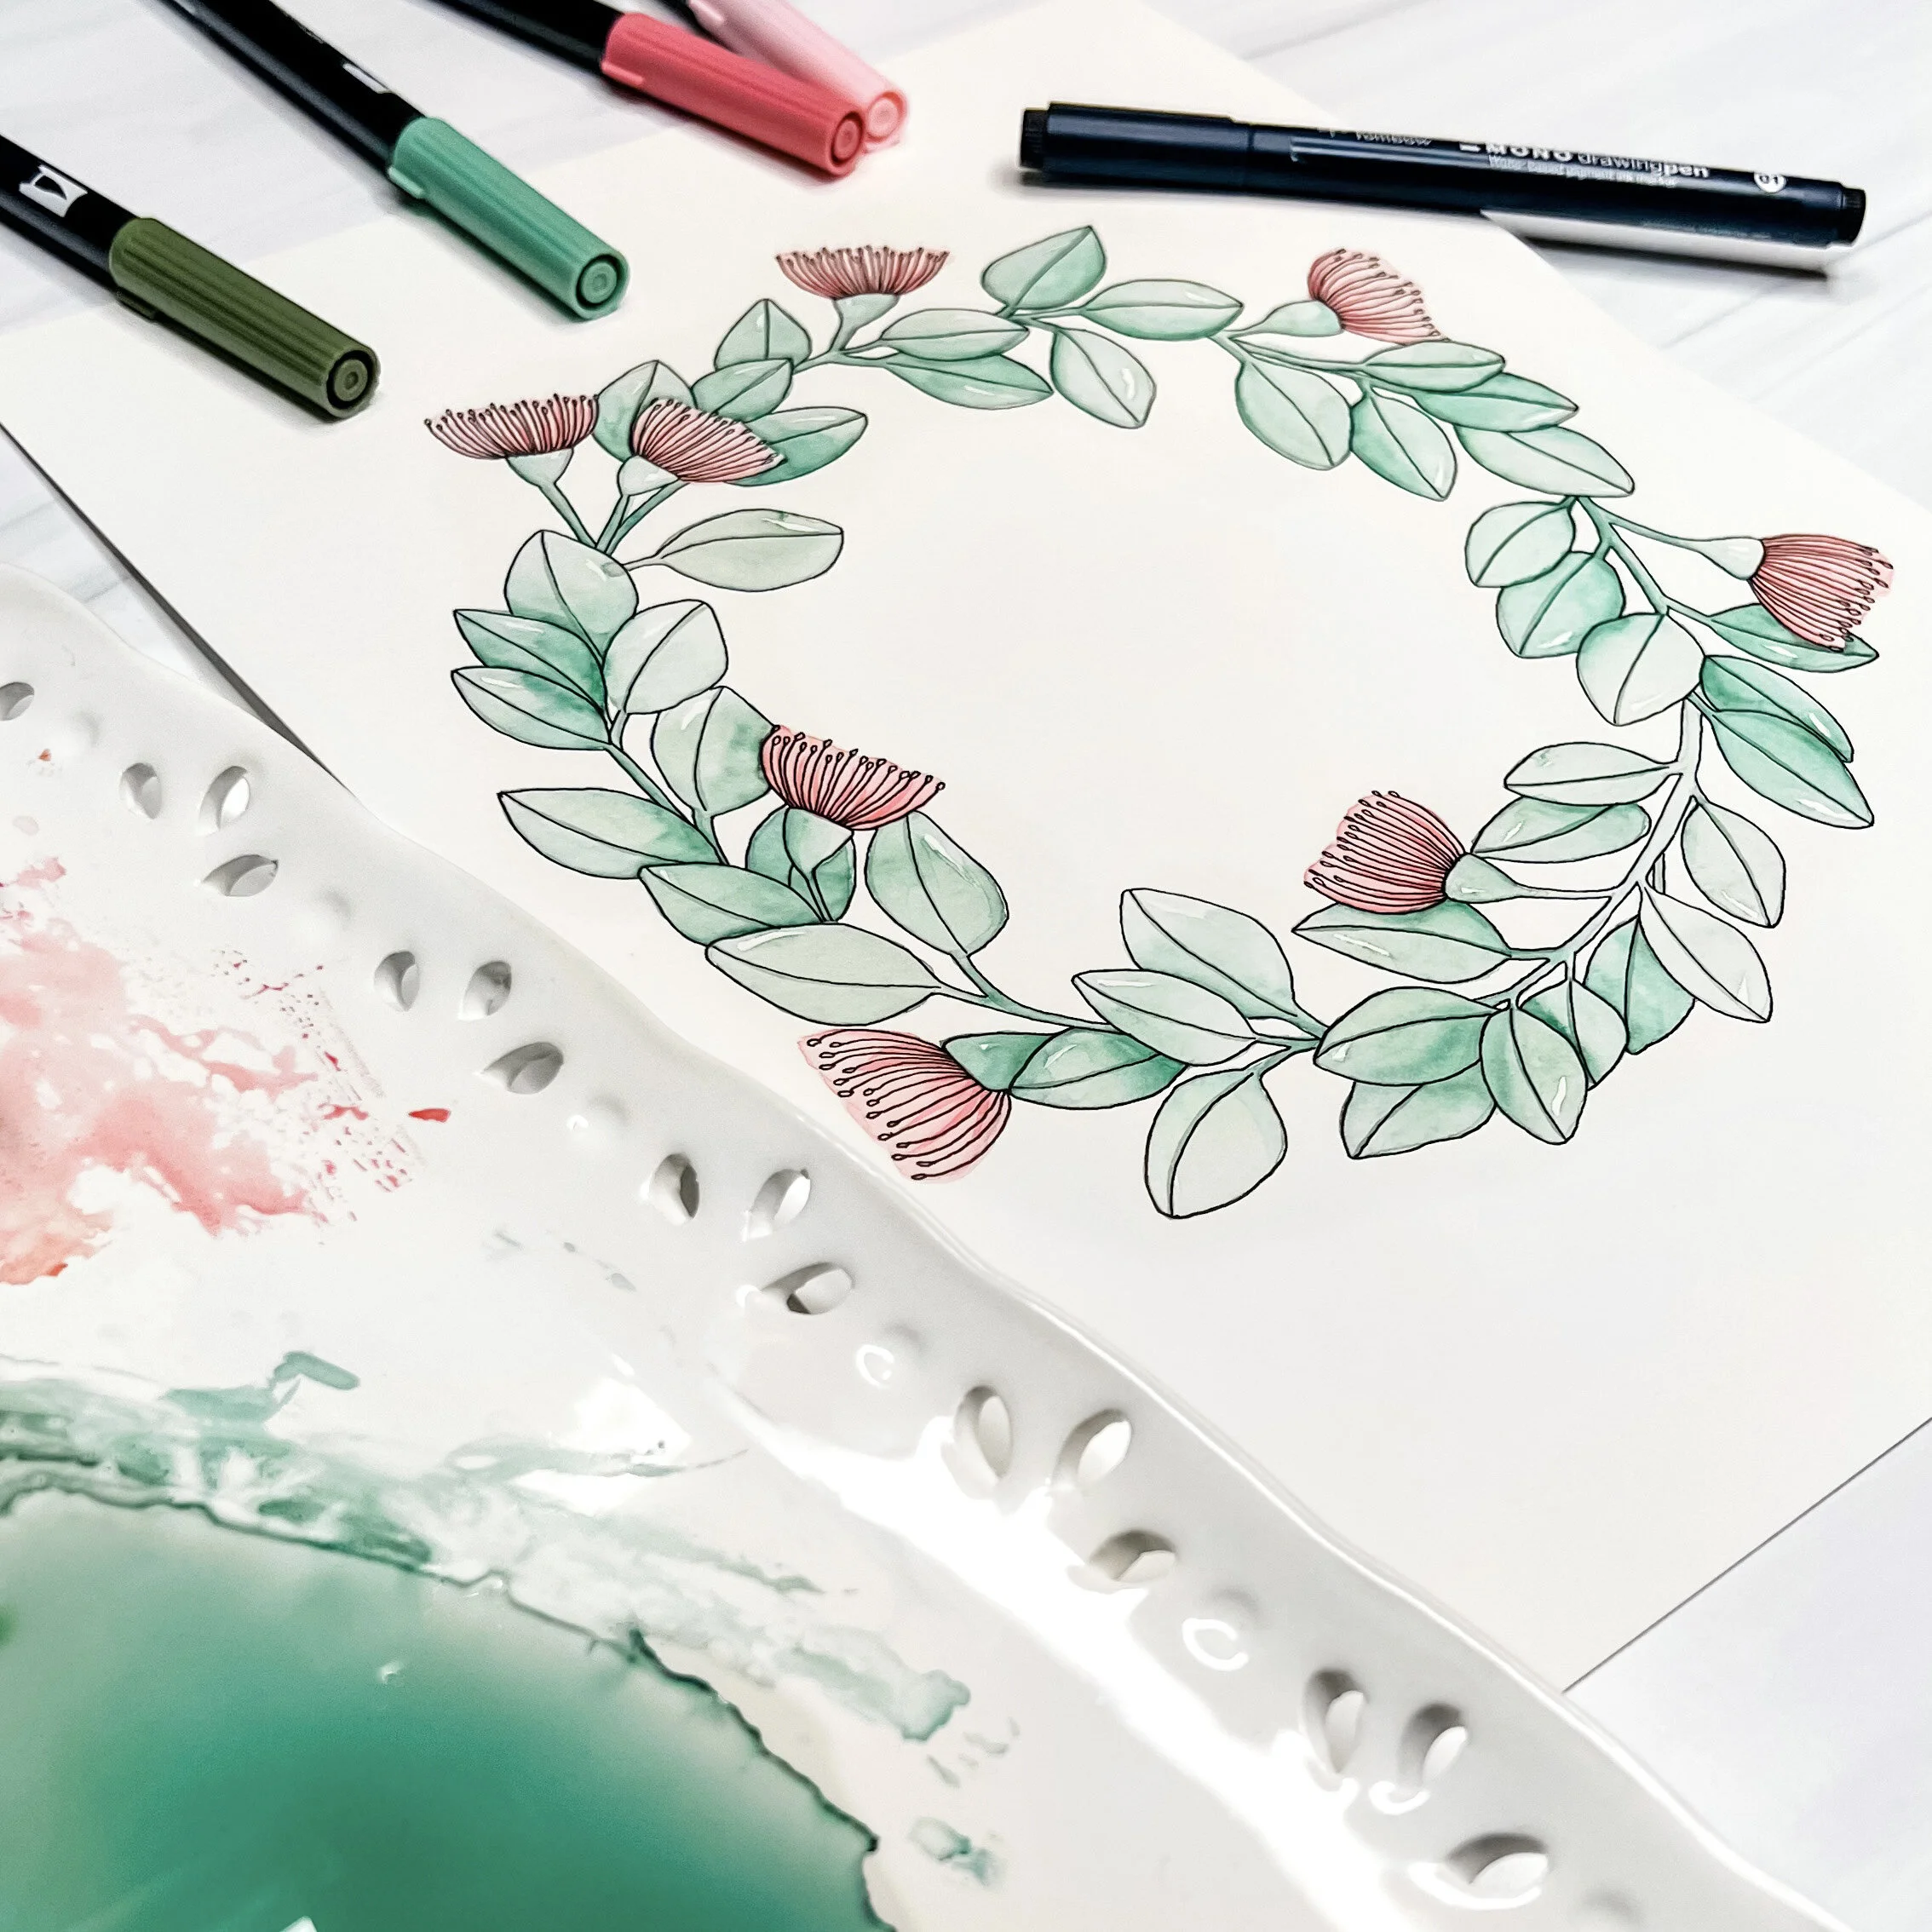
Thank you so much for pre-ordering my book Watercolor with Markers. Pre-orders are extremely important to the success of a book and I can’t tell you how much it means to me. As a token of my gratitude, please enjoy this exclusive gum leaf wreath tutorial. Being from Australia, gum trees (eucalyptus trees) will always have a special place in my heart, and the smell of one in flower always makes me think of home.
And don’t forget to add yourself to my newsletter so you don’t miss out on future tutorials, giveaways, tips, and news!
Below you’ll find all of the steps you need to create your own wreath, as well as a video at the end so you can watch each step come together. Let’s get started!
Materials:
I encourage you to use whatever colors you have on hand, or that make you happy, but here is a list of the materials I used for this project. if you do want to purchase any additional Tombow products, feel free to use my affiliate discount code for 15% off: bpbunny15 Tombow Dual Brush Pens are my favorite markers for blending and painting with, but feel free to try any water-based markers you have at home.
Tombow Dual Brush Pens (312, 228, 772, 761)
Tombow MONO Drawing Pen (Size 01)
Canson Watercolor Paper (9x12)
4H Pencil
Paper Towel for cleaning your brush and blending palette
For a blending palette, you can use a serving platter or white plate you aren’t using for food anymore, a laminated piece of card, a plastic or ceramic paint palette, or a Tombow blending palette.
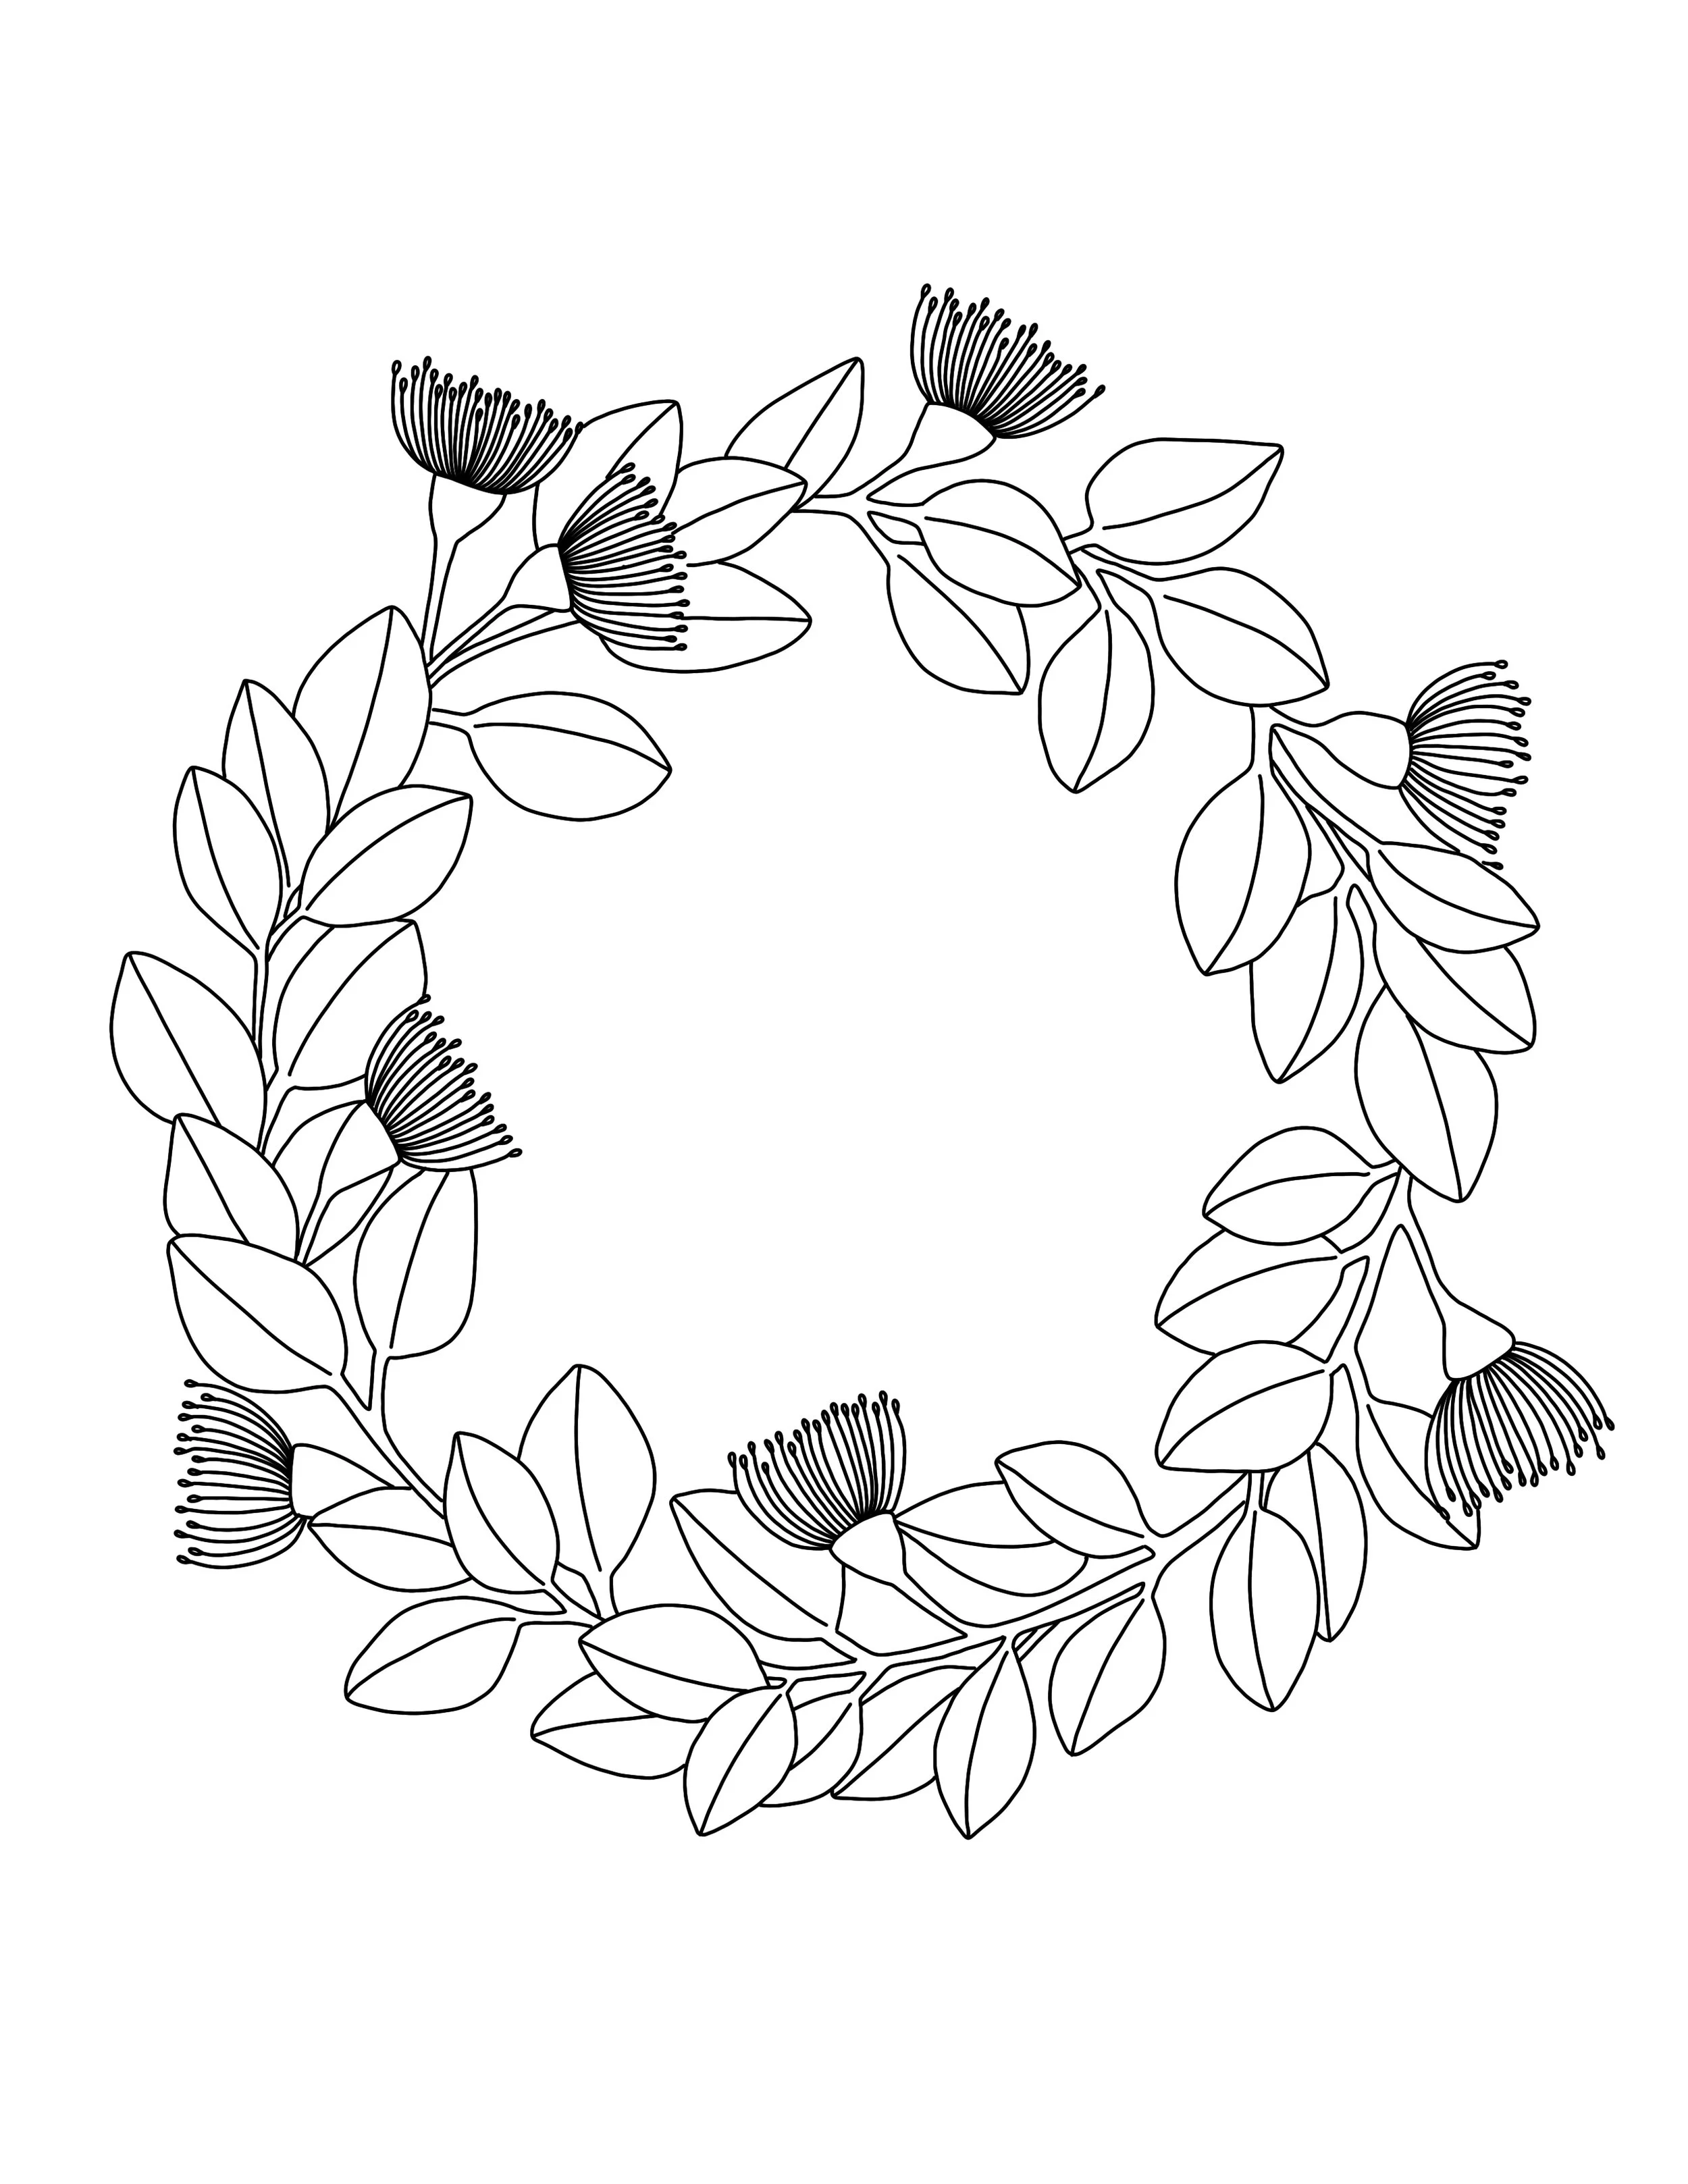
Step 1: Sketch Your Wreath
Sketch your wreath, using a 4H pencil on your watercolor paper. If you don’t feel confident sketching your own, you can download, print, and trace mine here.
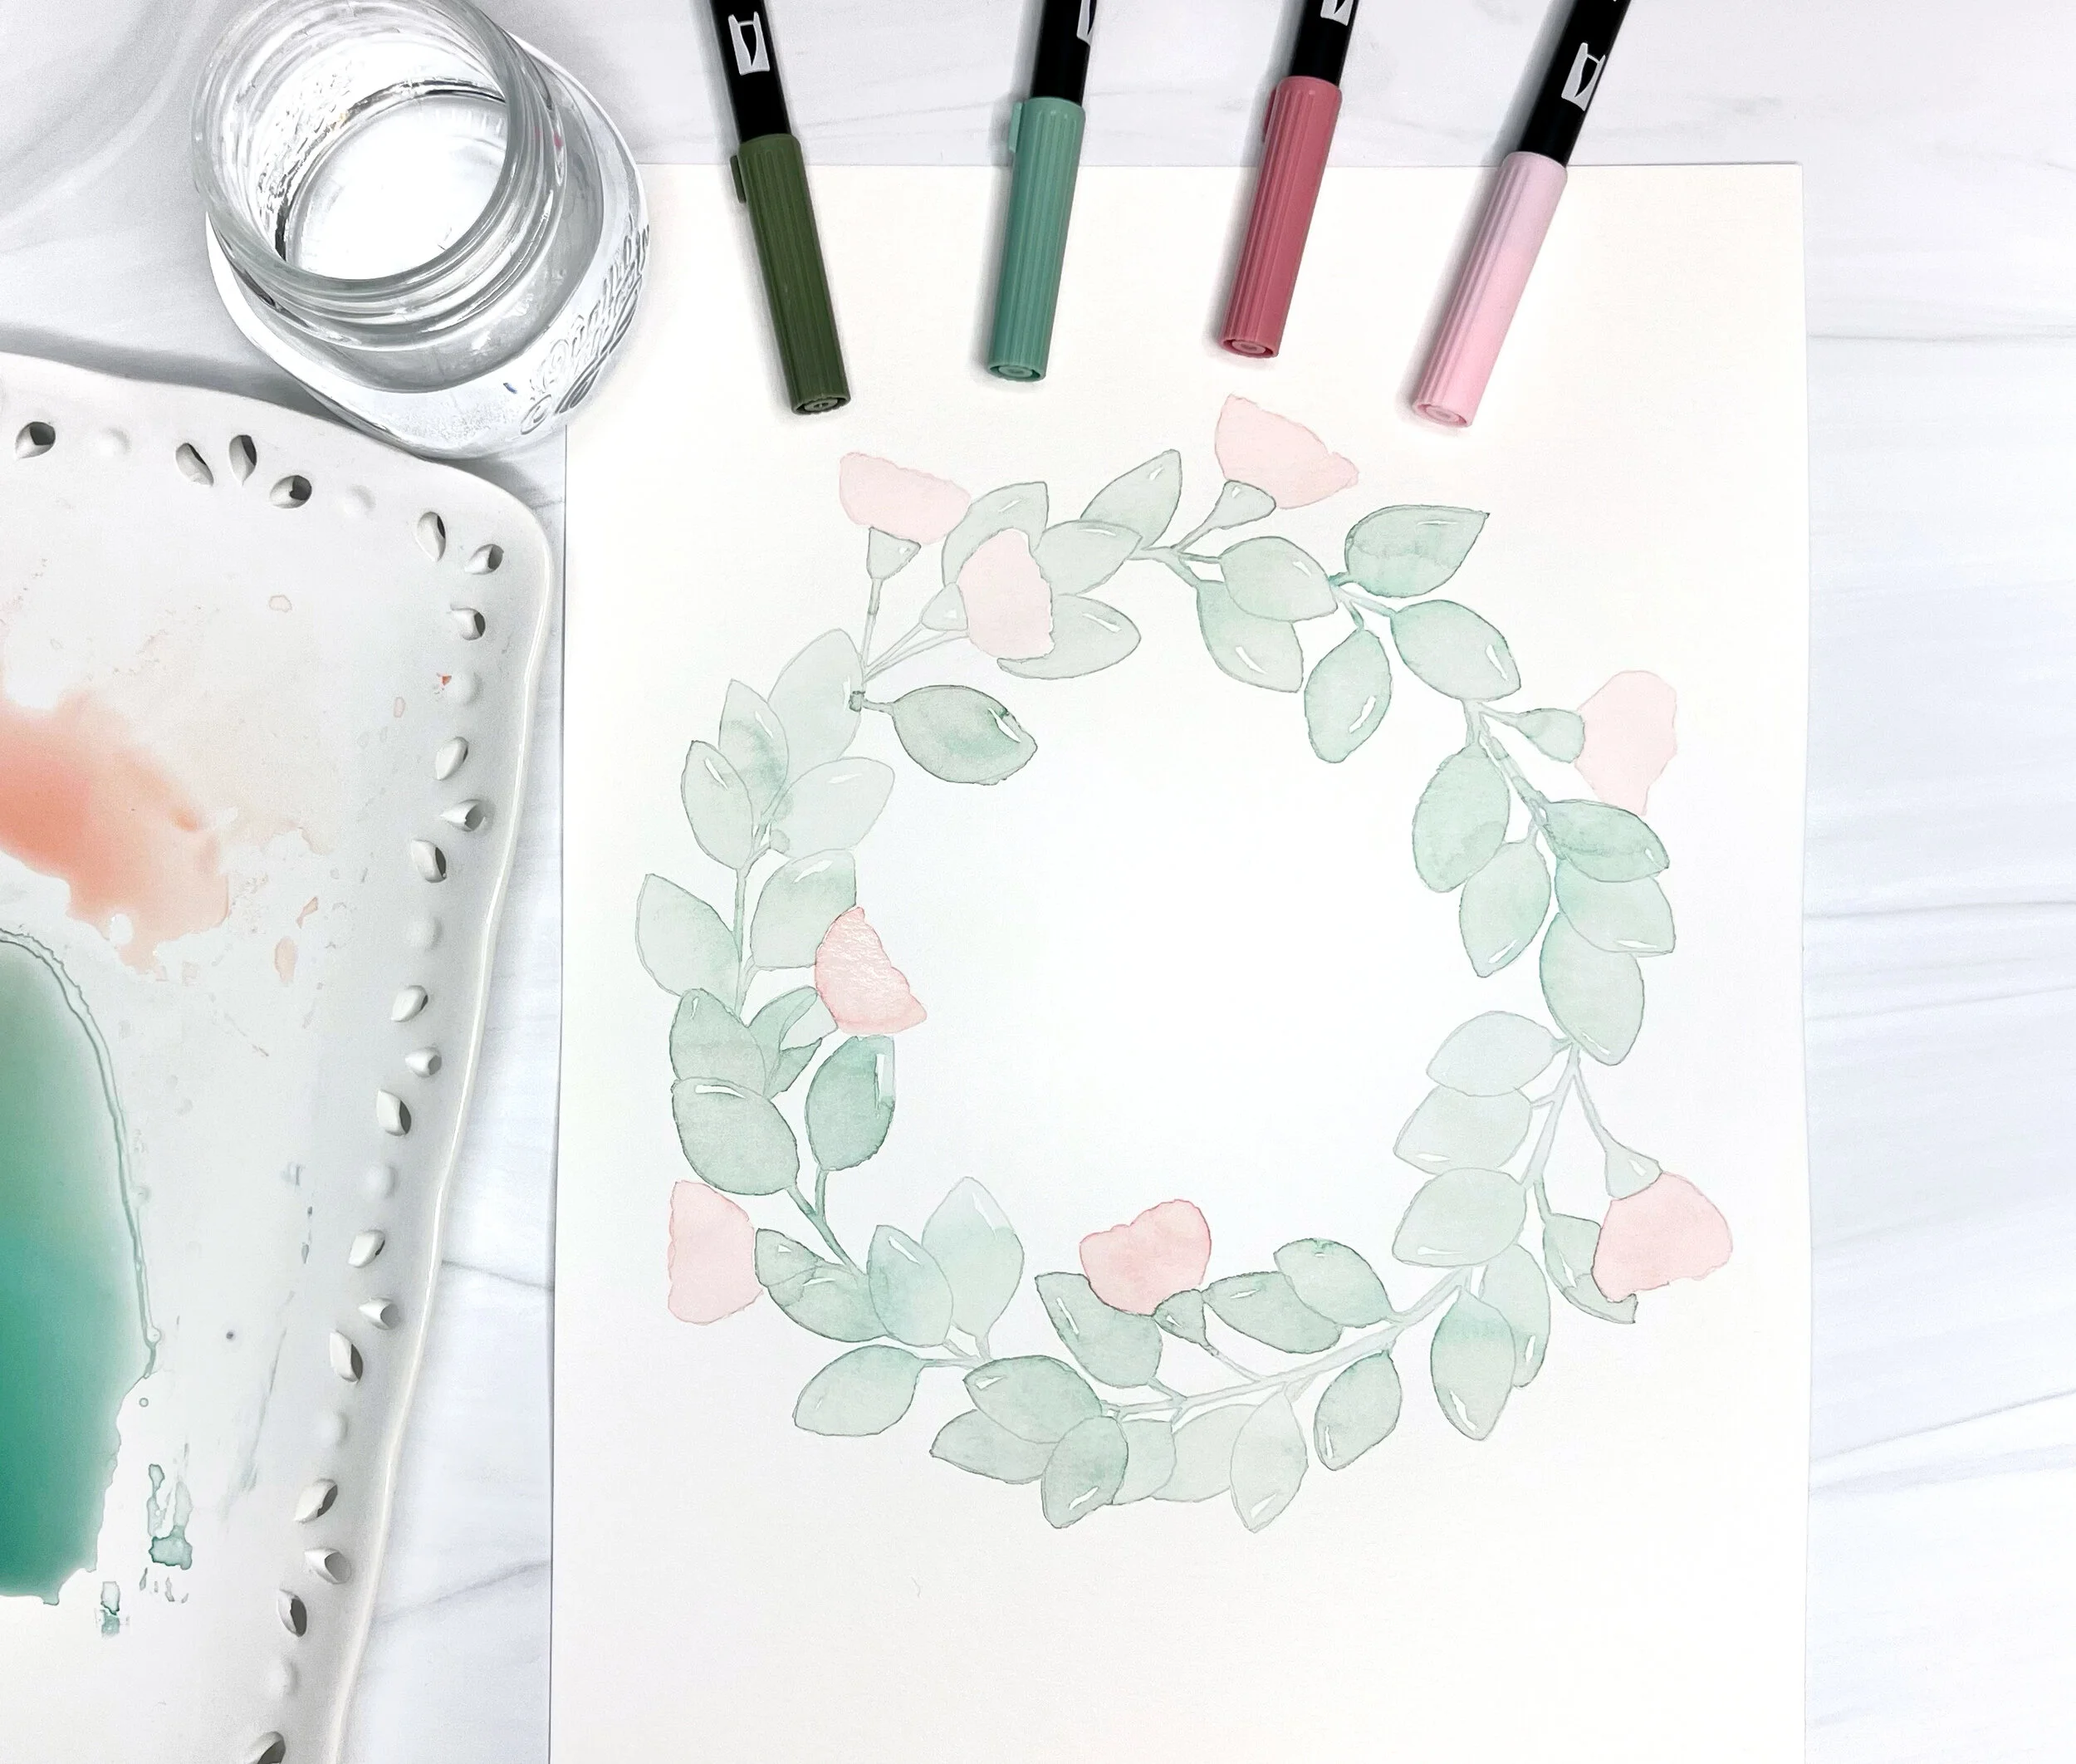
STEP 2: PAINT YOUR FIRST LAYER OF COLOR
Scribble some green ink onto your blending palette. I mixed Holly Green (312) with Gray Green (228) to make a new color all my own. Add a few drops of water to the ink and using a wet paintbrush transfer the ink from your palette to paint in the leaves on your paper.
Let the green ink dry, then mix up some pink on your blending palette and apply a first layer of color to the flowers. I used Carnation (761) for this first layer.
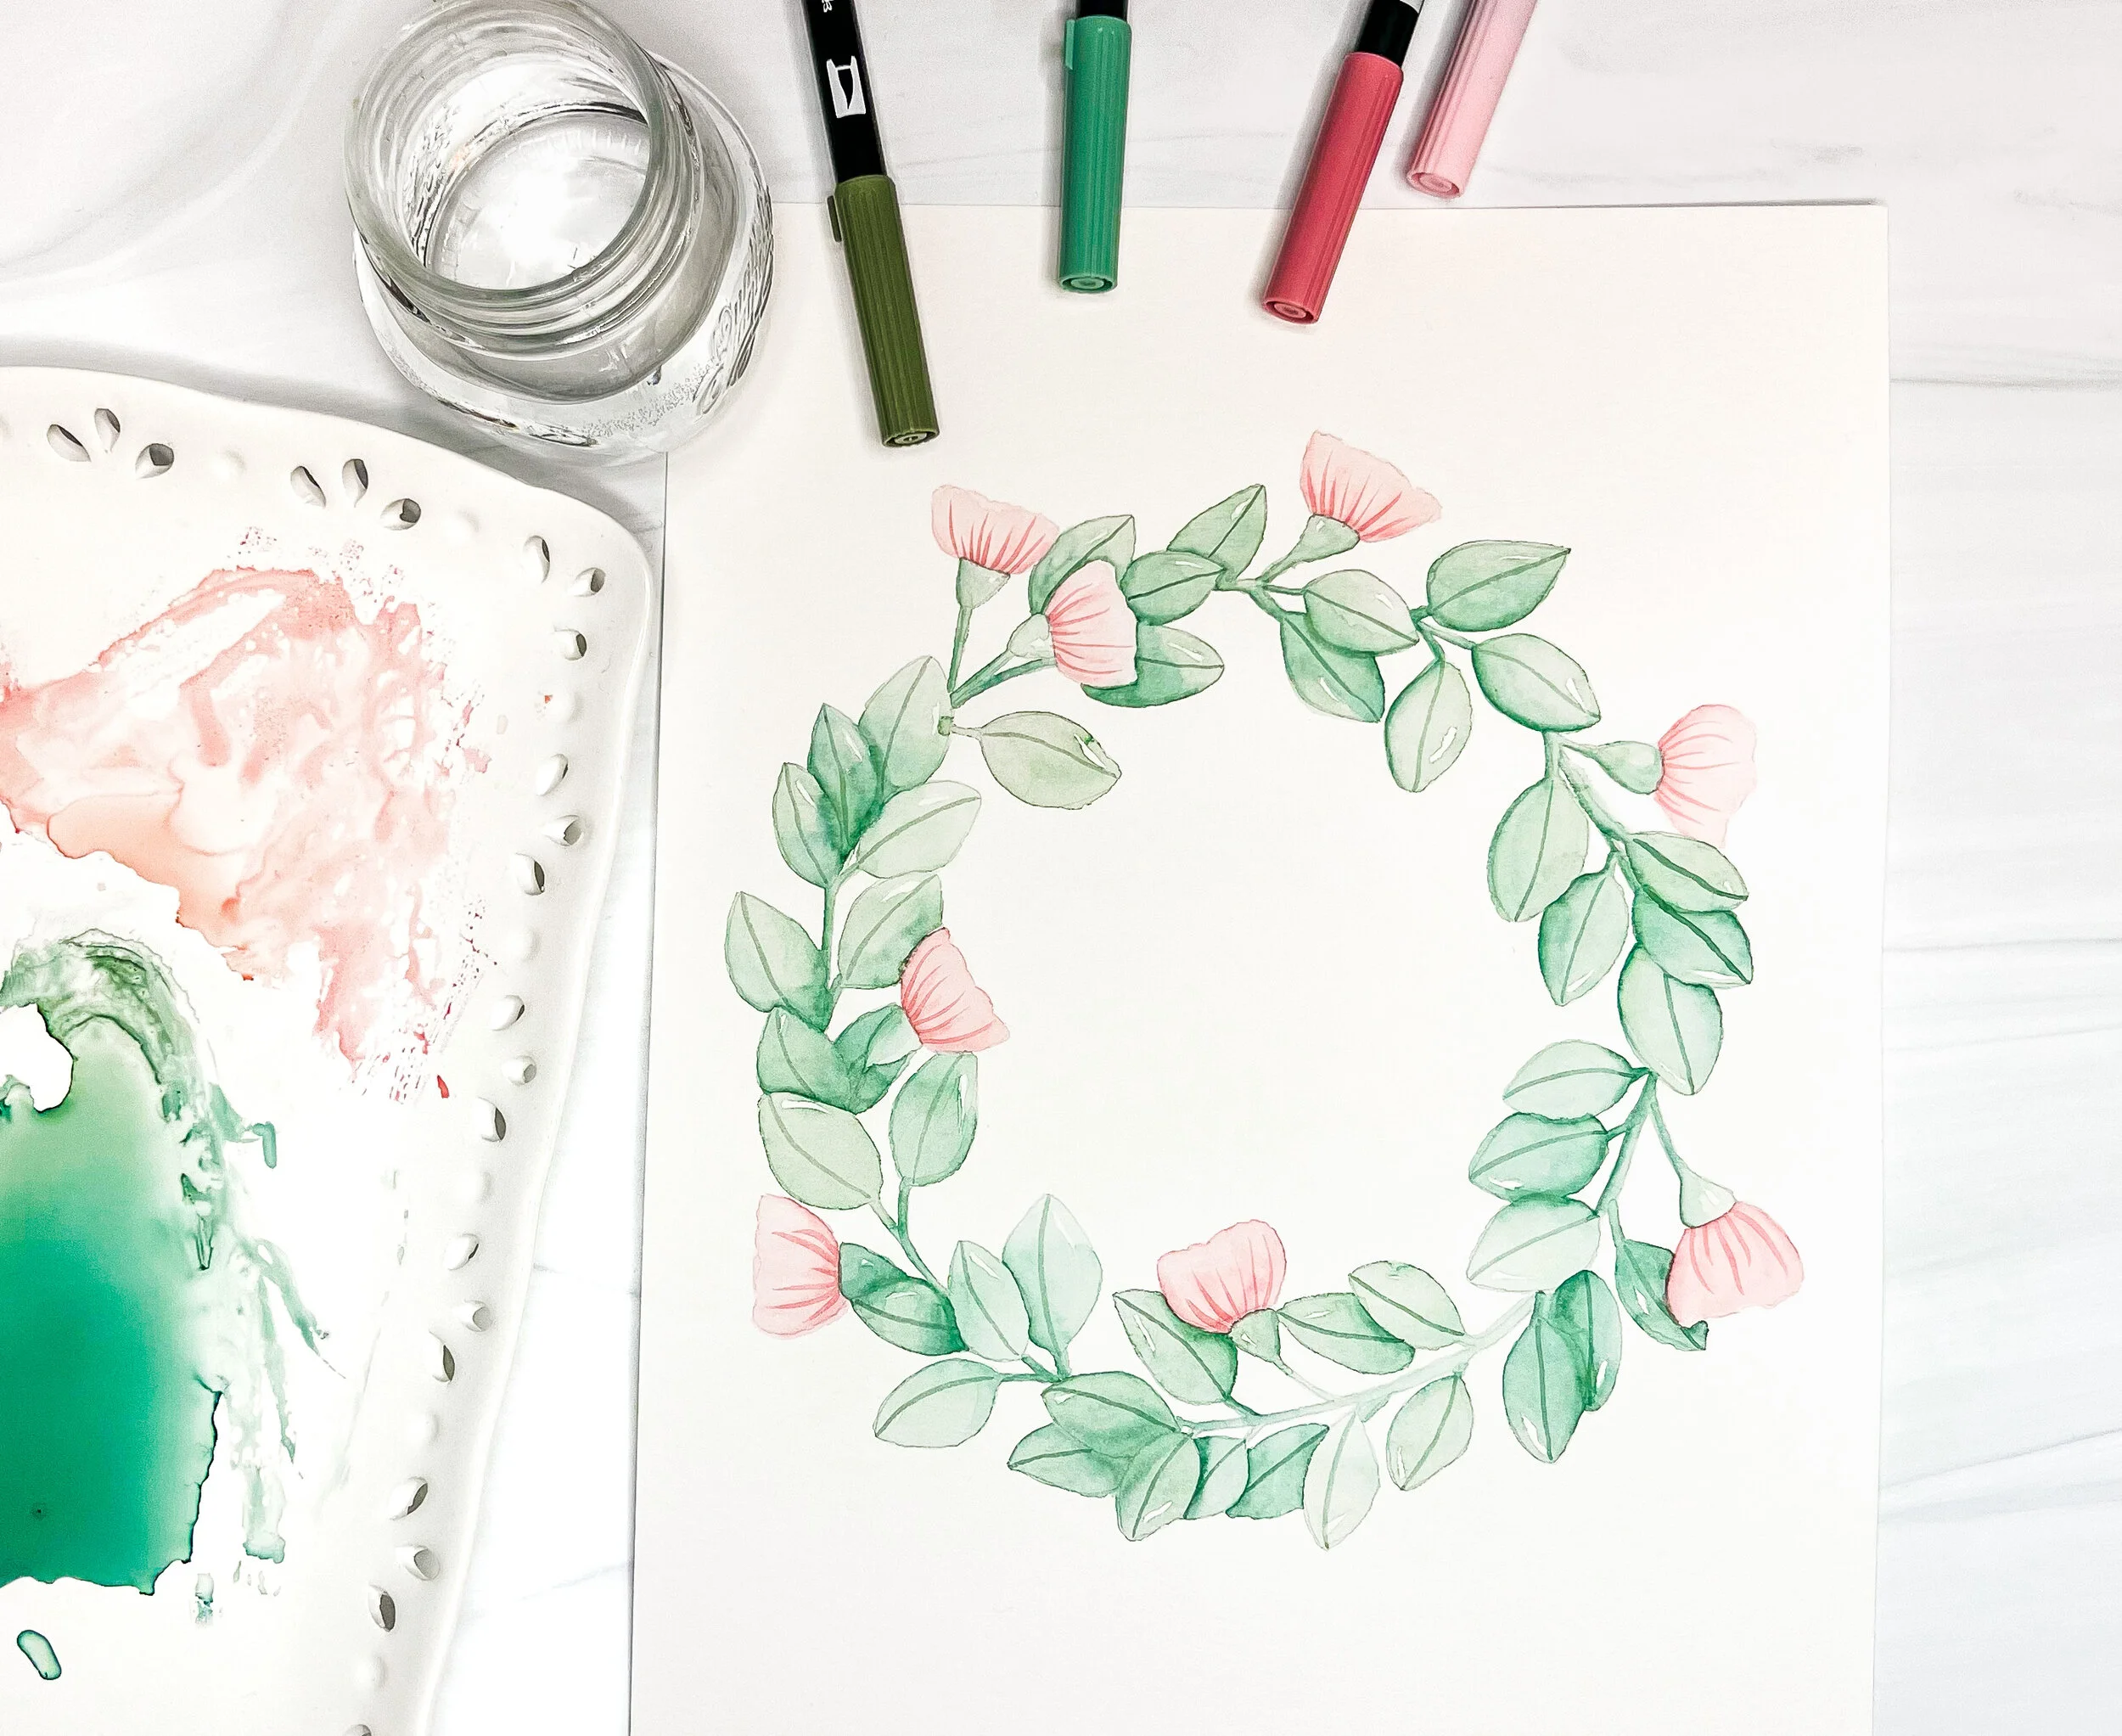
STEP 2: ADD SHADING
Once your first layer of color has dried completely use your darkest green (mine was Gray Green 228) to draw a line of shadow wherever there are overlapping leaves. Use the brush or bullet tip of your marker to draw directly onto the paper for this step.

Then use a damp (but not dripping) paintbrush to wet each line of ink and blend it to soften the edges. You can also add a little more color to the flowers at this stage too if you would like to.

STEP 3: ADDING DETAILS
Once all of your shadows are dry, scribble some of your darkest pink (Dusty Rose 772 for me) and mix it with just a drop or two of water. Use your paintbrush to pick up the ink and paint thin lines coming from the center stem of each flower. Once your flowers are dry, mix up your darkest green (Gray Green 228 for me) on your blending palette. Using your paintbrush pick up the ink and add lines to the middle of all of your leaves. If you like the look of your wreath at this point feel free to stop here, otherwise continue on to Step 4.
STEP 4: ADD LINES
This step is optional, but if you’d like to add a little more detail and linework to your painting, use a size 01 MONO Drawing Pen to outline the leaves and add details to the flowers.
Voila, you’re finished! This wreath would make a lovely gift with someone’s name or a quote lettered inside. I’d love to see how yours came out, so tag @BrownPaperBunny on social media if you share it.