

Please note: This blog post contains affiliate links, which help pay for the upkeep of this site. That being said, I will never, ever promote anything I am not 100% in love with!
----------
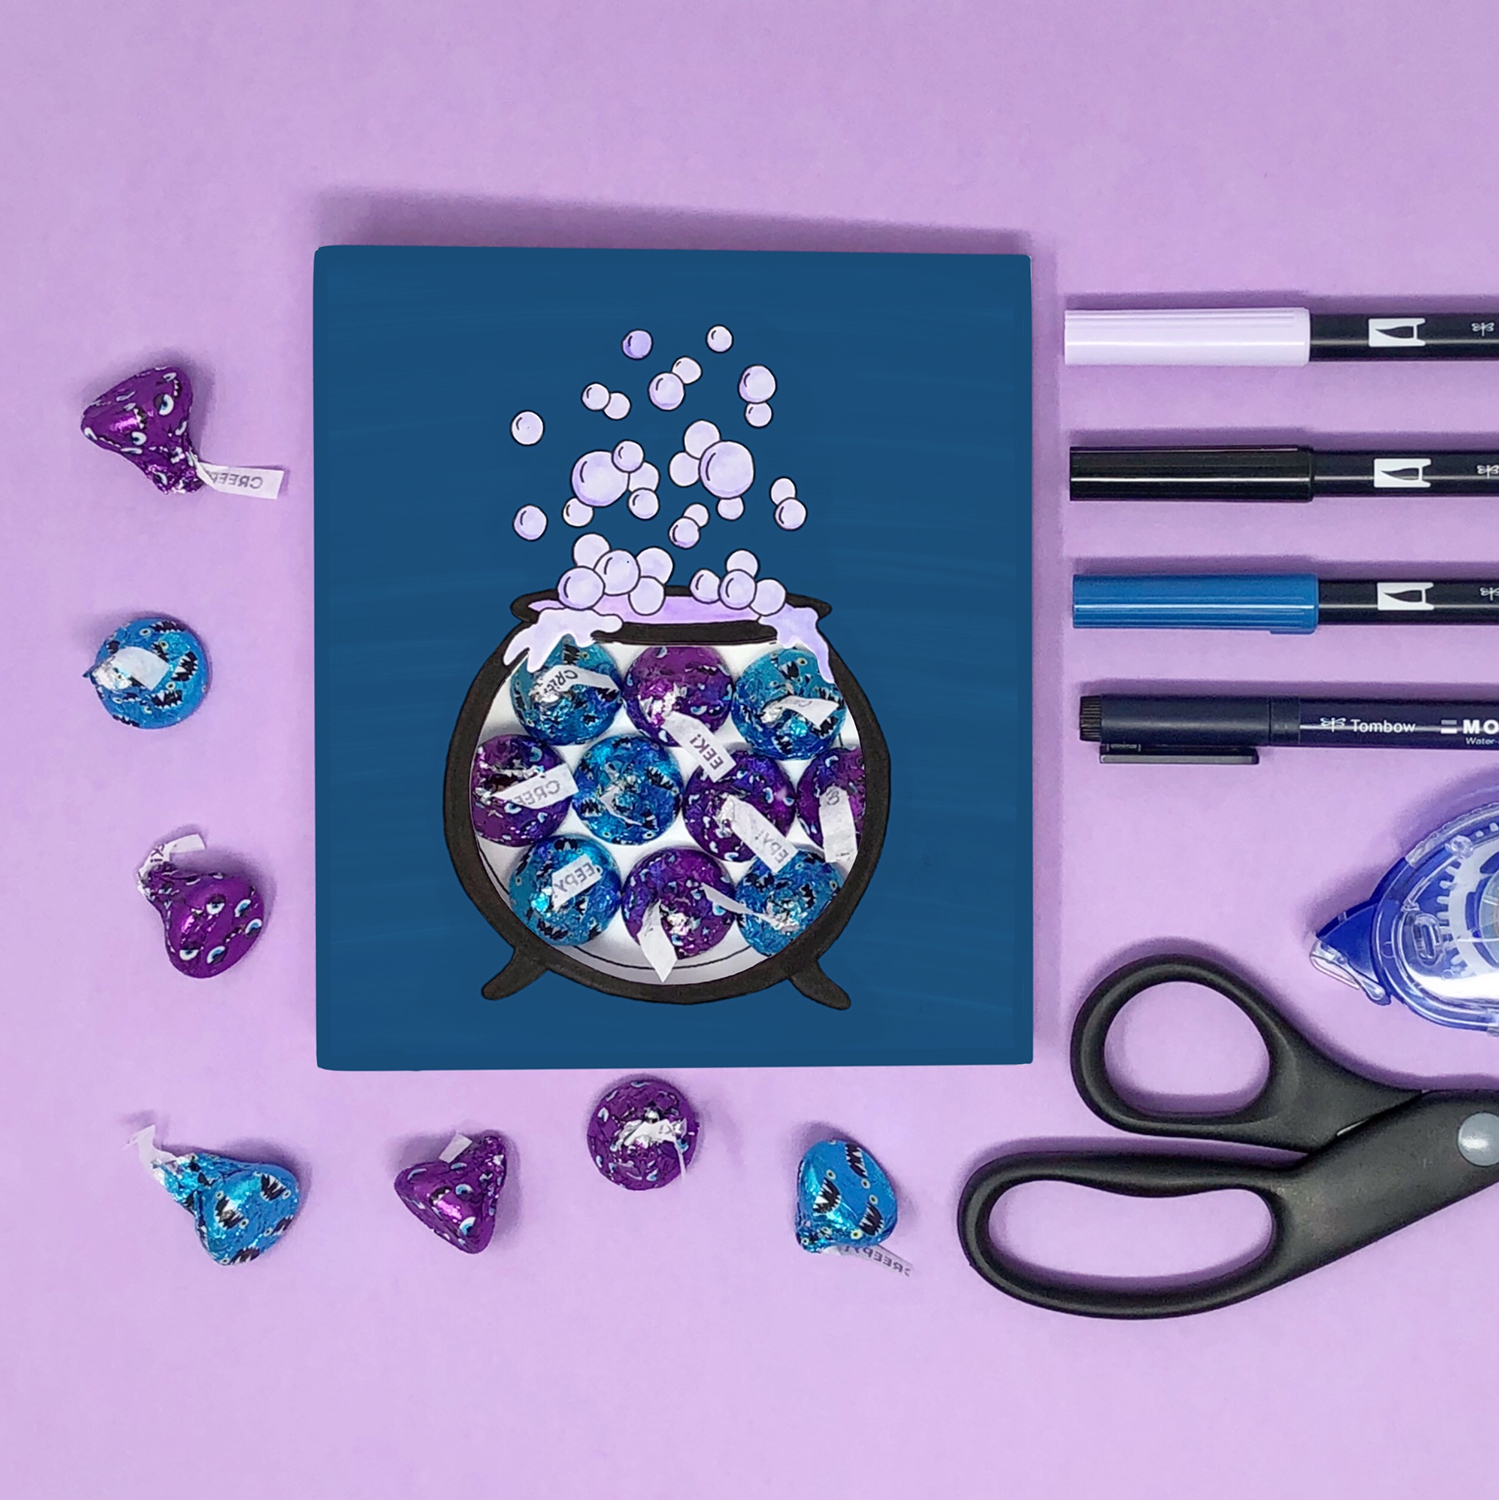
Today I’m going to show you how to make these deliciously simple Halloween candy cards. These tasty greetings are great for work colleagues, friends or family. Here's what you'll need to get started.
Supplies:
Strathmore Bristol or other cardstock
Scissors
Individually-Wrapped Halloween Candy

Step 1: Draw a Cauldron
Using your Tombow Dual Brush Pens, draw a cauldron and some bubbles onto the right-hand side of your card. Try spooky Halloween colors like purples or oranges!

Step 2: Cut Out The Cauldron
The next step is to carefully cut out the center of your cauldron, this way the candy will show through to the front once the card is finished.

Step 3: Add Detail
Use your Mono Drawing Pen to add lines around the bubbles and give them a little more definition.

Step 4: Color The Background
Using your Dual Brush Pens again color the background of your Halloween candy card. If you want to leave the front of the card white you can skip this step.

Step 5: Stick On Your Candy
Now fold your card in half, then use the cutout section on the front of your card to draw a cauldron outline on the inside of the card. Next, use your Mono Permanent Adhesive to cover the cauldron shape and stick down your Halloween candy.

Voila, you're finished! It's time to hand out your delicious Halloween candy cards, who will you give yours to?
I’d love to see how your Halloween candy cards came out, so tag @BrownPaperBunny on social media!