Please note: This blog post contains affiliate links, which help pay for the upkeep of this site. That being said, I will never, ever promote anything I am not 100% in love with!
I'm getting RIGHT into the whole planner thing. I guess I've always been a notebook kind of gal, but lately I've combined my bullet journals with pretty planners full of color, ink, and stickers!
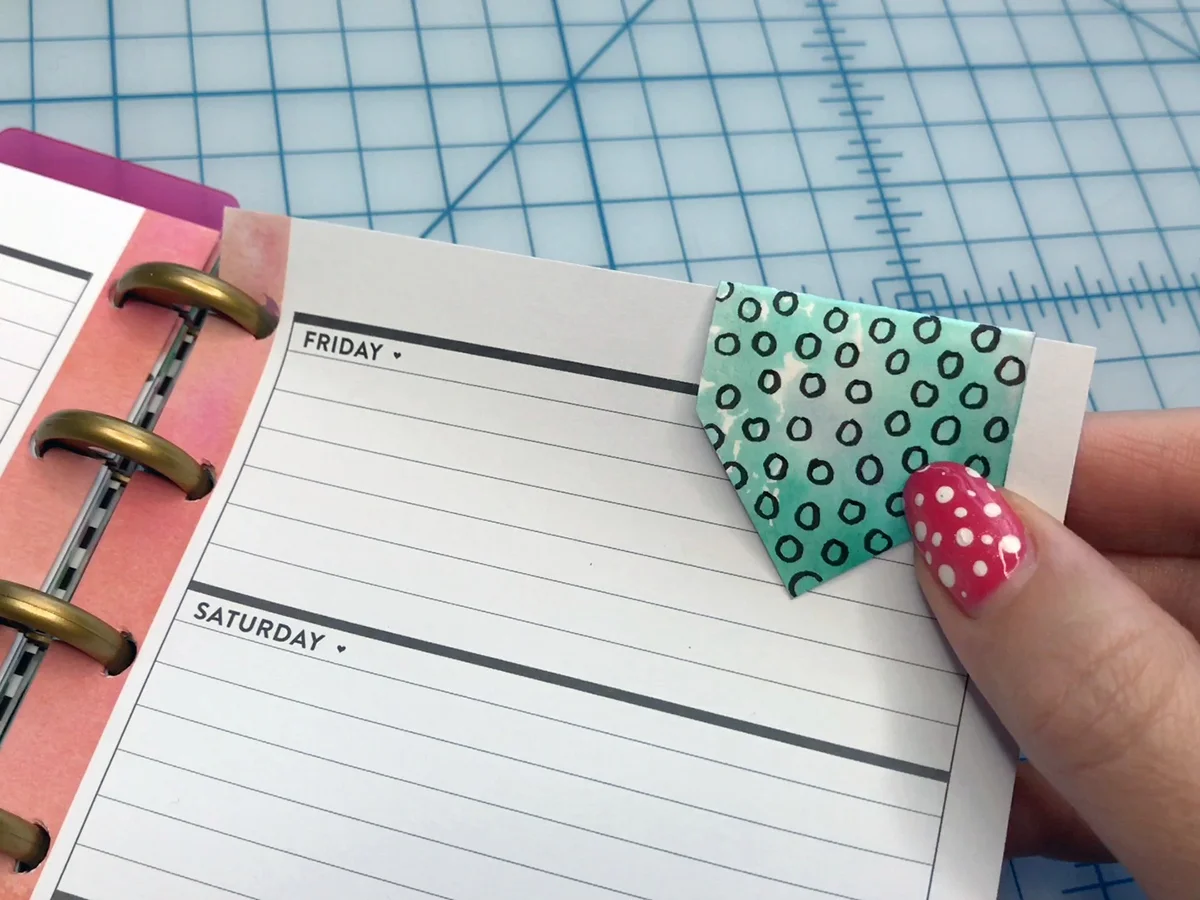
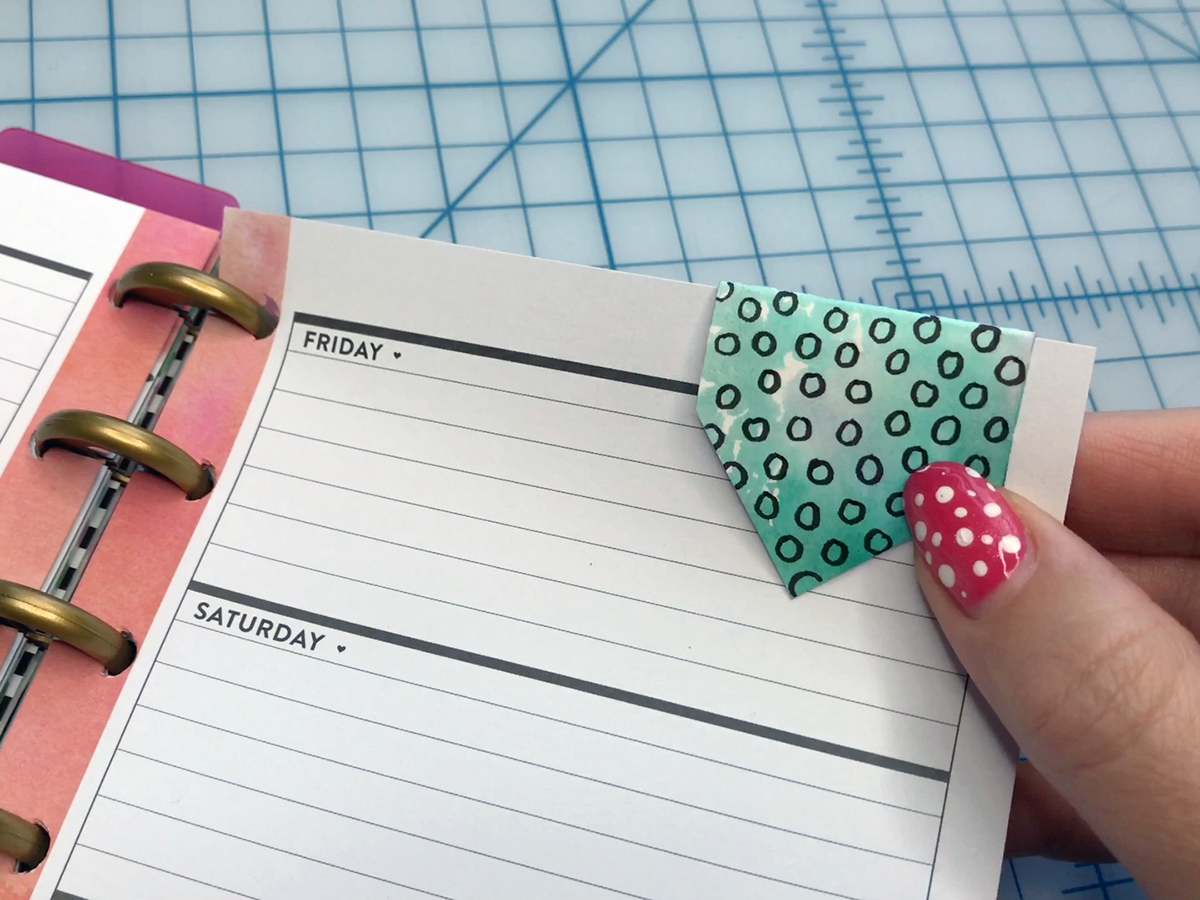
This week I made myself a magnetic bookmark so I could easily turn to the current date in my planner, and it was so fun and so easy that I thought I'd show you how I did it!

Supplies
- Scrap of watercolor paper or card
- Ruler
- Scissors or cutting tool
- Bone folder (optional)
- Tombow Dual Brush Pens in your favorite colors
- Tombow Mono Drawing Pen (I like Size 01)
- Tombow XL Liquid Glue
- Plastic sheet (overhead projector sheet, or sandwich bag etc)
- Old fridge magnet or Stick-On Magnetic Craft Dots or Magnetic Tape
Steps
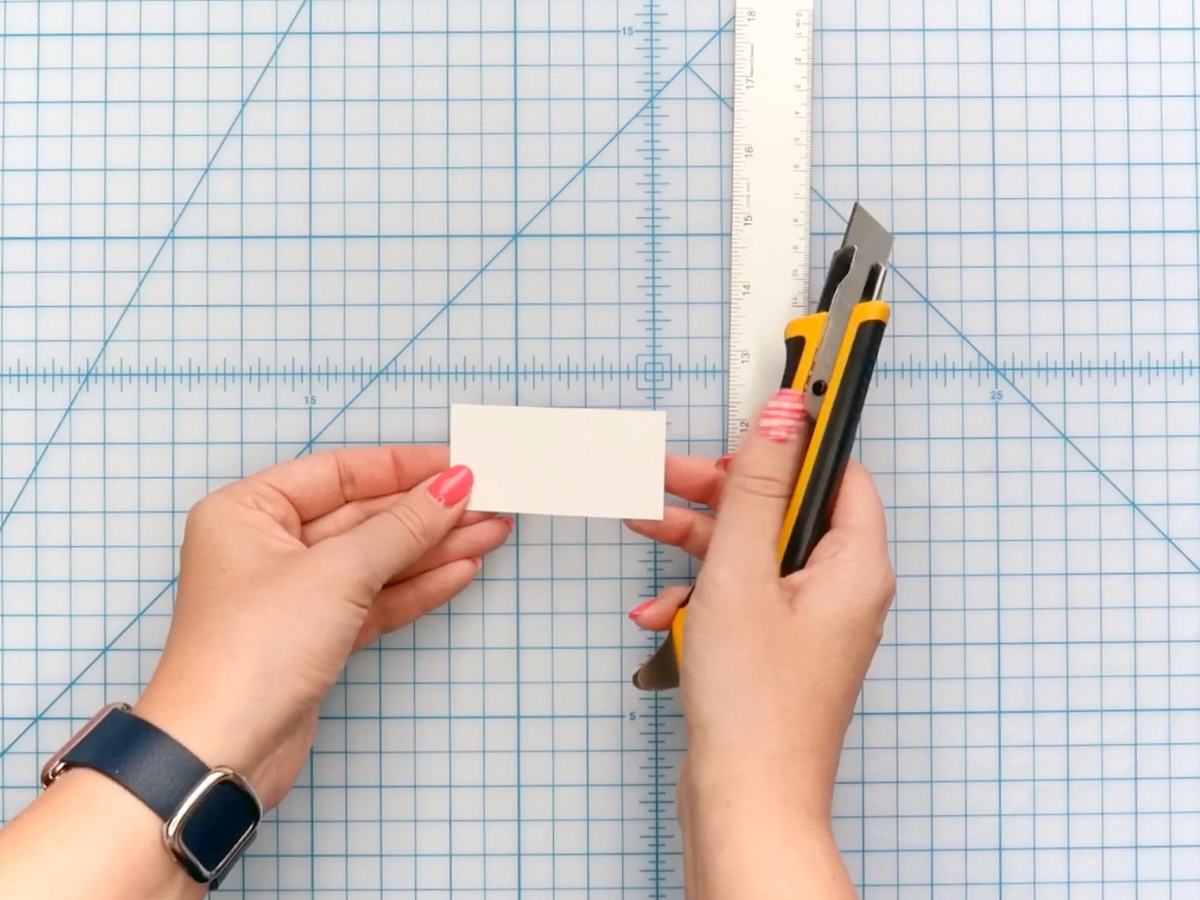
1. Cut a rectangle double the size you want your finished bookmark
You're going to fold it in half once you're finished decorating the watercolor paper or cardstock, so measure and cut it out at double the size you want the finished product. I made my rectangle about 1 inch wide and 2 inches long.
2. Make a crease down the middle of your rectangle
Because watercolor paper or cardstock is fairly thick, it helps to make a crease so that when you fold it in half the paper doesn't split or bend unevenly. You can use the back of a butter knife if you don't have a bone folder.

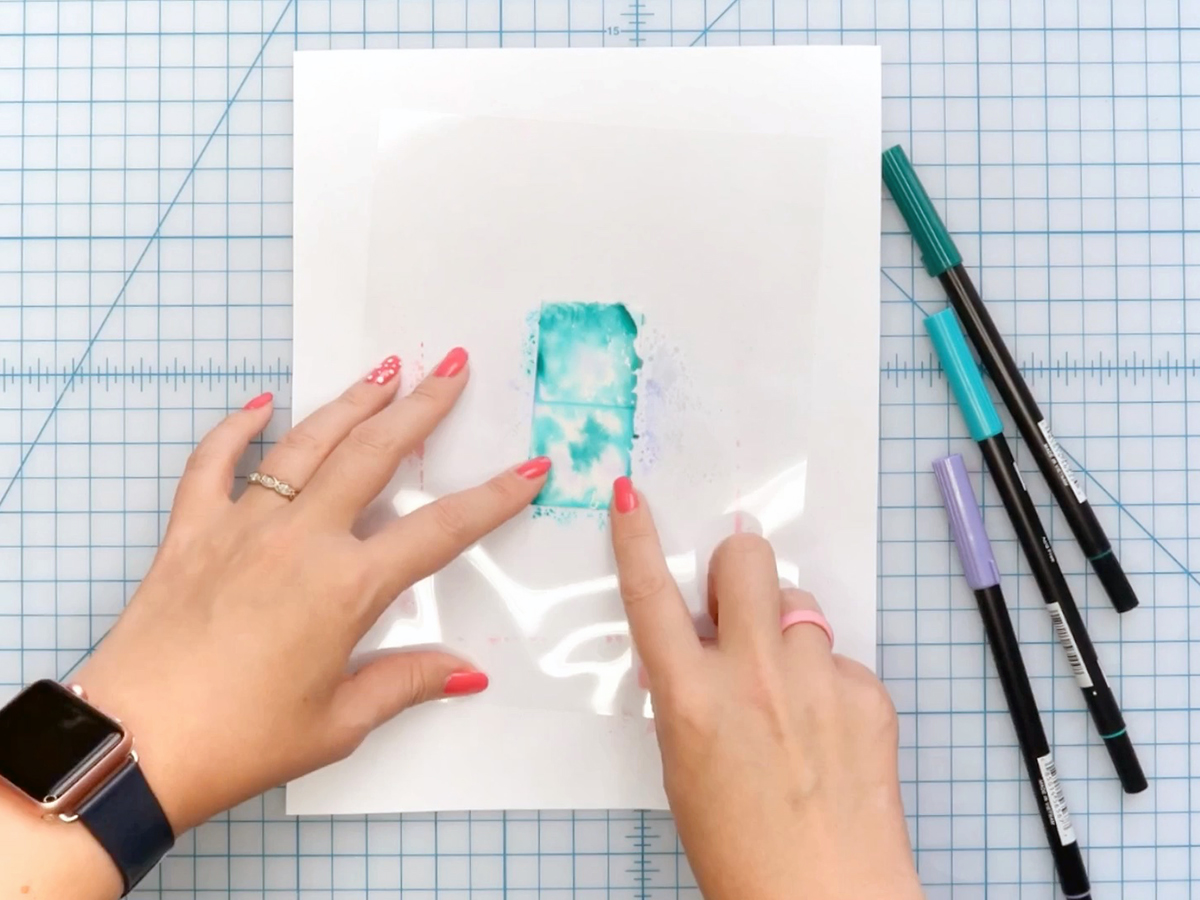
3. Lay your plastic on top of your rectangle
You don't have to lay your plastic sheet or sandwich bag on top of your rectangle, but I like to see the size of the paper I'm coloring so I can get the ink roughly in the right spot.

4. Color on the plastic with your Tombow Dual Brush Pens
Pick a couple of your favorite Tombow Dual Brush Pen colors, that go nicely together, and color right onto the plastic.

5. Wet the ink
I like to spray a little water using a craft mister, but you could just as easily drop a few droplets of water onto the plastic with a paintbrush or your fingers.
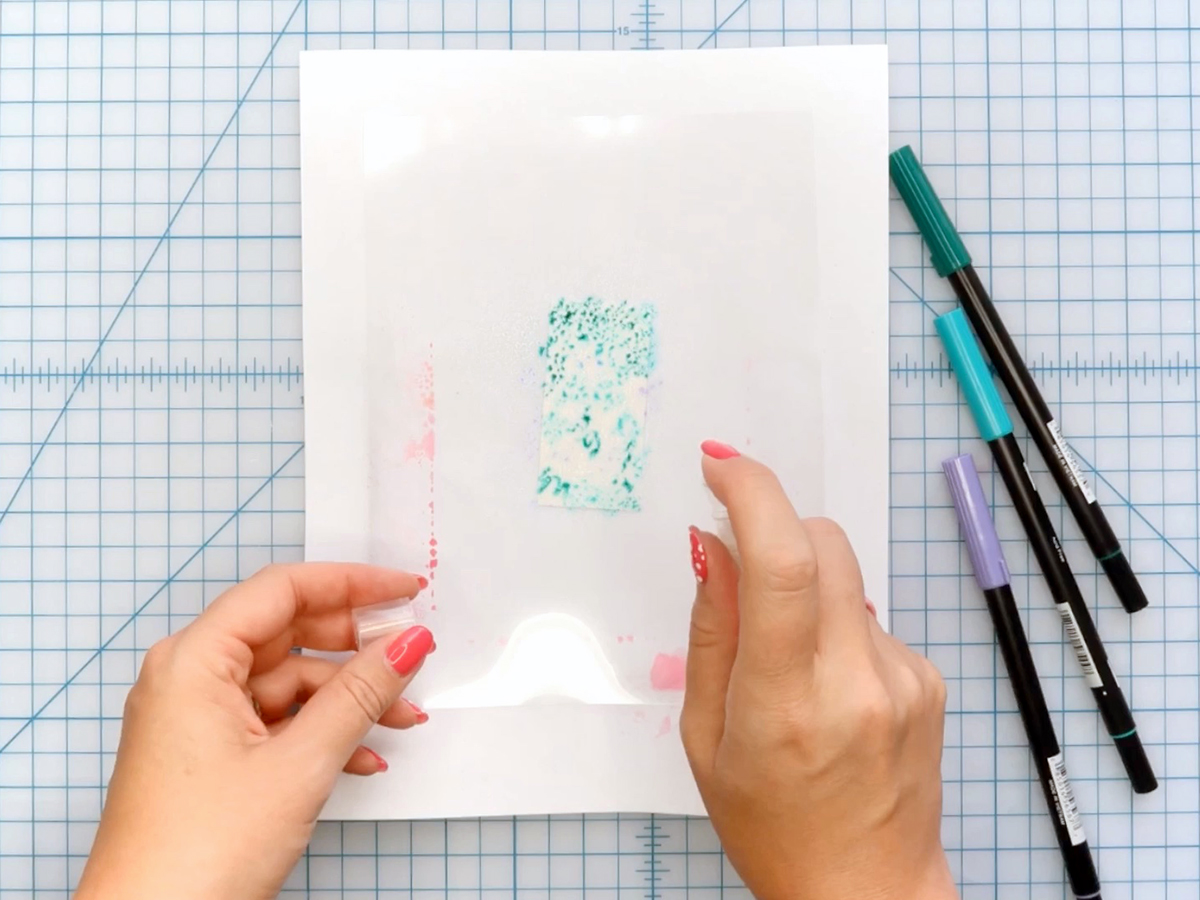
6. Turn the wet side onto your paper
Carefully turn the plastic over and press it down onto your watercolor paper or cardstock and smush the color together to get a nice watercolor effect.
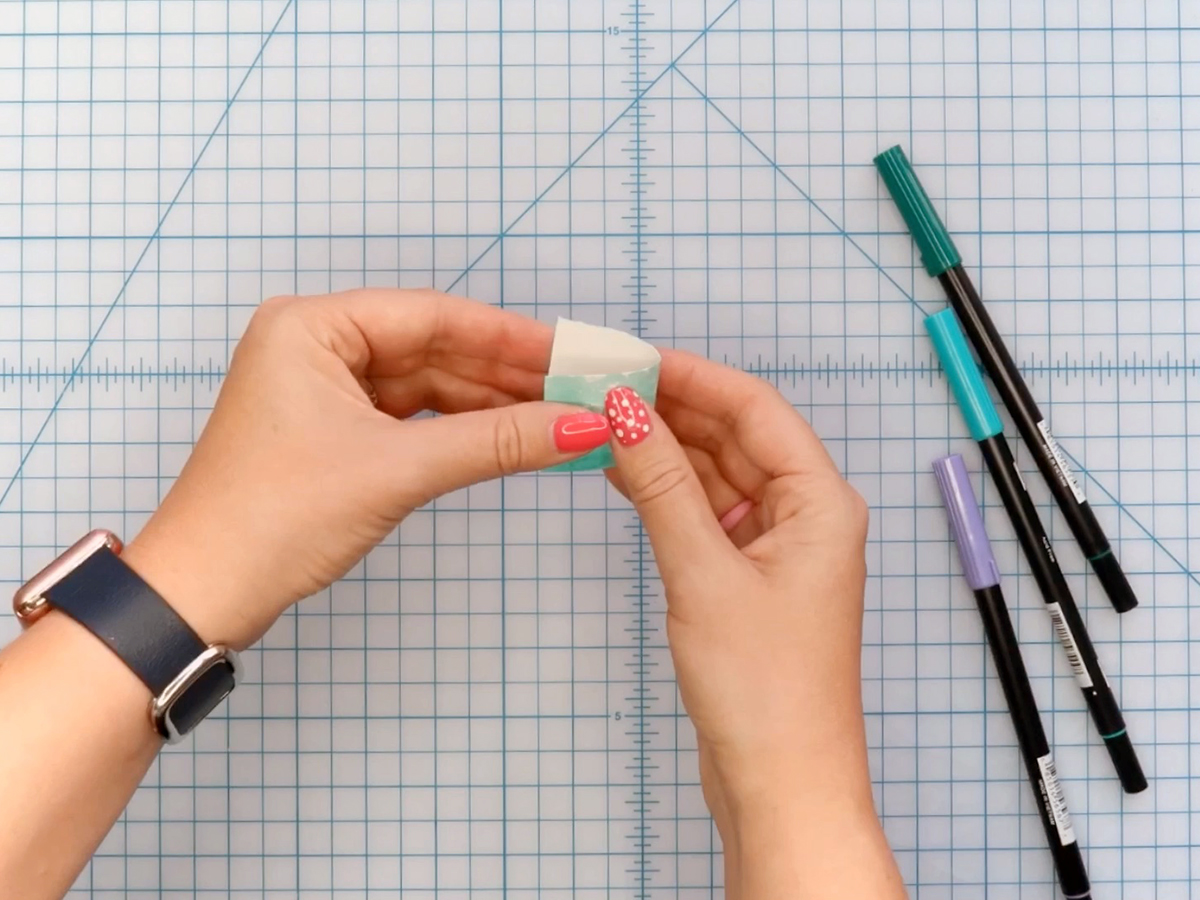
7. Fold in half
Once your paper is dry (I used a hair-dryer to speed it along) fold it in half along the line you scored / creased at the begining.
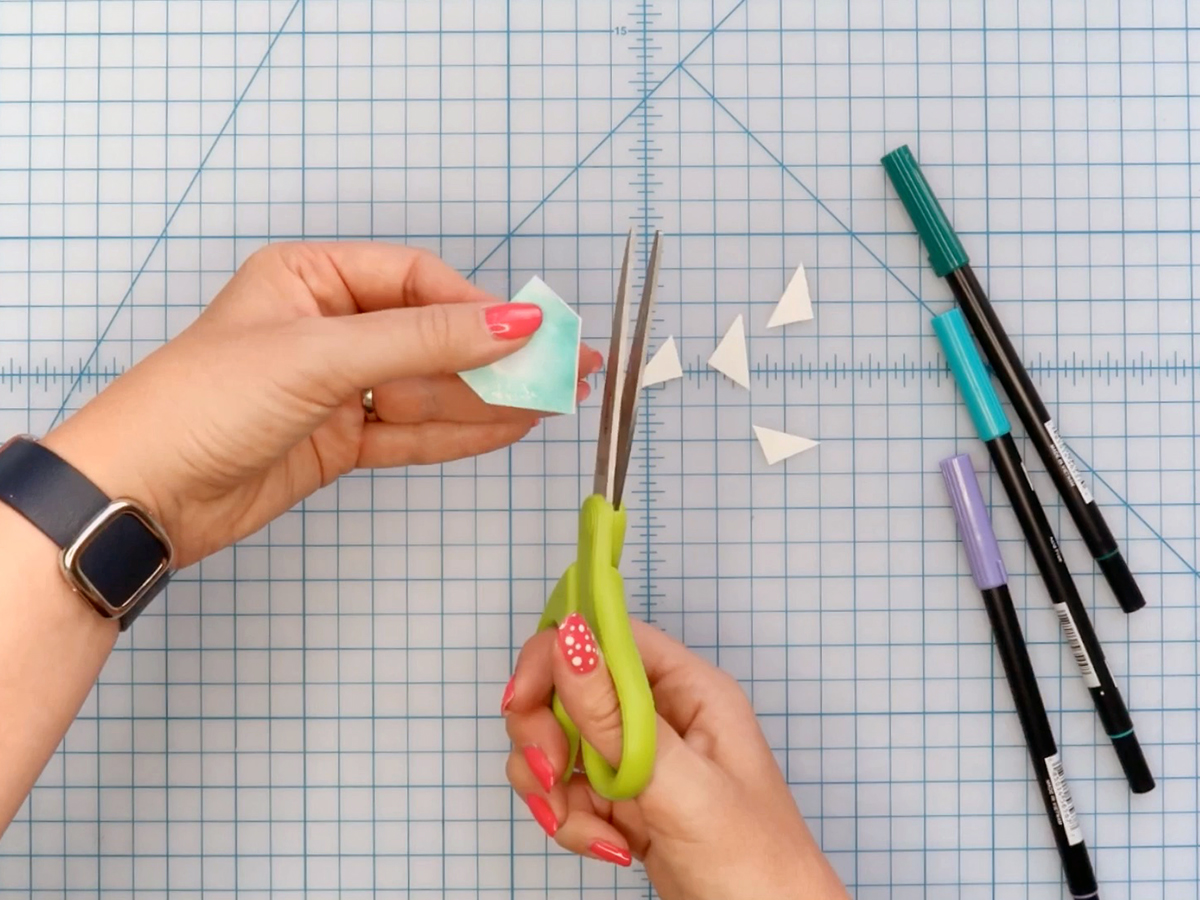
8. Trim the edges
This step is optional, but I think it adds a special touch to cut the open side into a point or use a corner rounding punch etc.
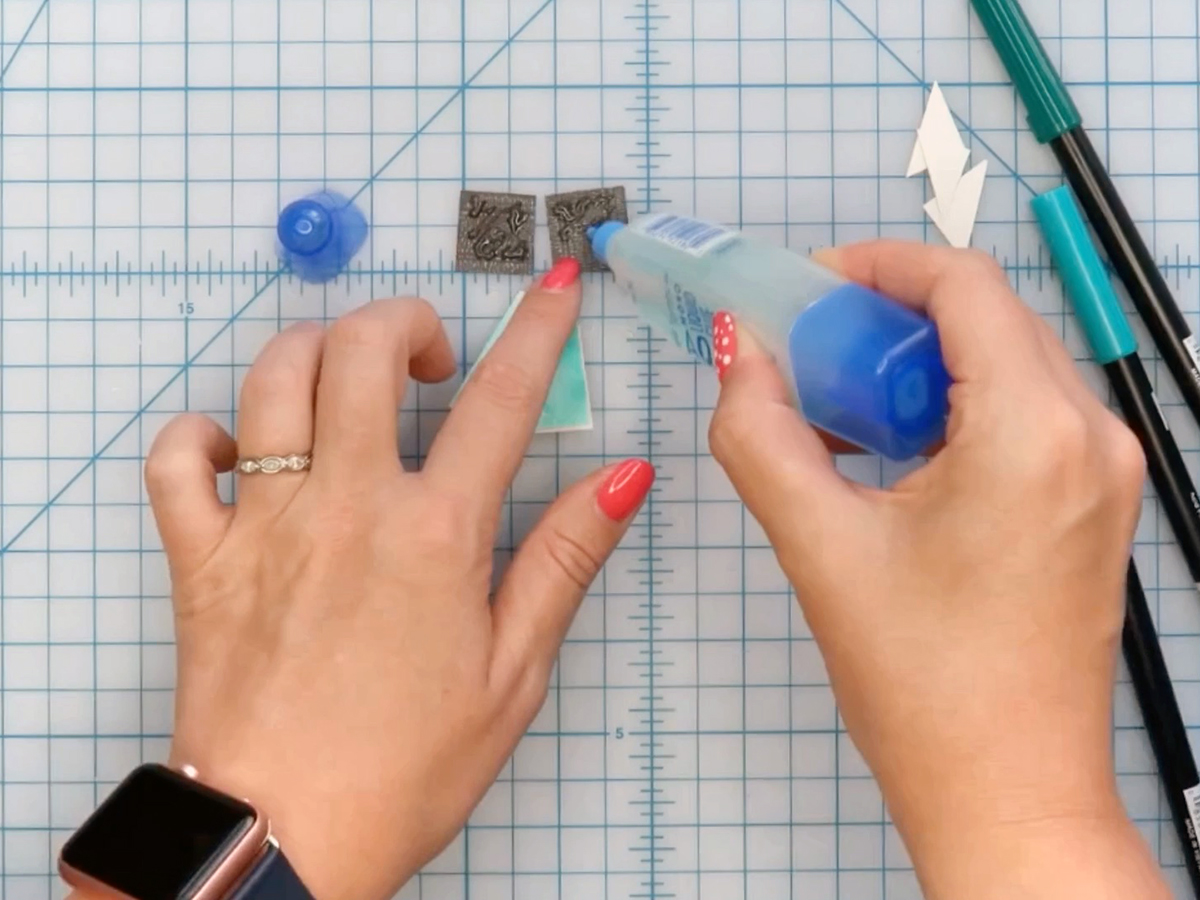
9. Glue your magnets to your paper
Glue or stick your magnets to the inside (non colored side) of your paper. If you're using glue, I like Tombow Mono Aqua Liquid Glue or Multi XL Liquid Glue.

10. Decorate your bookmark
This step is optional too, but I decorated both sides of my finished bookmark using the Tombow Mono Drawing Pen (size 01), which draws and writes really smoothly, even over thick paper. I did polka dots on one side and stripes on the other, just to mix it up.

And you're finished!

If you'd like to watch all of the steps together, check out the short time-lapse video below.