• Book
    • Watercolor with Brush Pens
    • Watercolor Flowers Using Markers
    • Paint a Watercolor Galaxy Butterfly with Markers
    • Paint Watercolor Galaxy Bookmarks using Markers
    • Timelapse Video for Artists
  • Shop
  • Society6 Store
  • Blog
  • Portfolio
  • About
  • Contact
Menu

Brown Paper Bunny Studio

Art & Fashion Illustration
  • Book
  • Classes
    • Watercolor with Brush Pens
    • Watercolor Flowers Using Markers
    • Paint a Watercolor Galaxy Butterfly with Markers
    • Paint Watercolor Galaxy Bookmarks using Markers
    • Timelapse Video for Artists
  • Shop
  • Society6 Store
  • Blog
  • Portfolio
  • About
  • Contact

Creative Retreat Live

February 17, 2022

Want a whole lot of free, online art classes? Of course you do!

Good thing I’ll be teaching, alongside 74 of my closest art buddies, during Creative Retreat Live. I mentioned it’s all free right? Right?! So mark your calendar, and snag your seat so you don’t miss out.

Dates: February 24 to March 5, 2022

Save my seat!

There will be classes on drawing, watercolor painting, lettering, Procreate, calligraphy, mixed media, fiber arts, journaling and so much more!

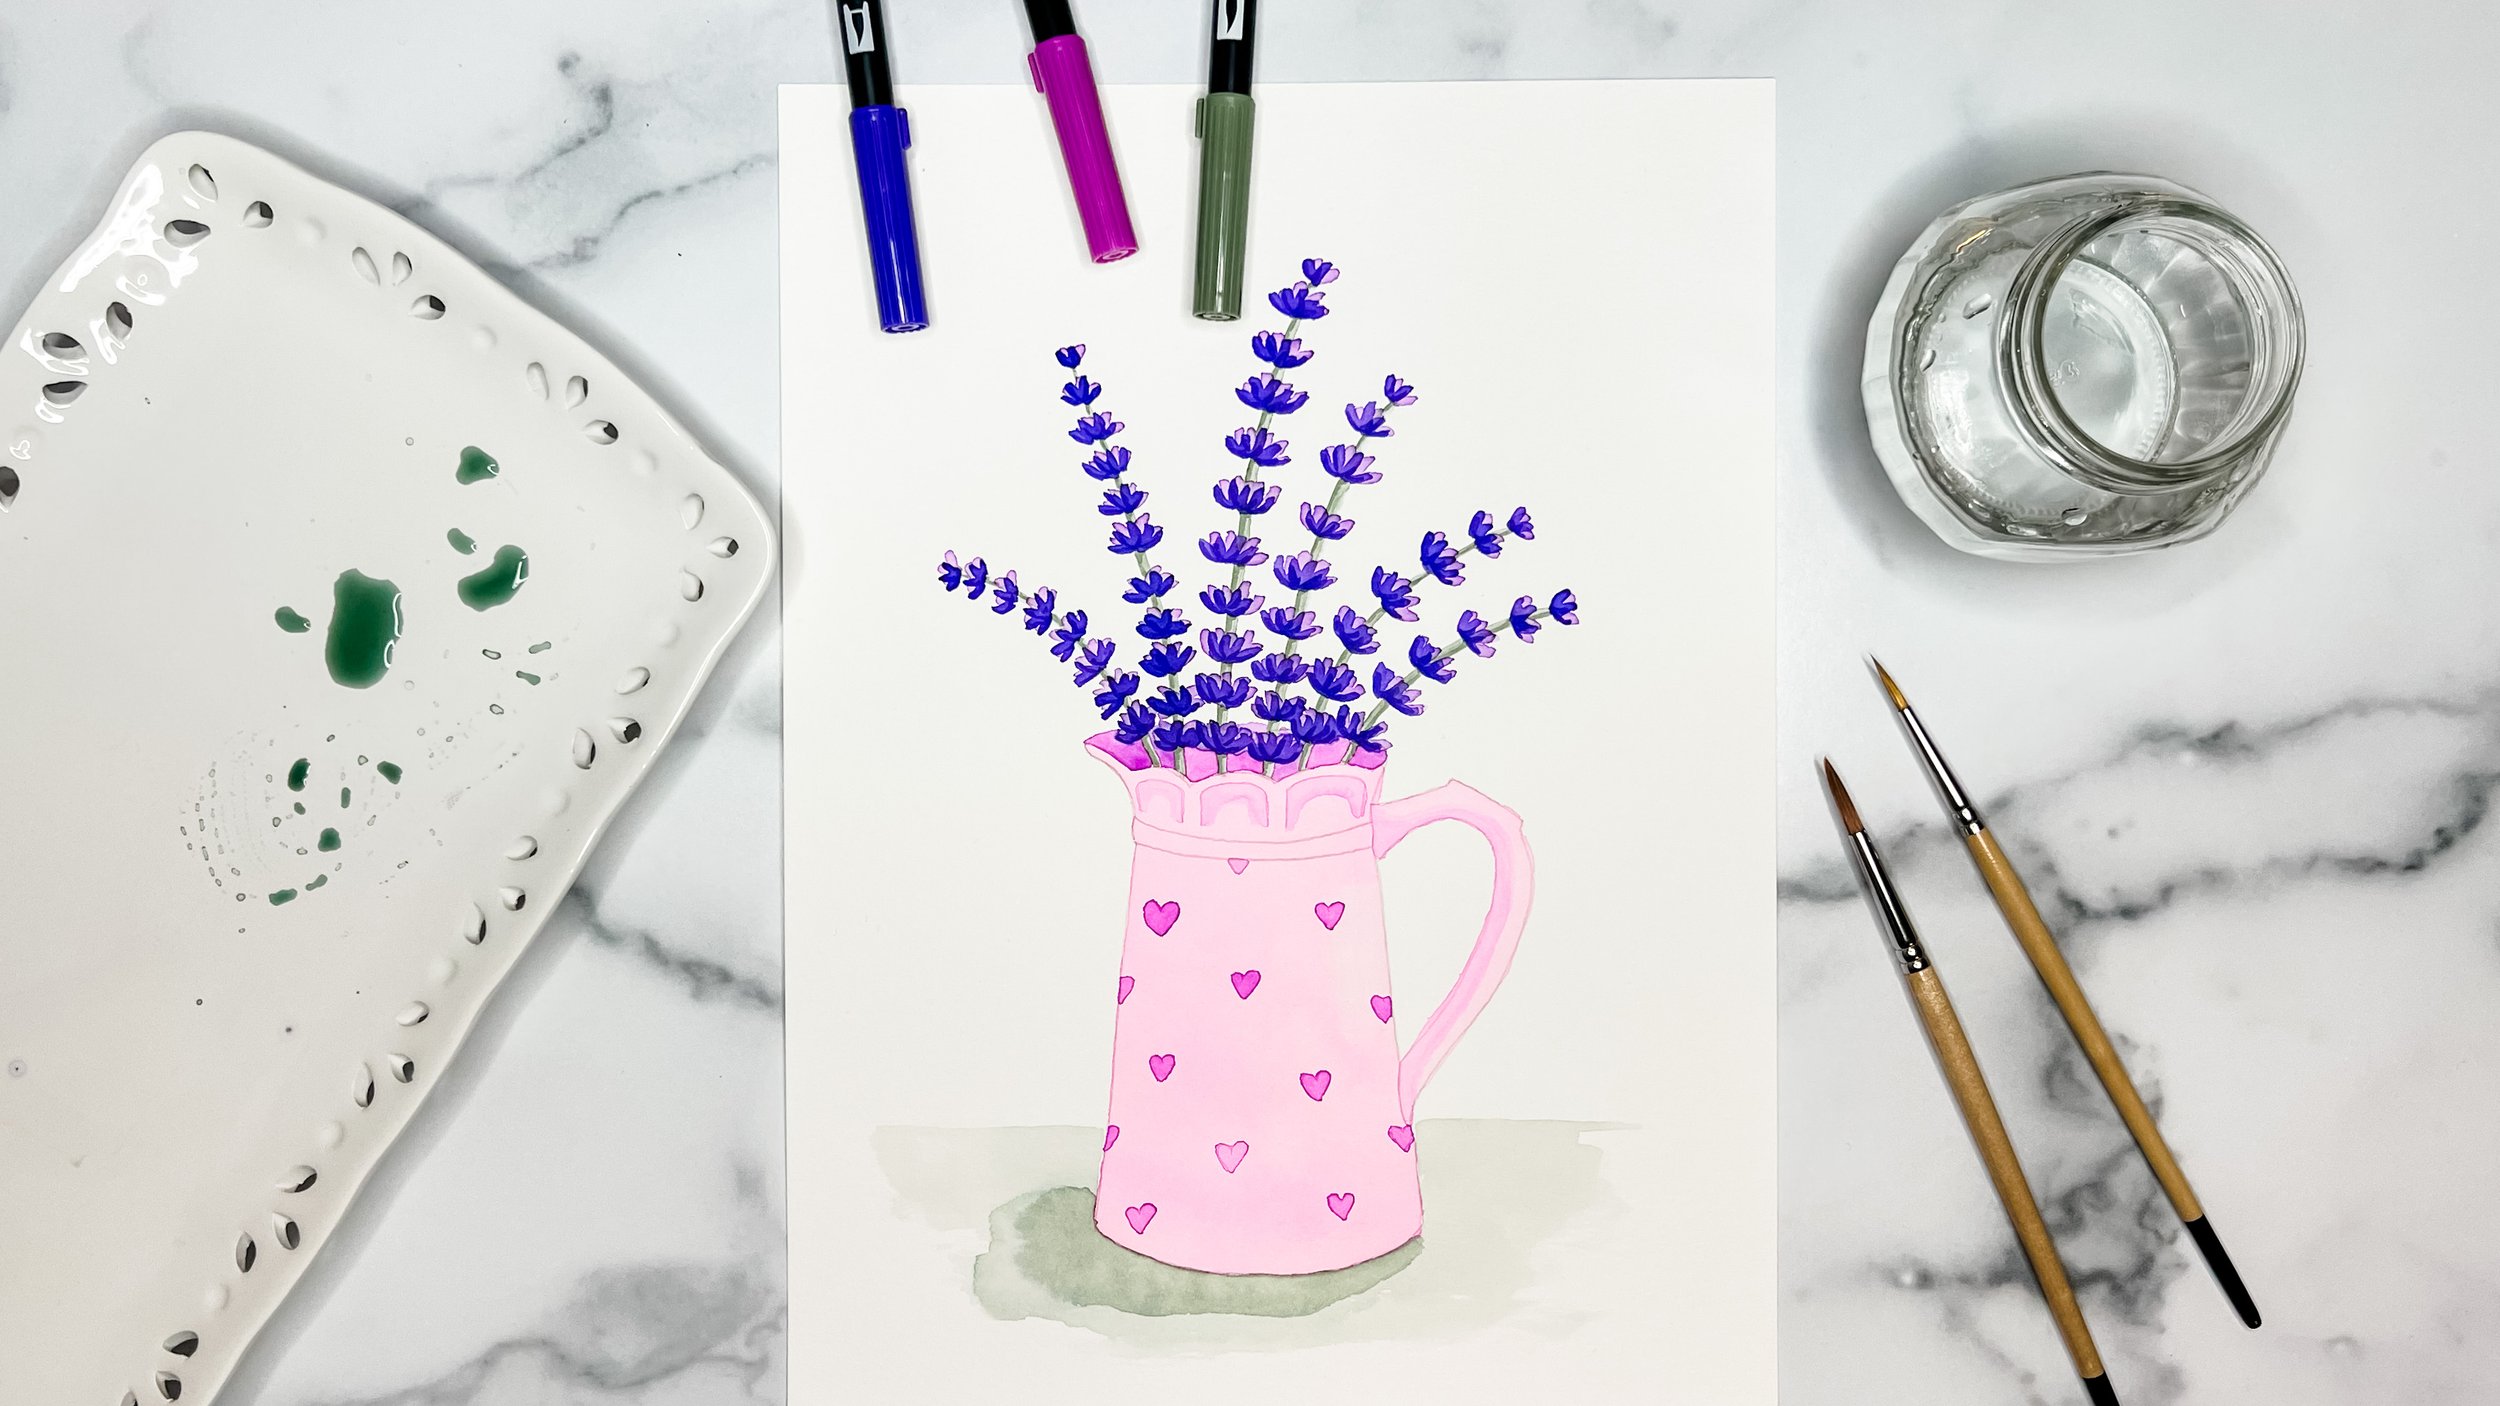
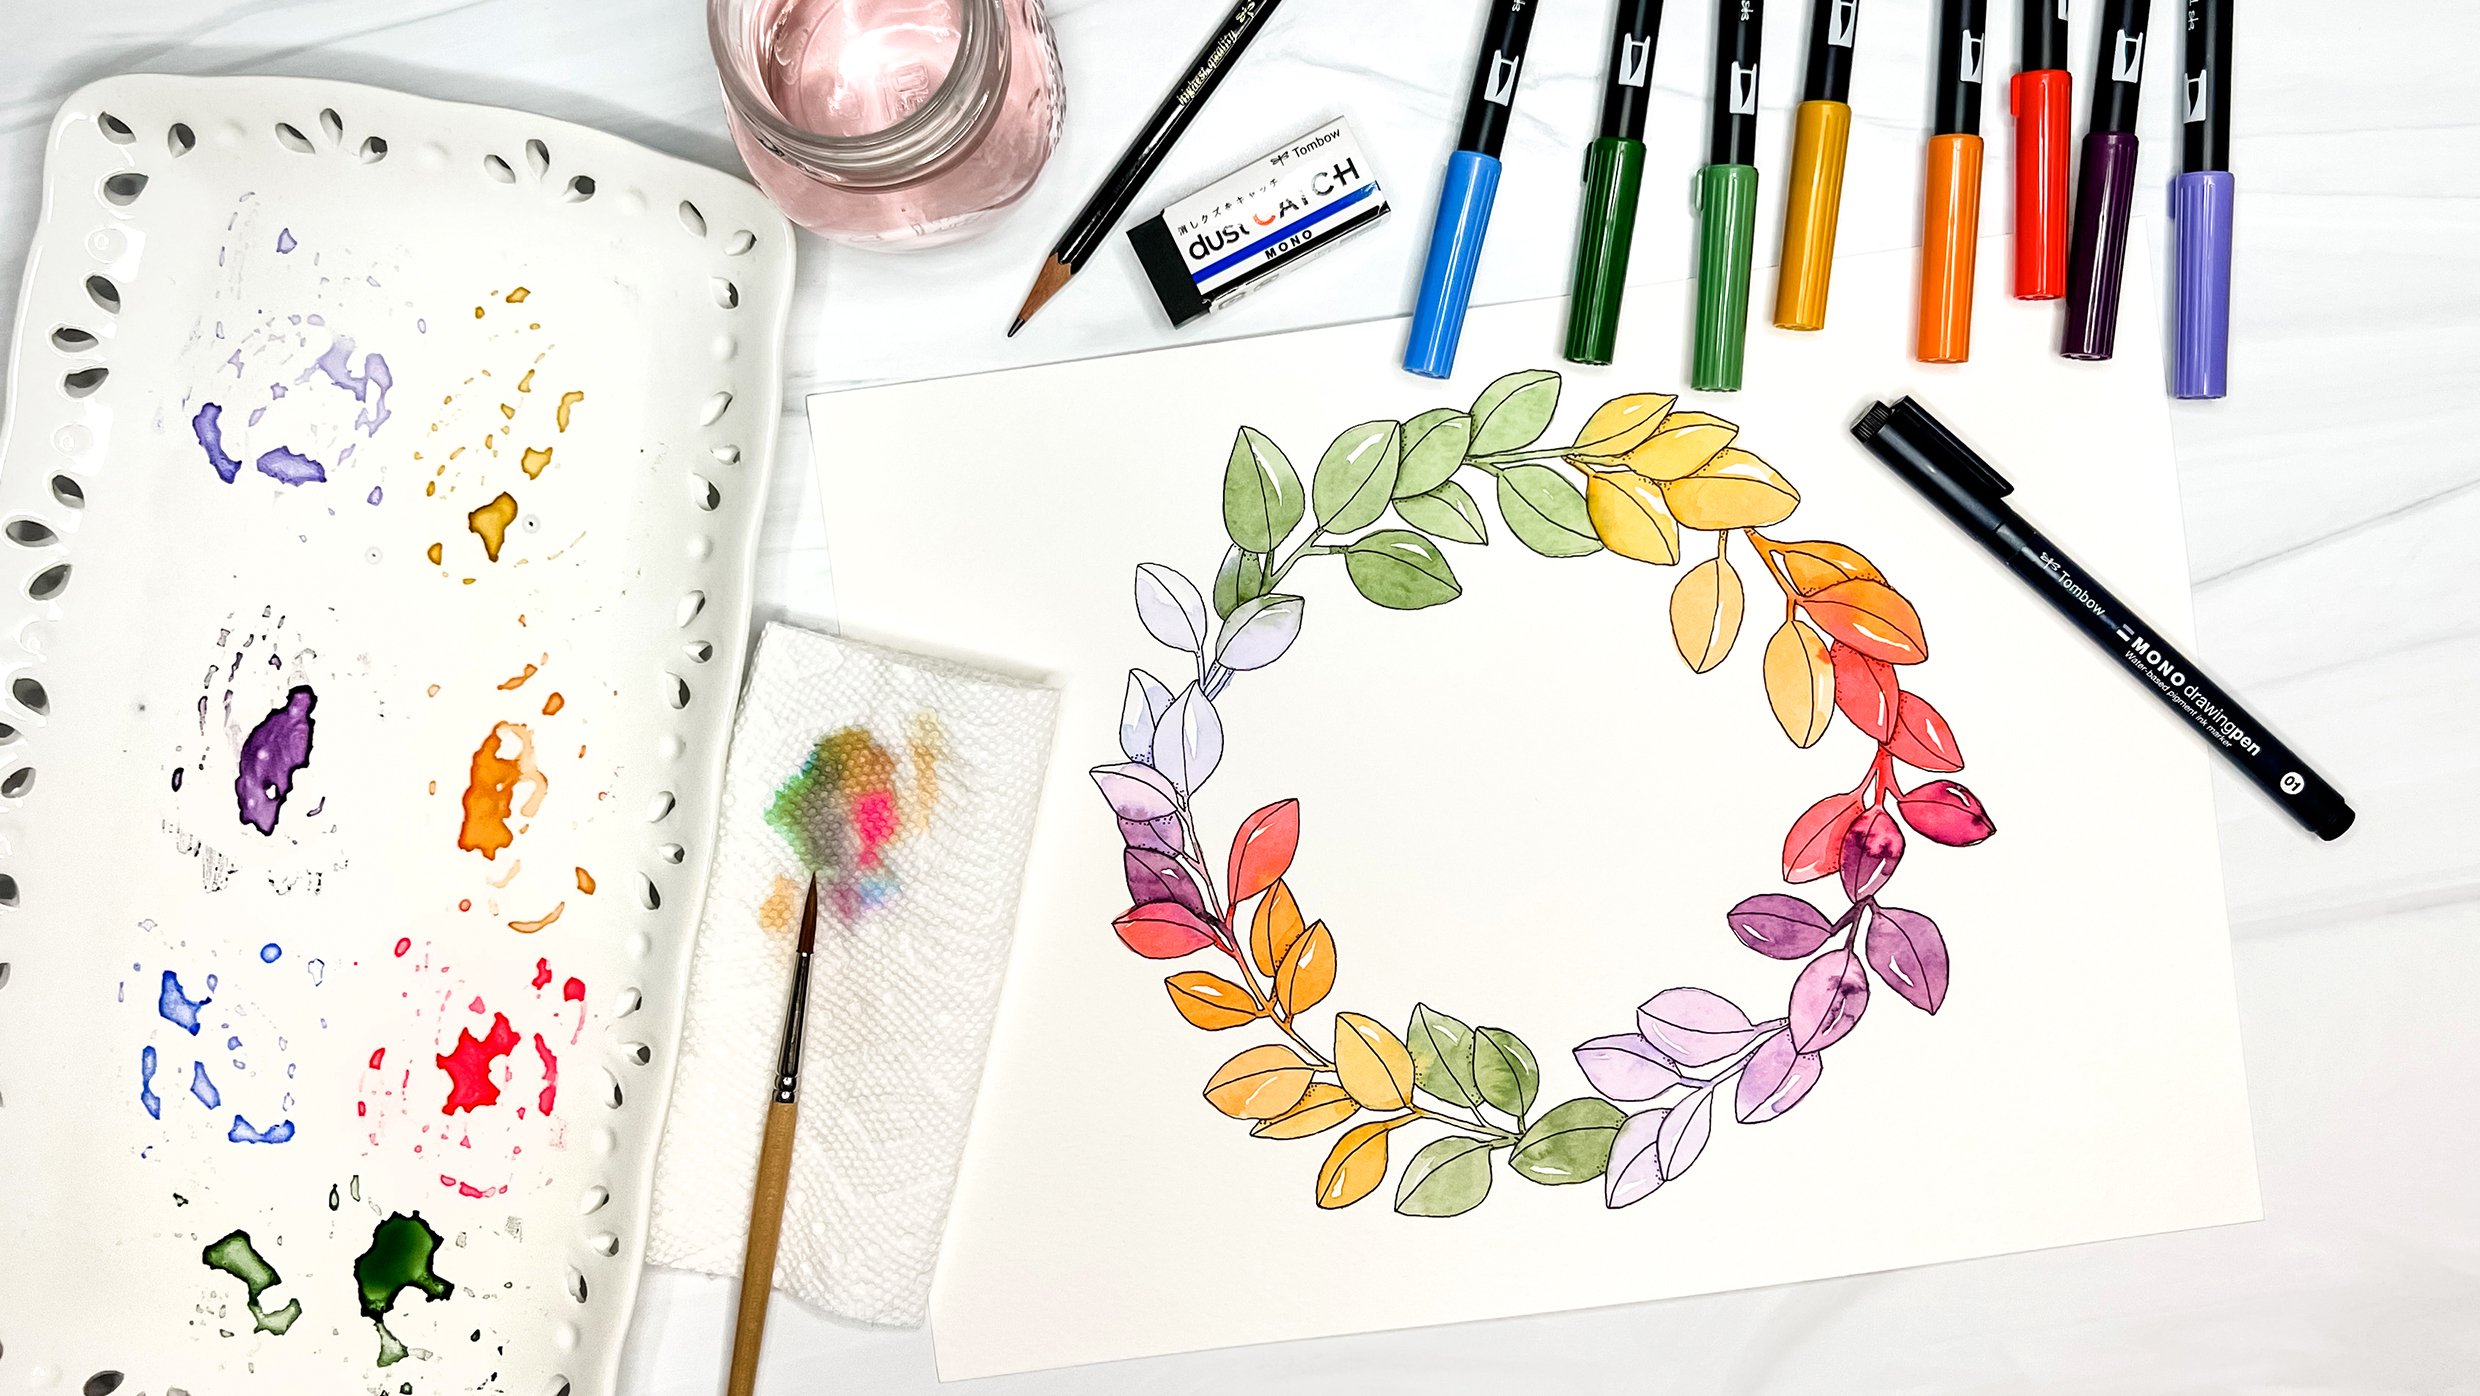
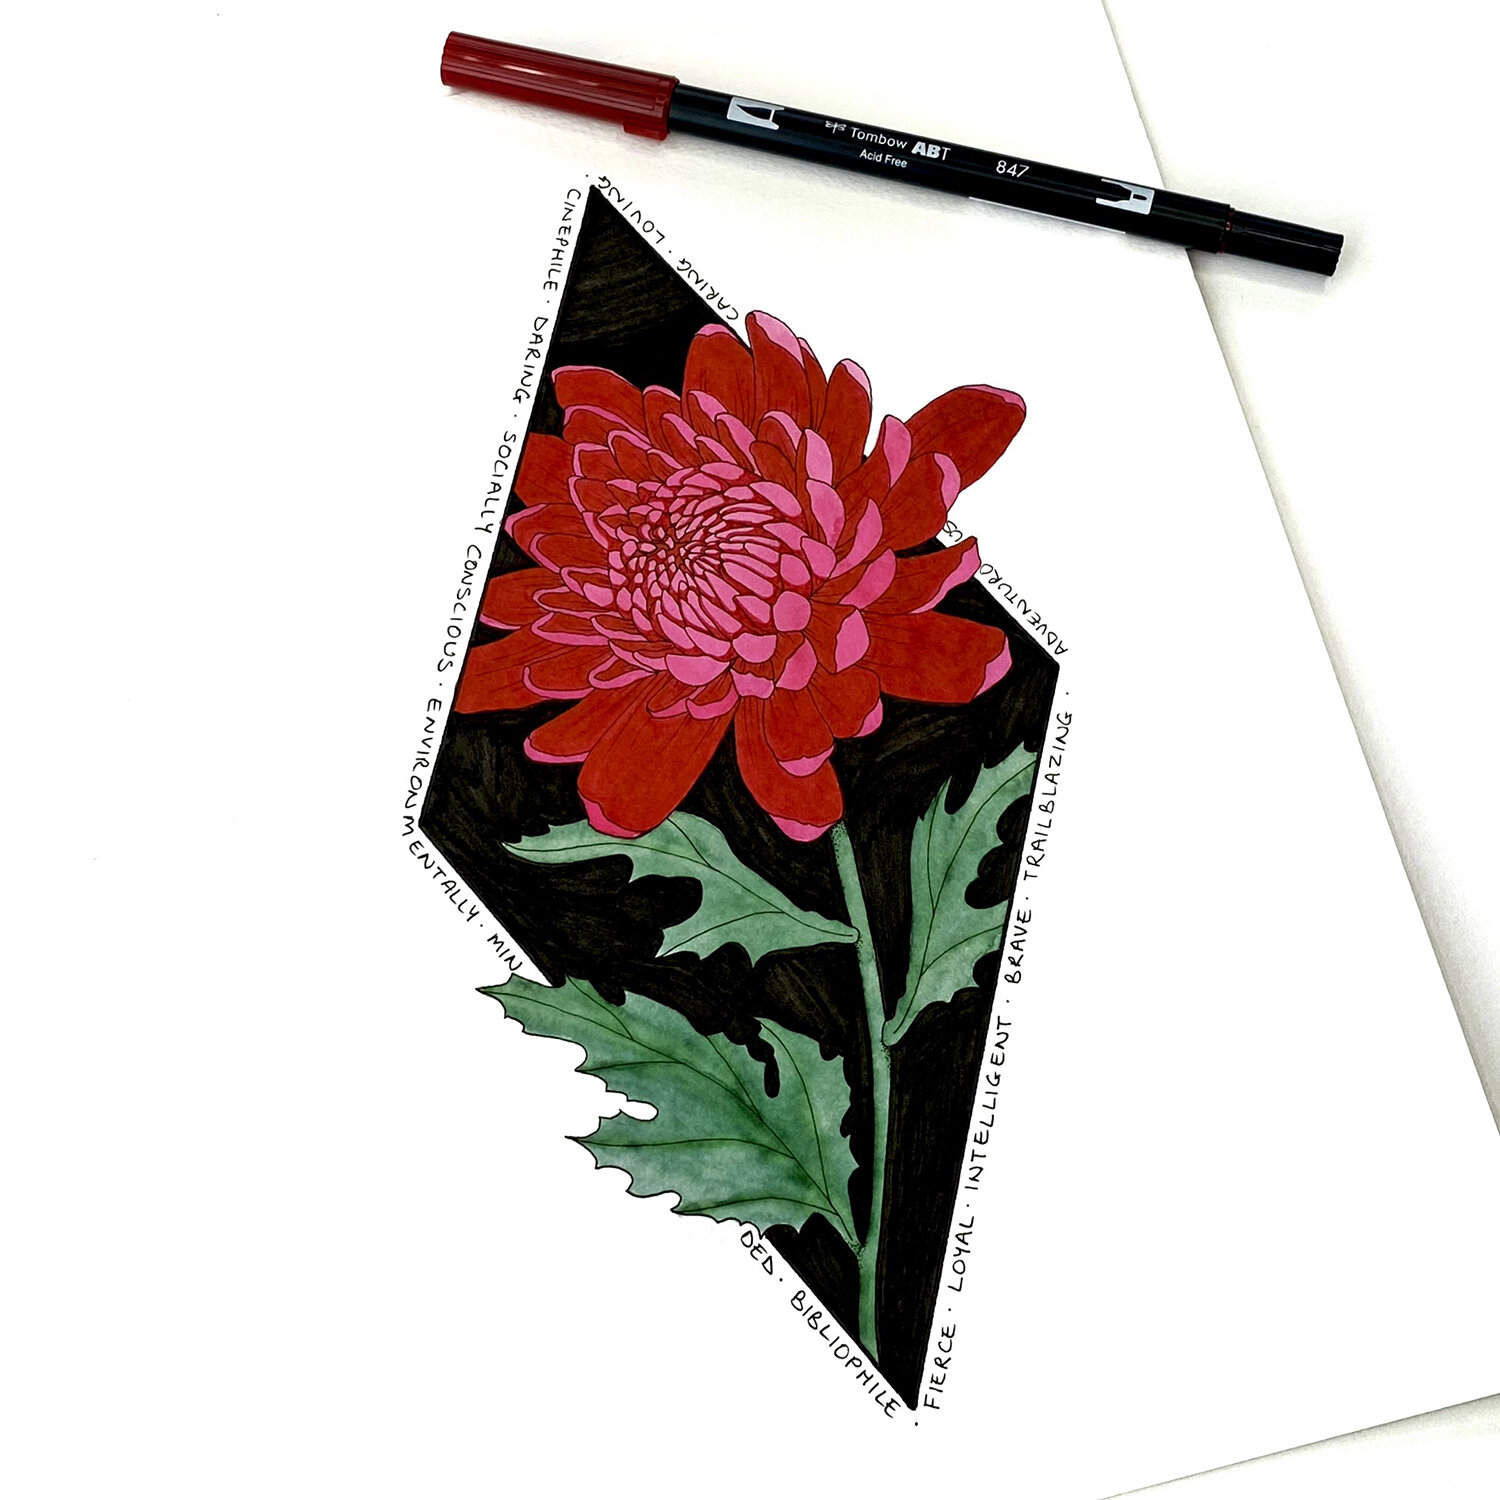
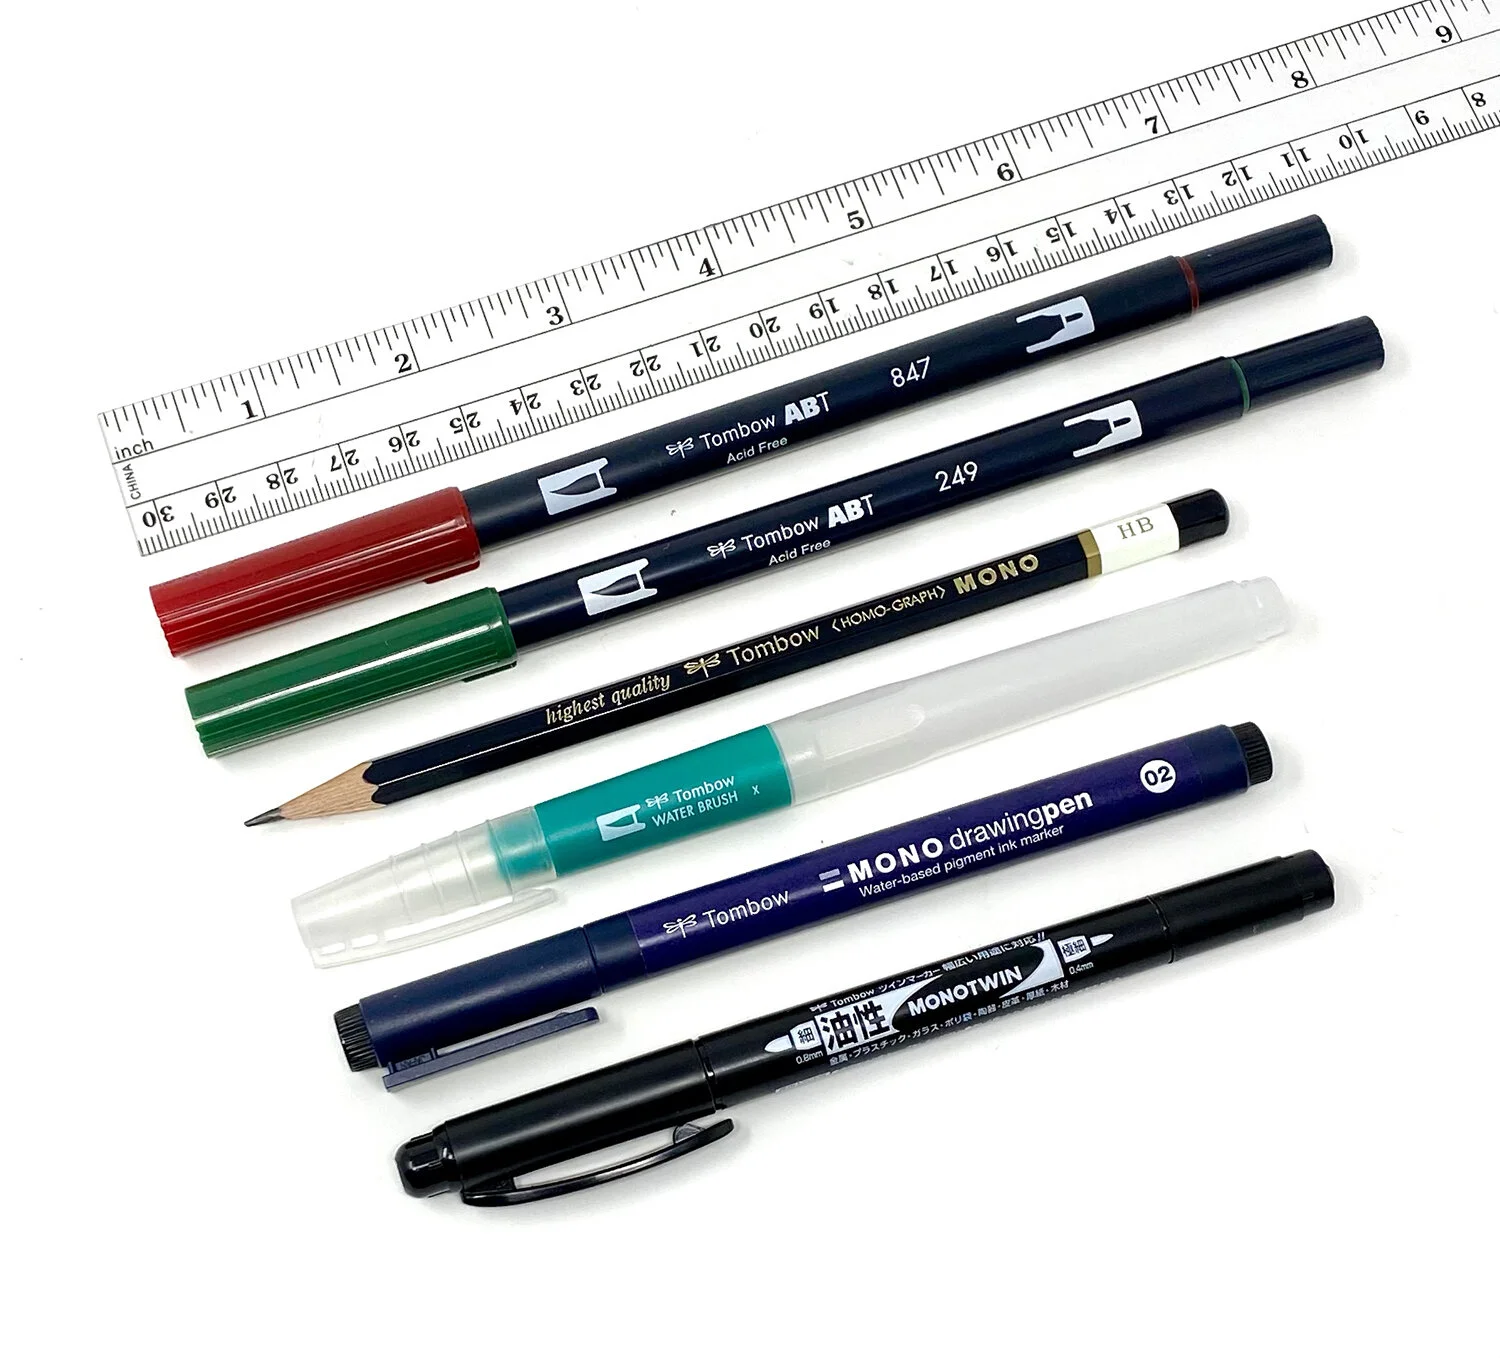
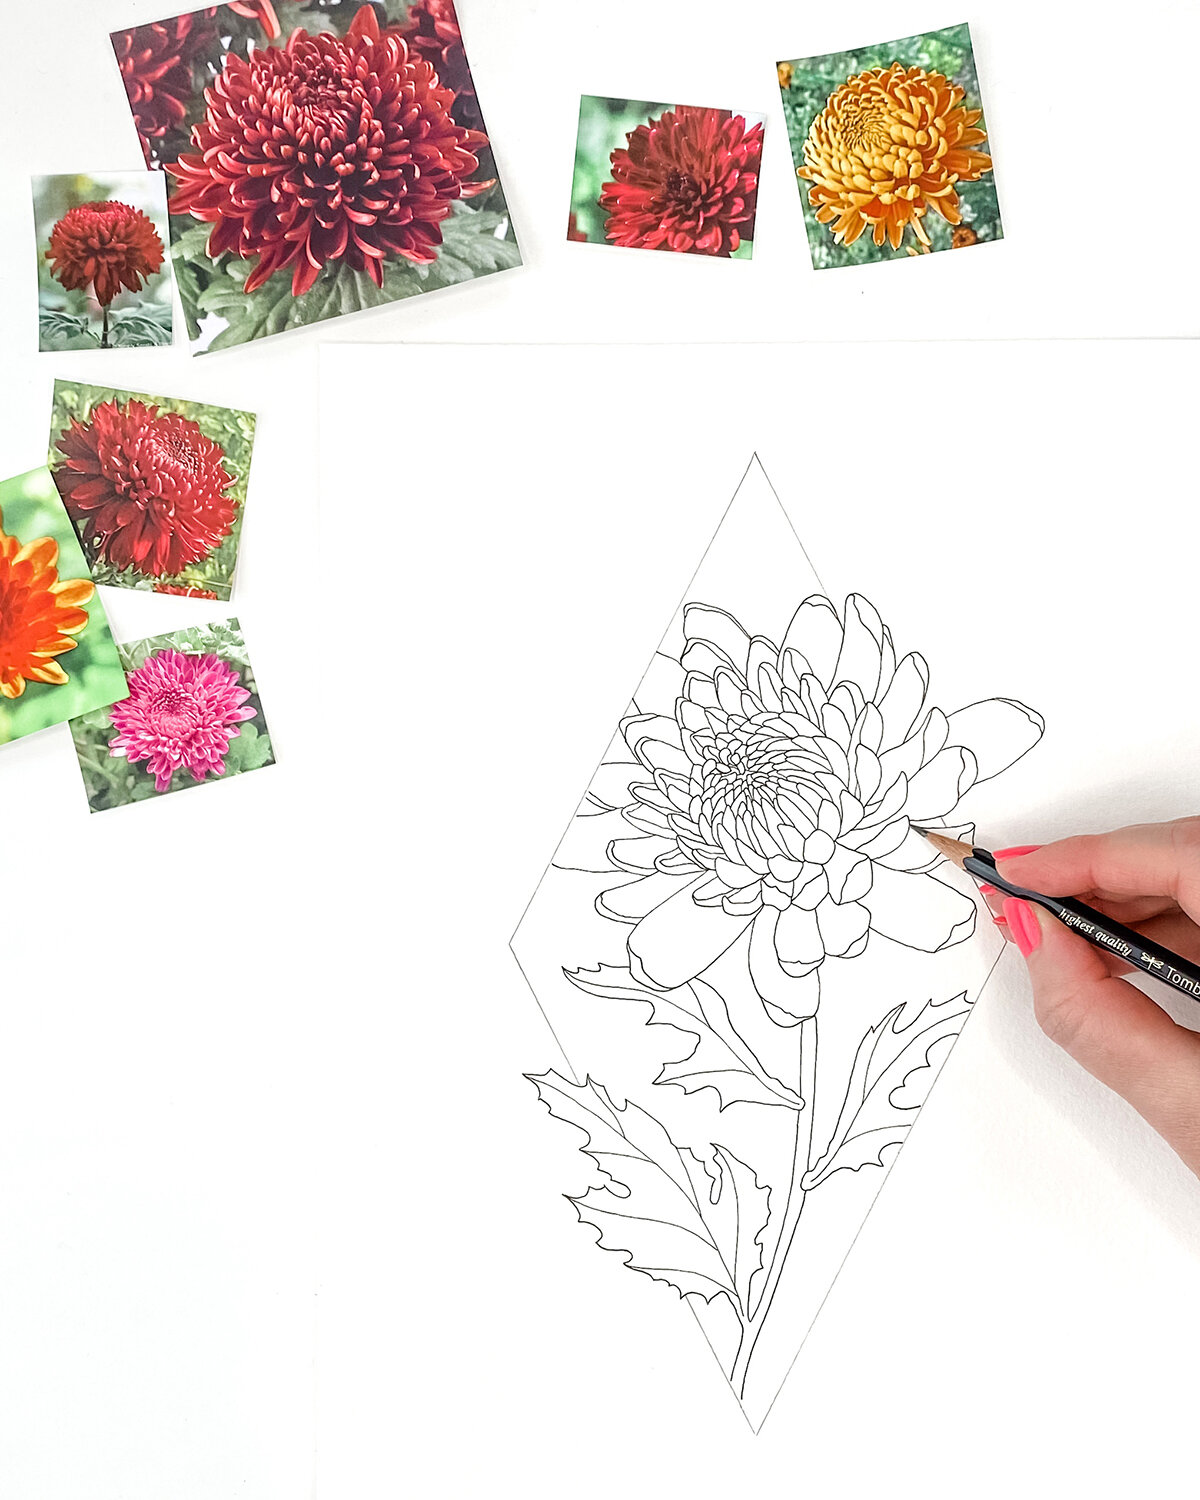
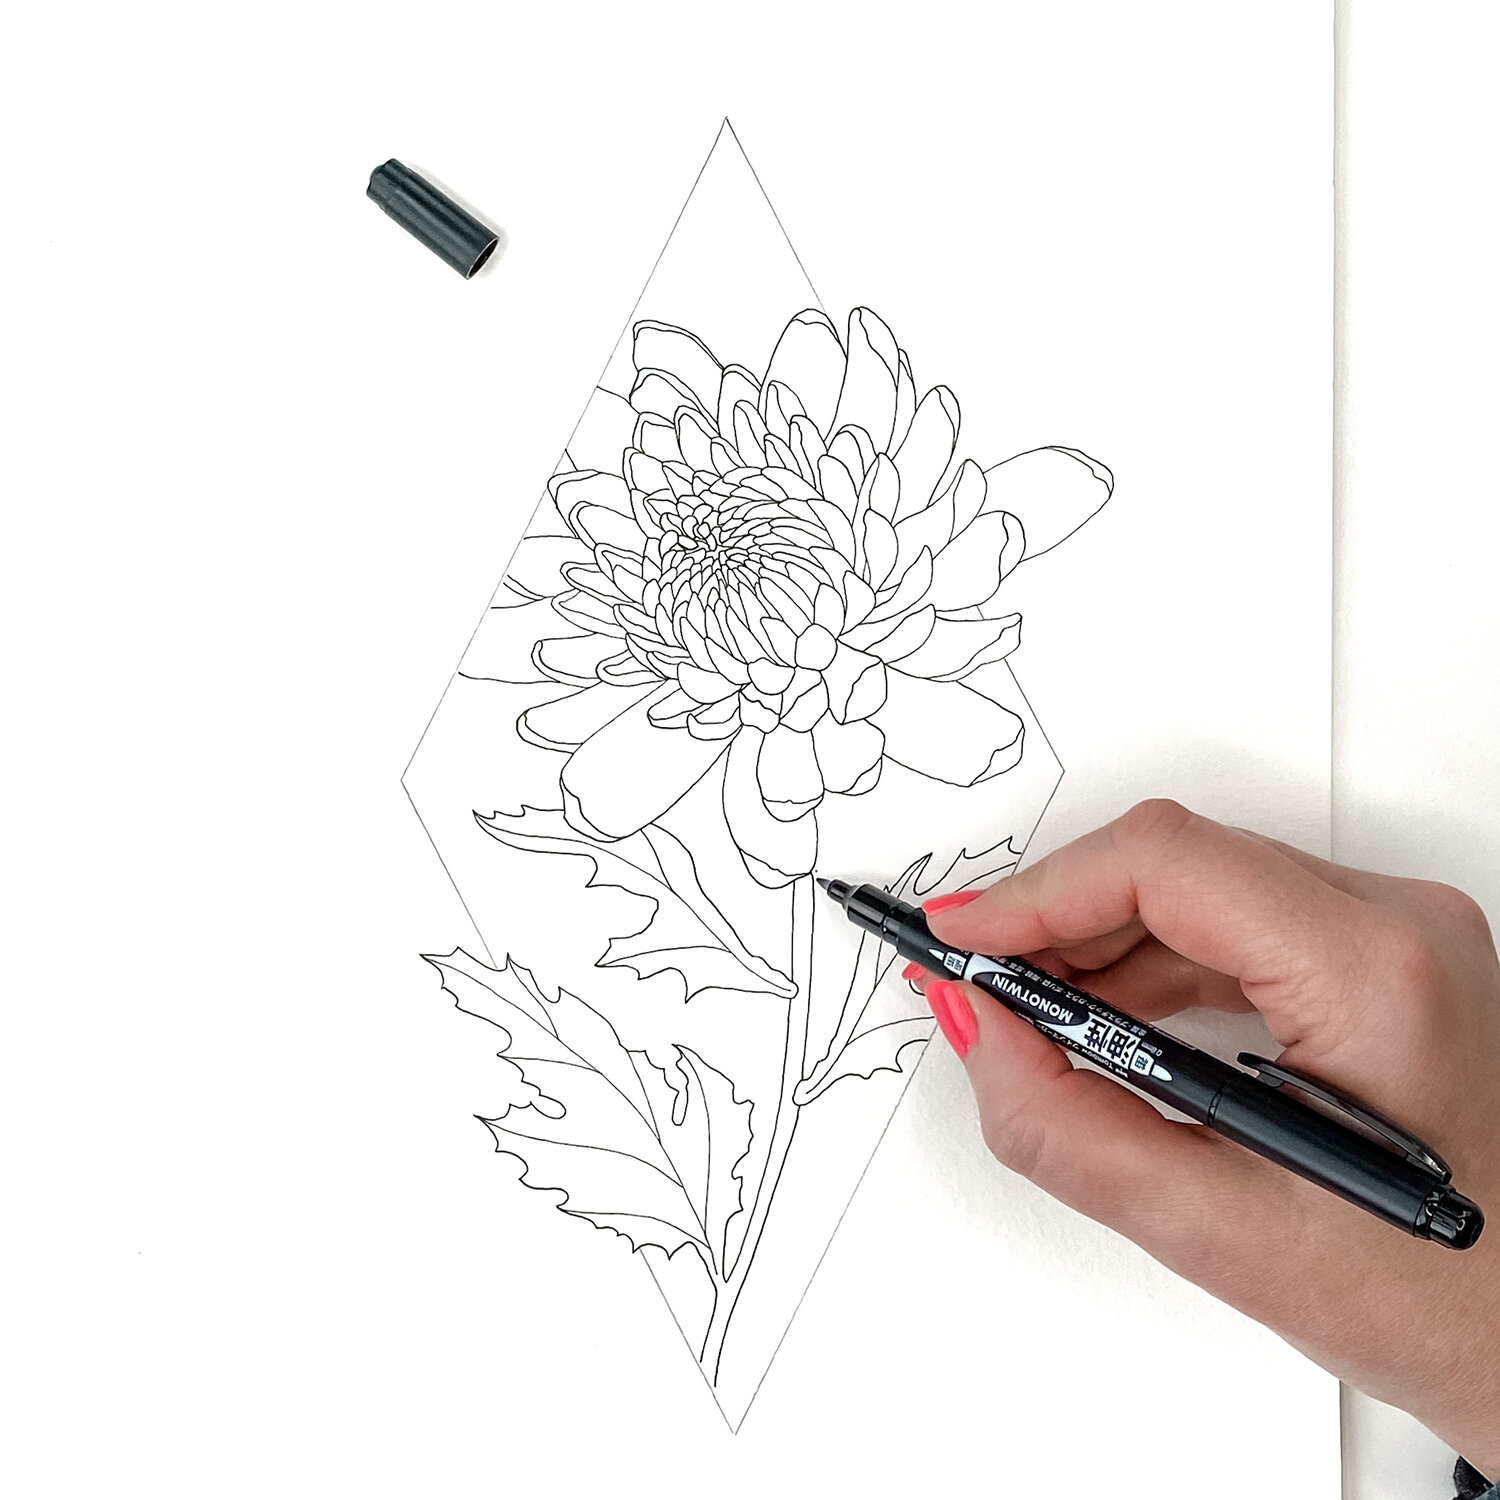
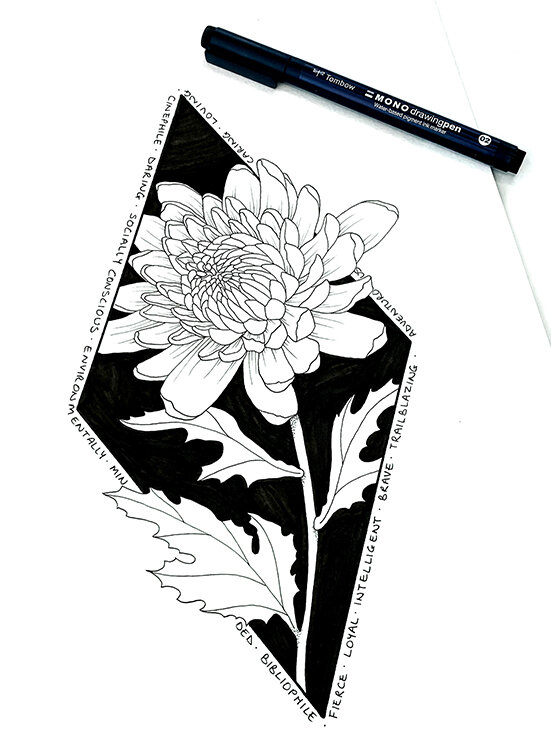
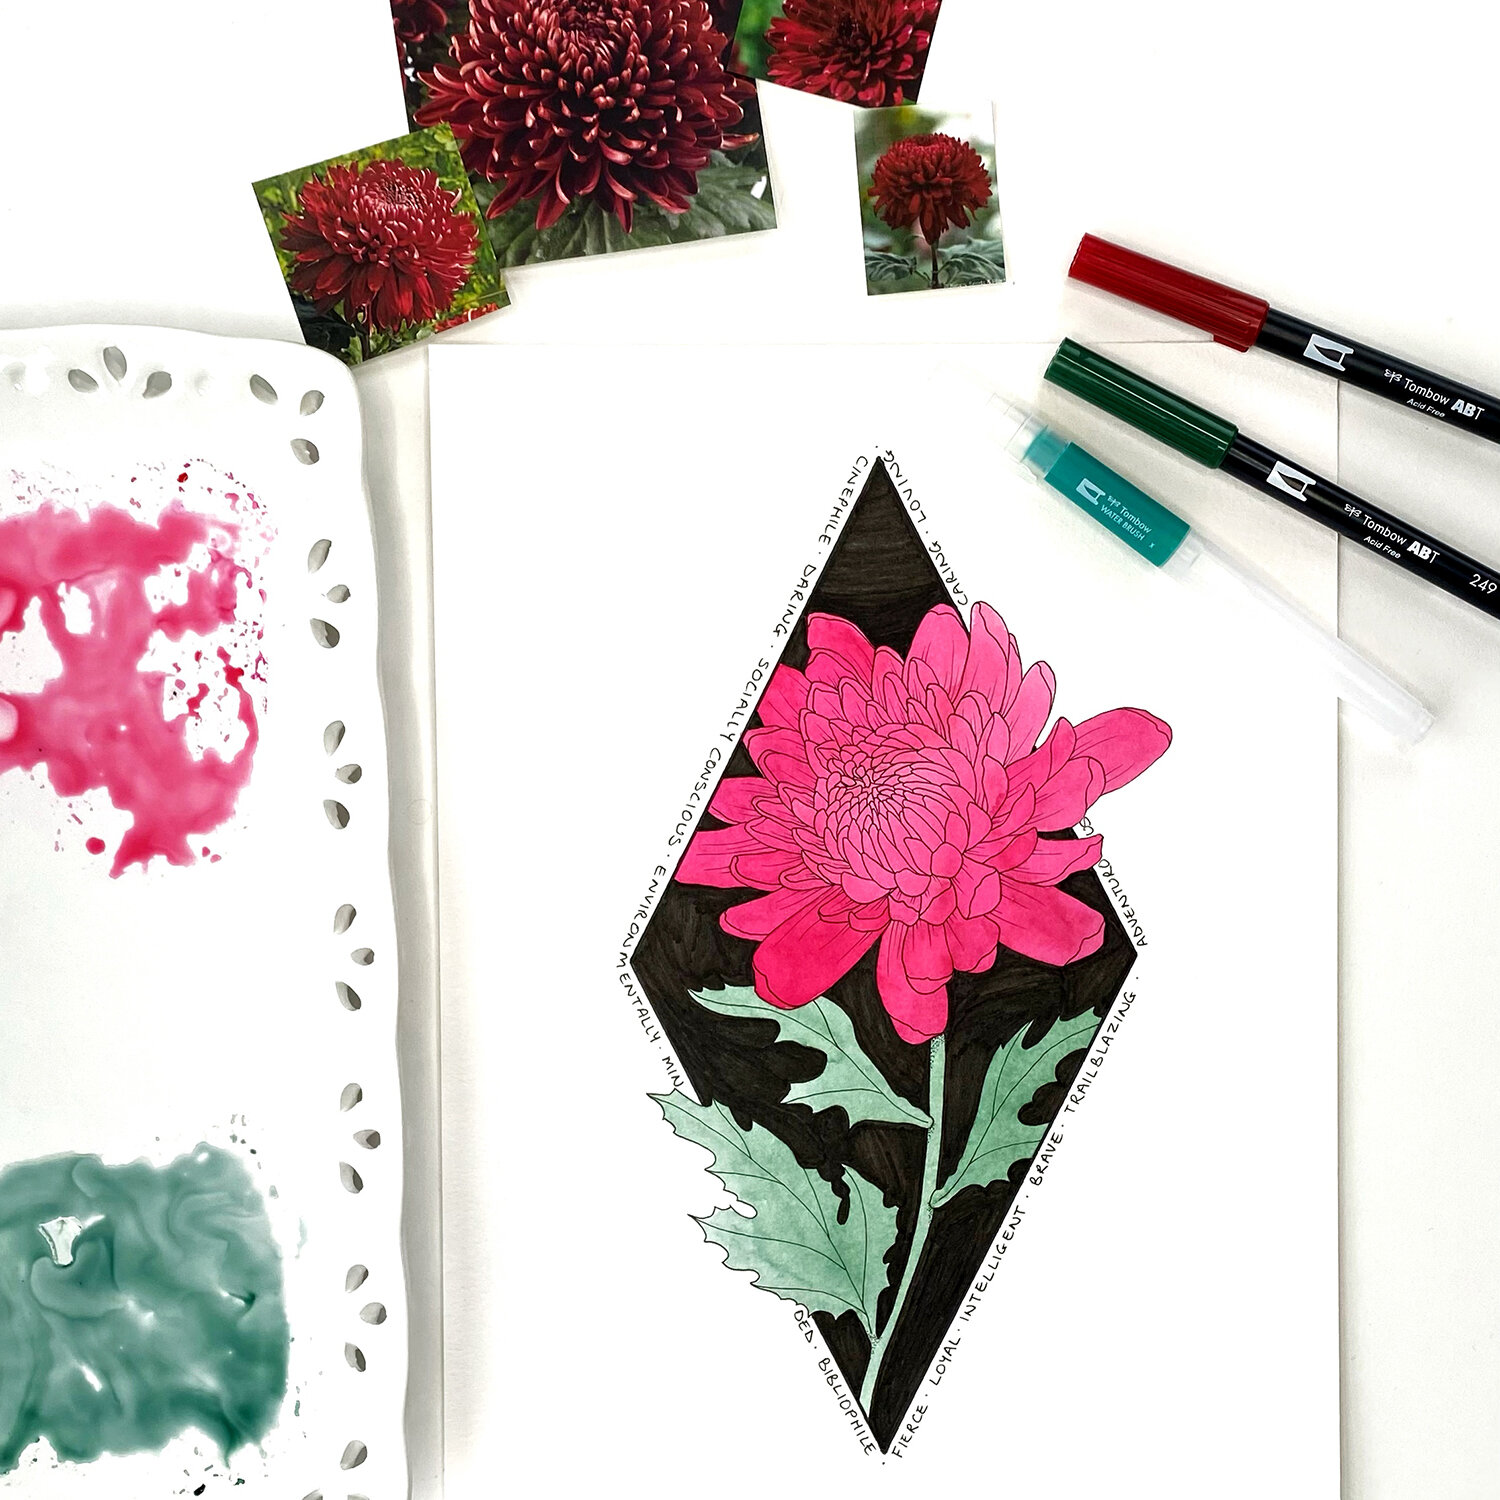
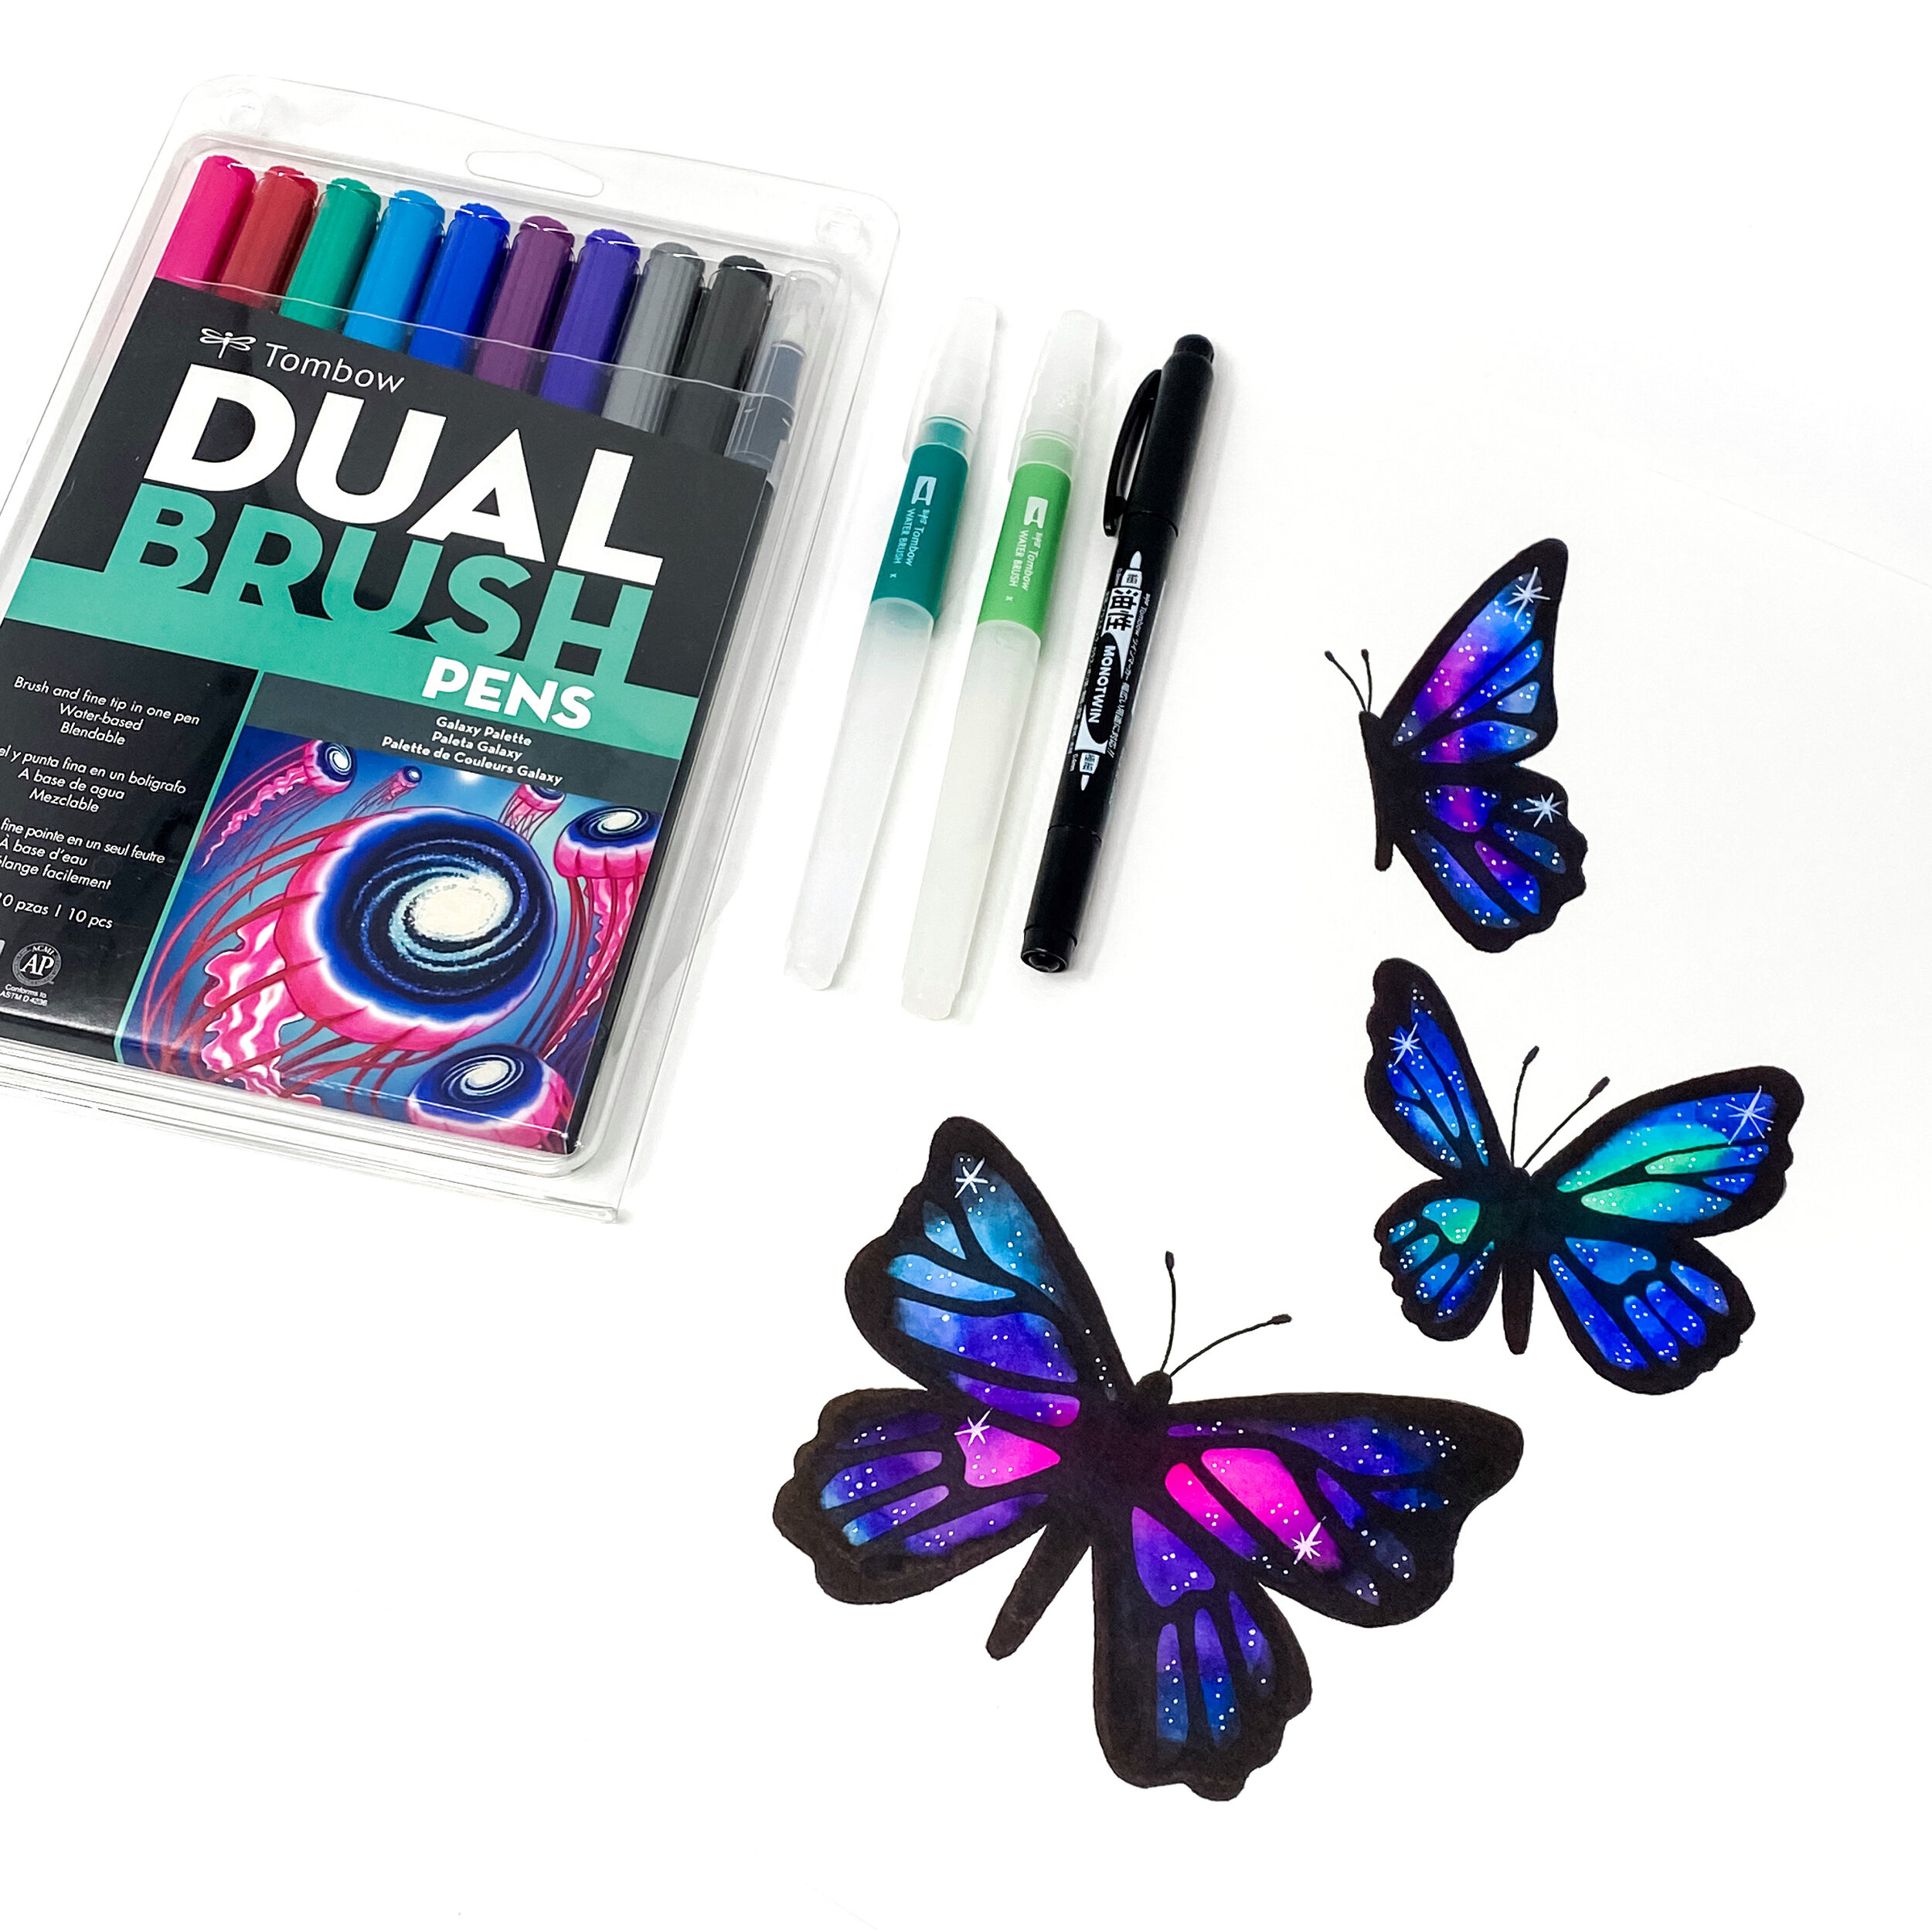
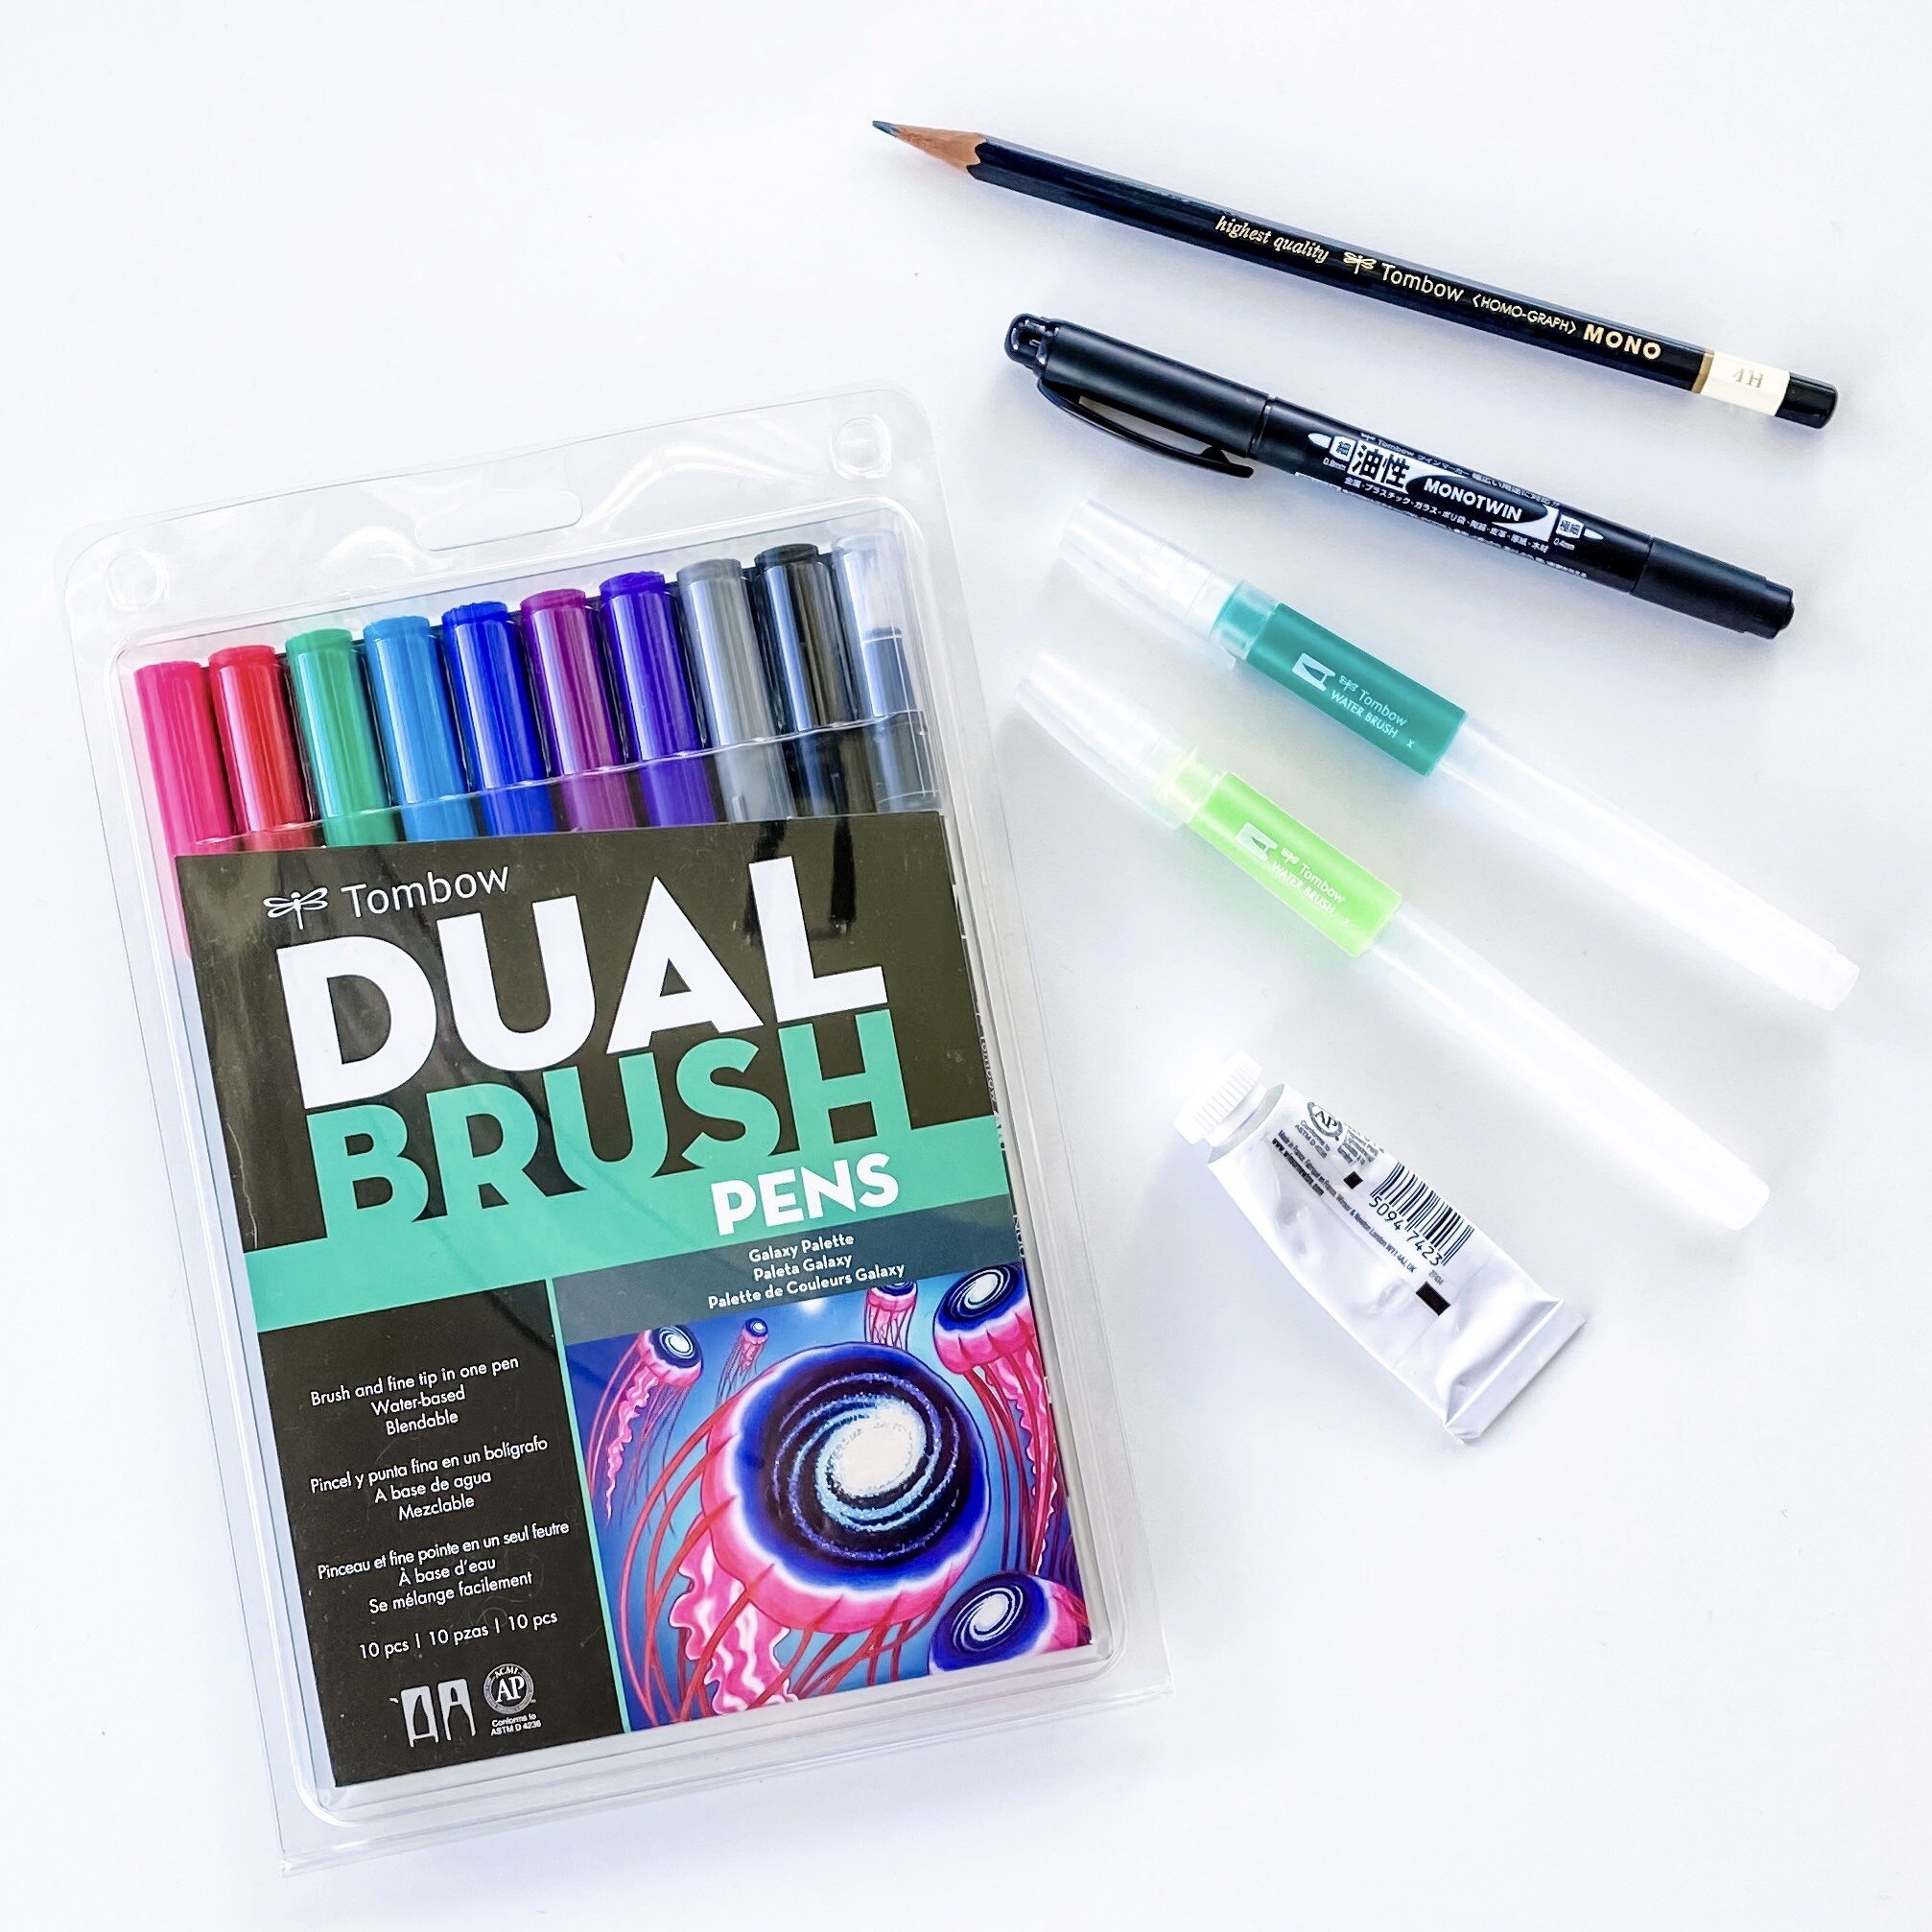
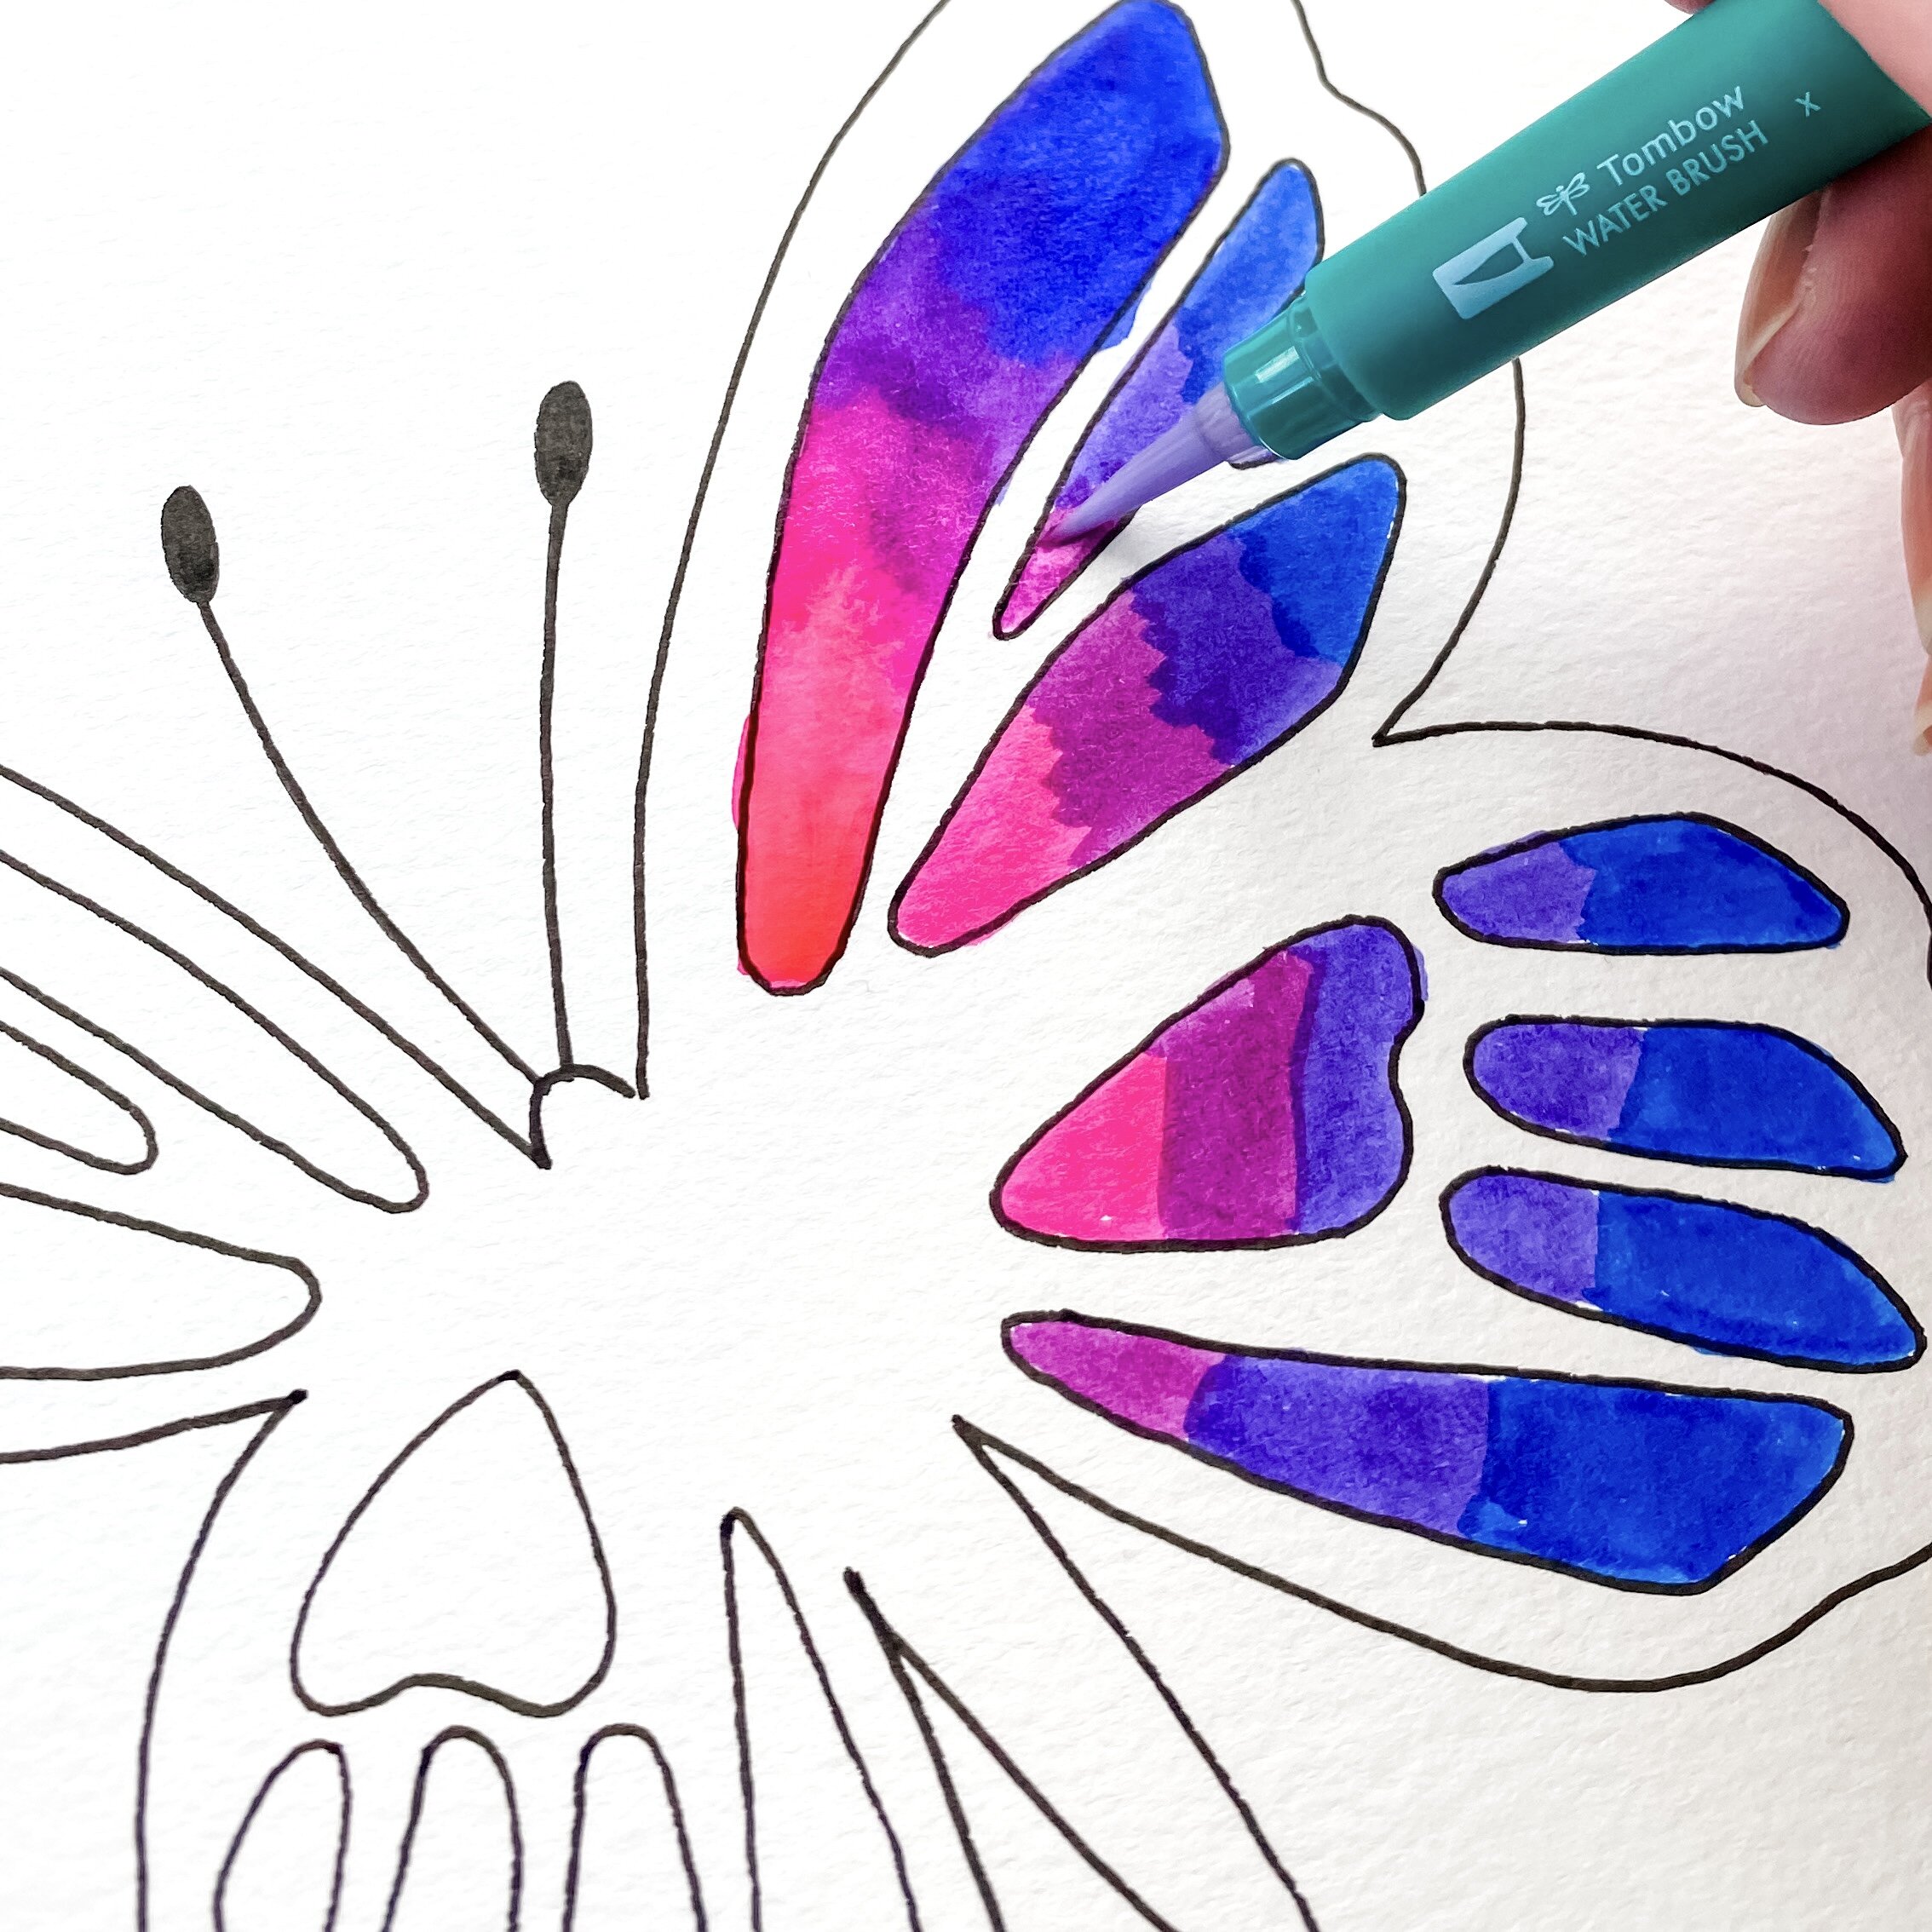
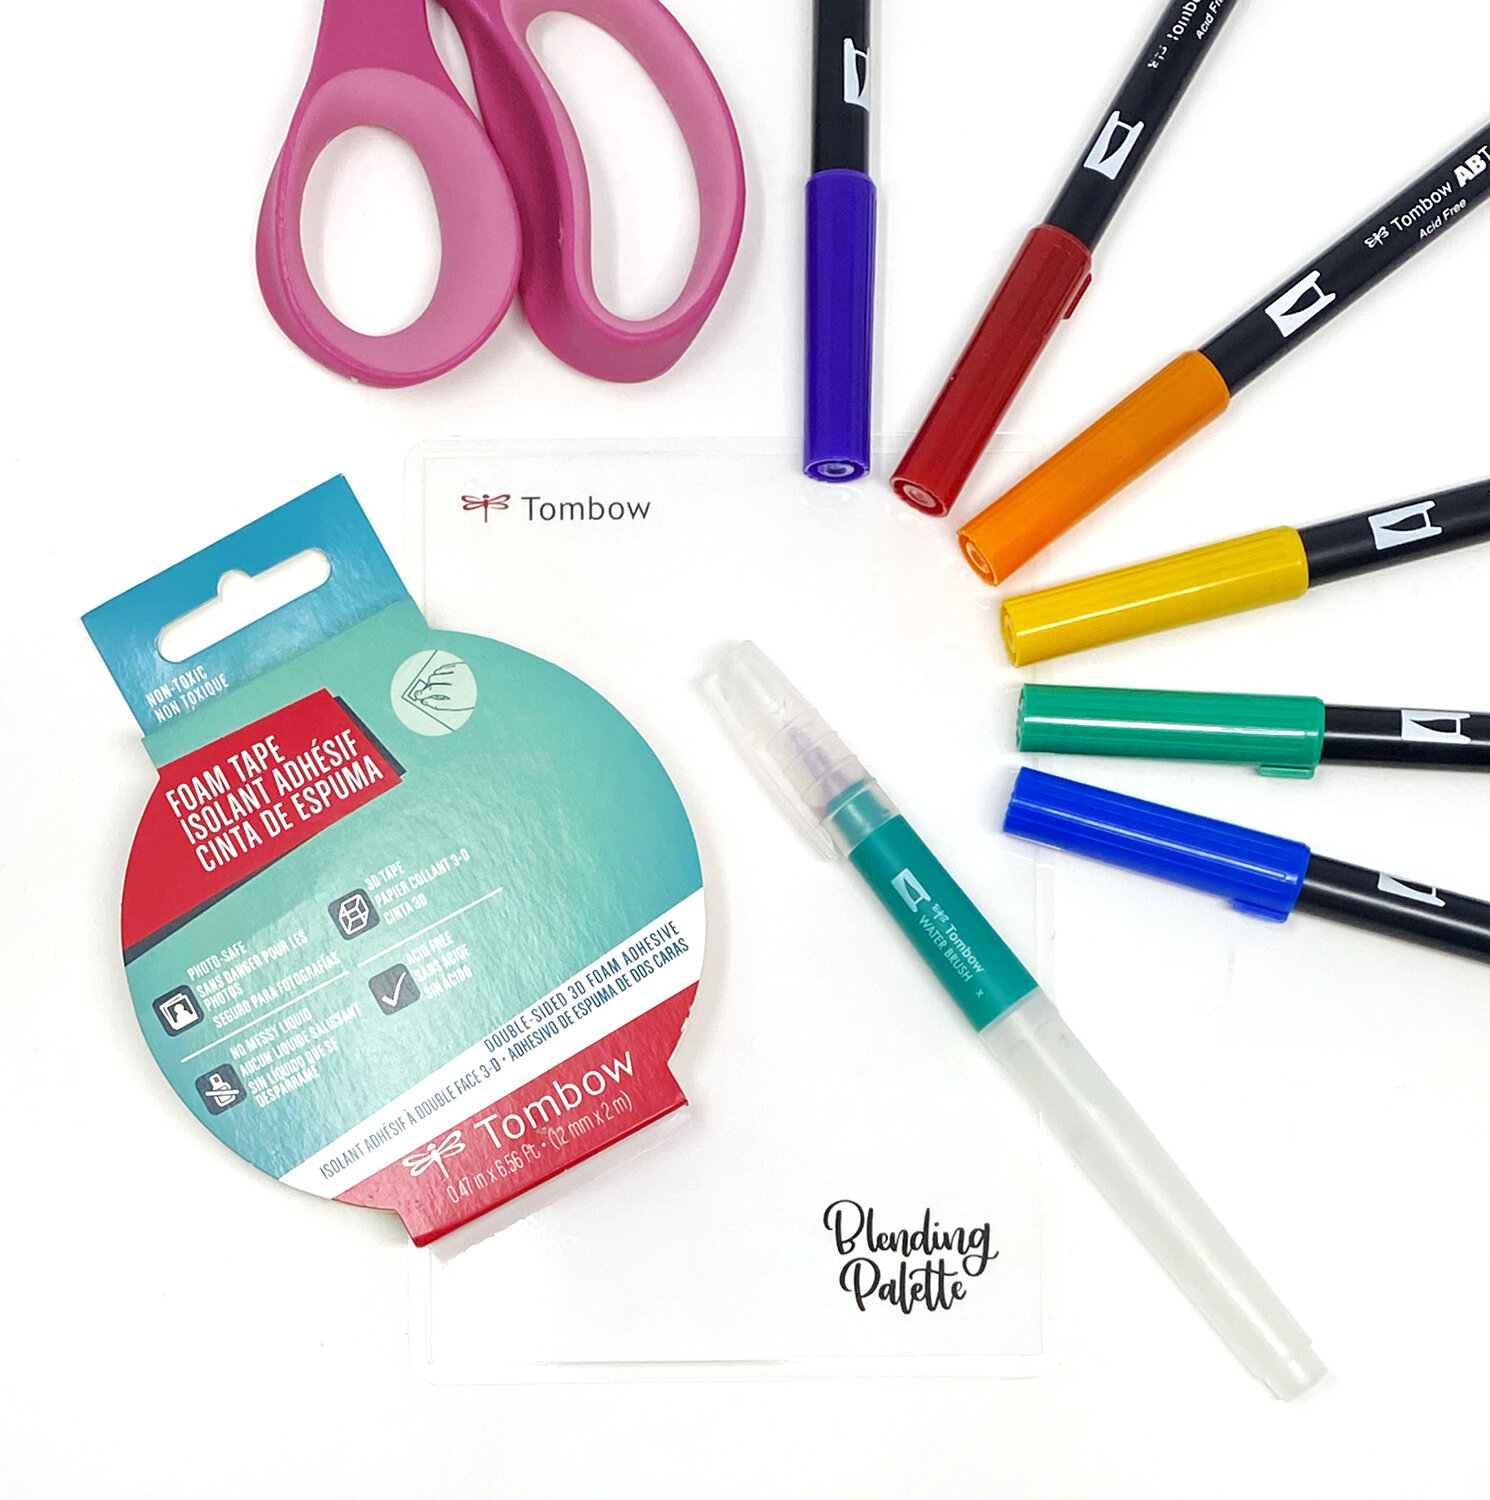
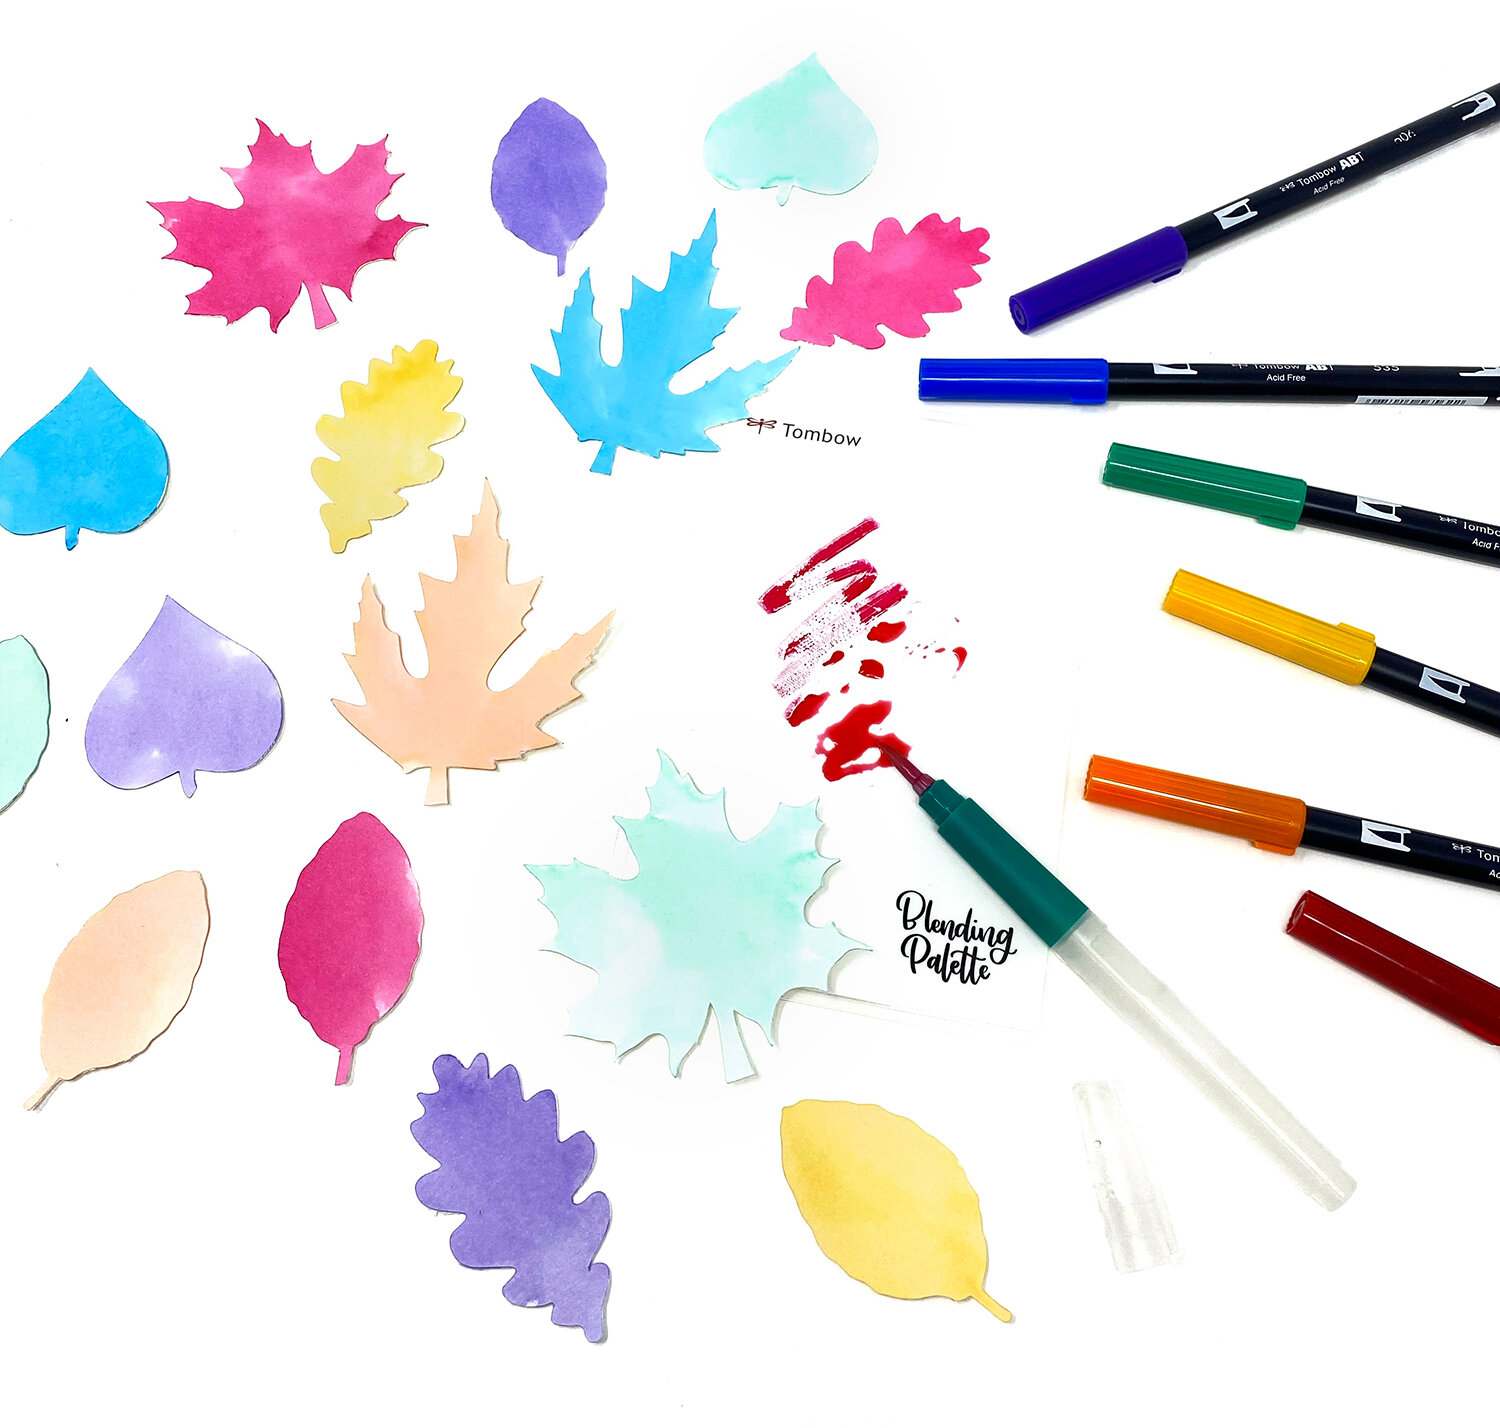
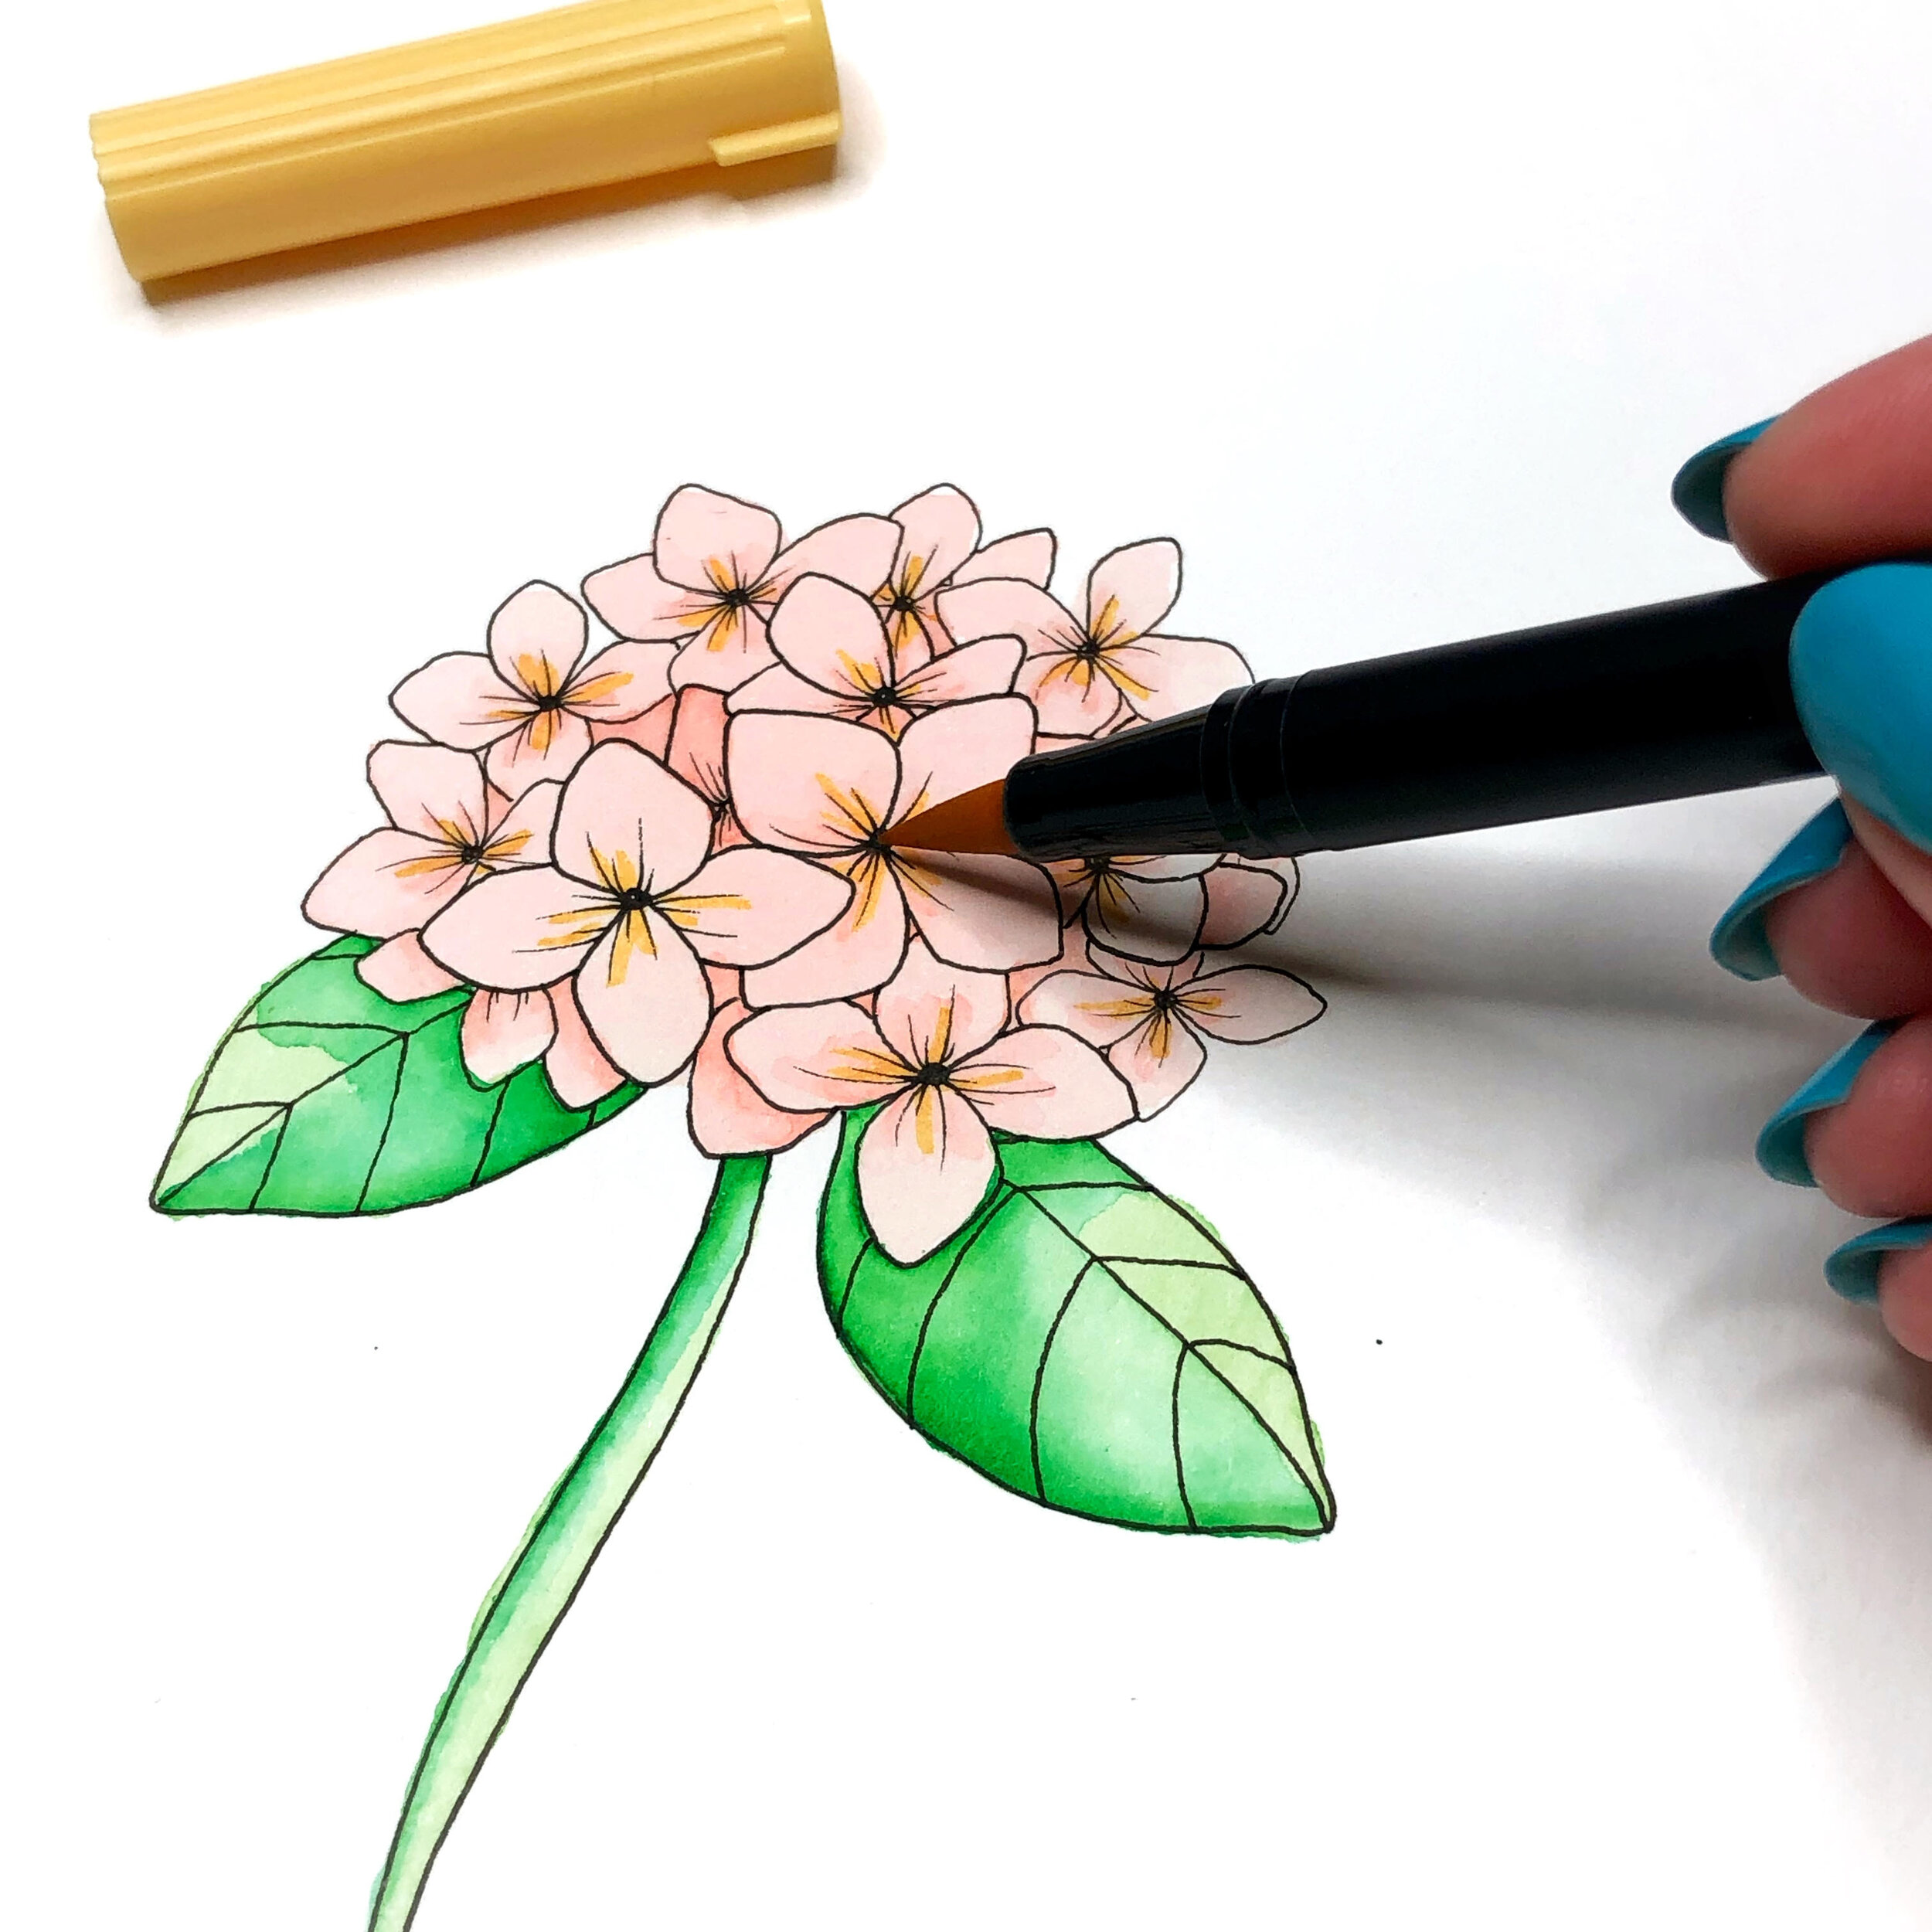
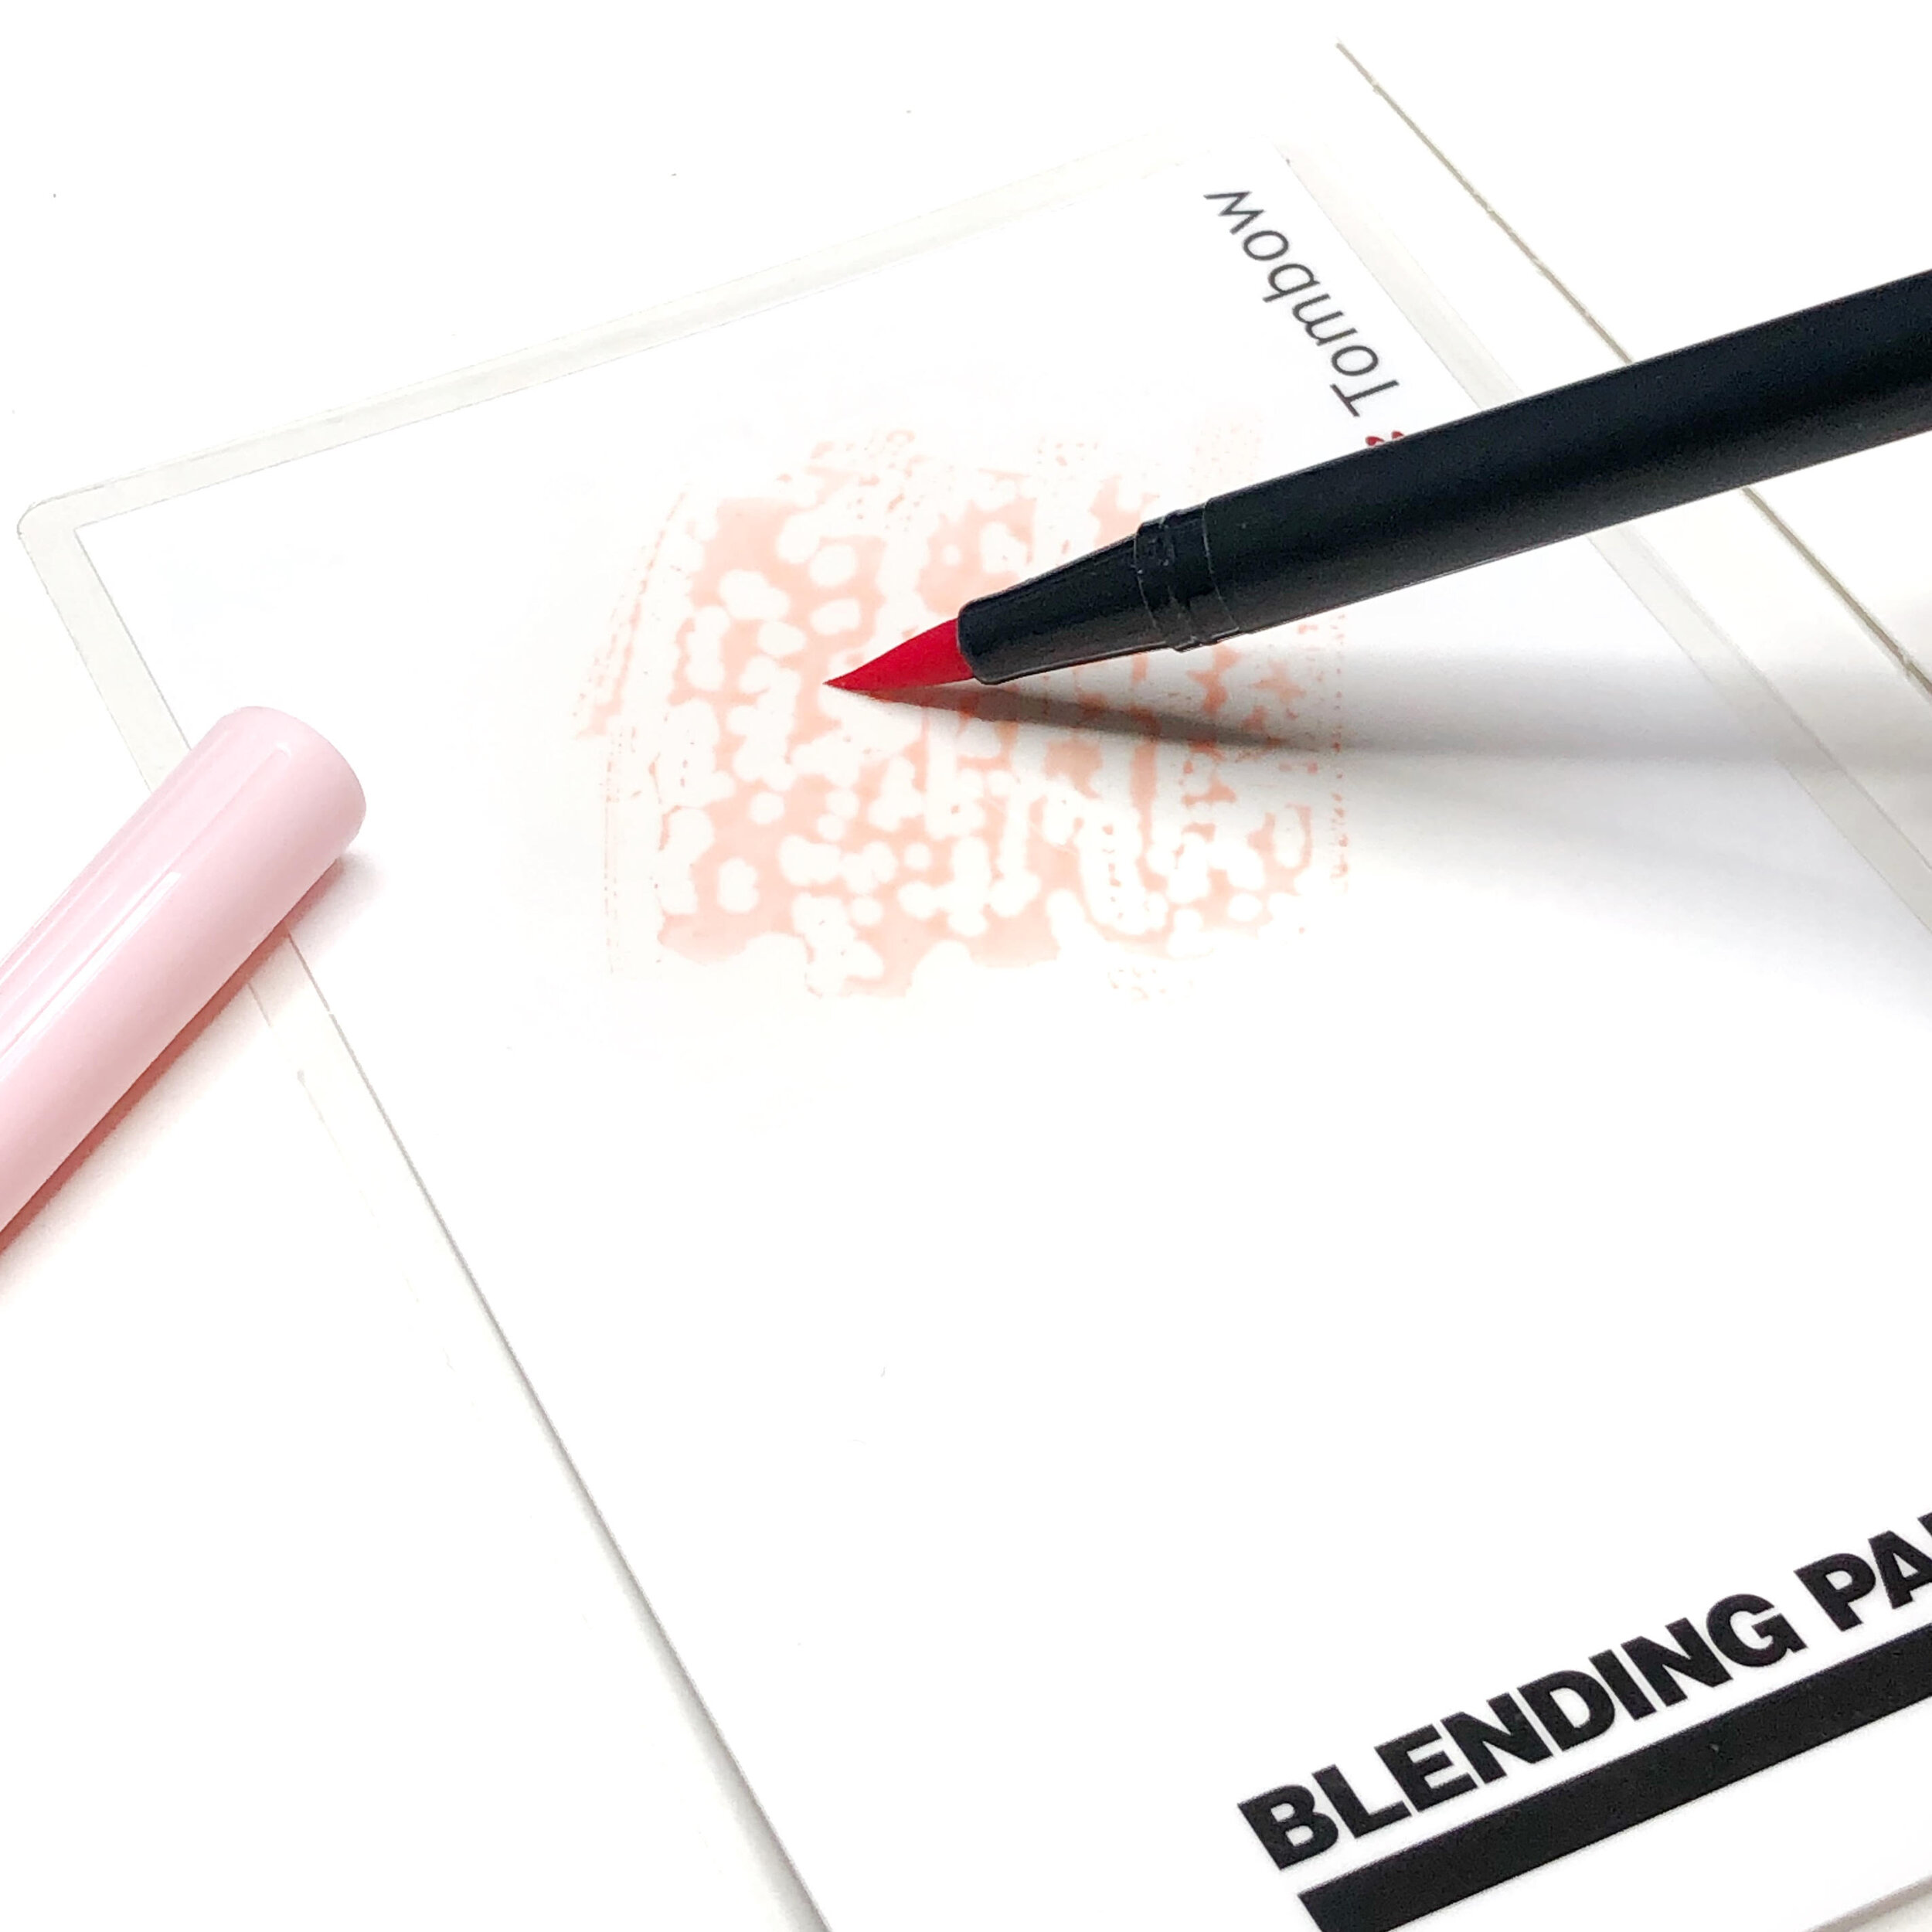
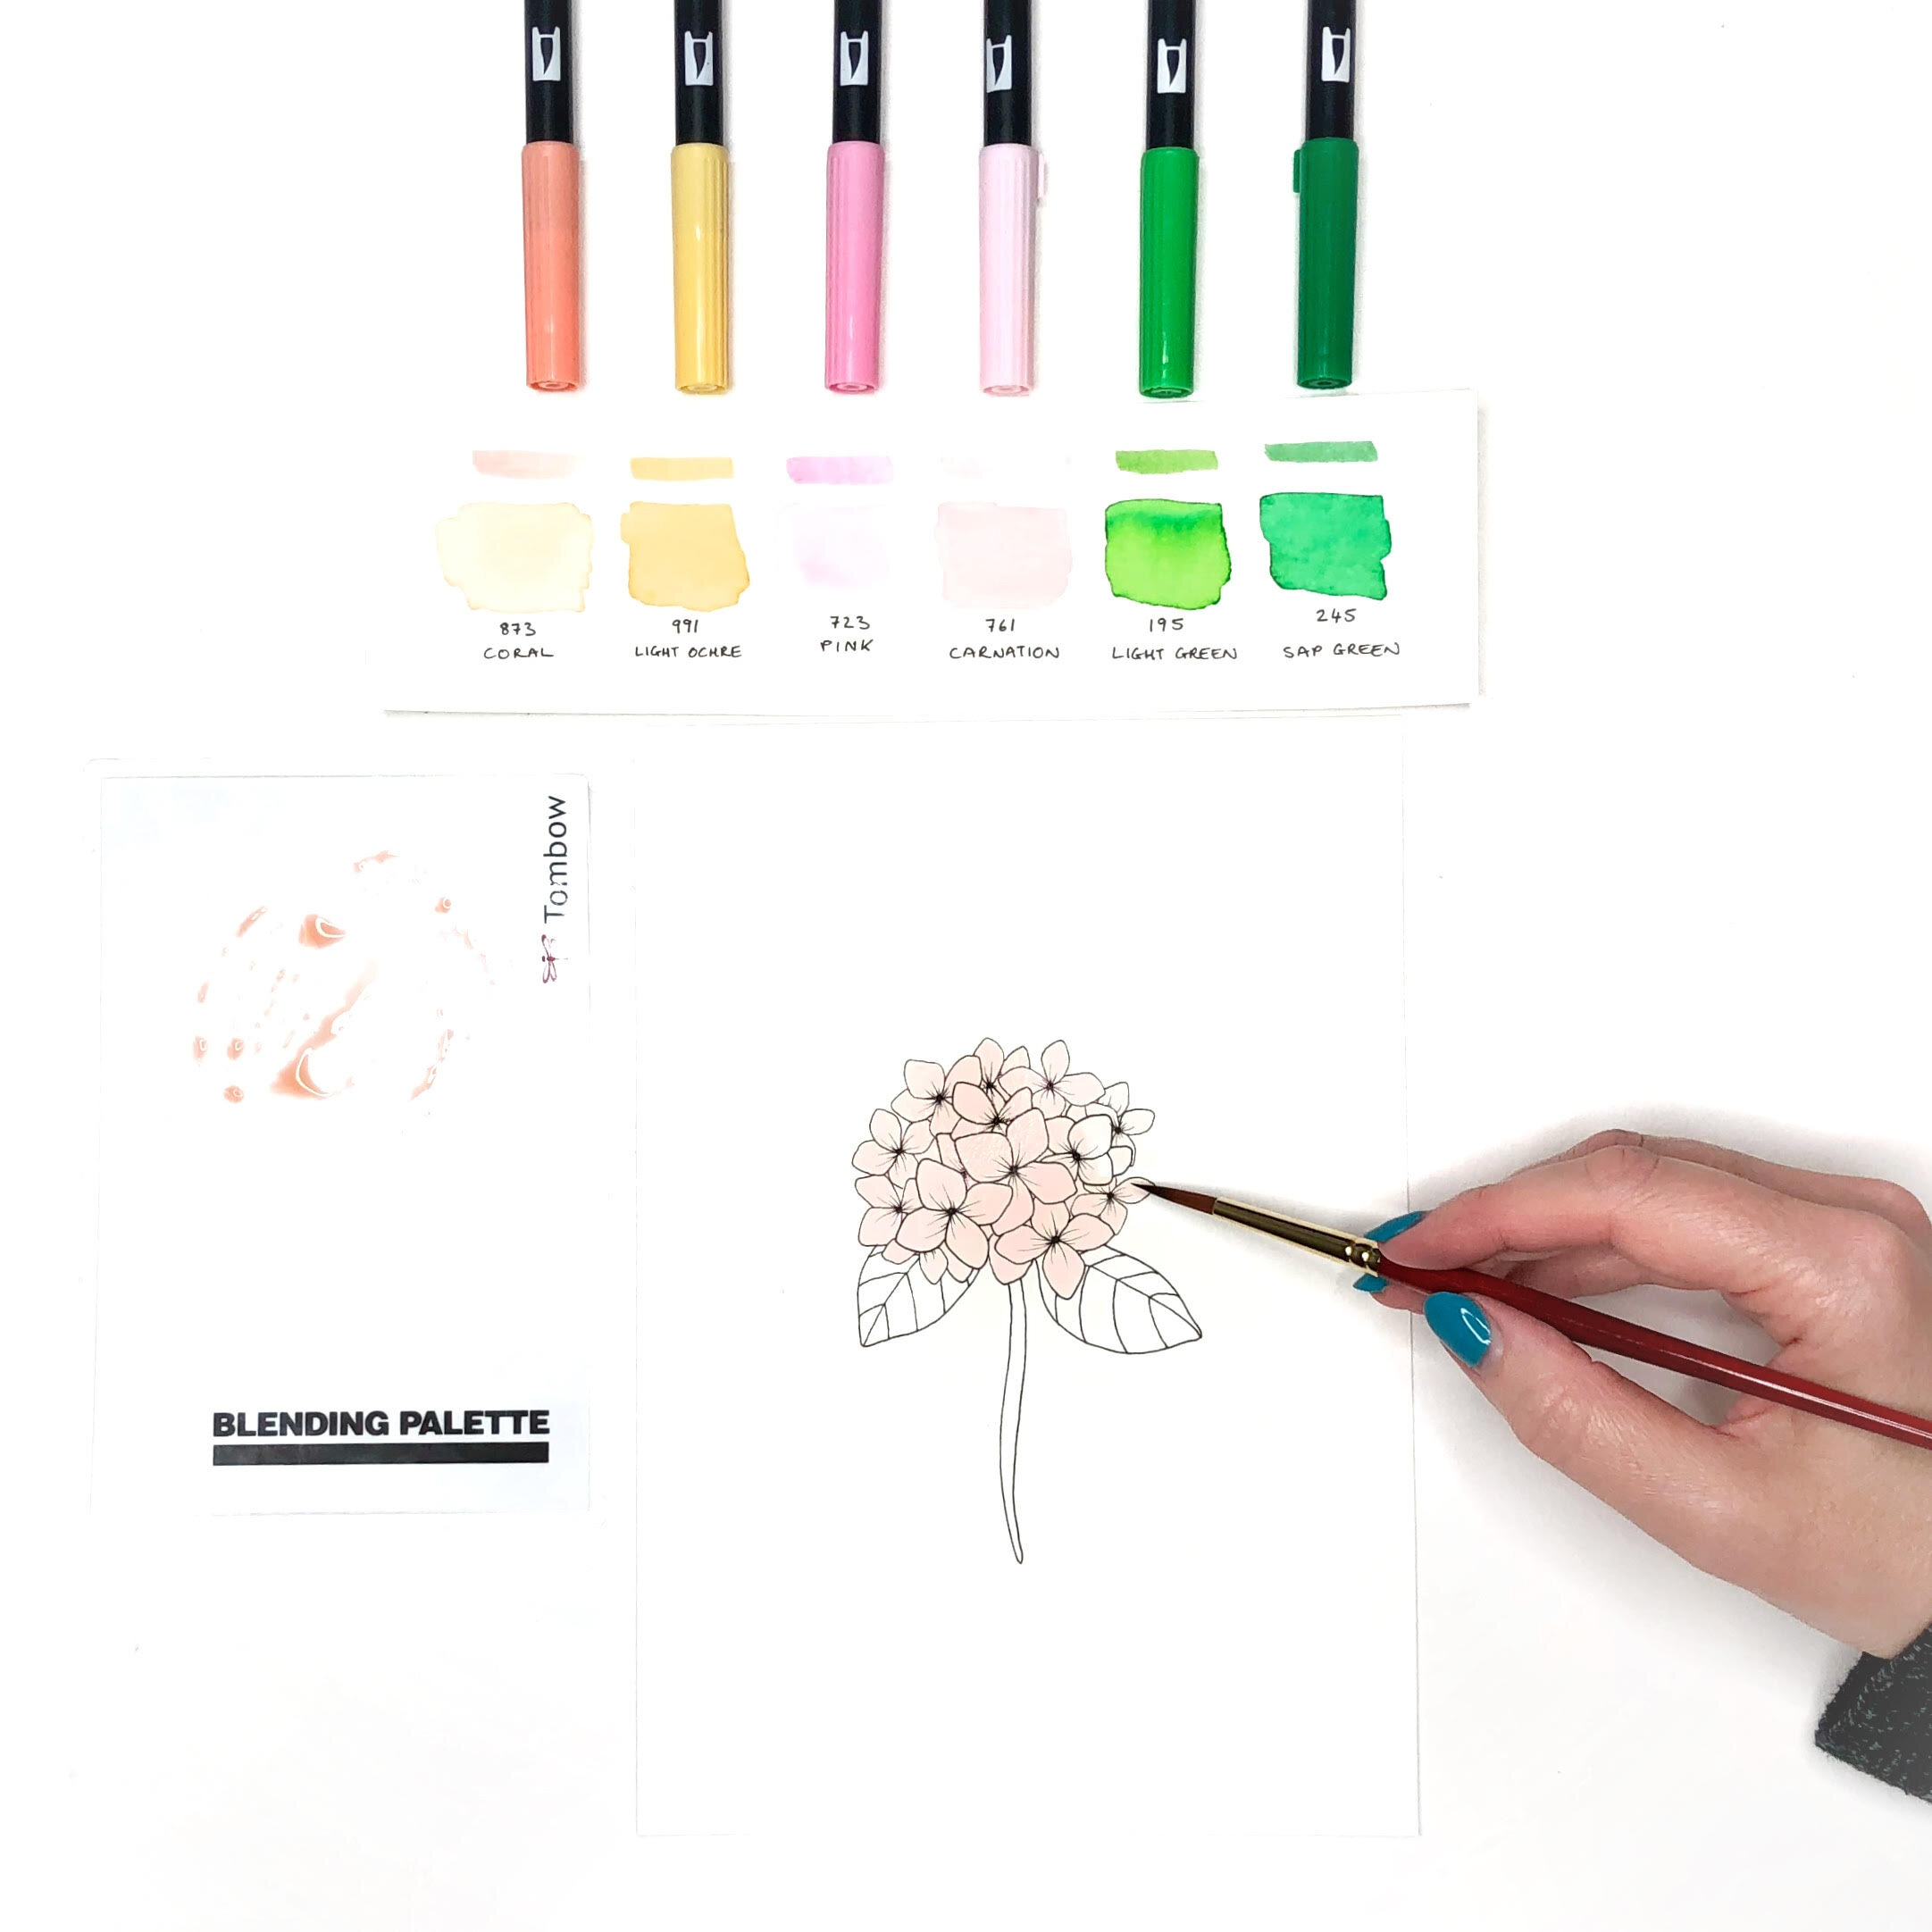
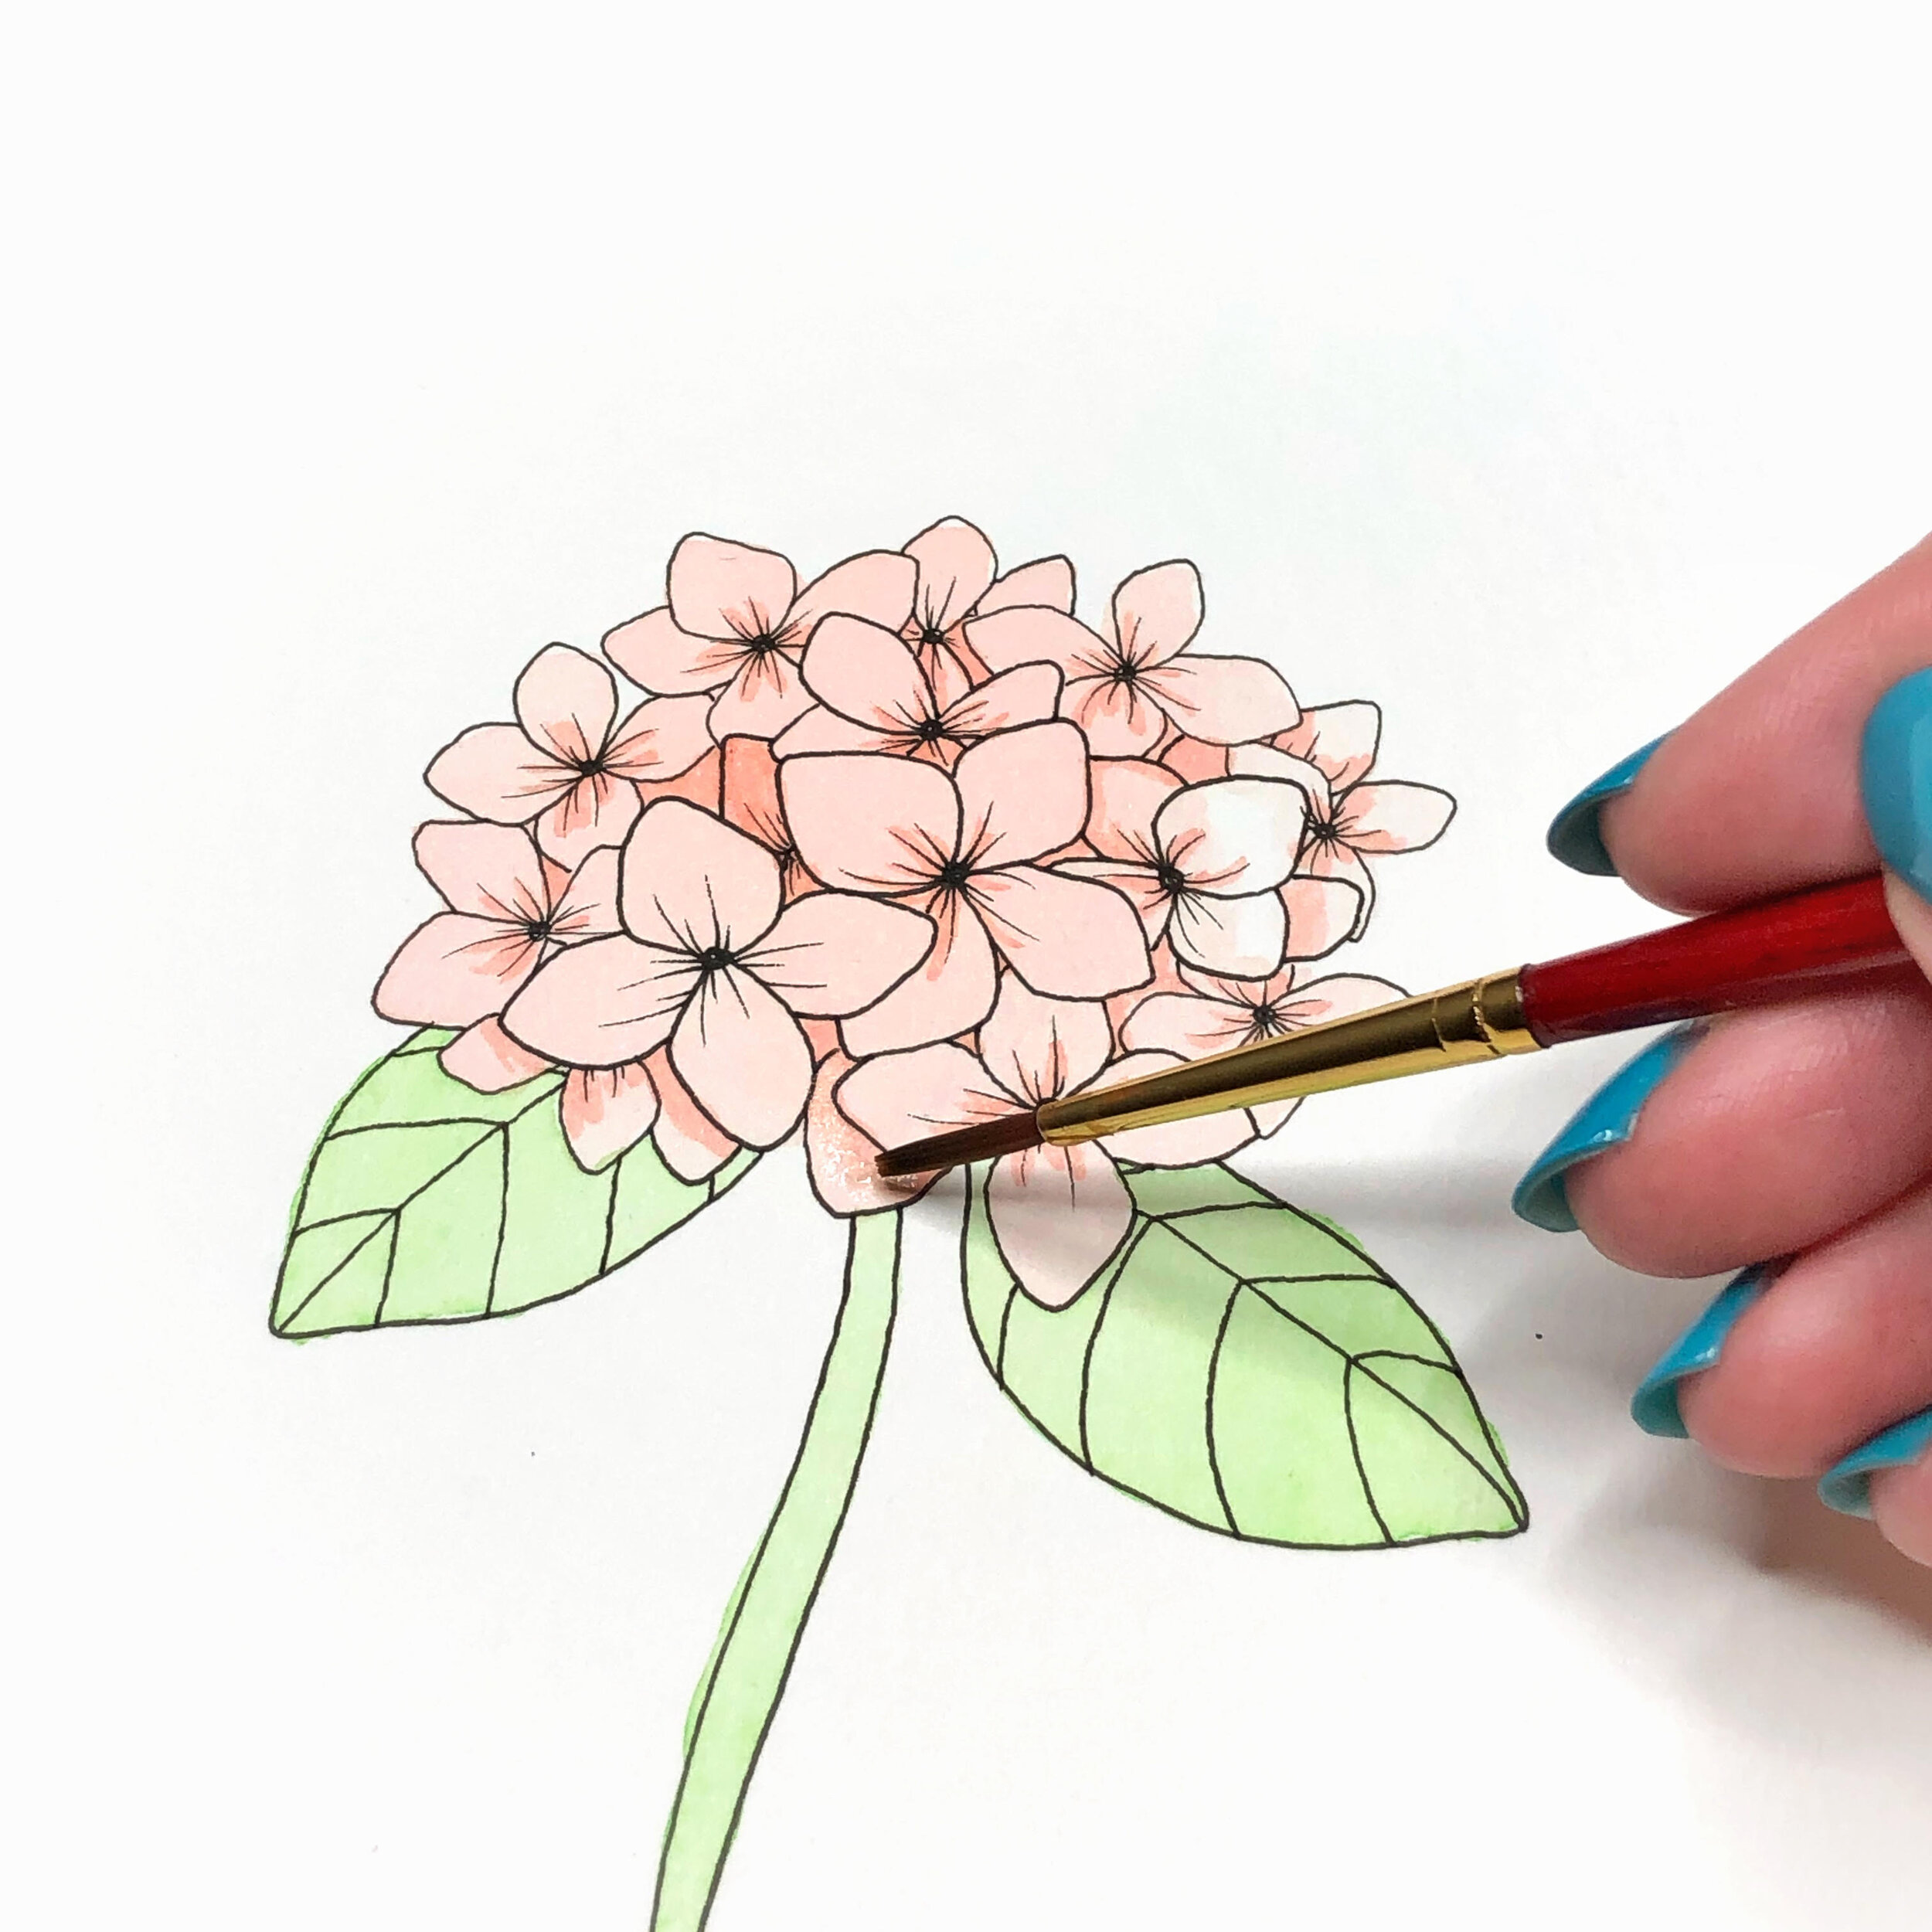
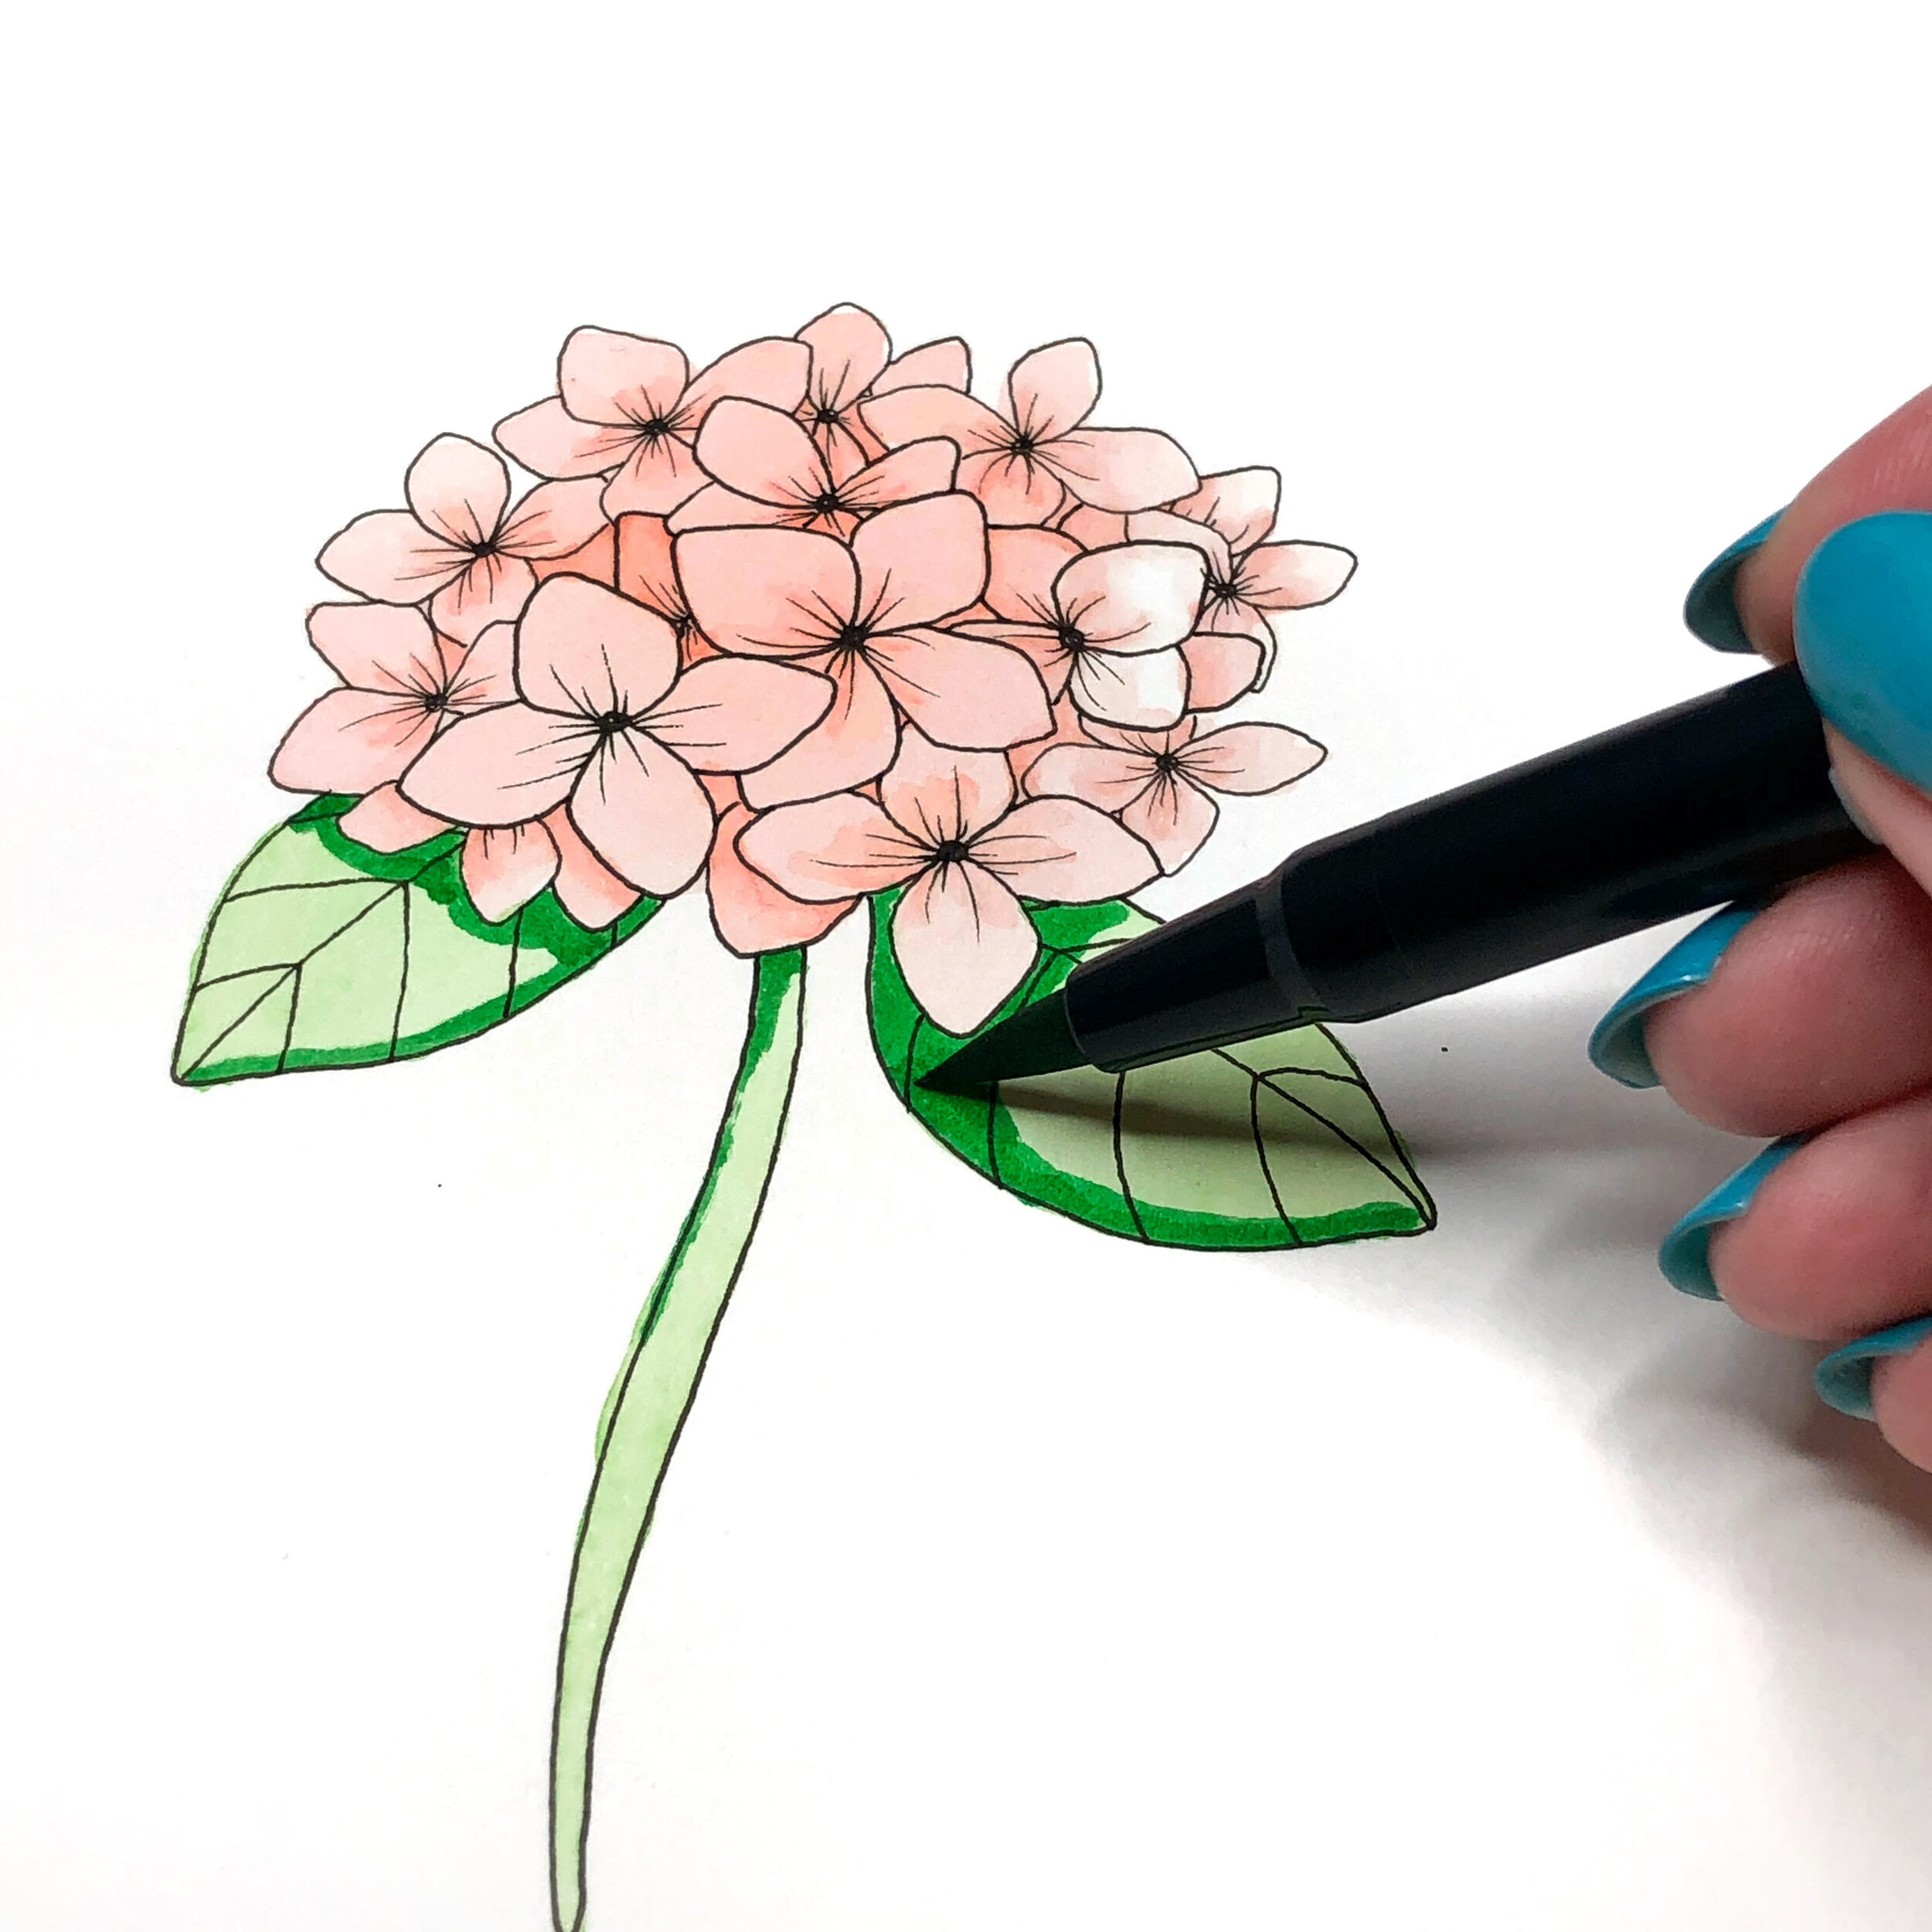
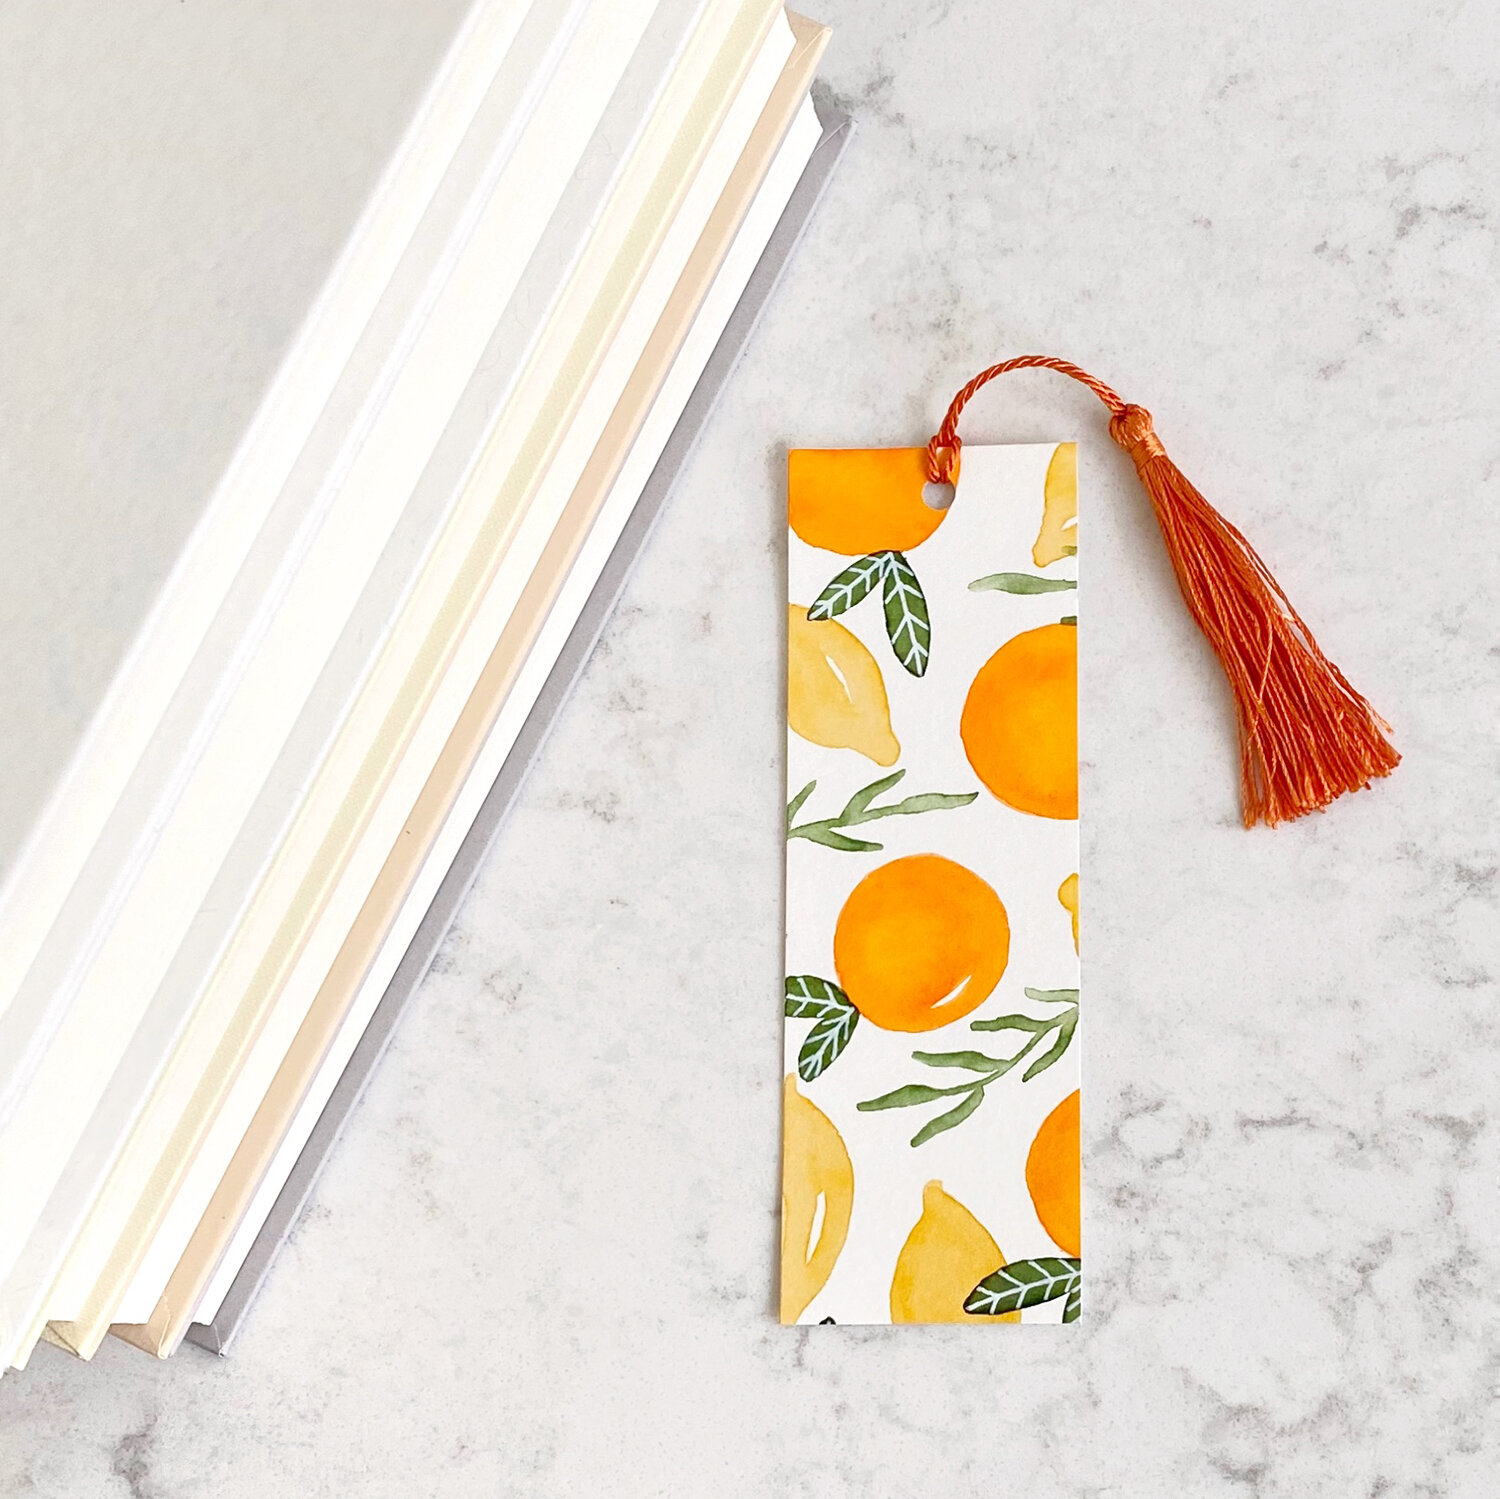
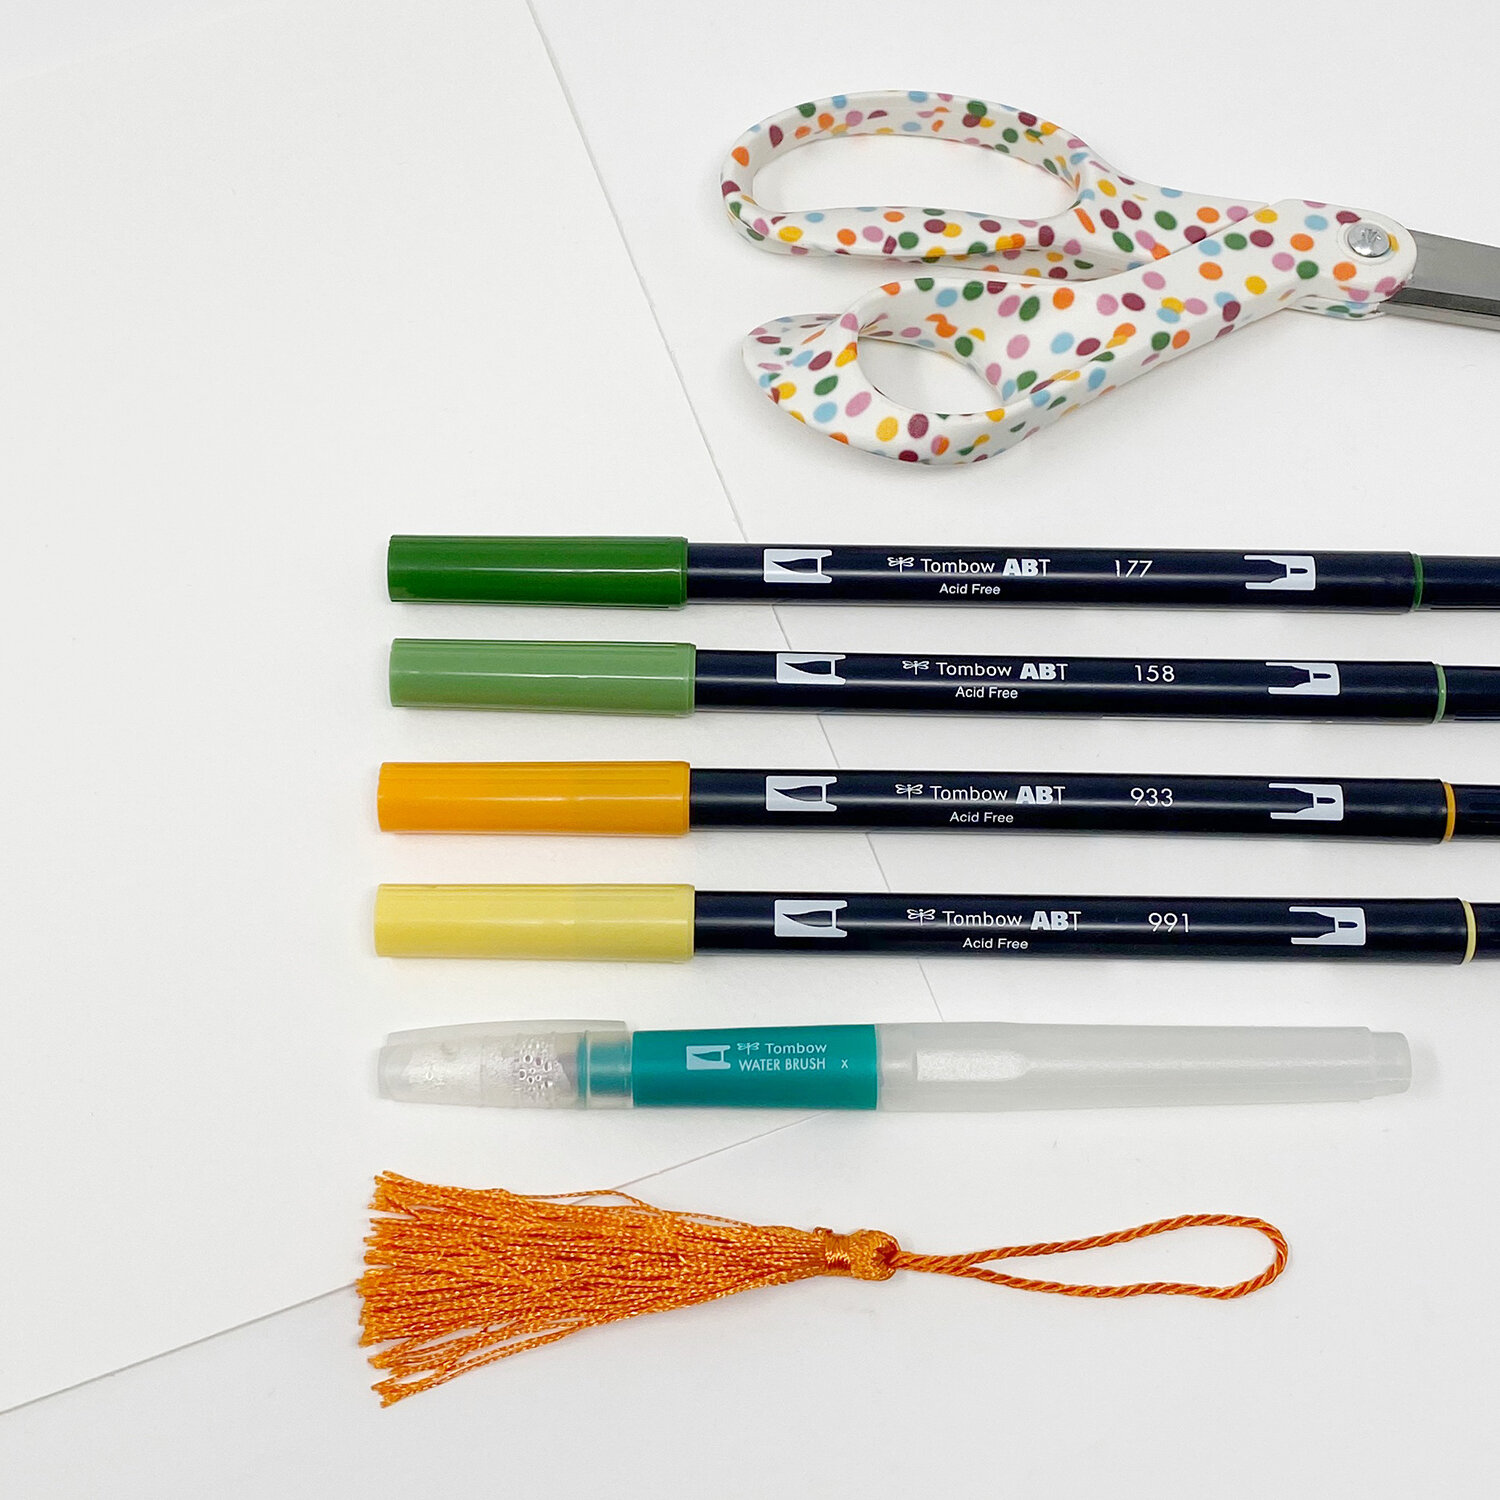
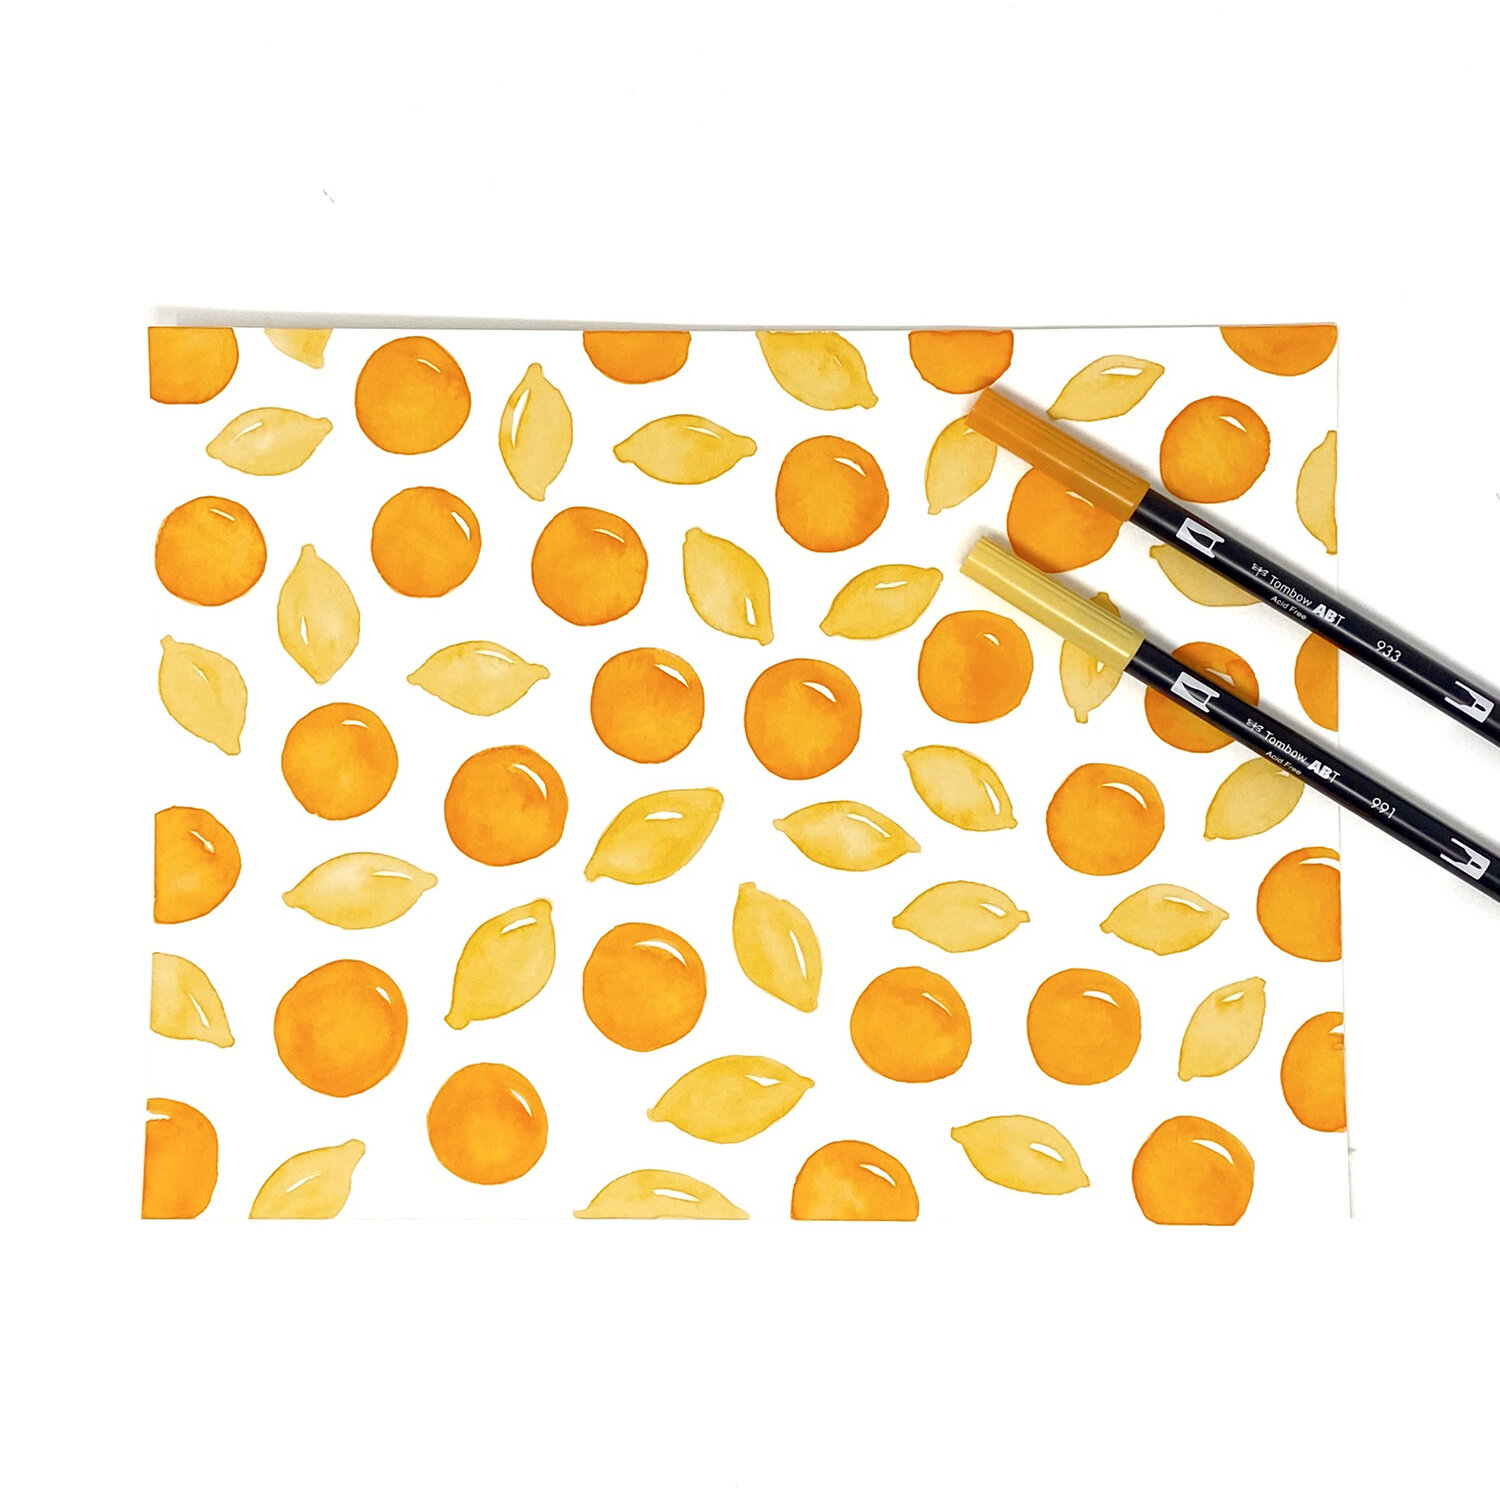
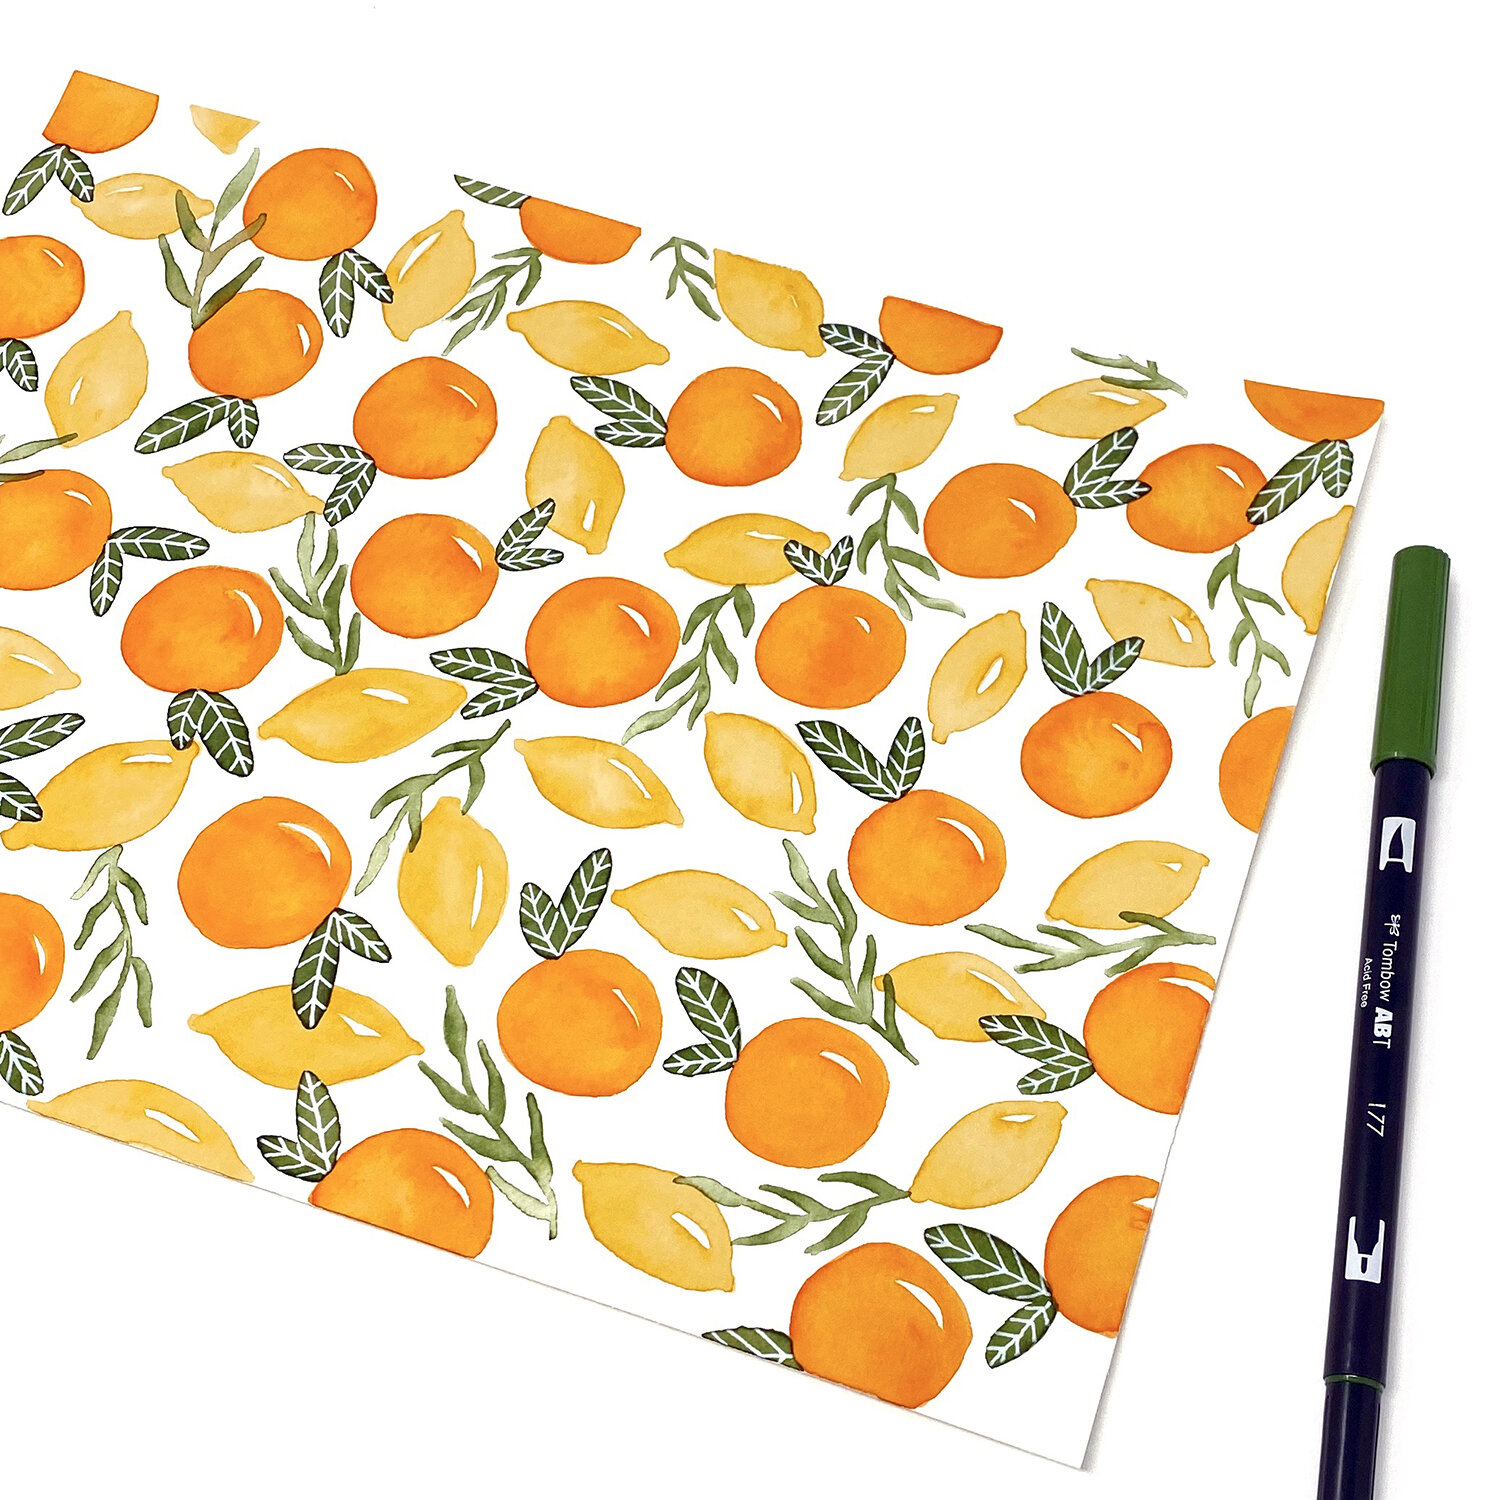
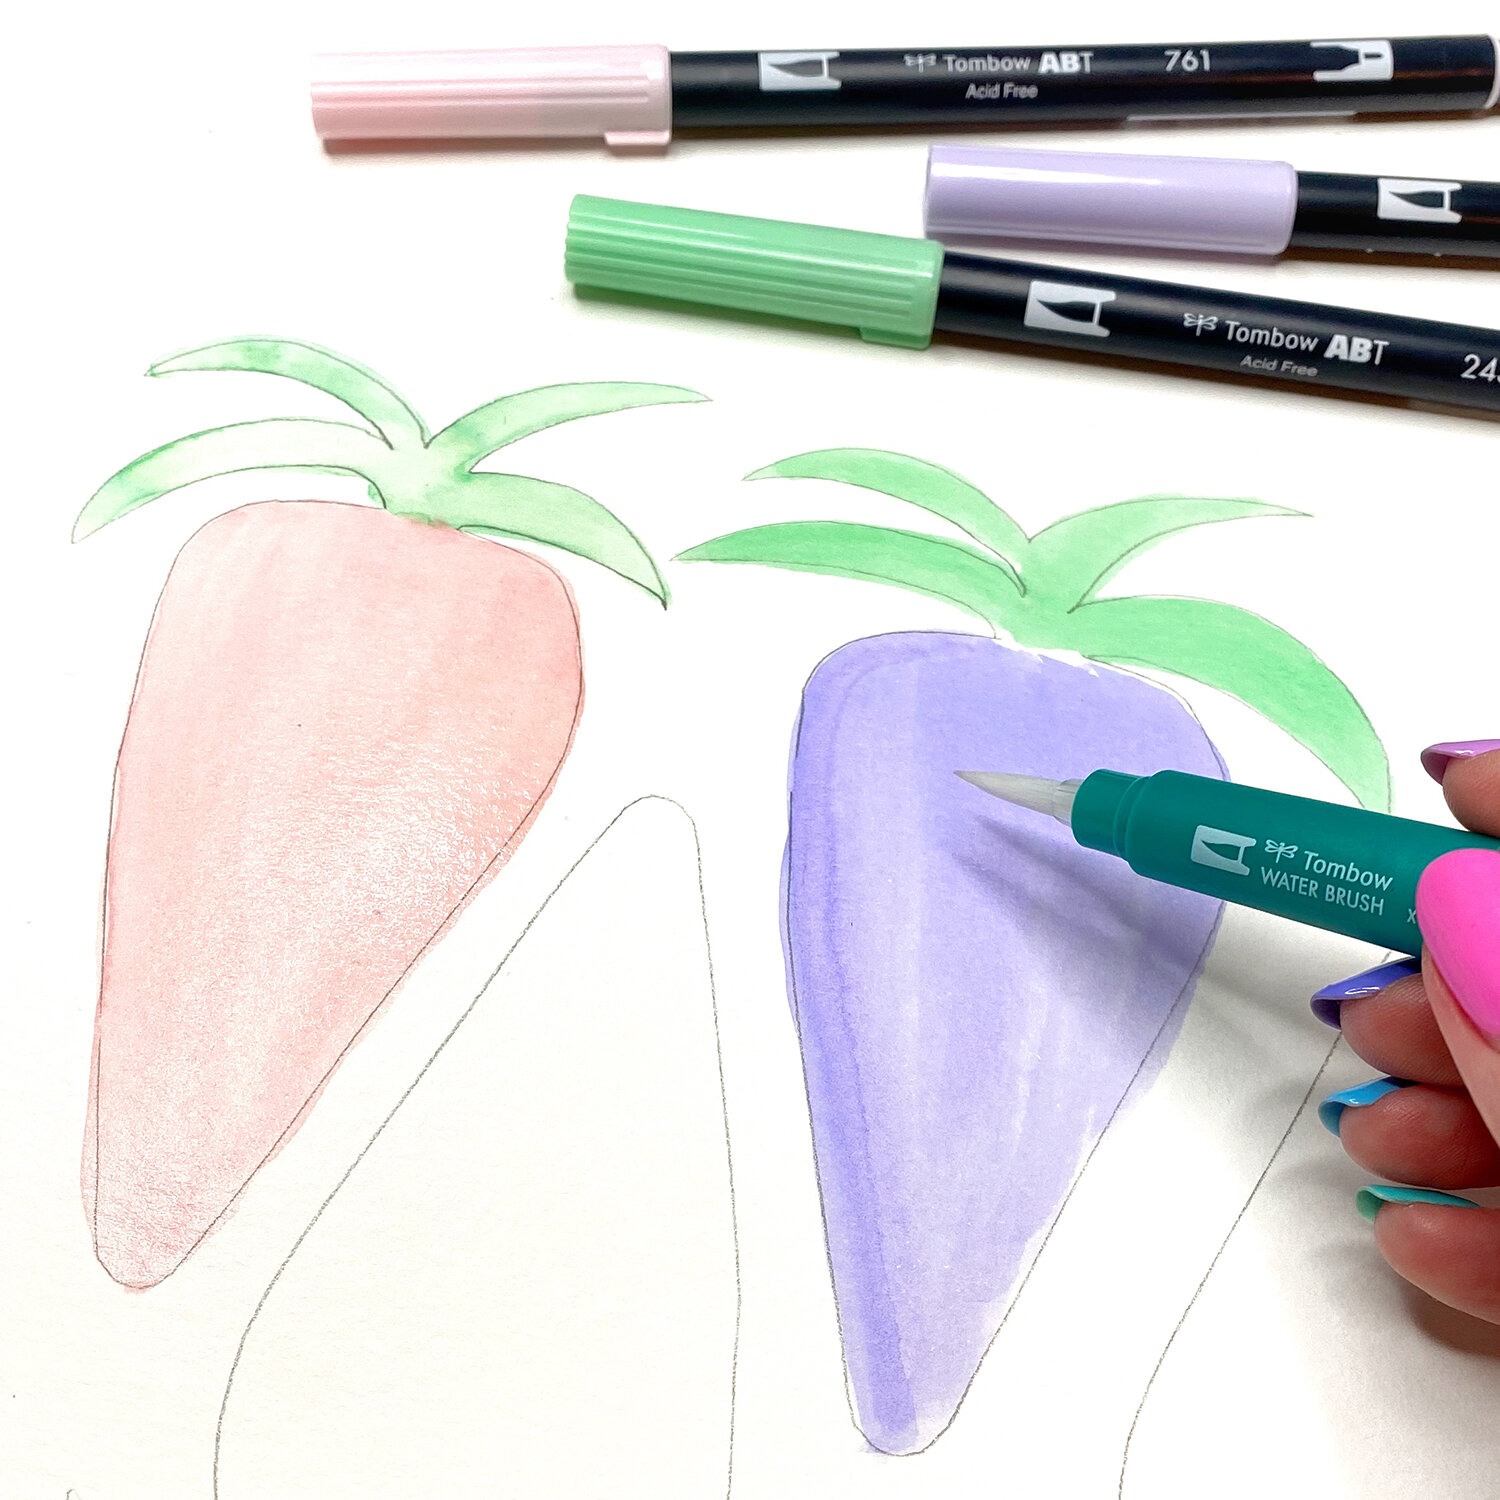
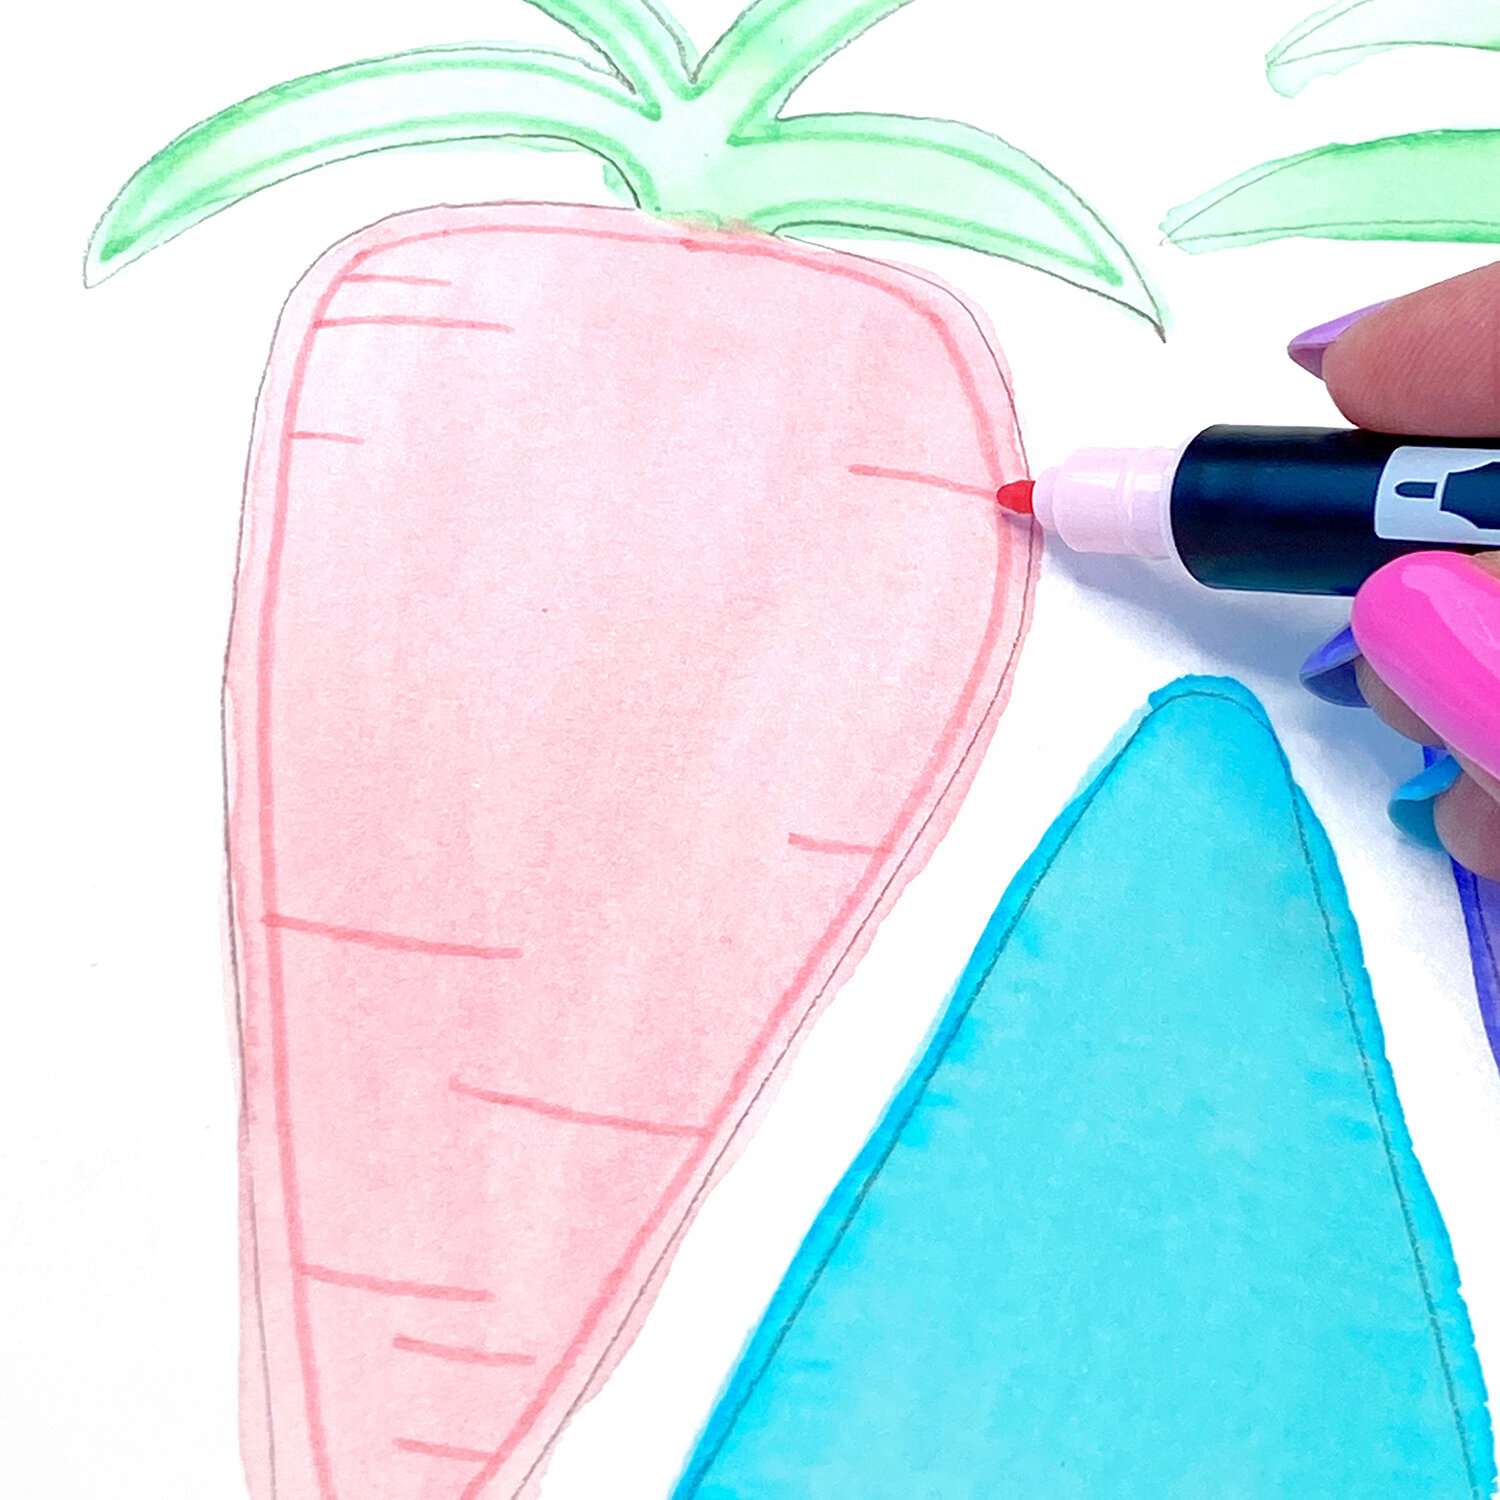
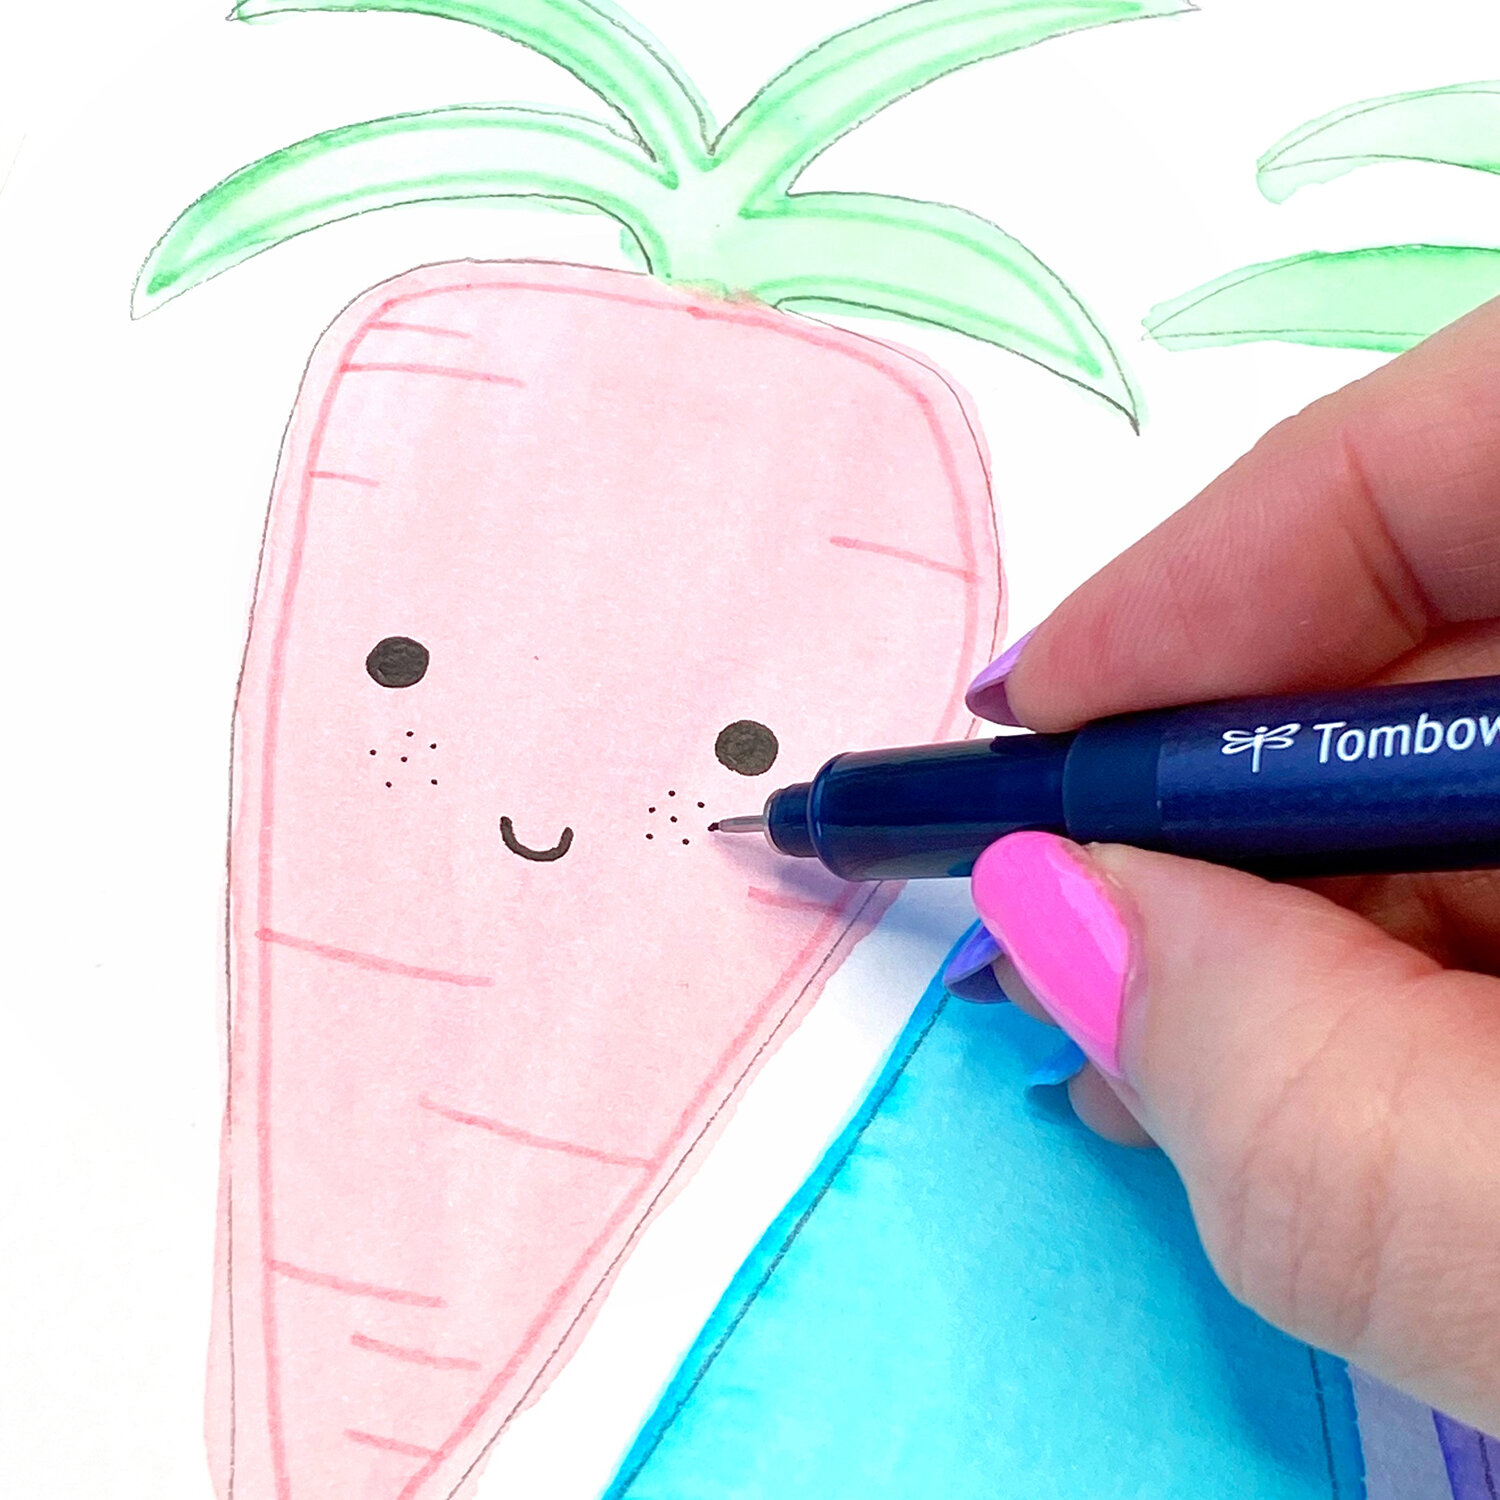
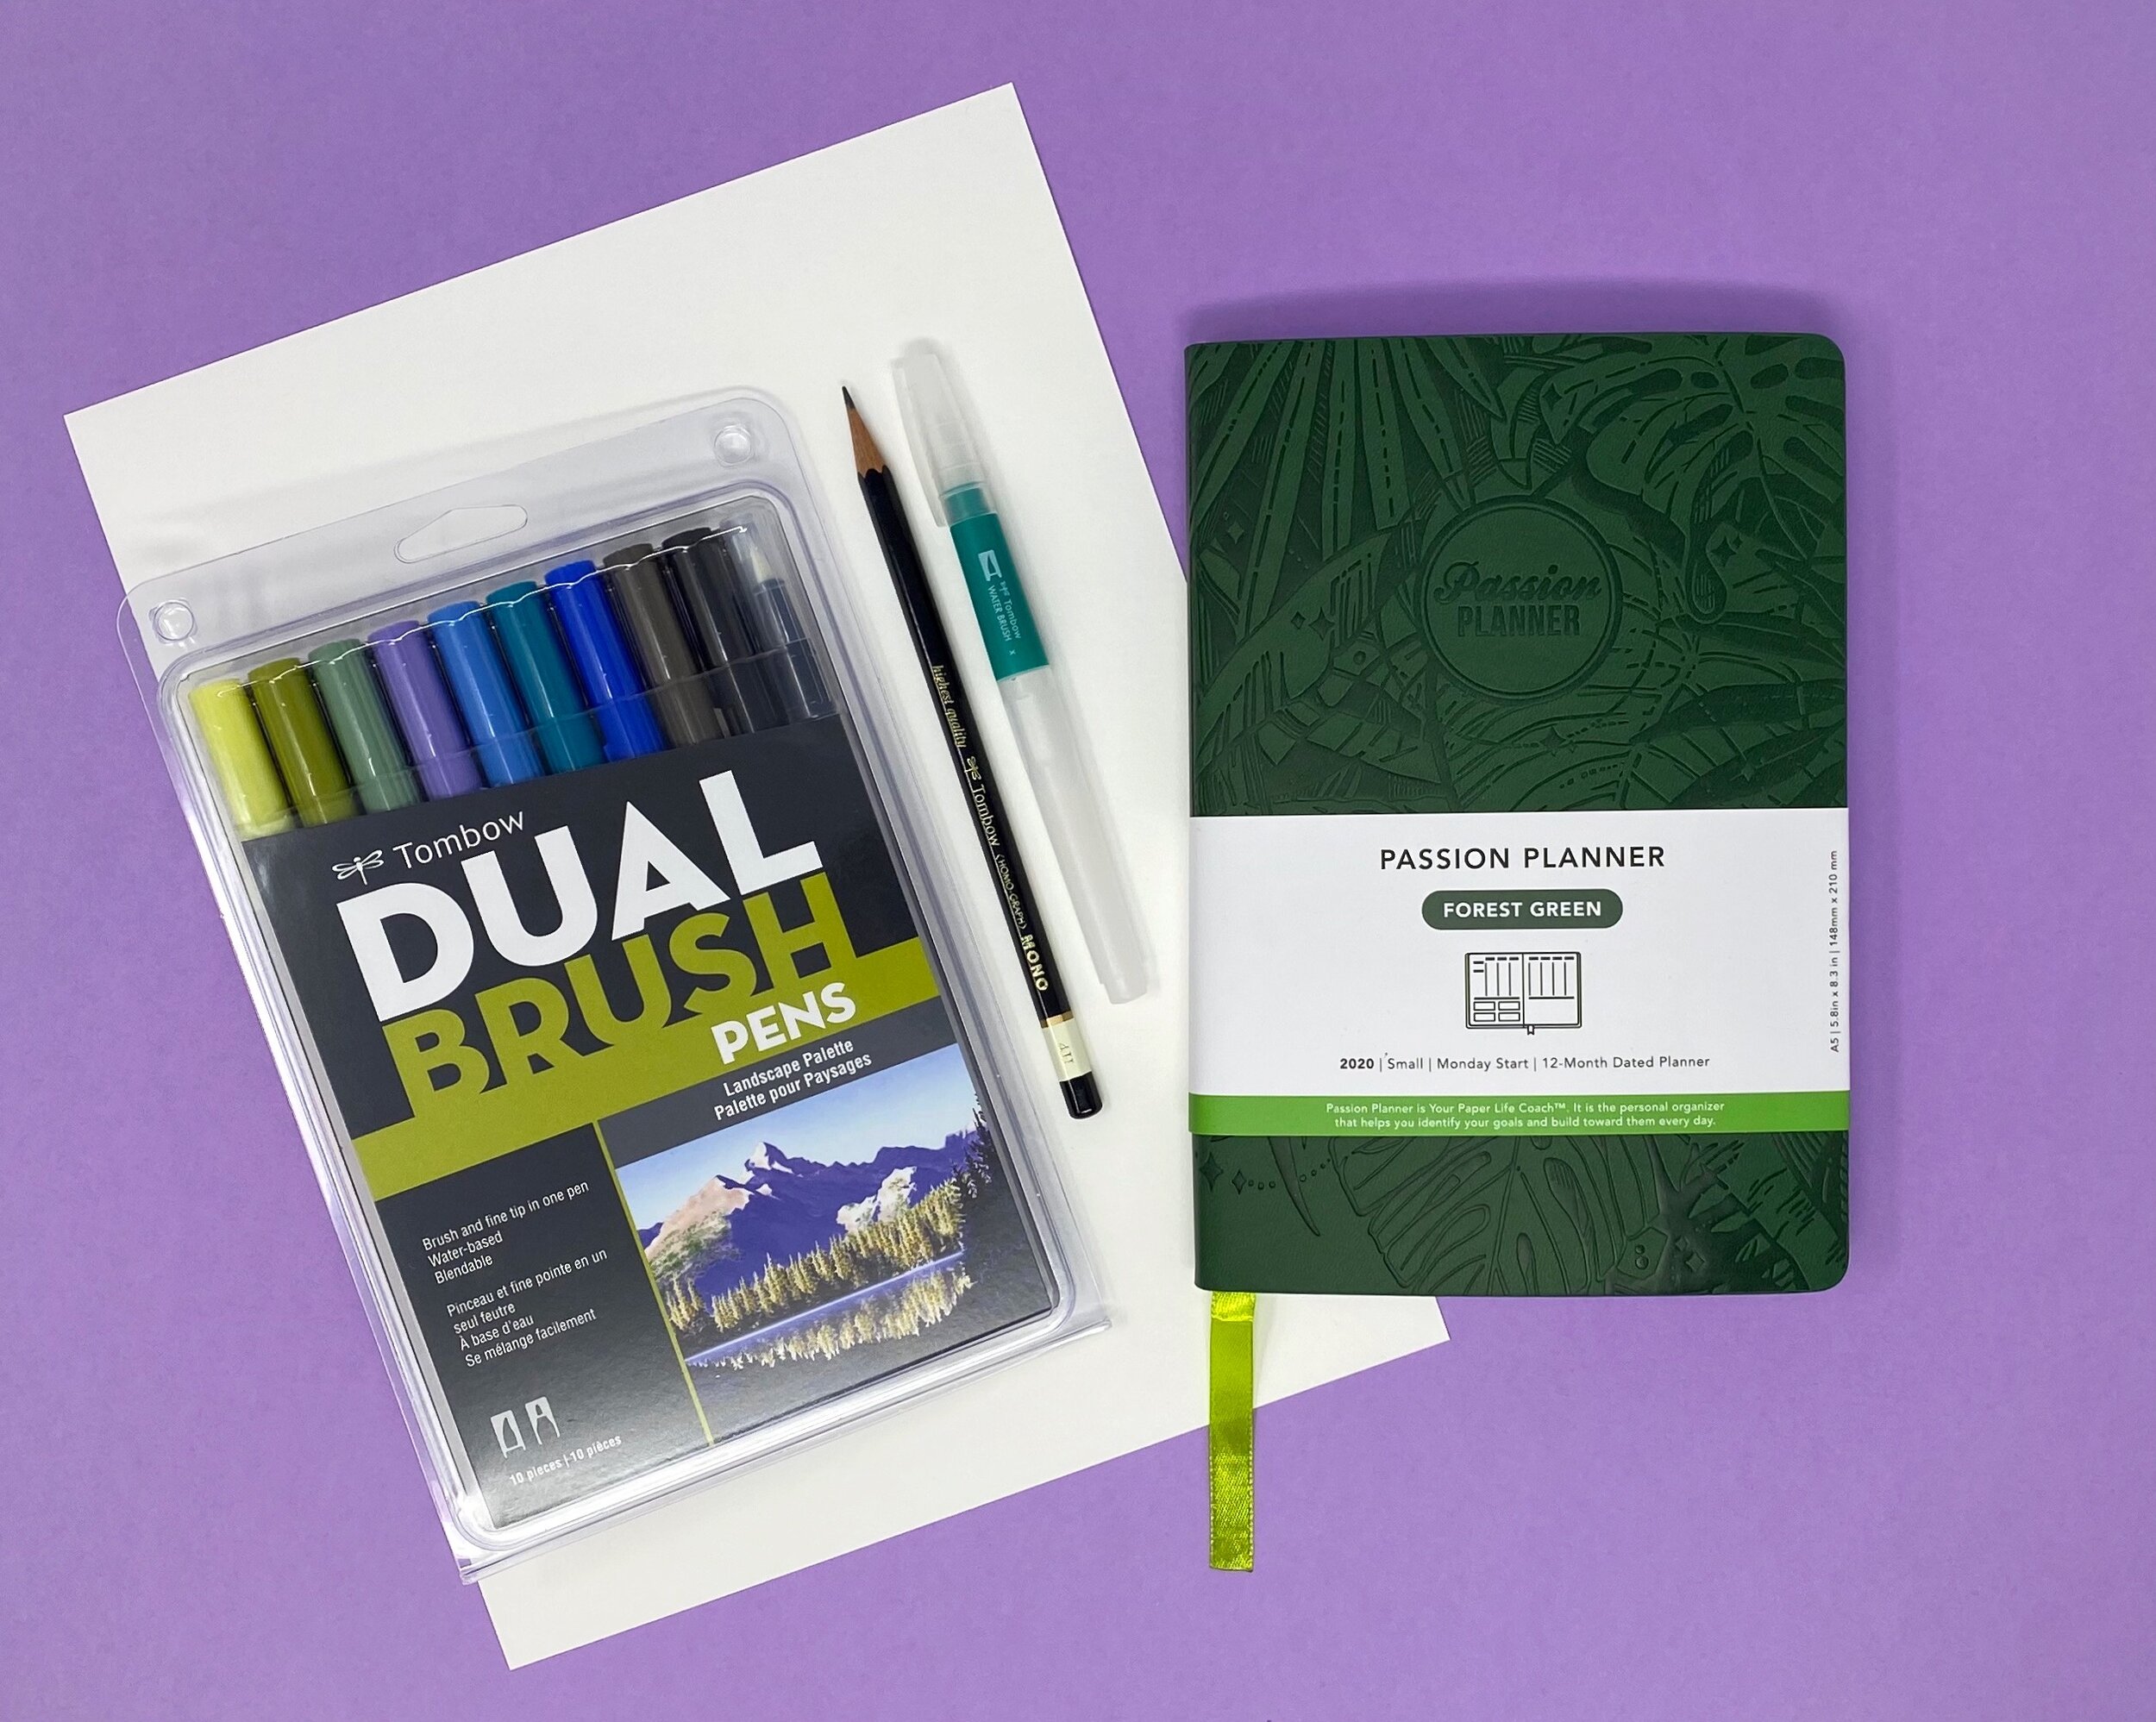
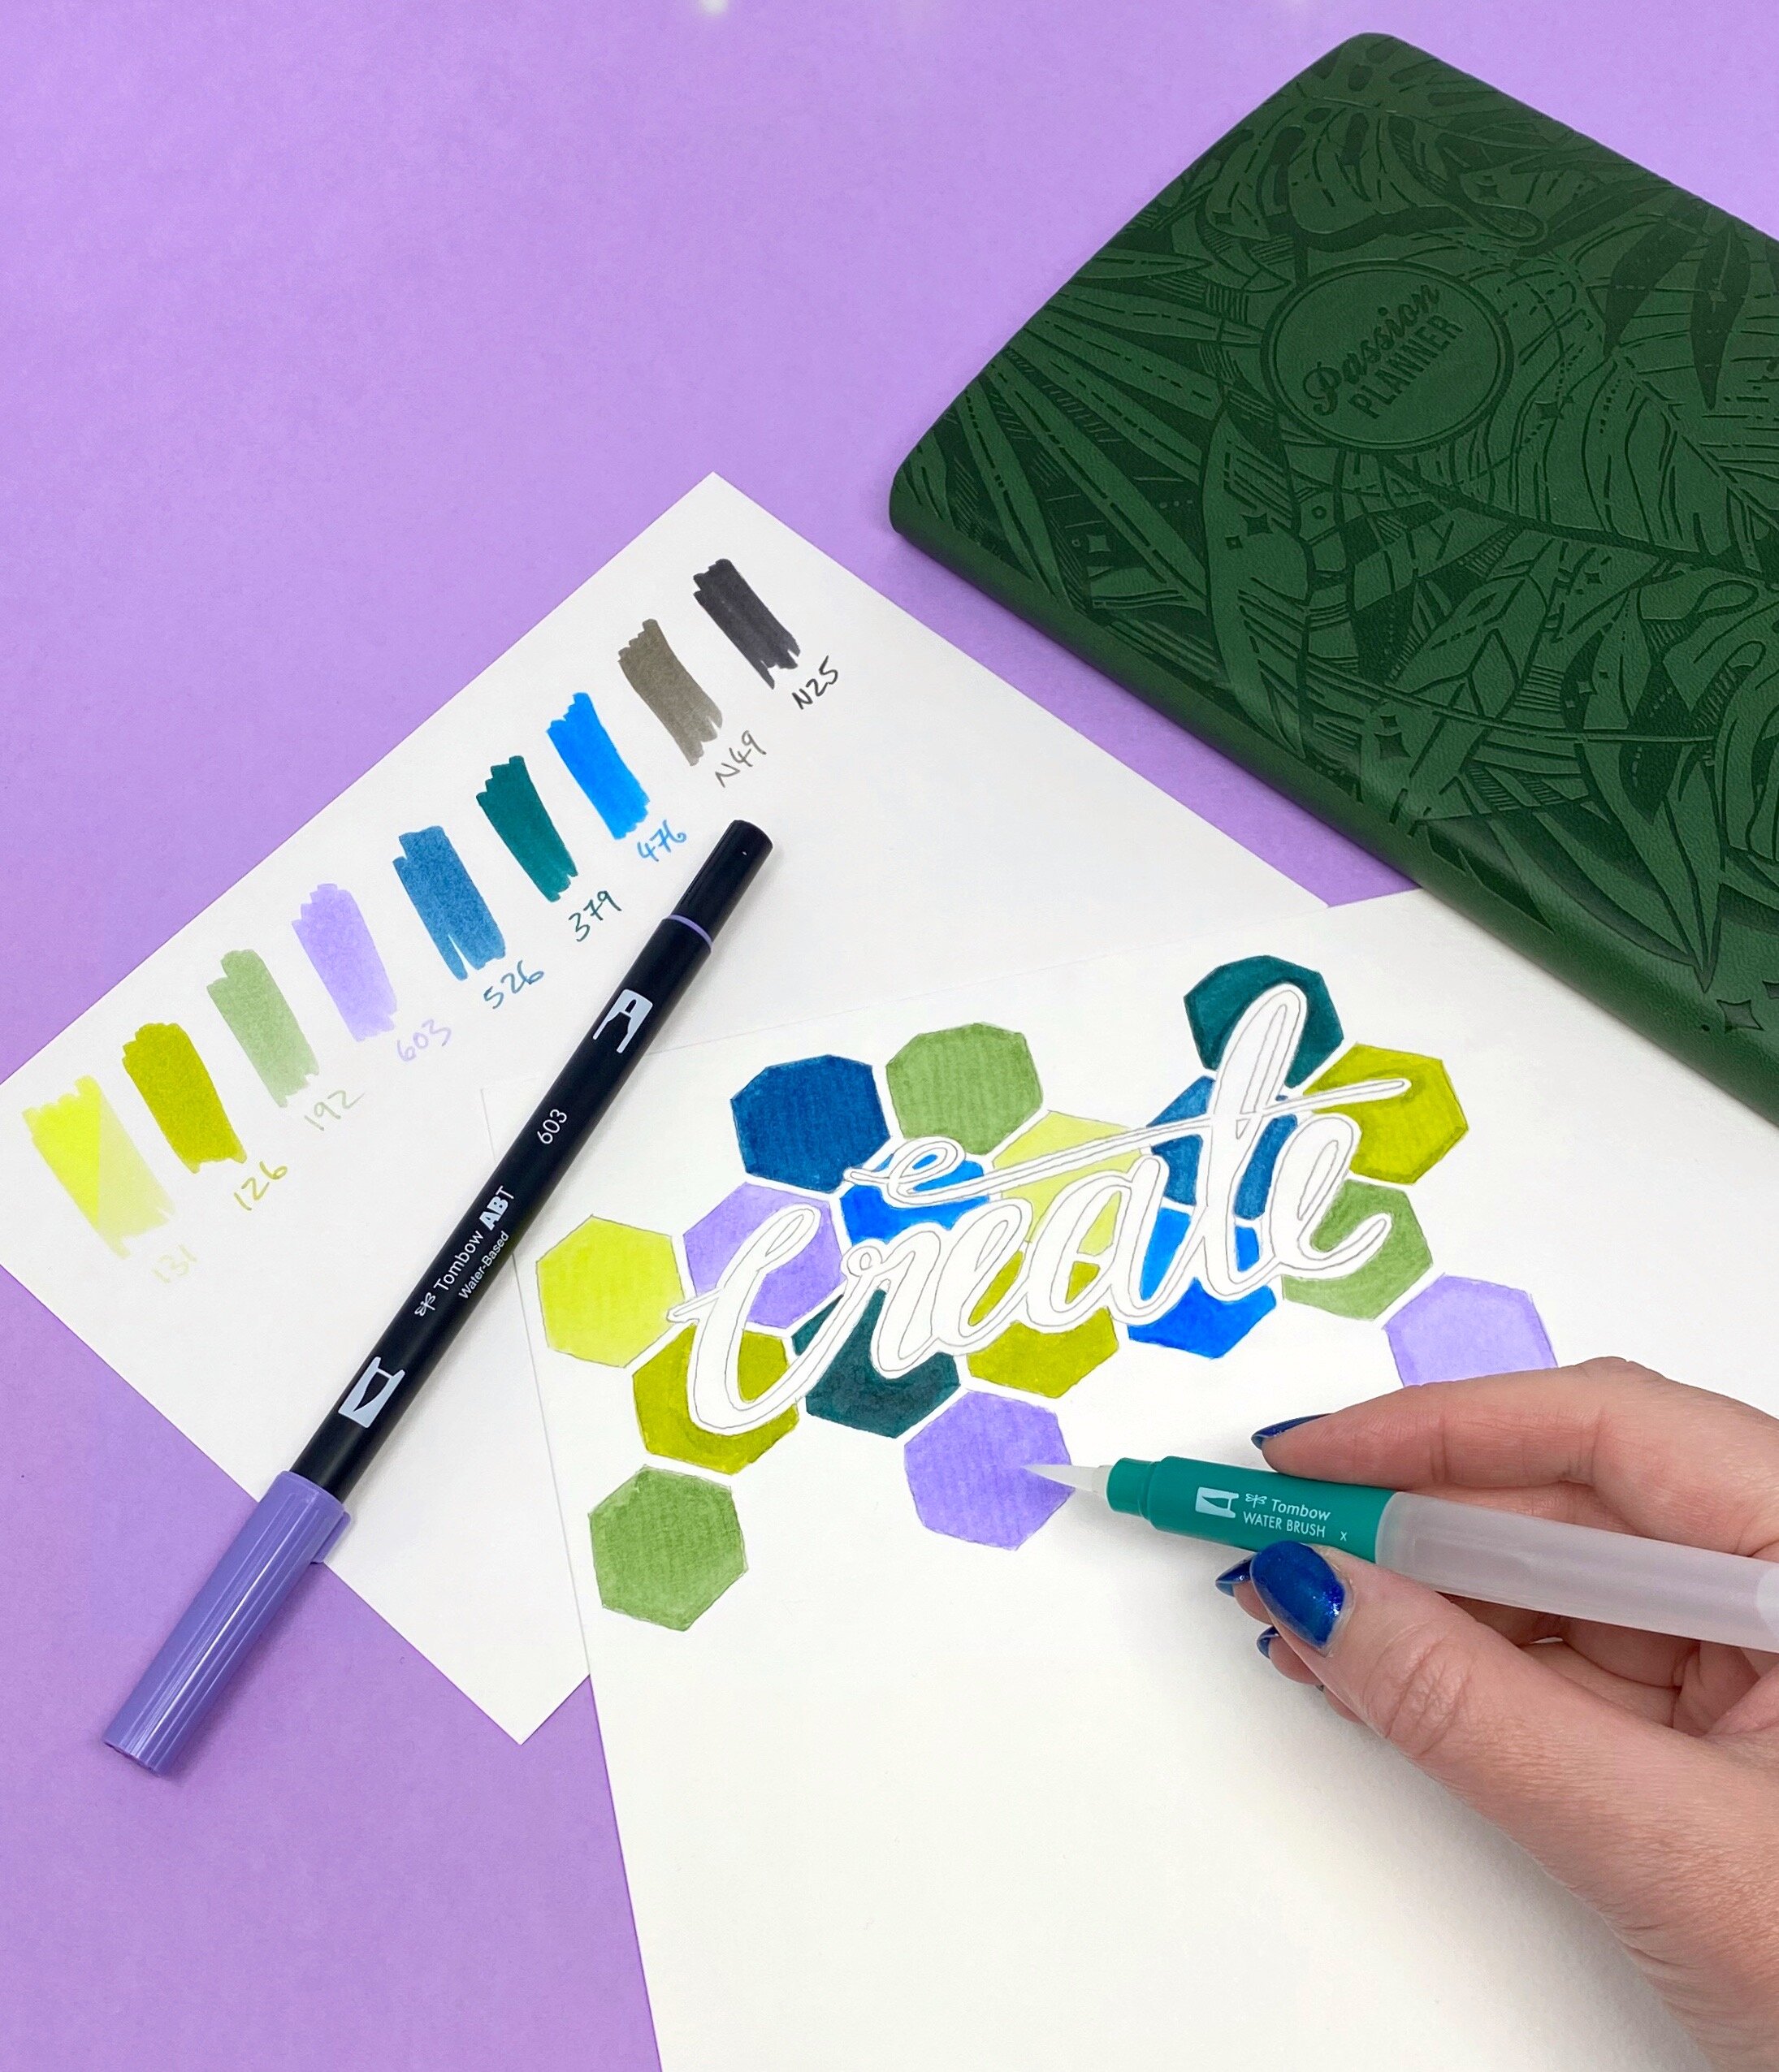
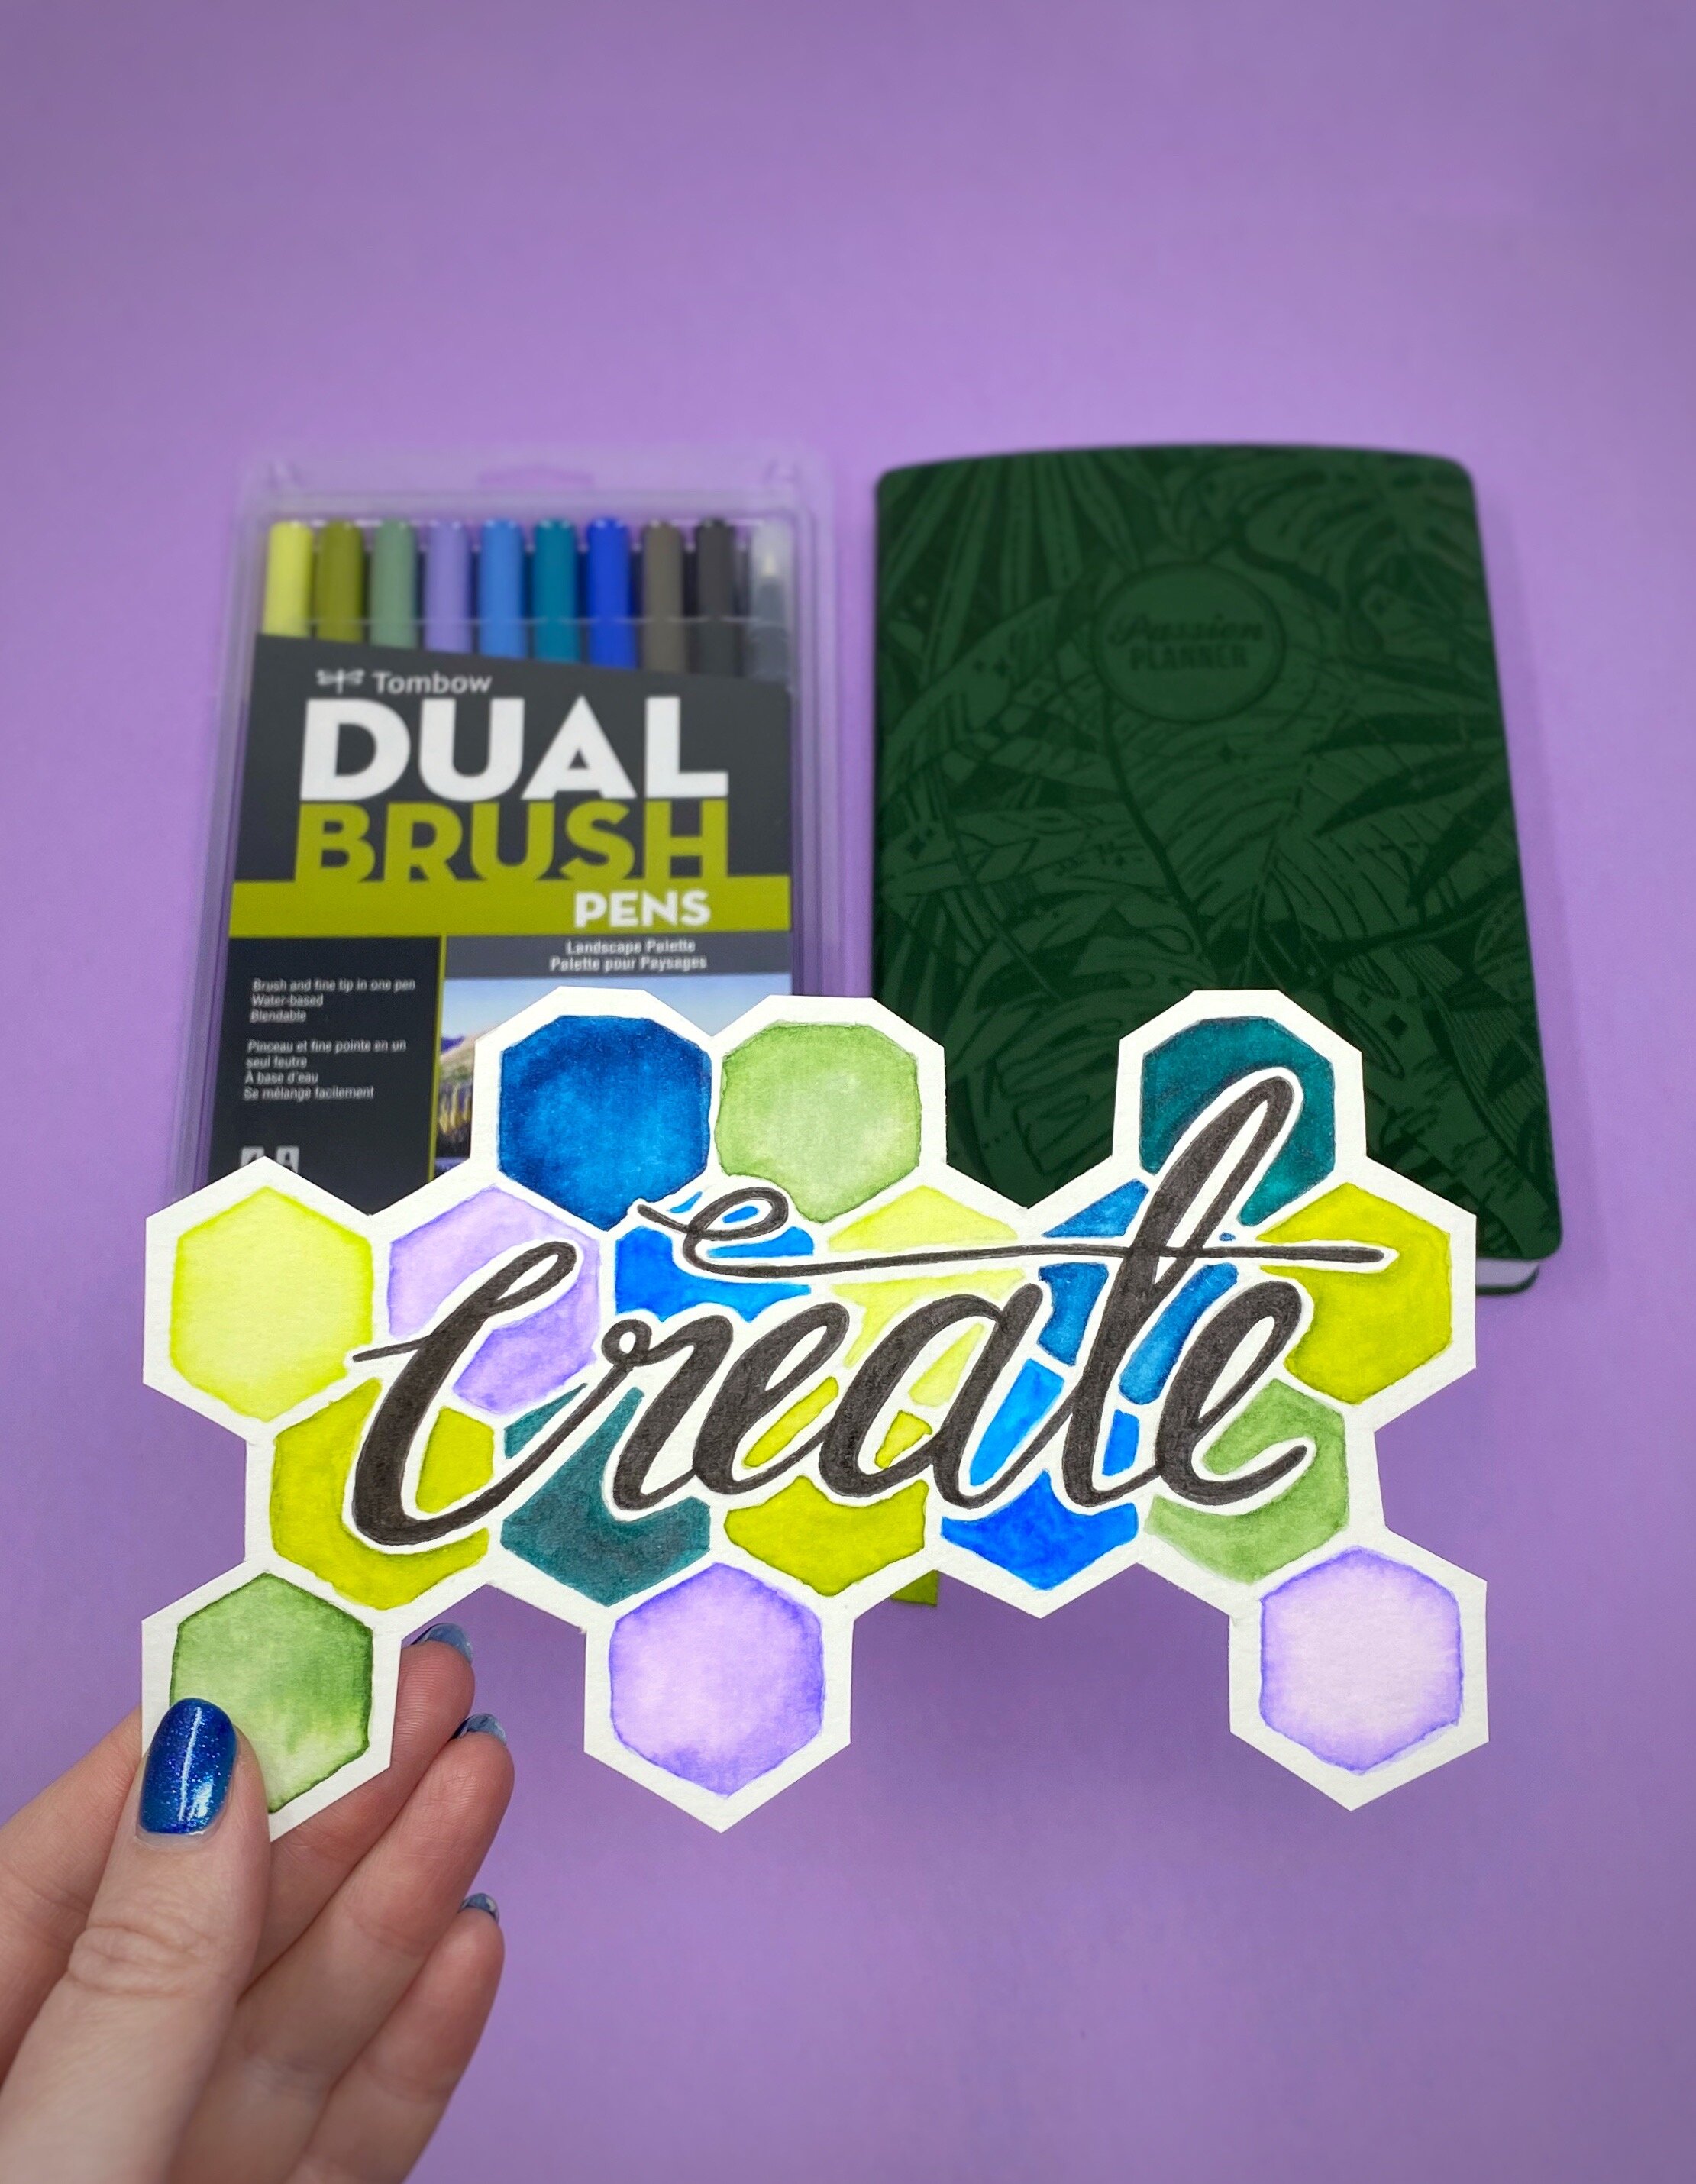
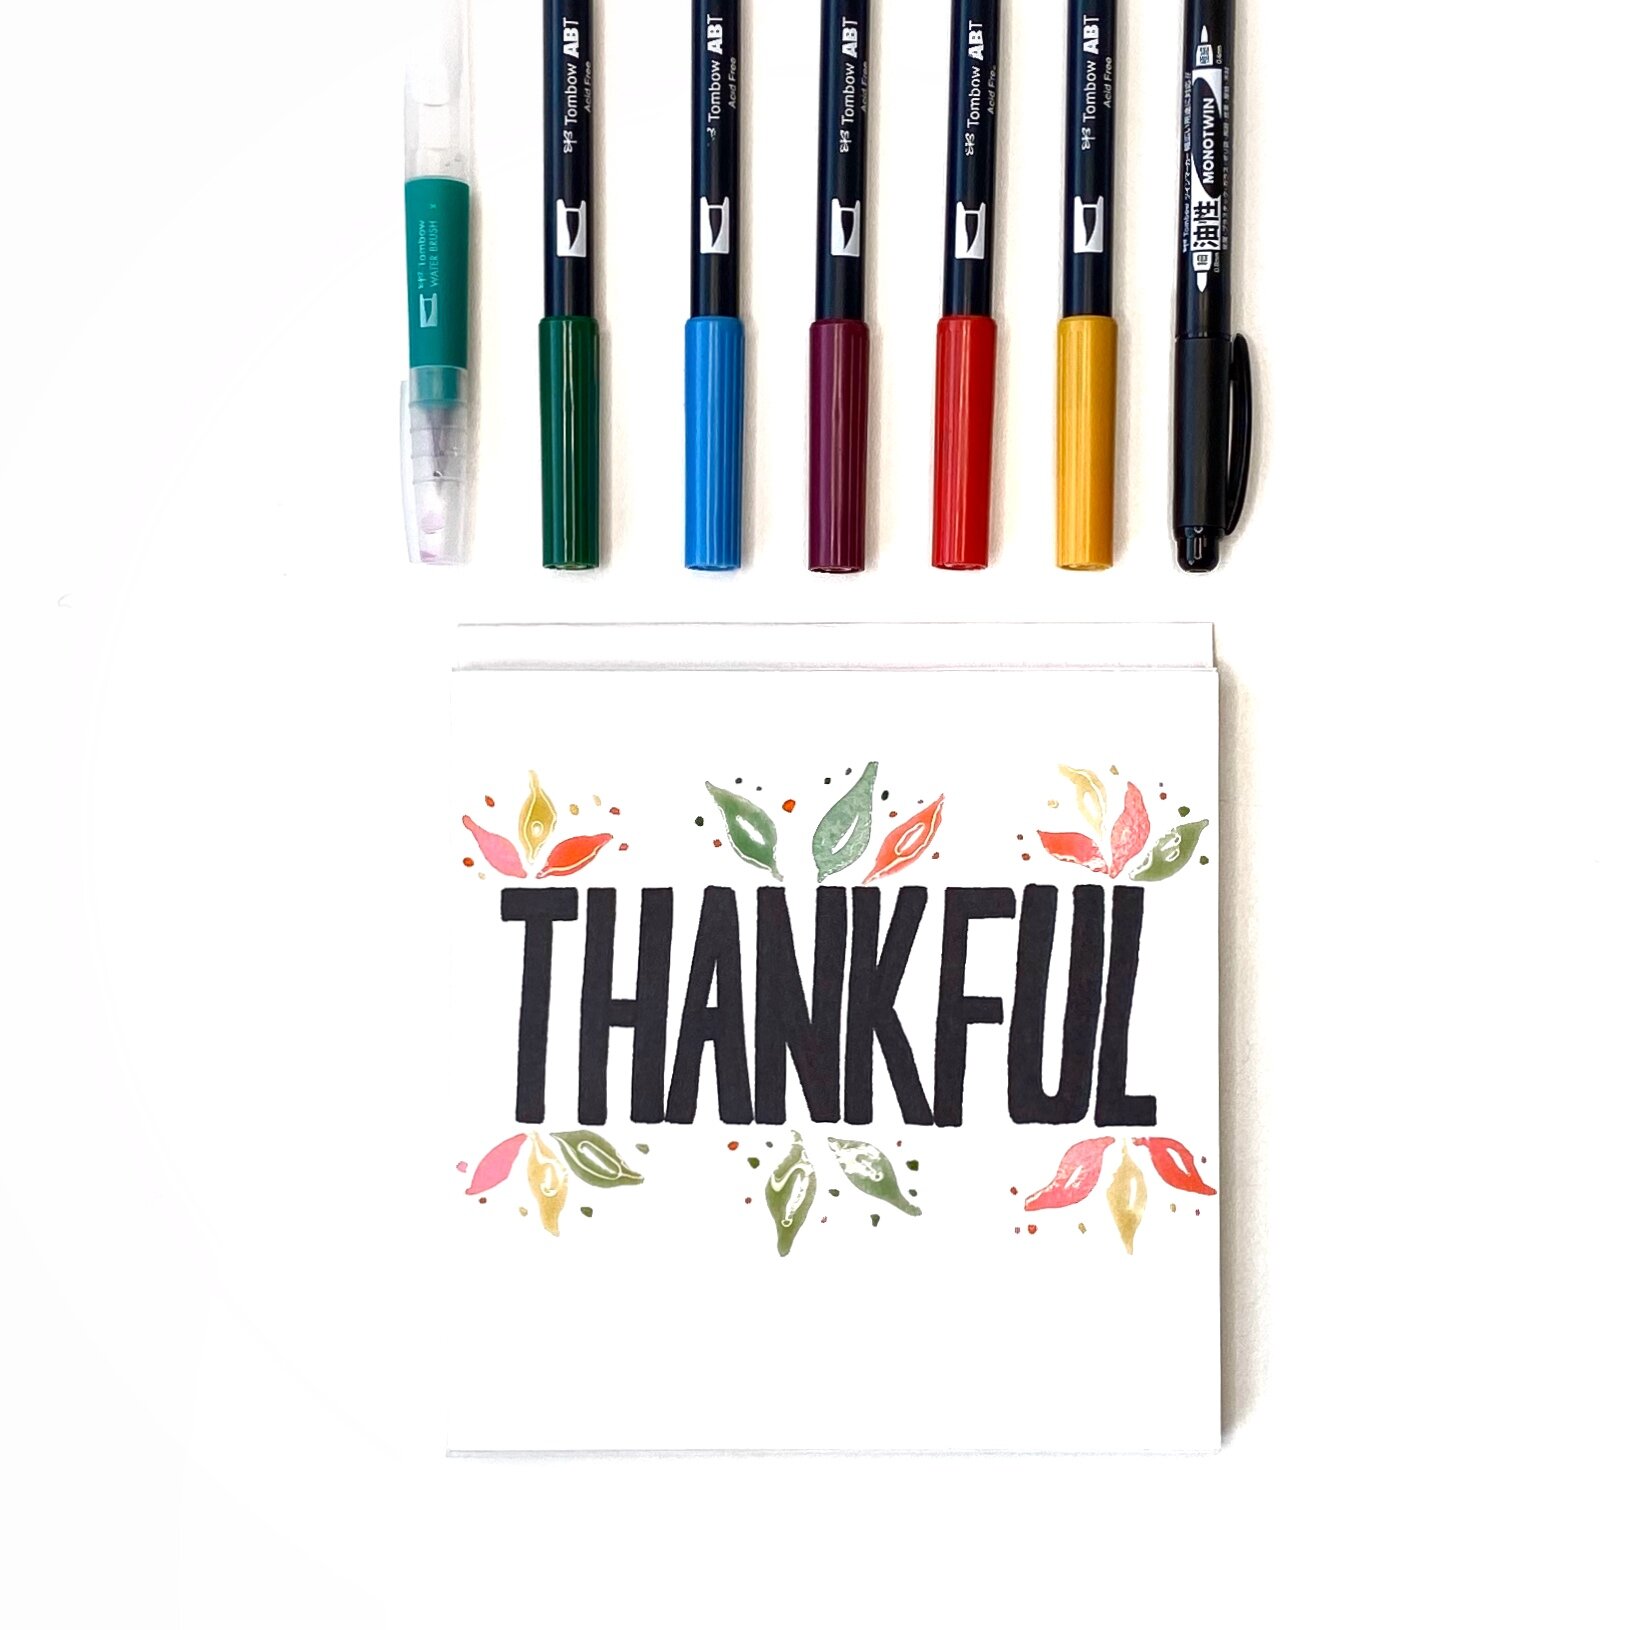
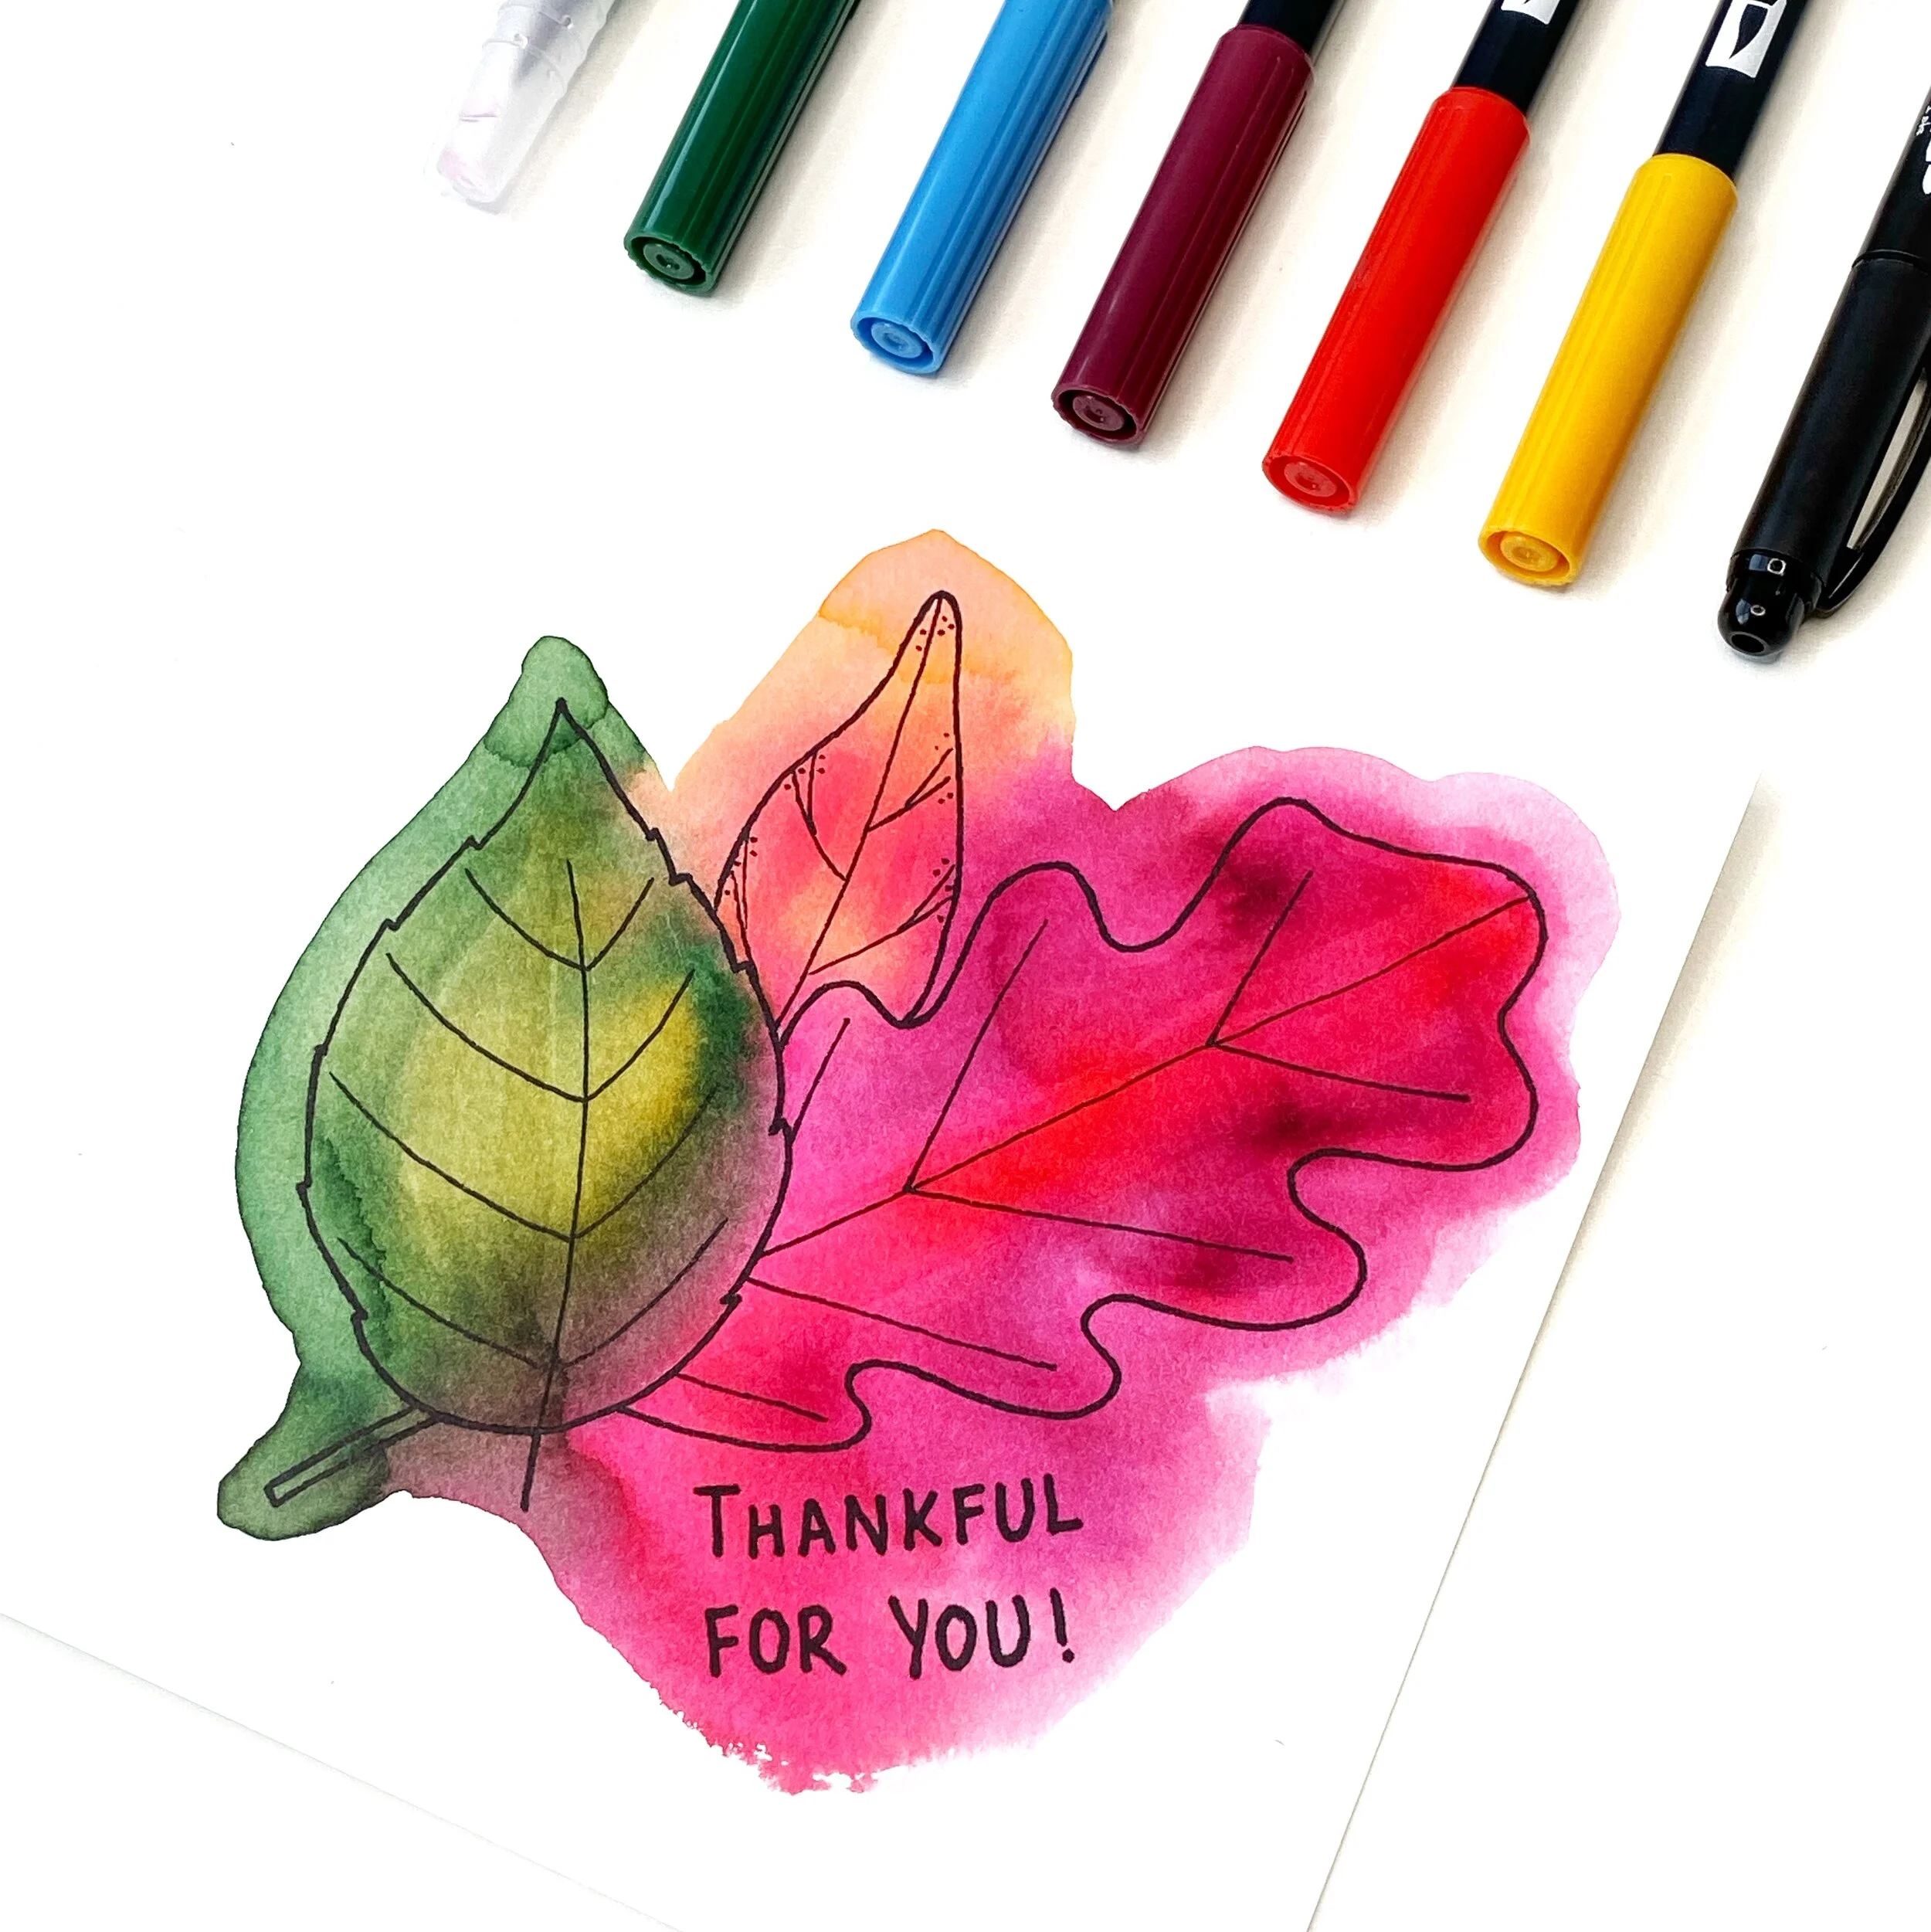
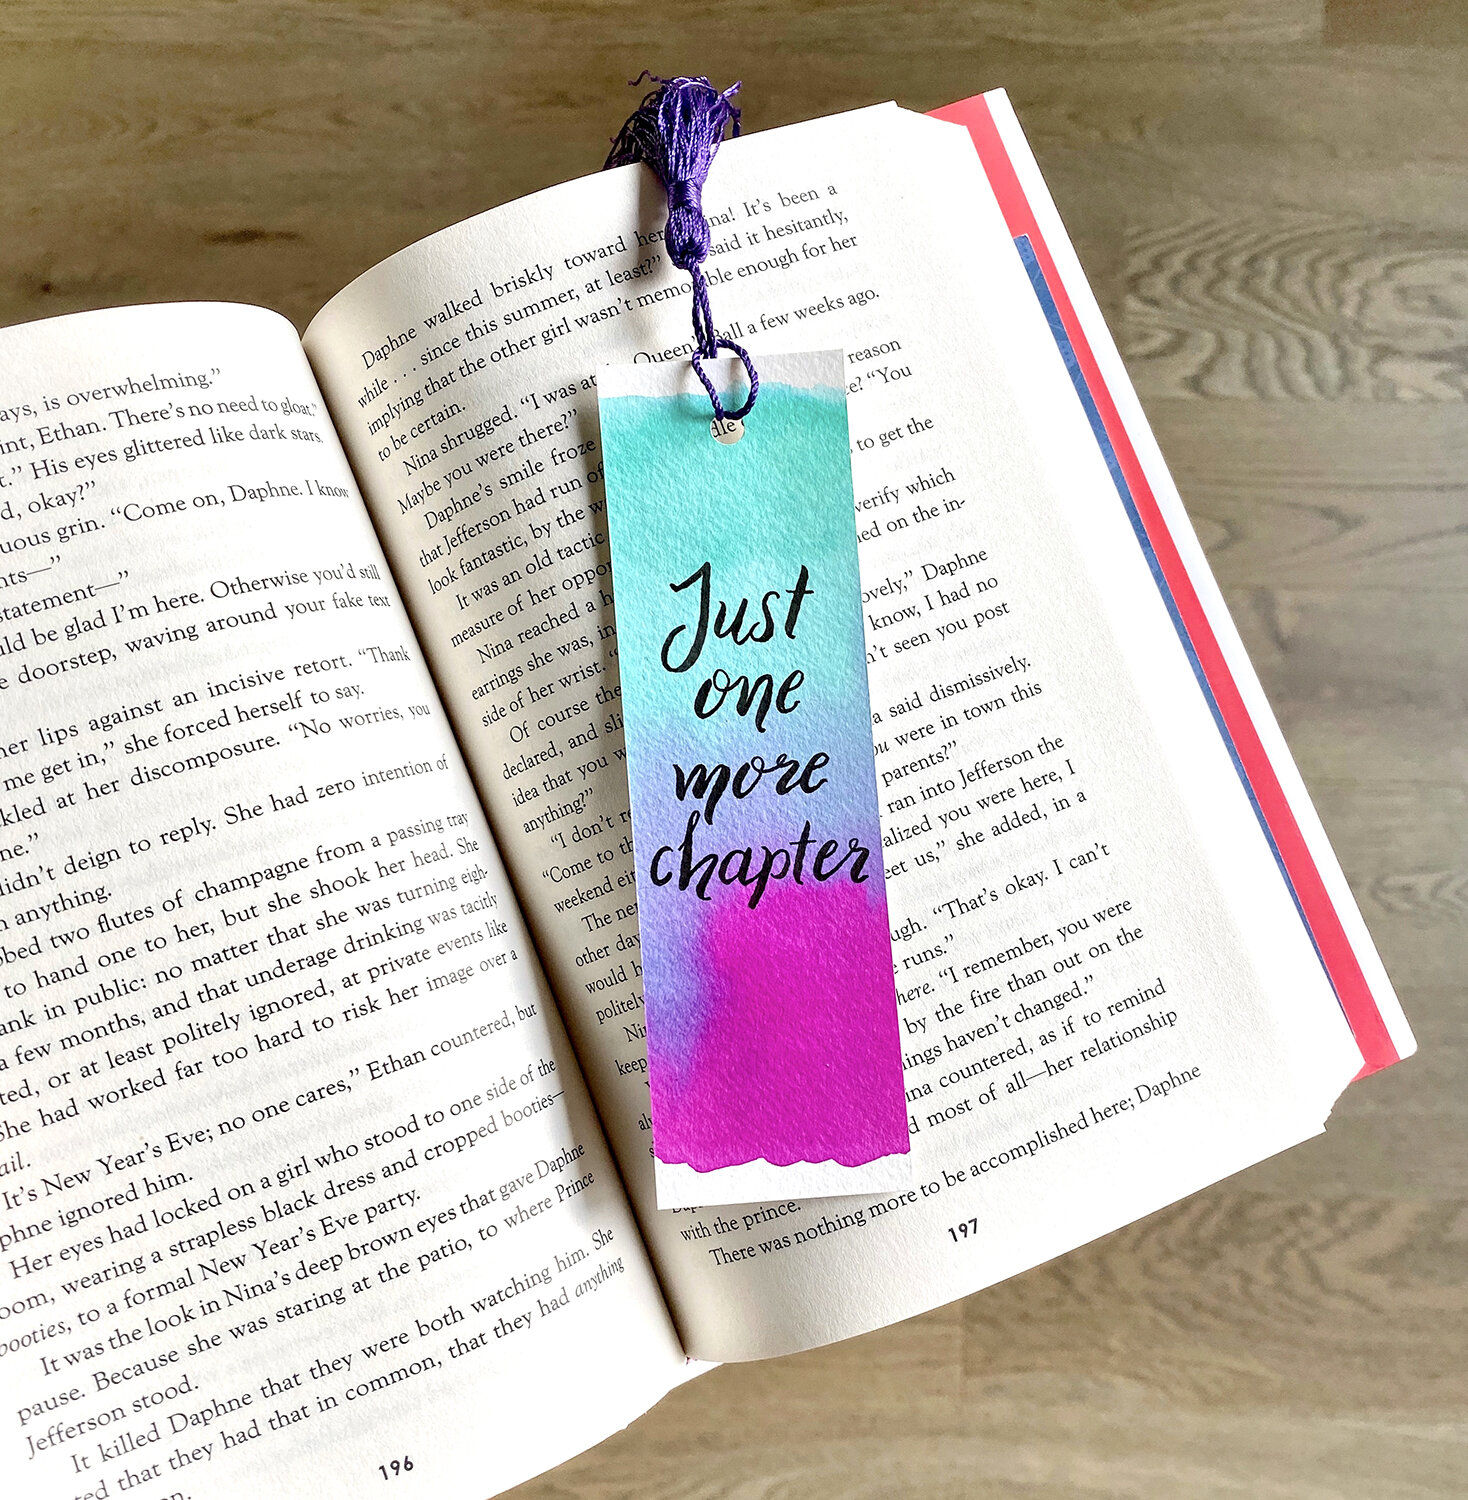
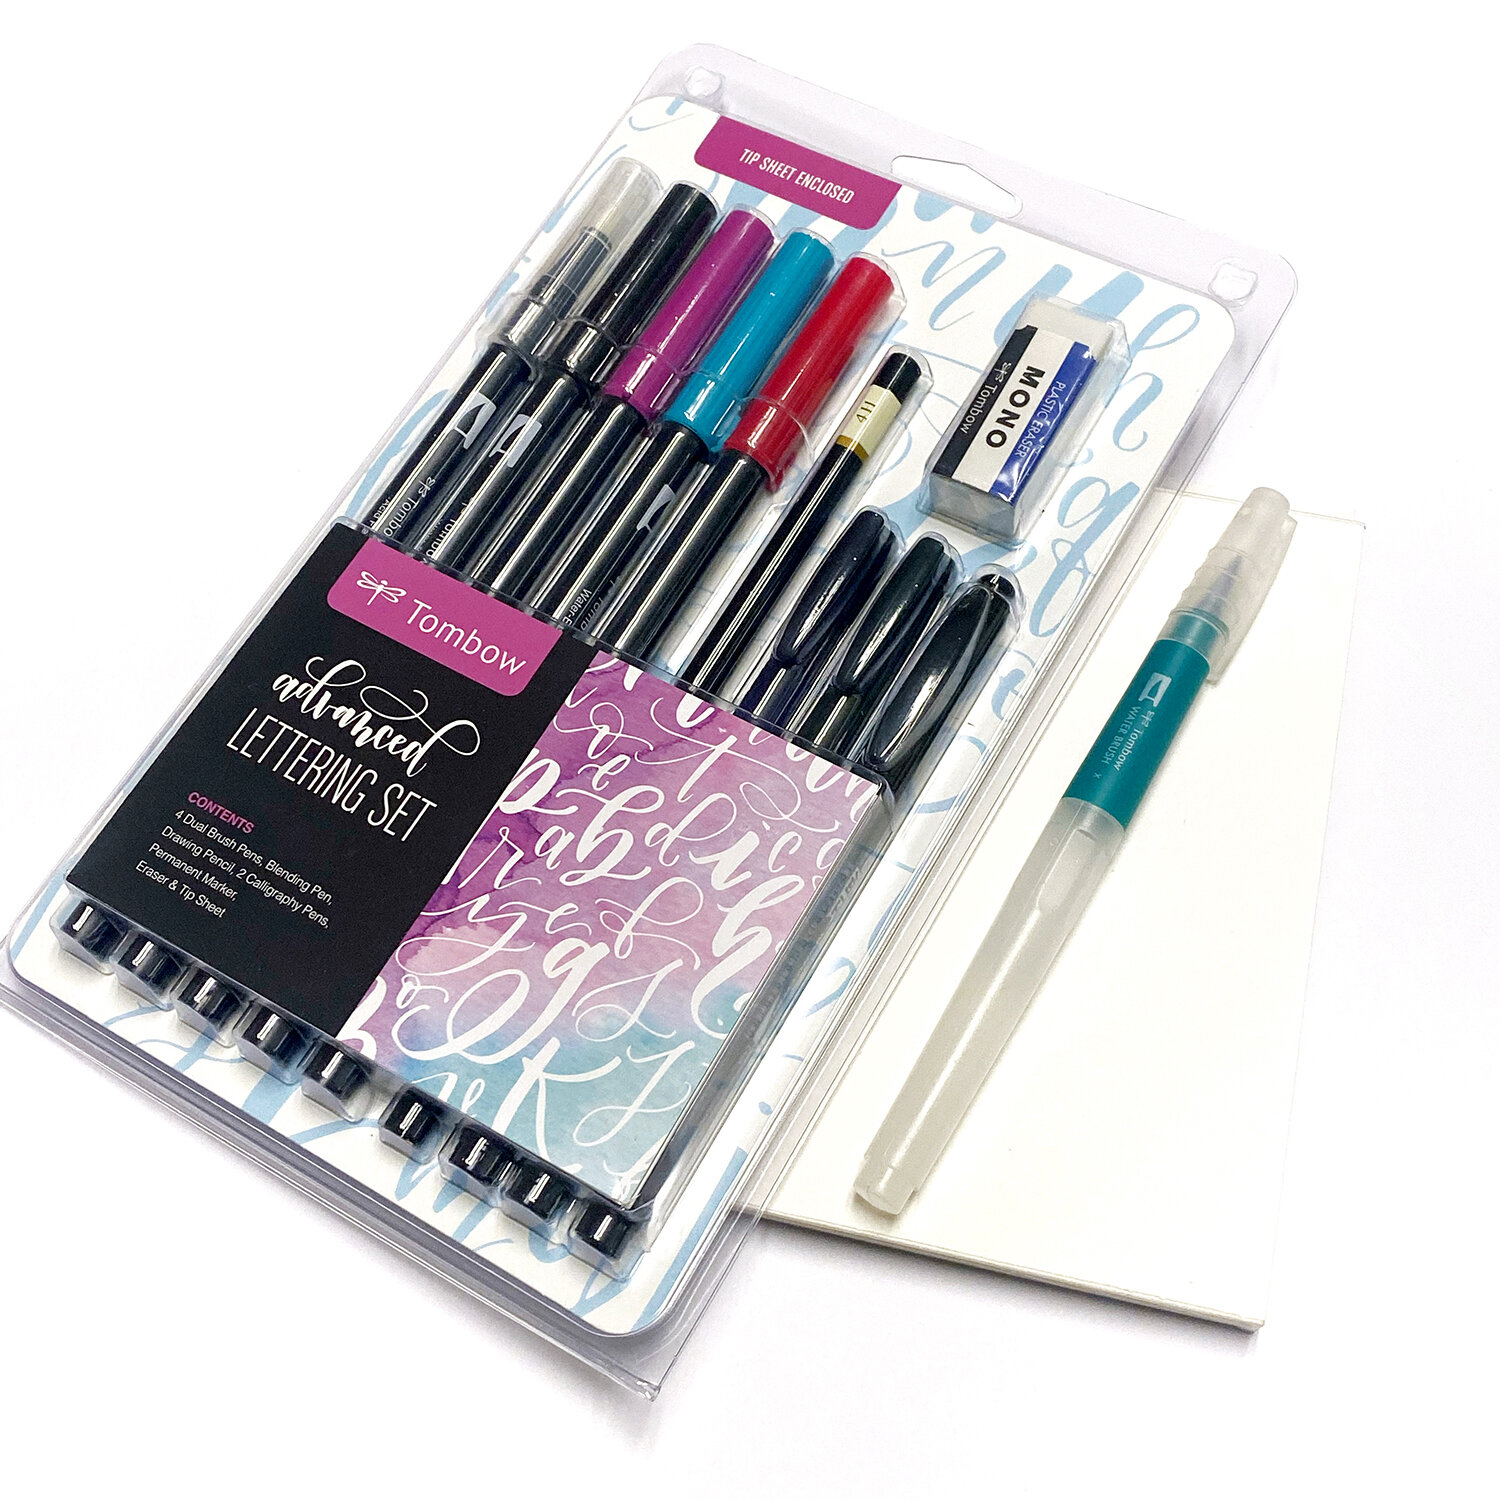
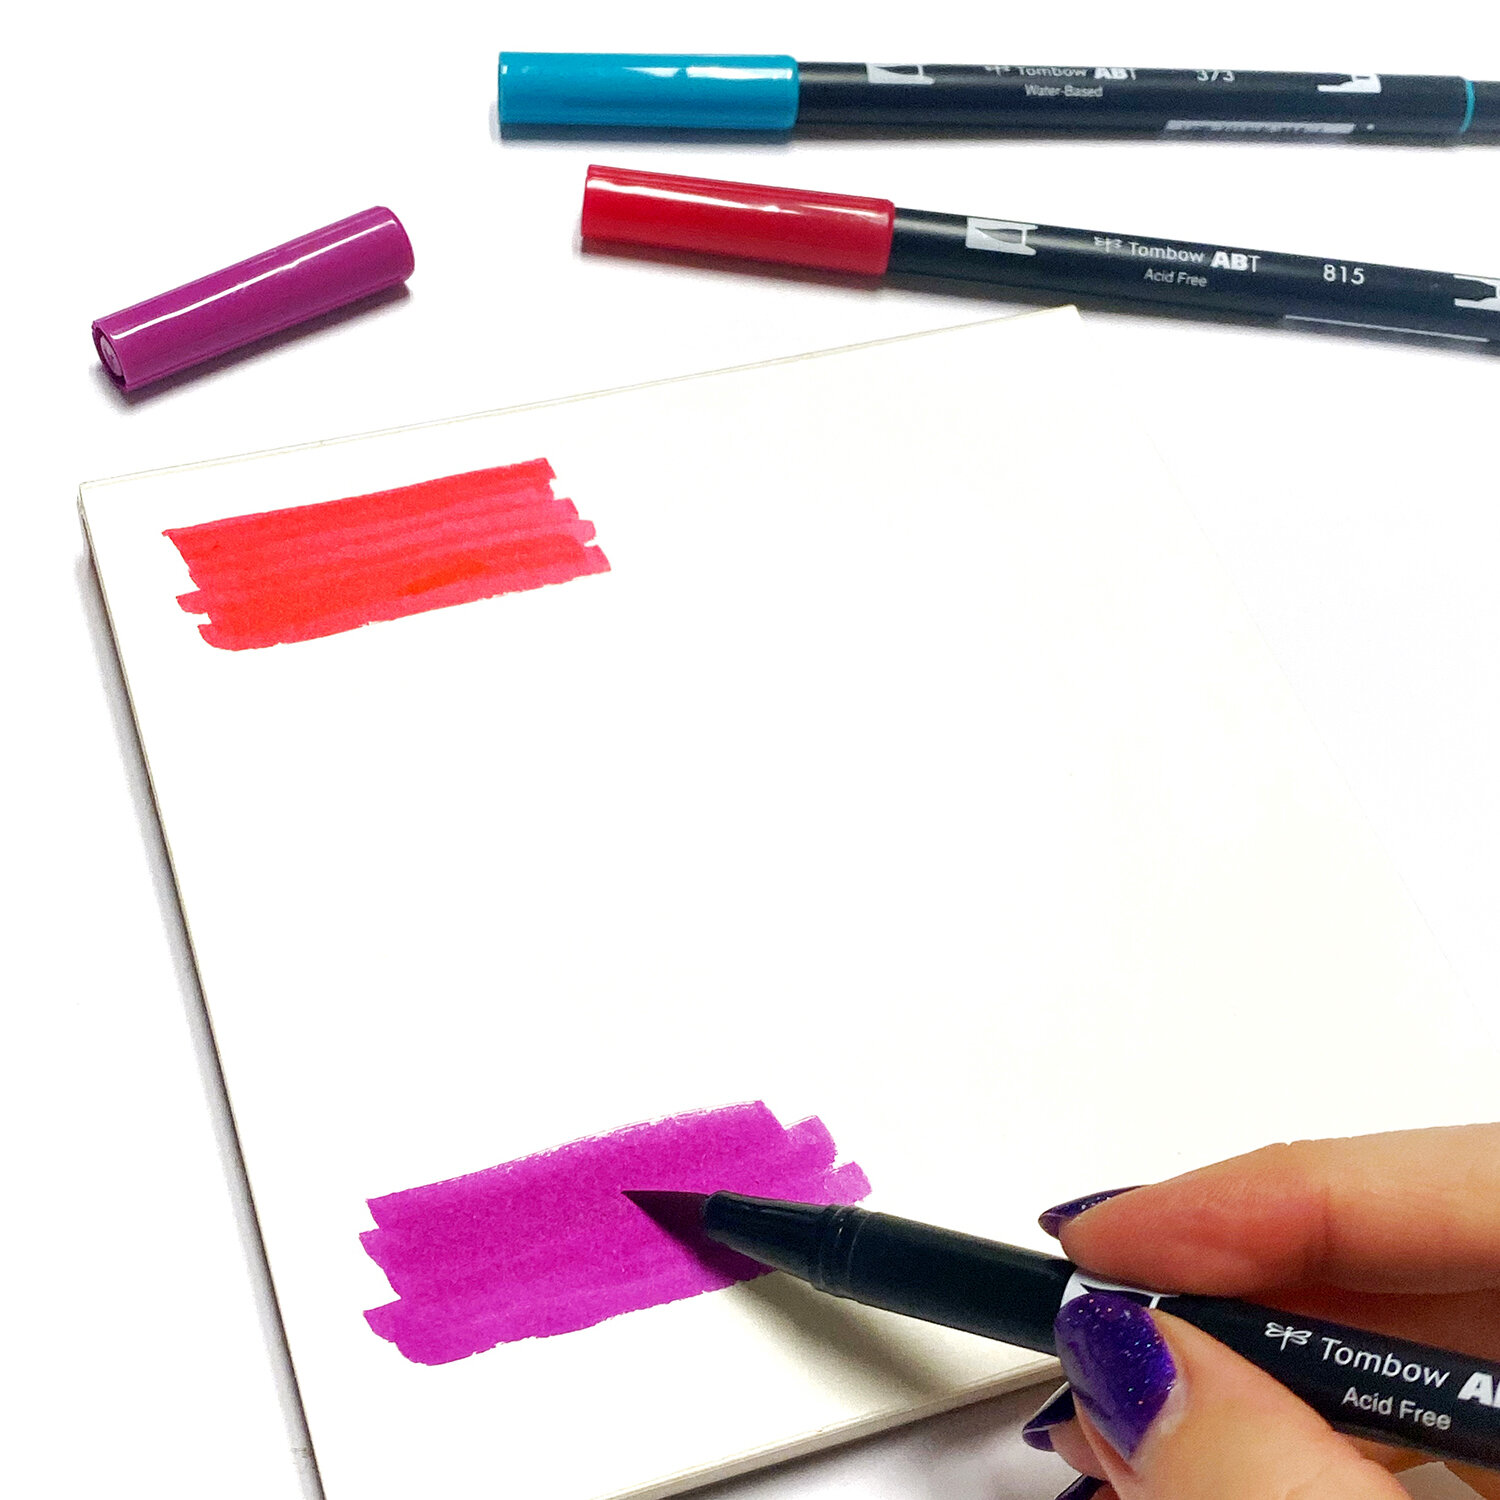
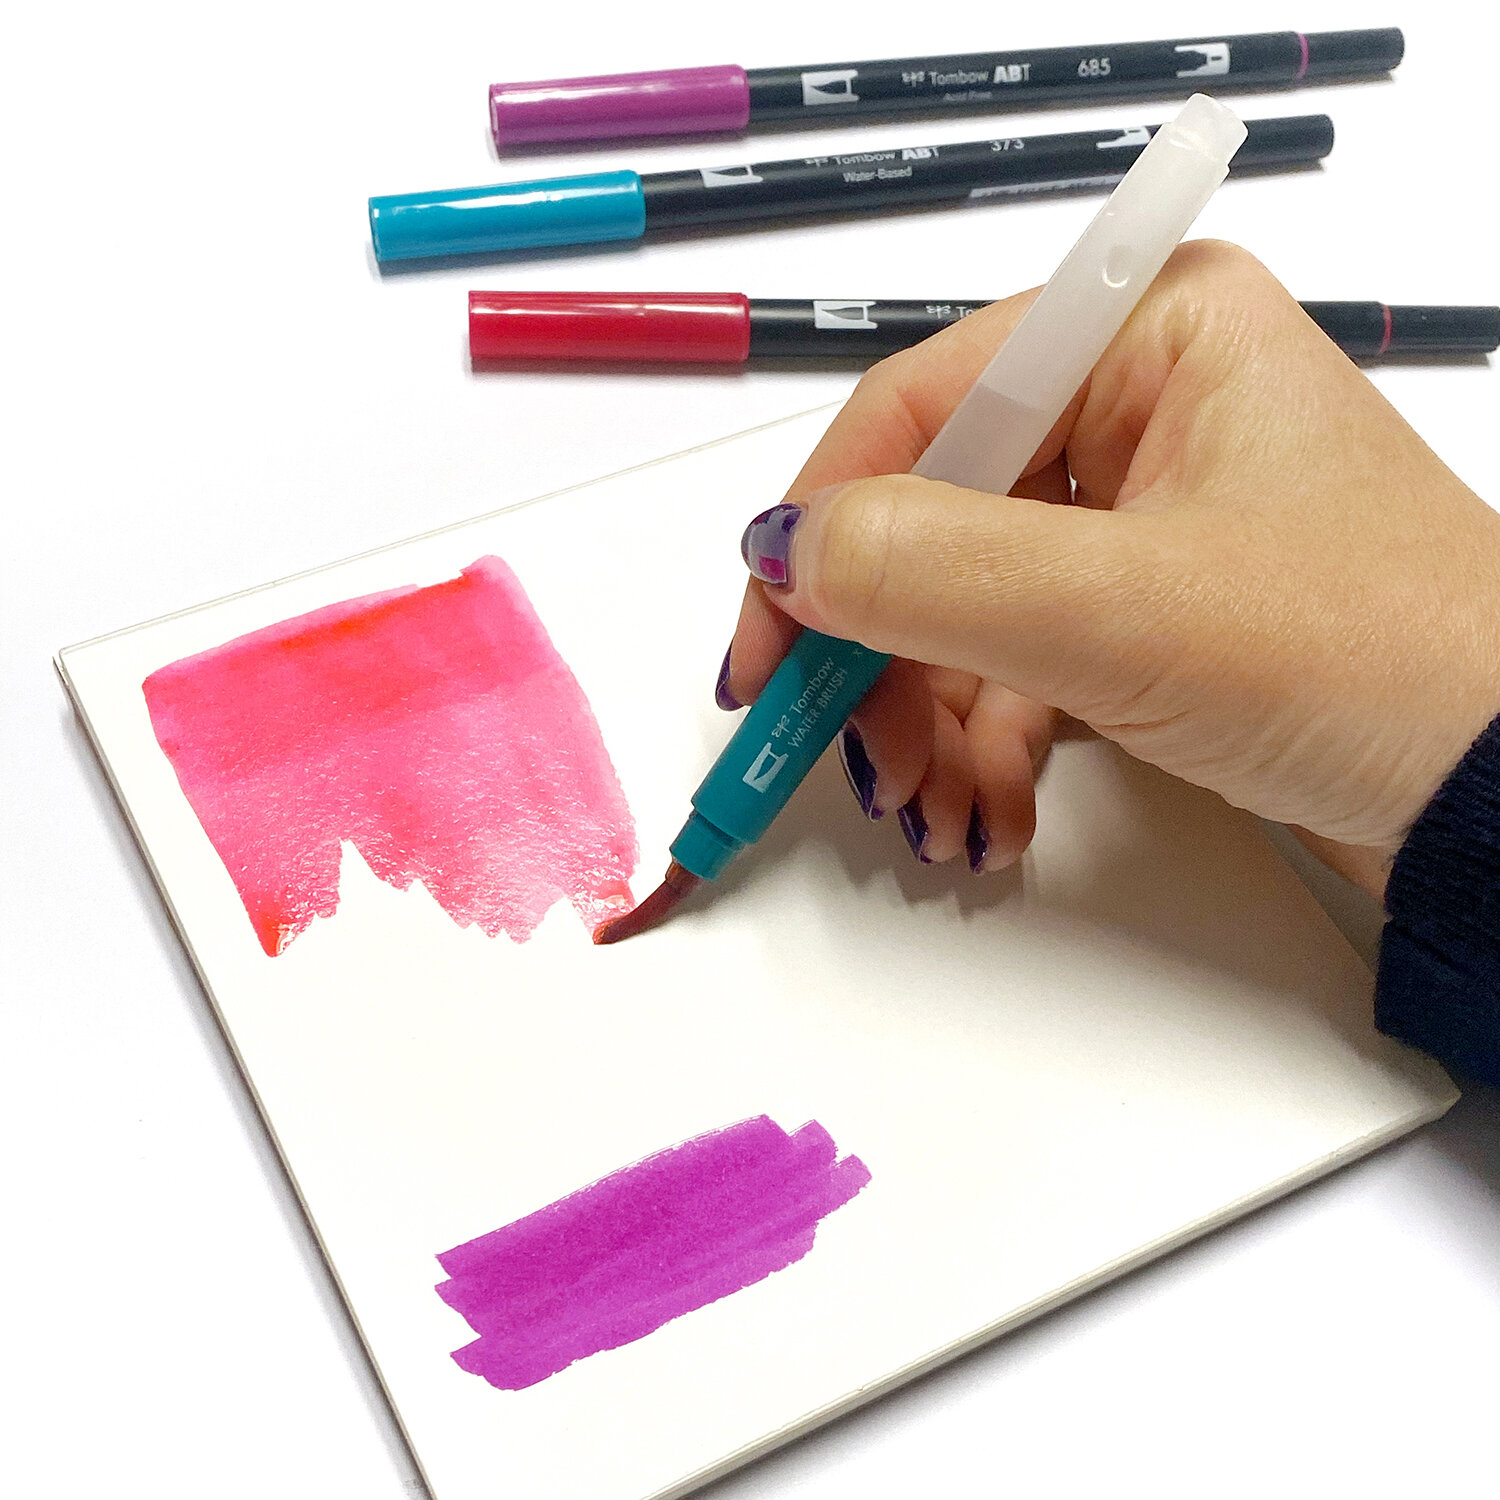
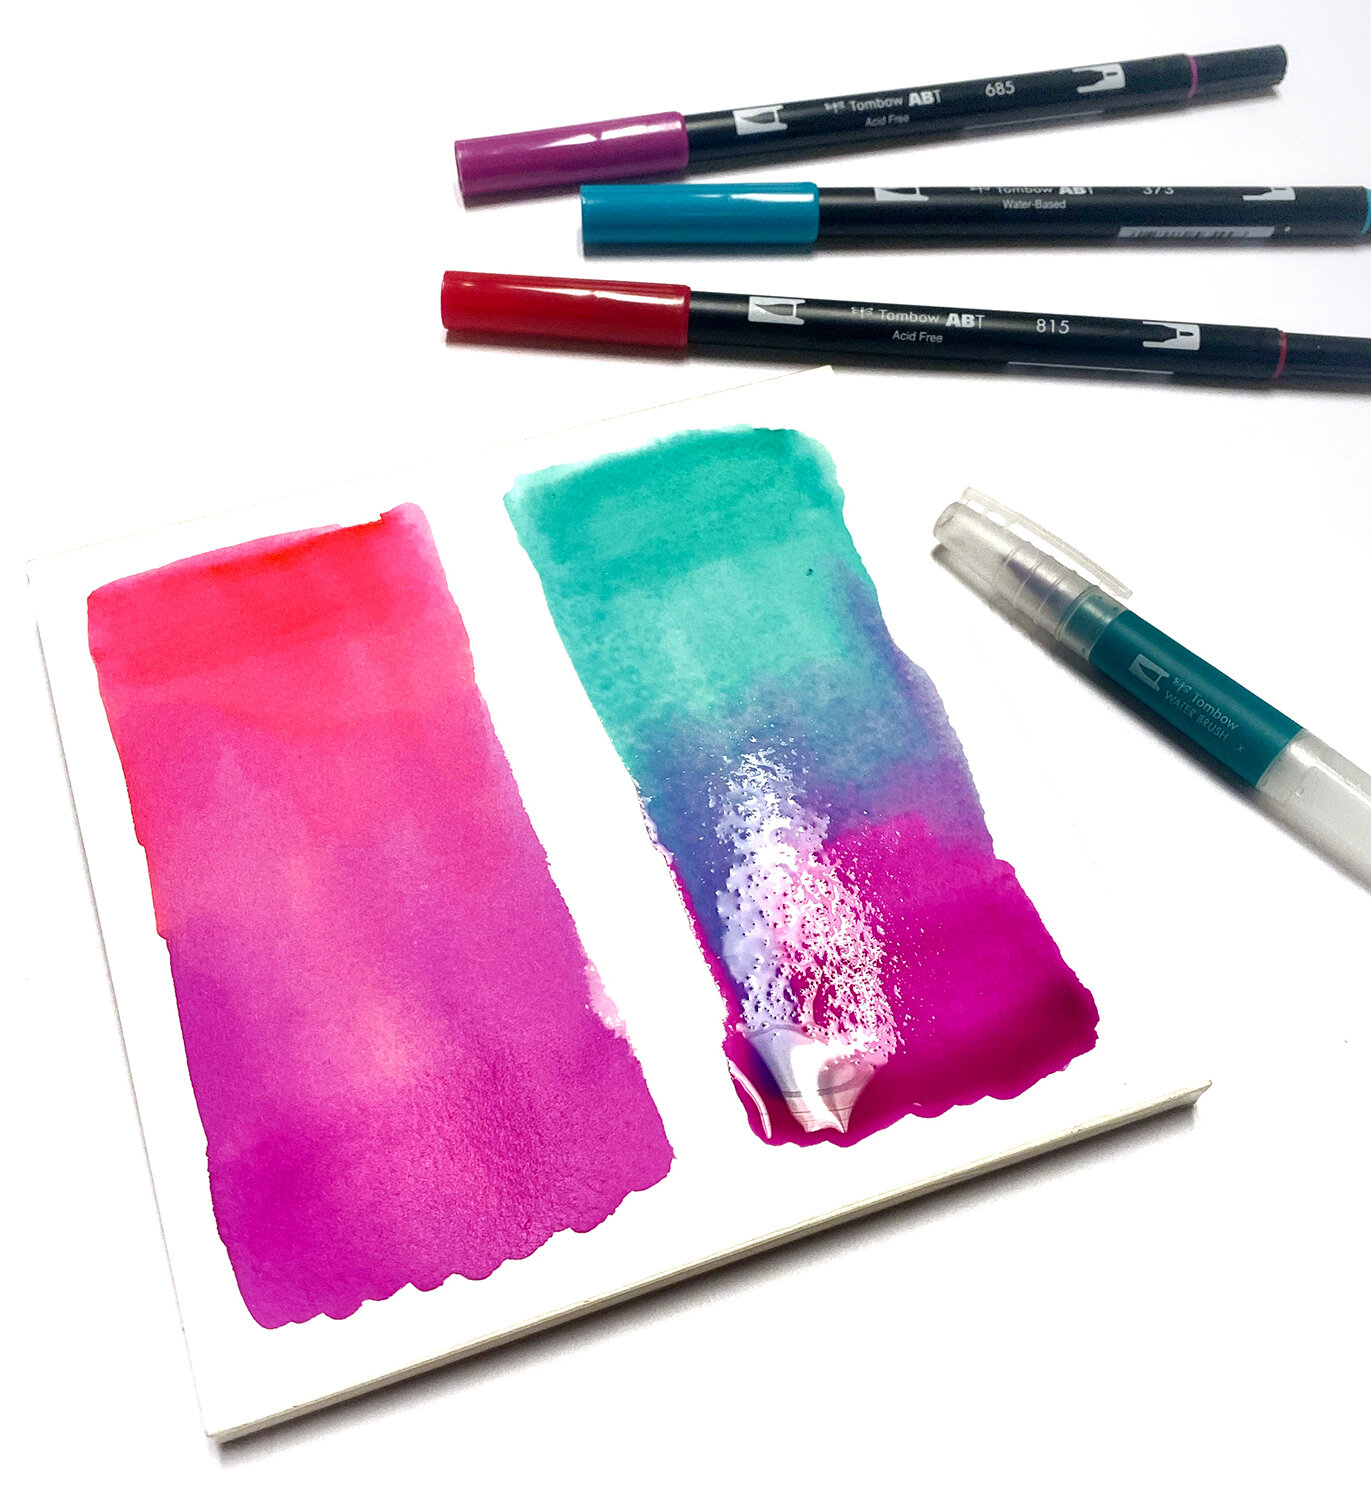
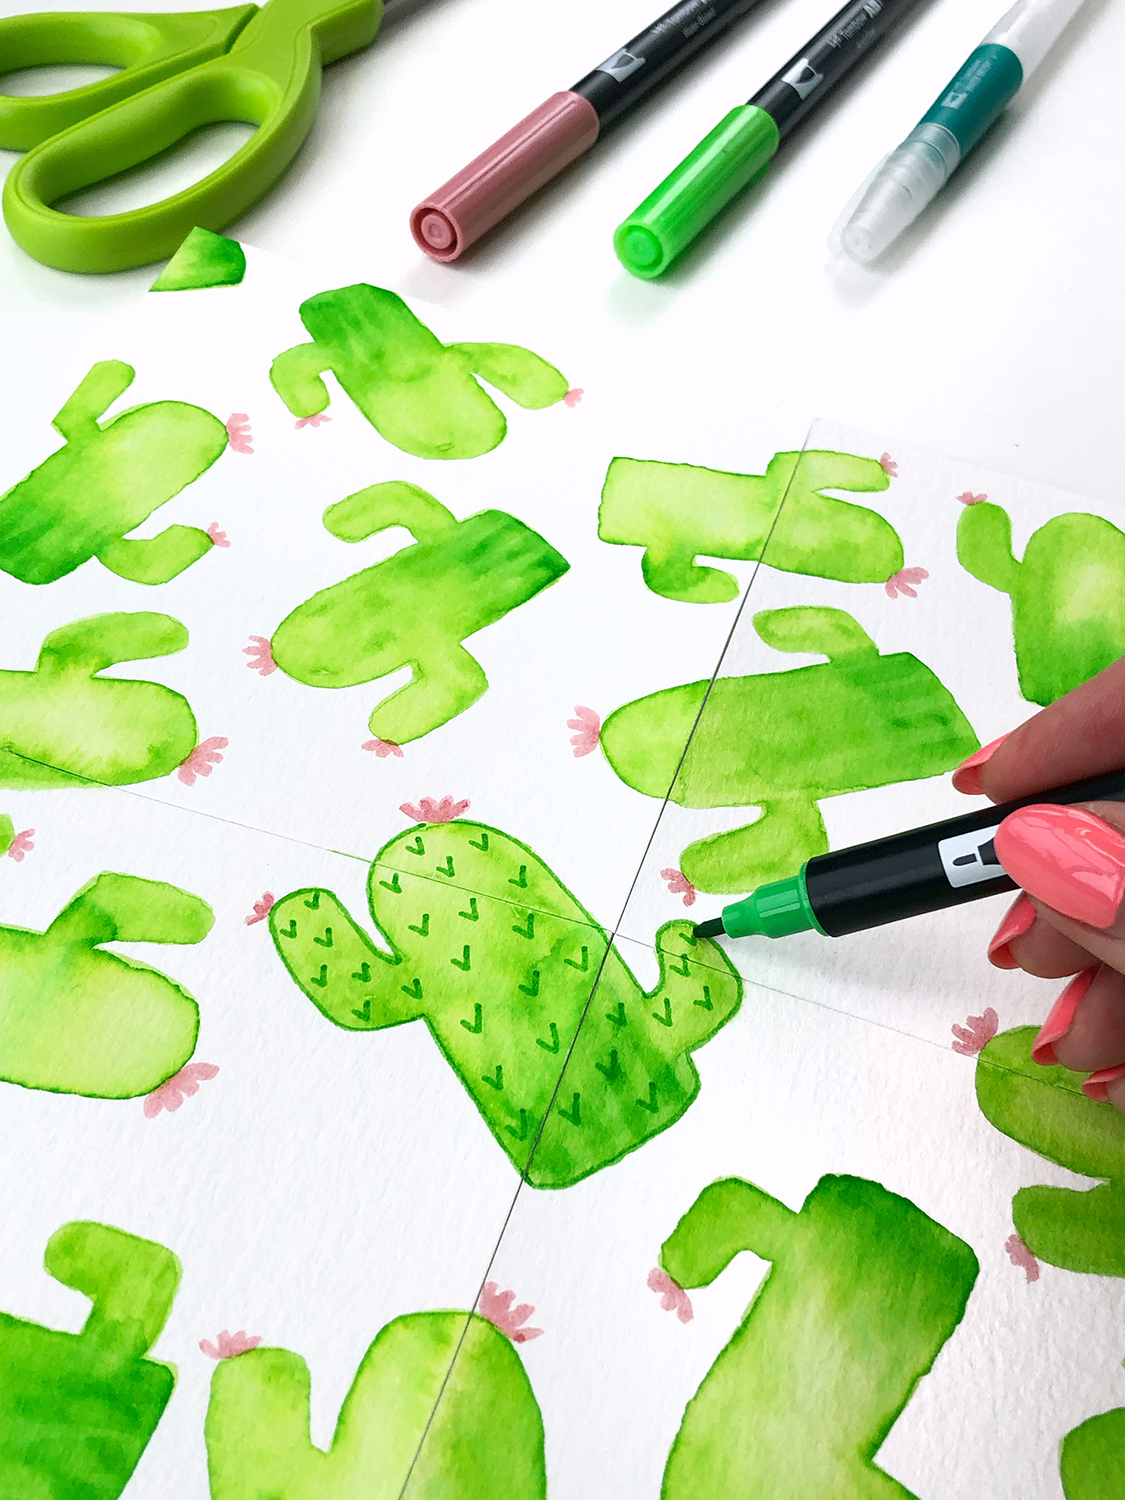
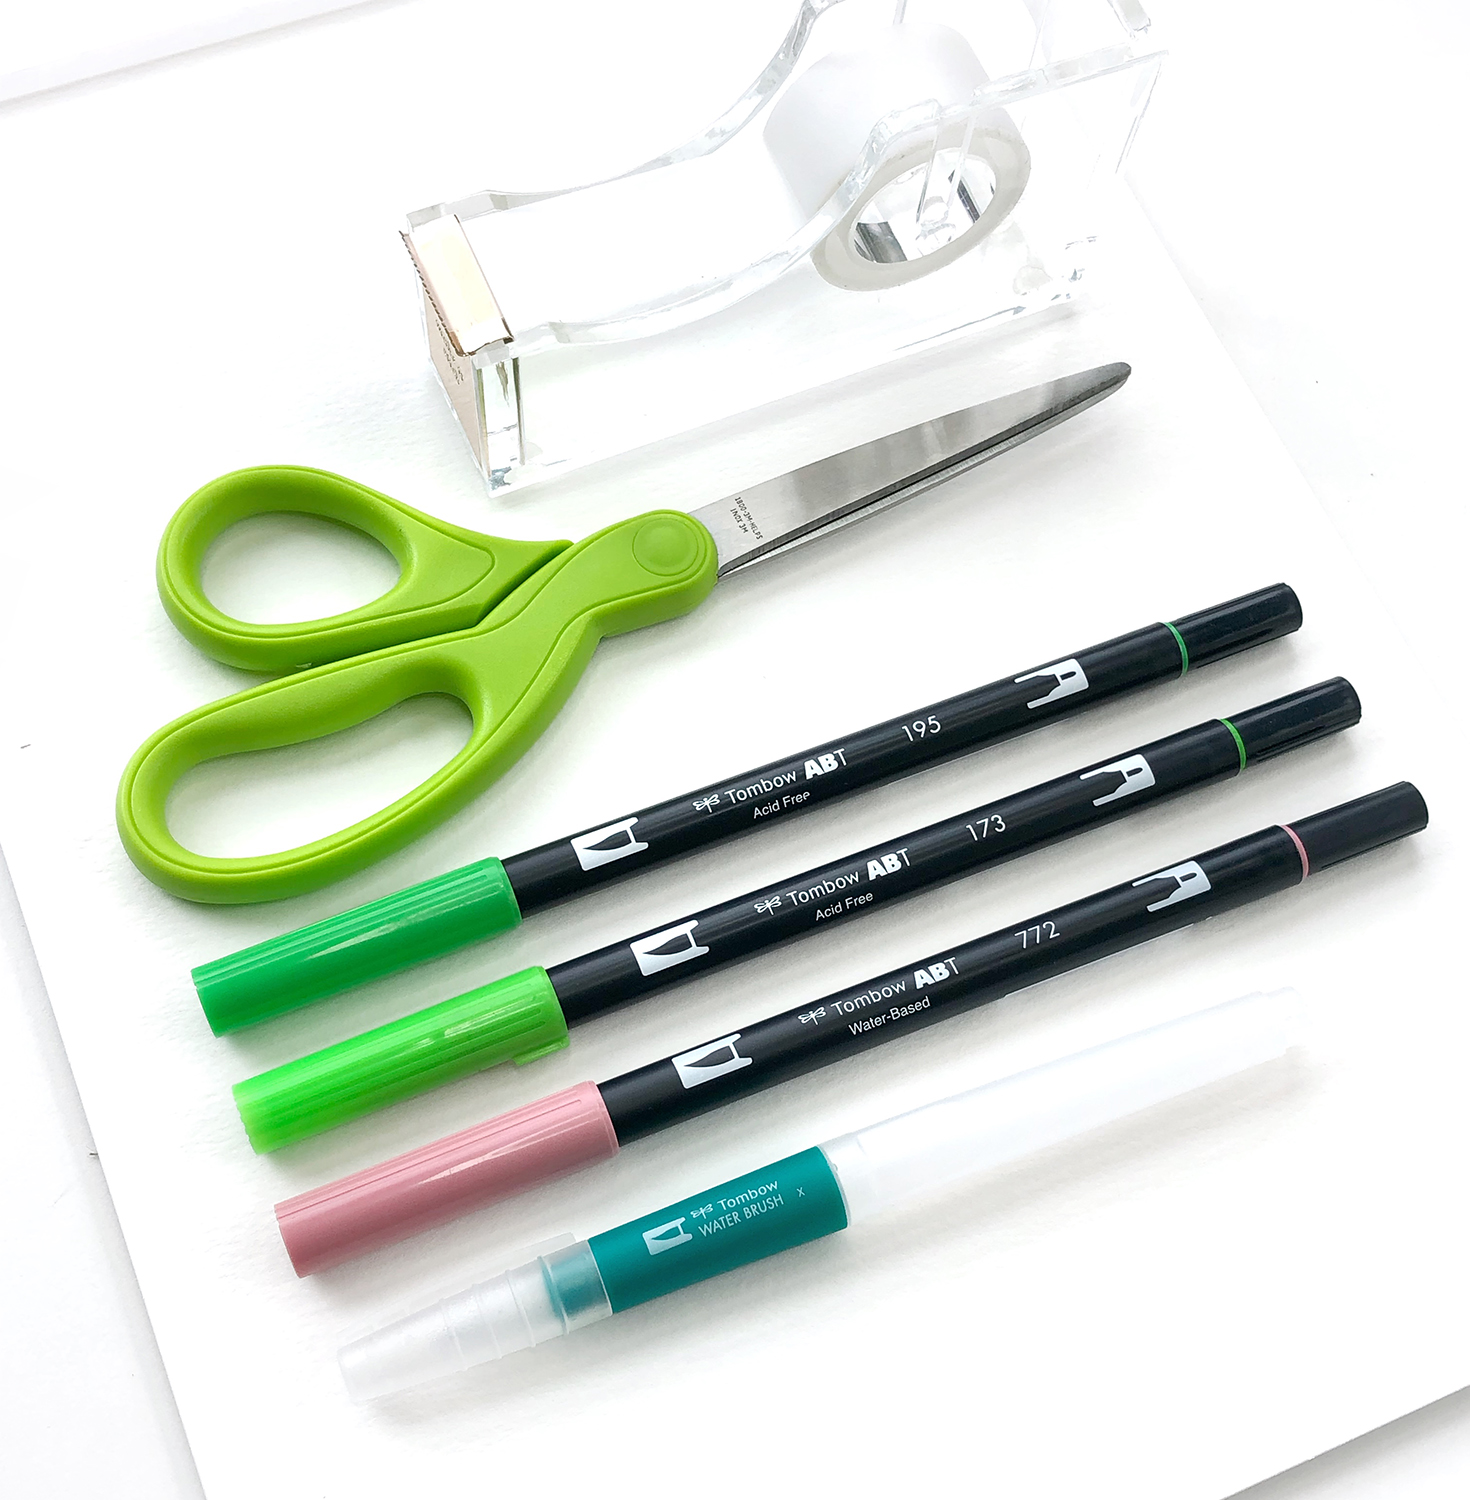
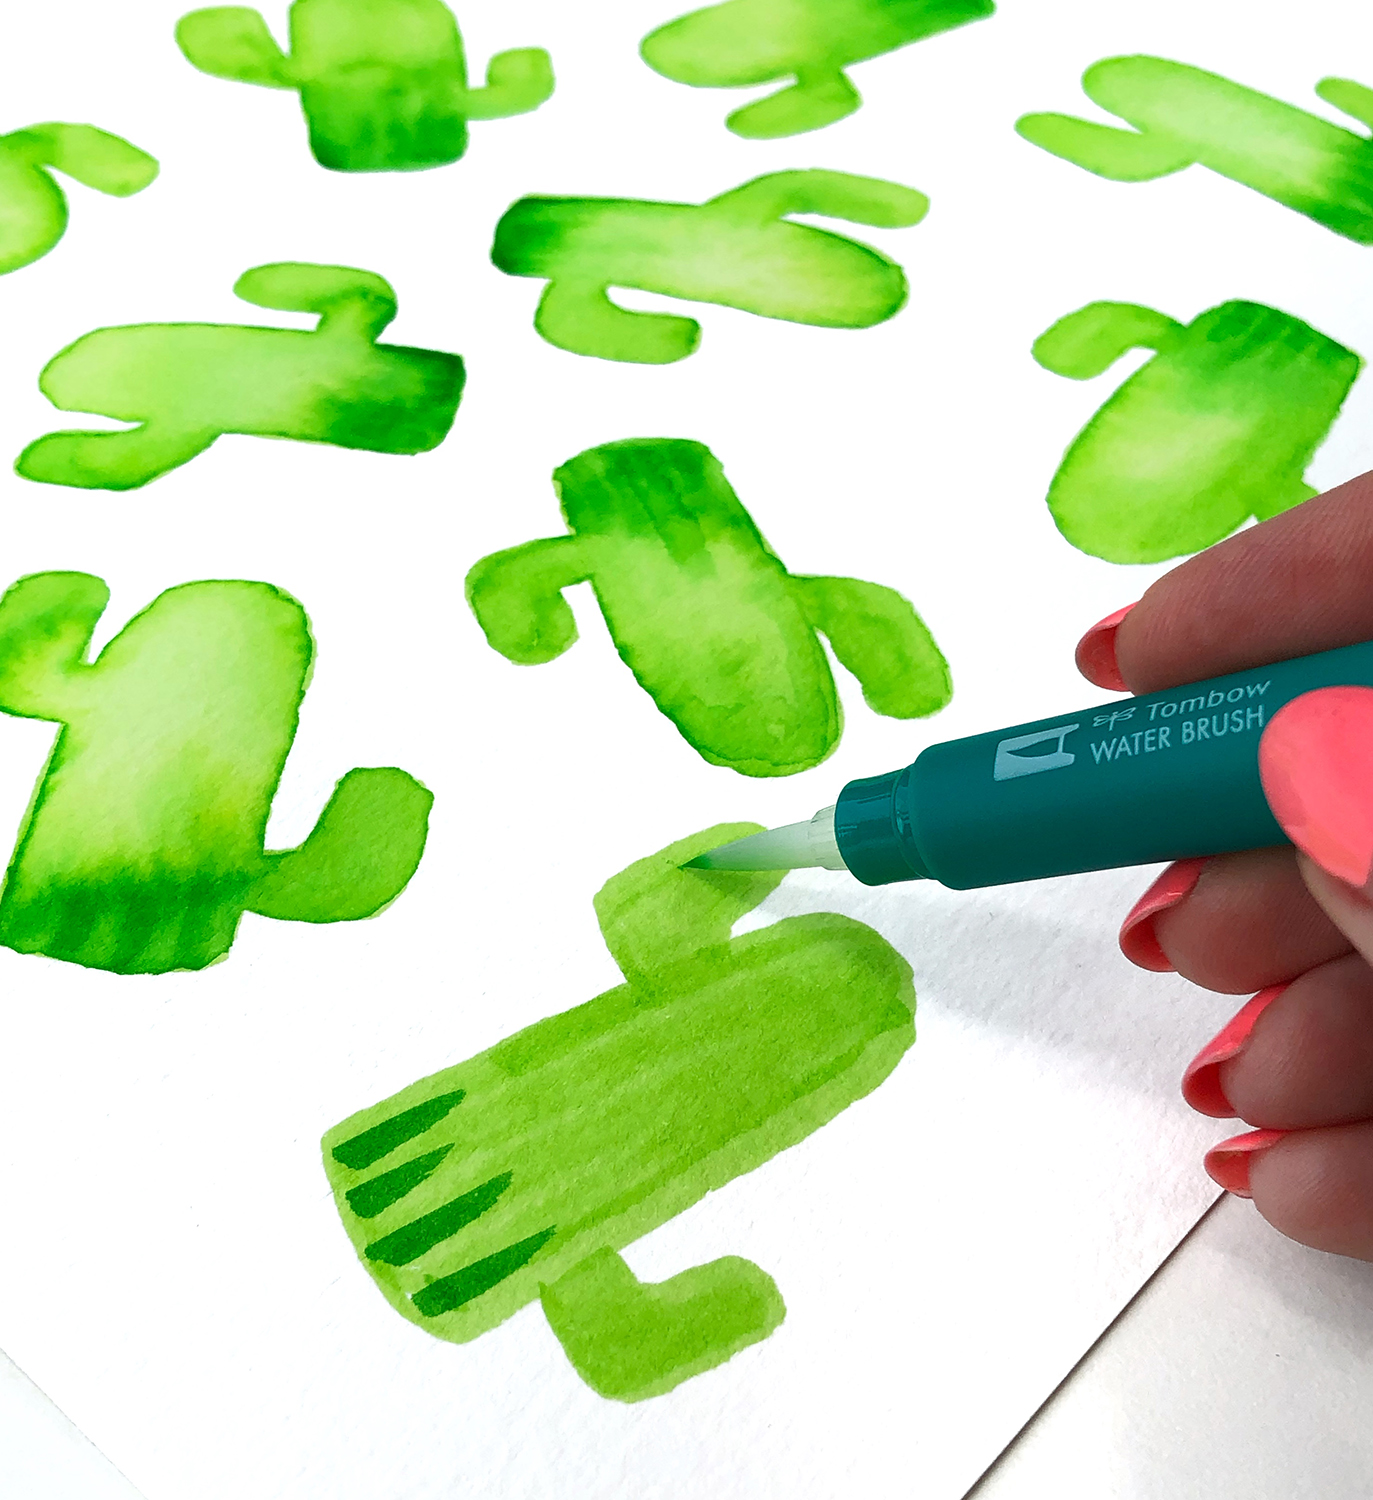
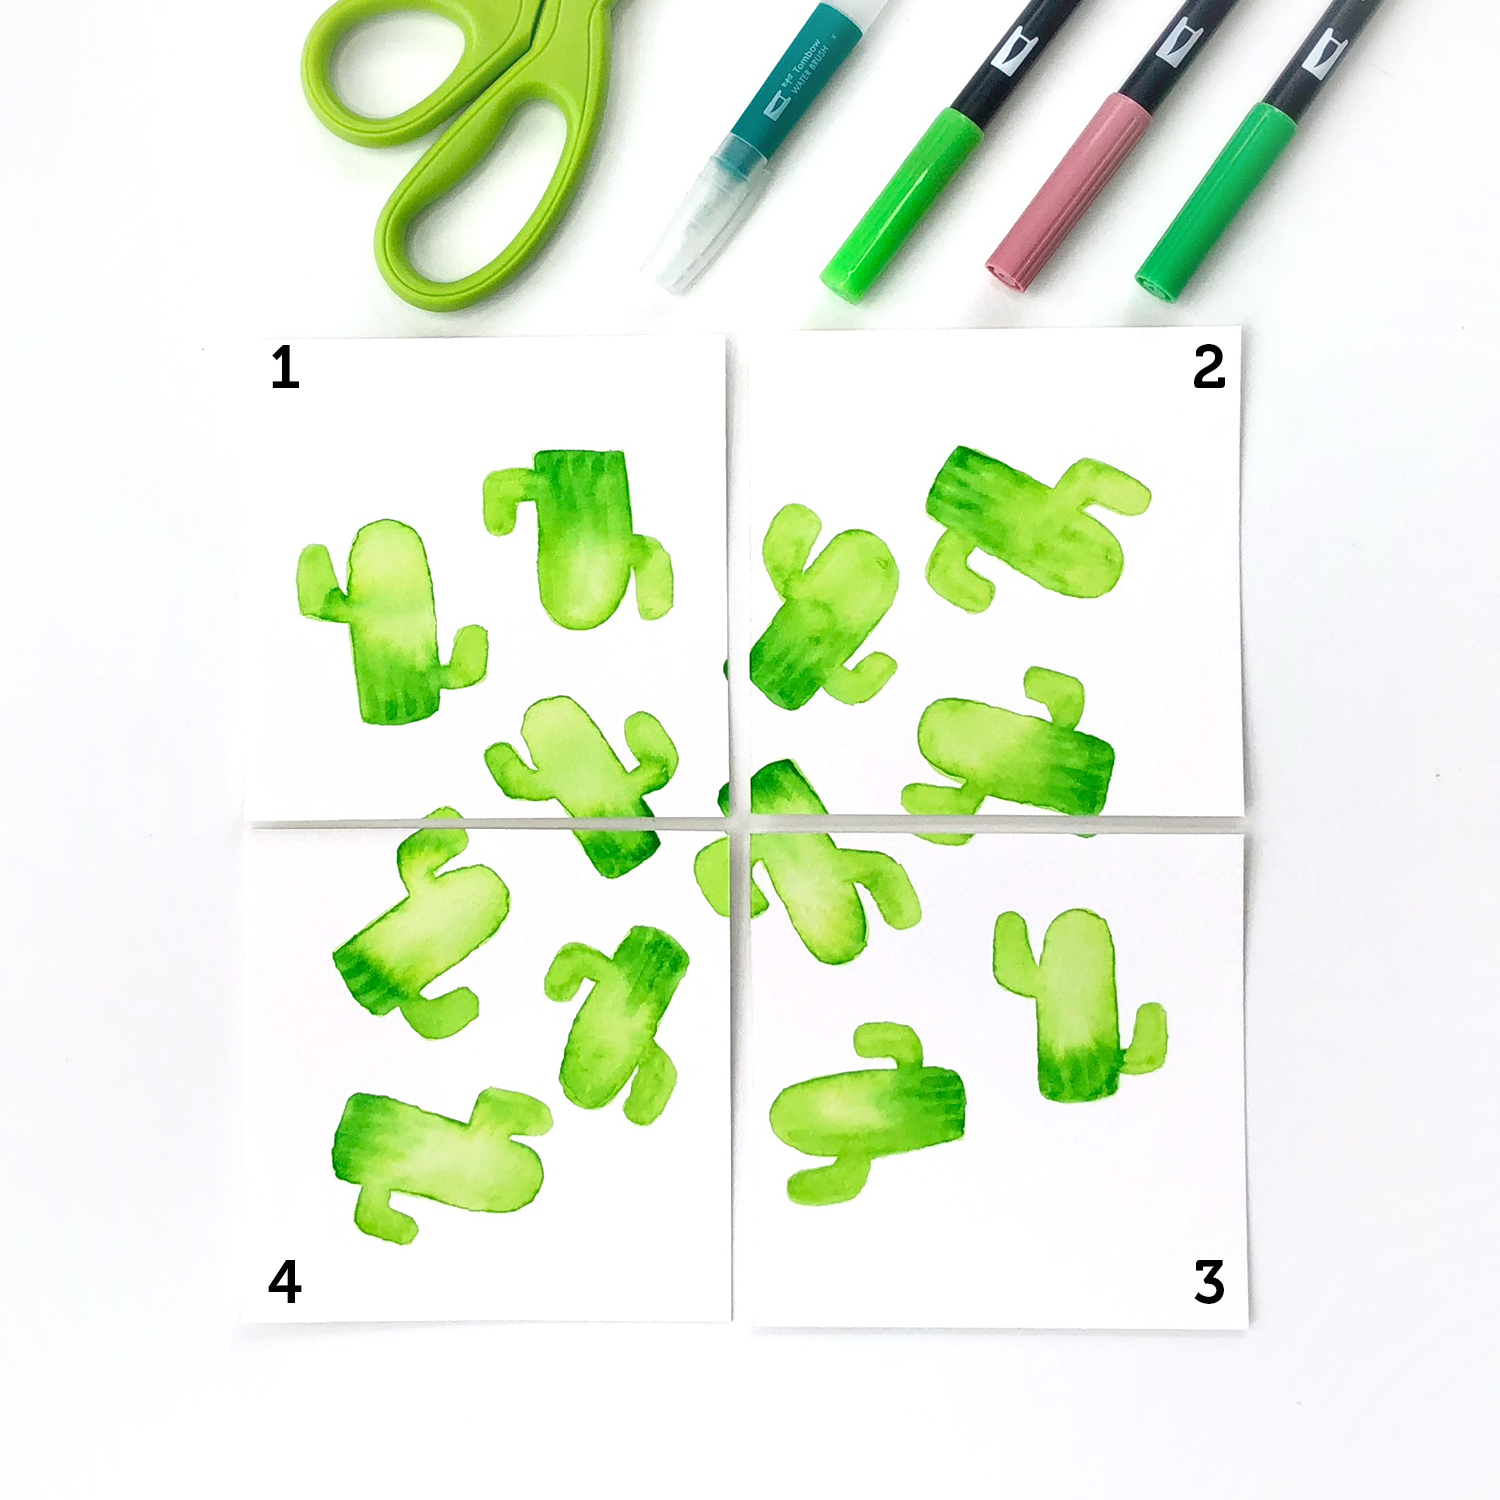
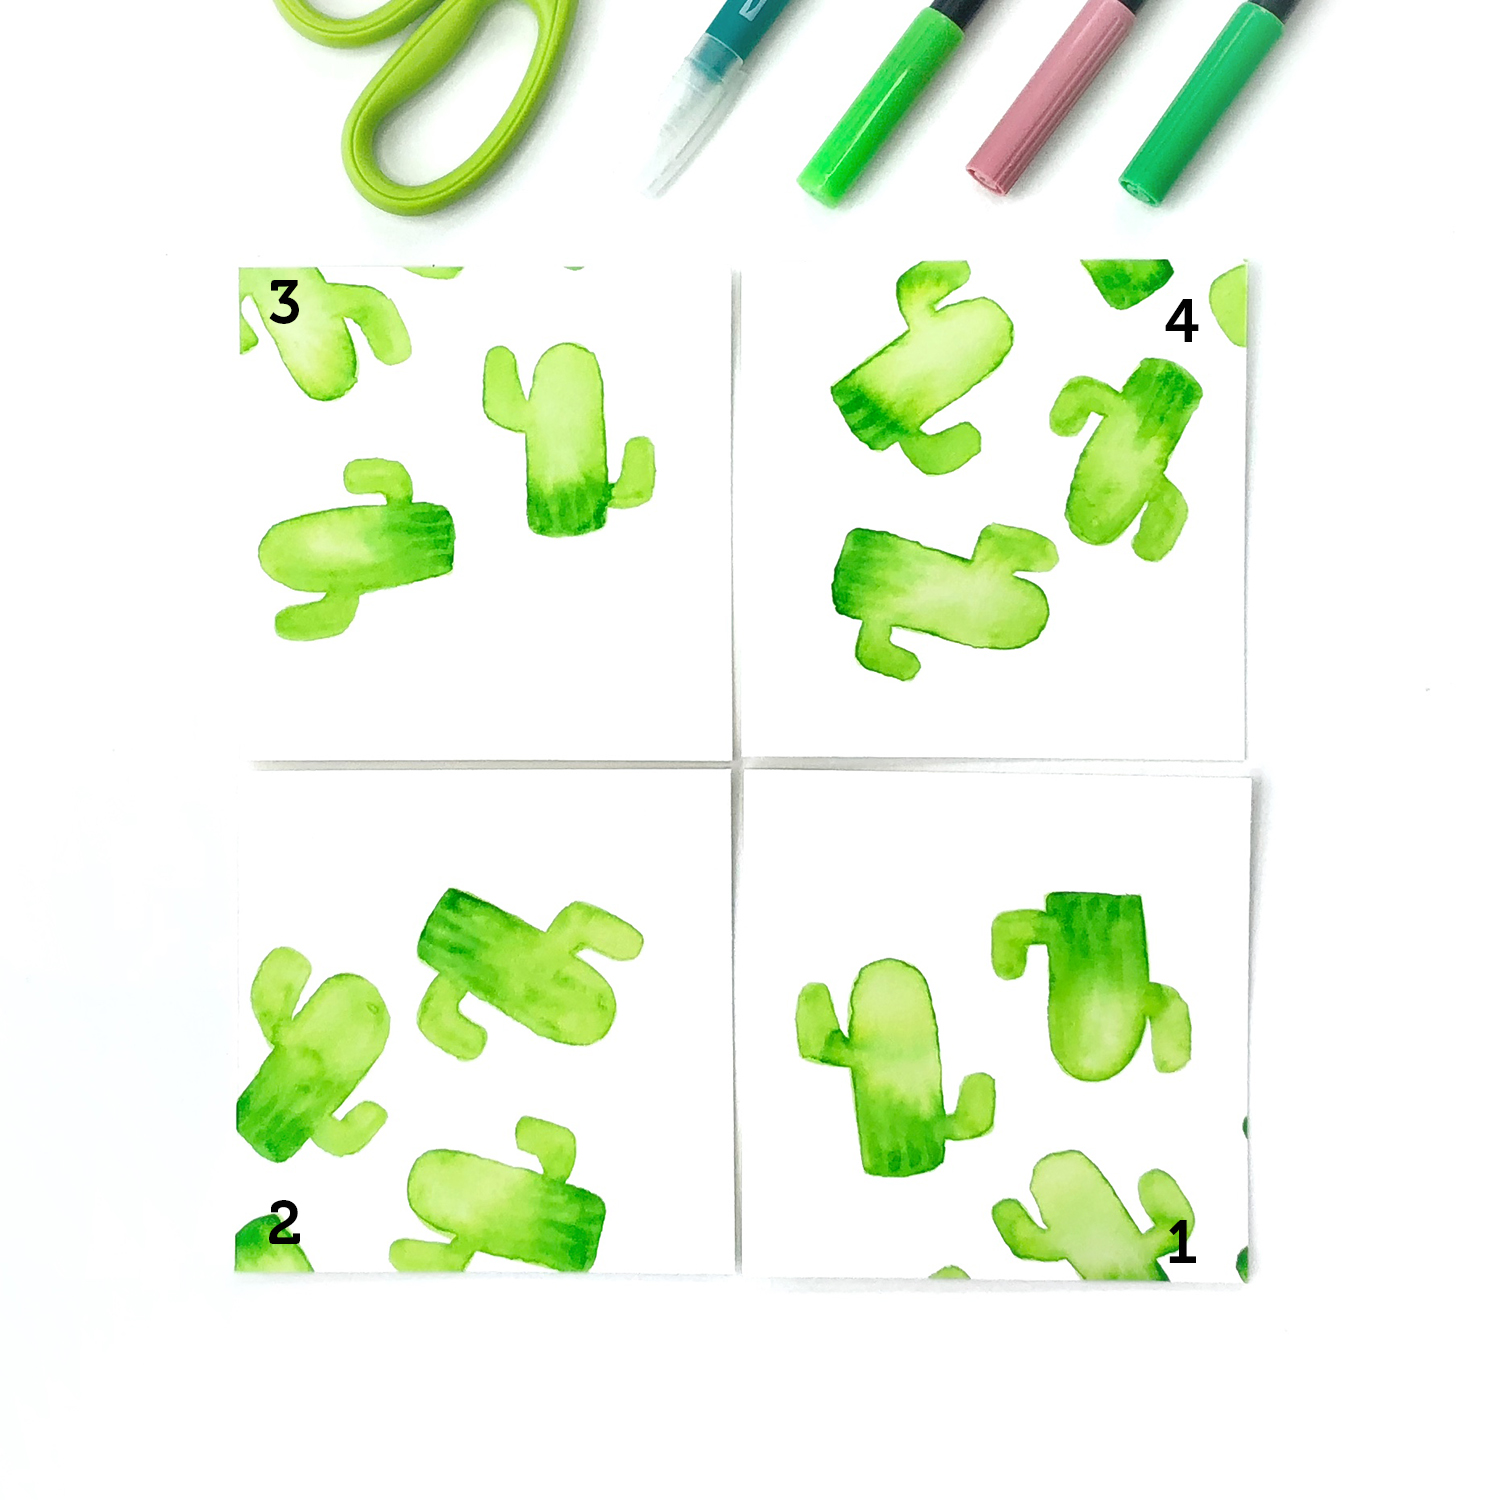
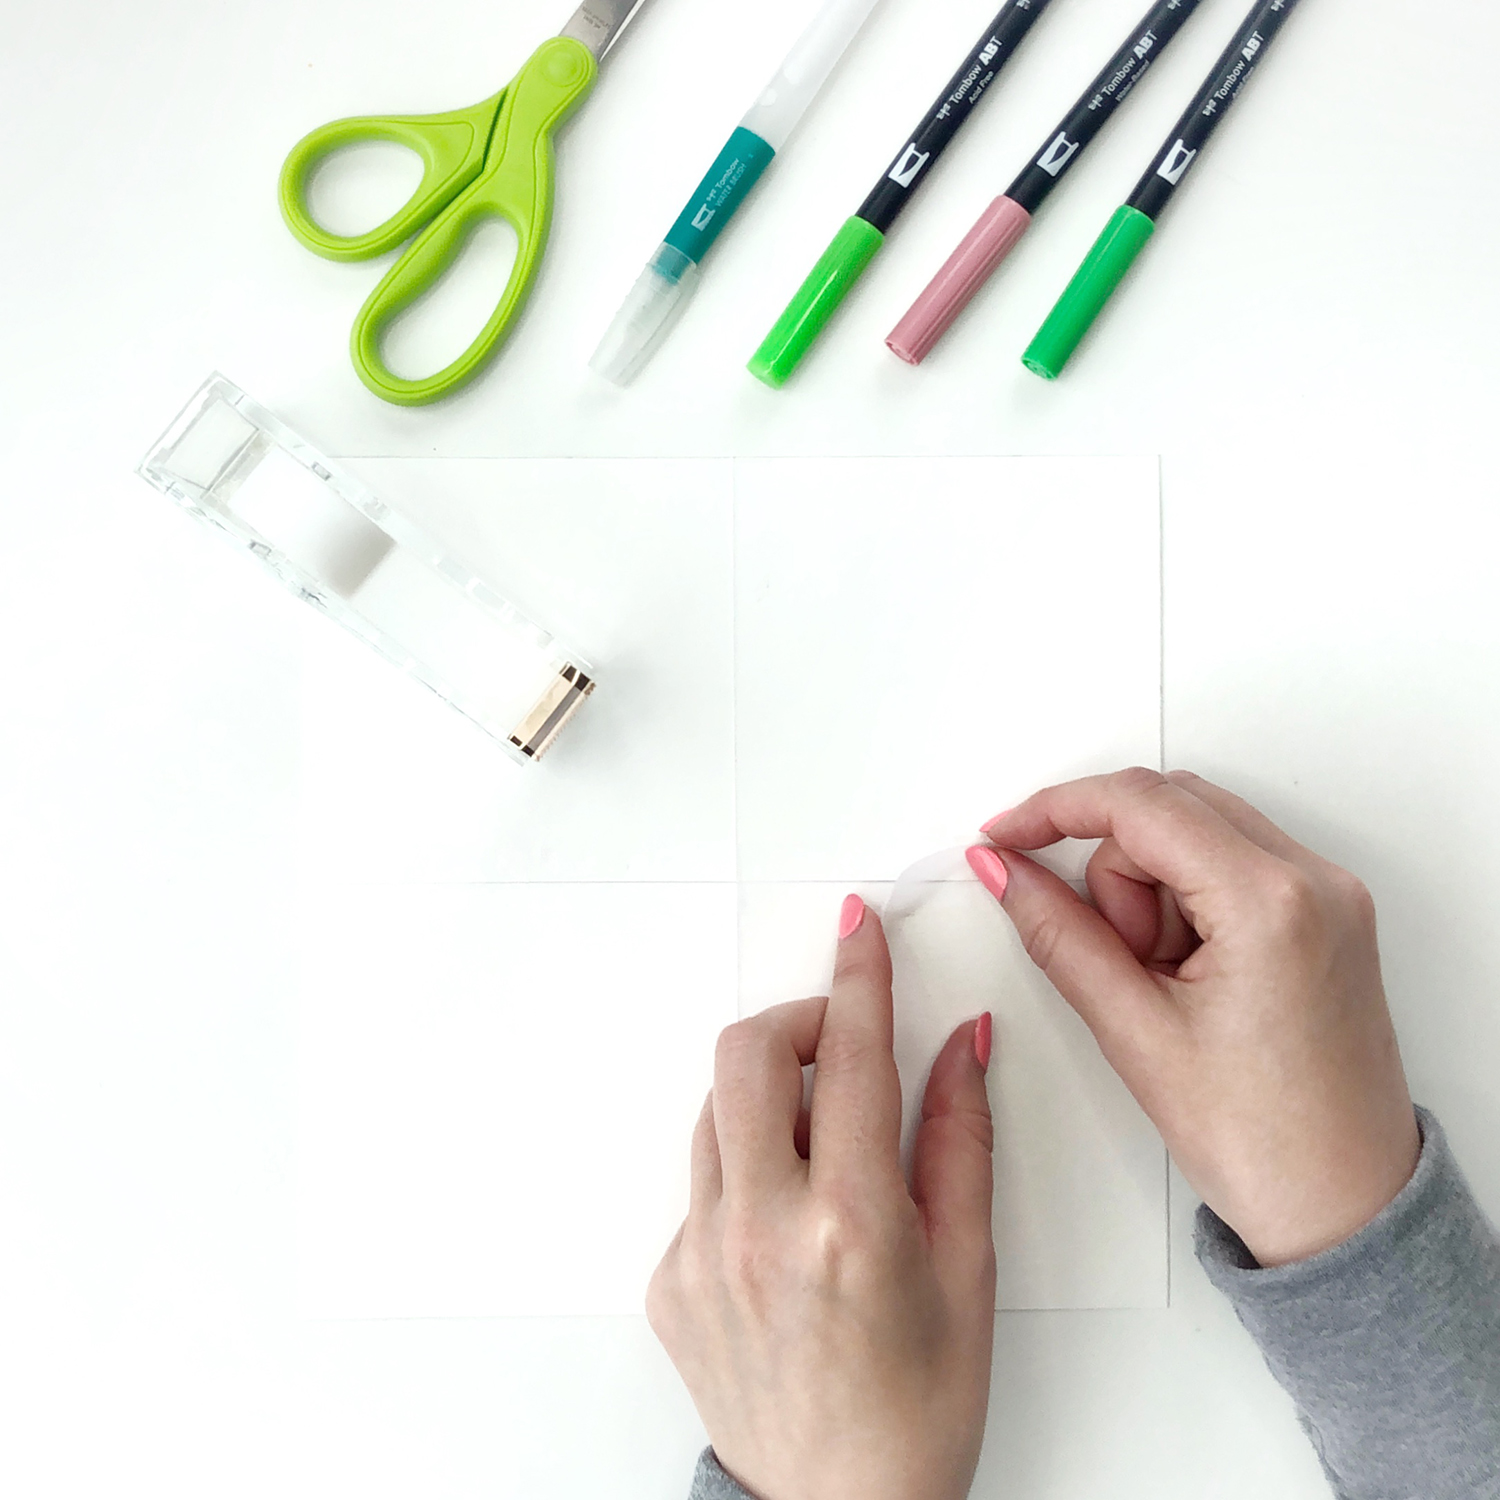
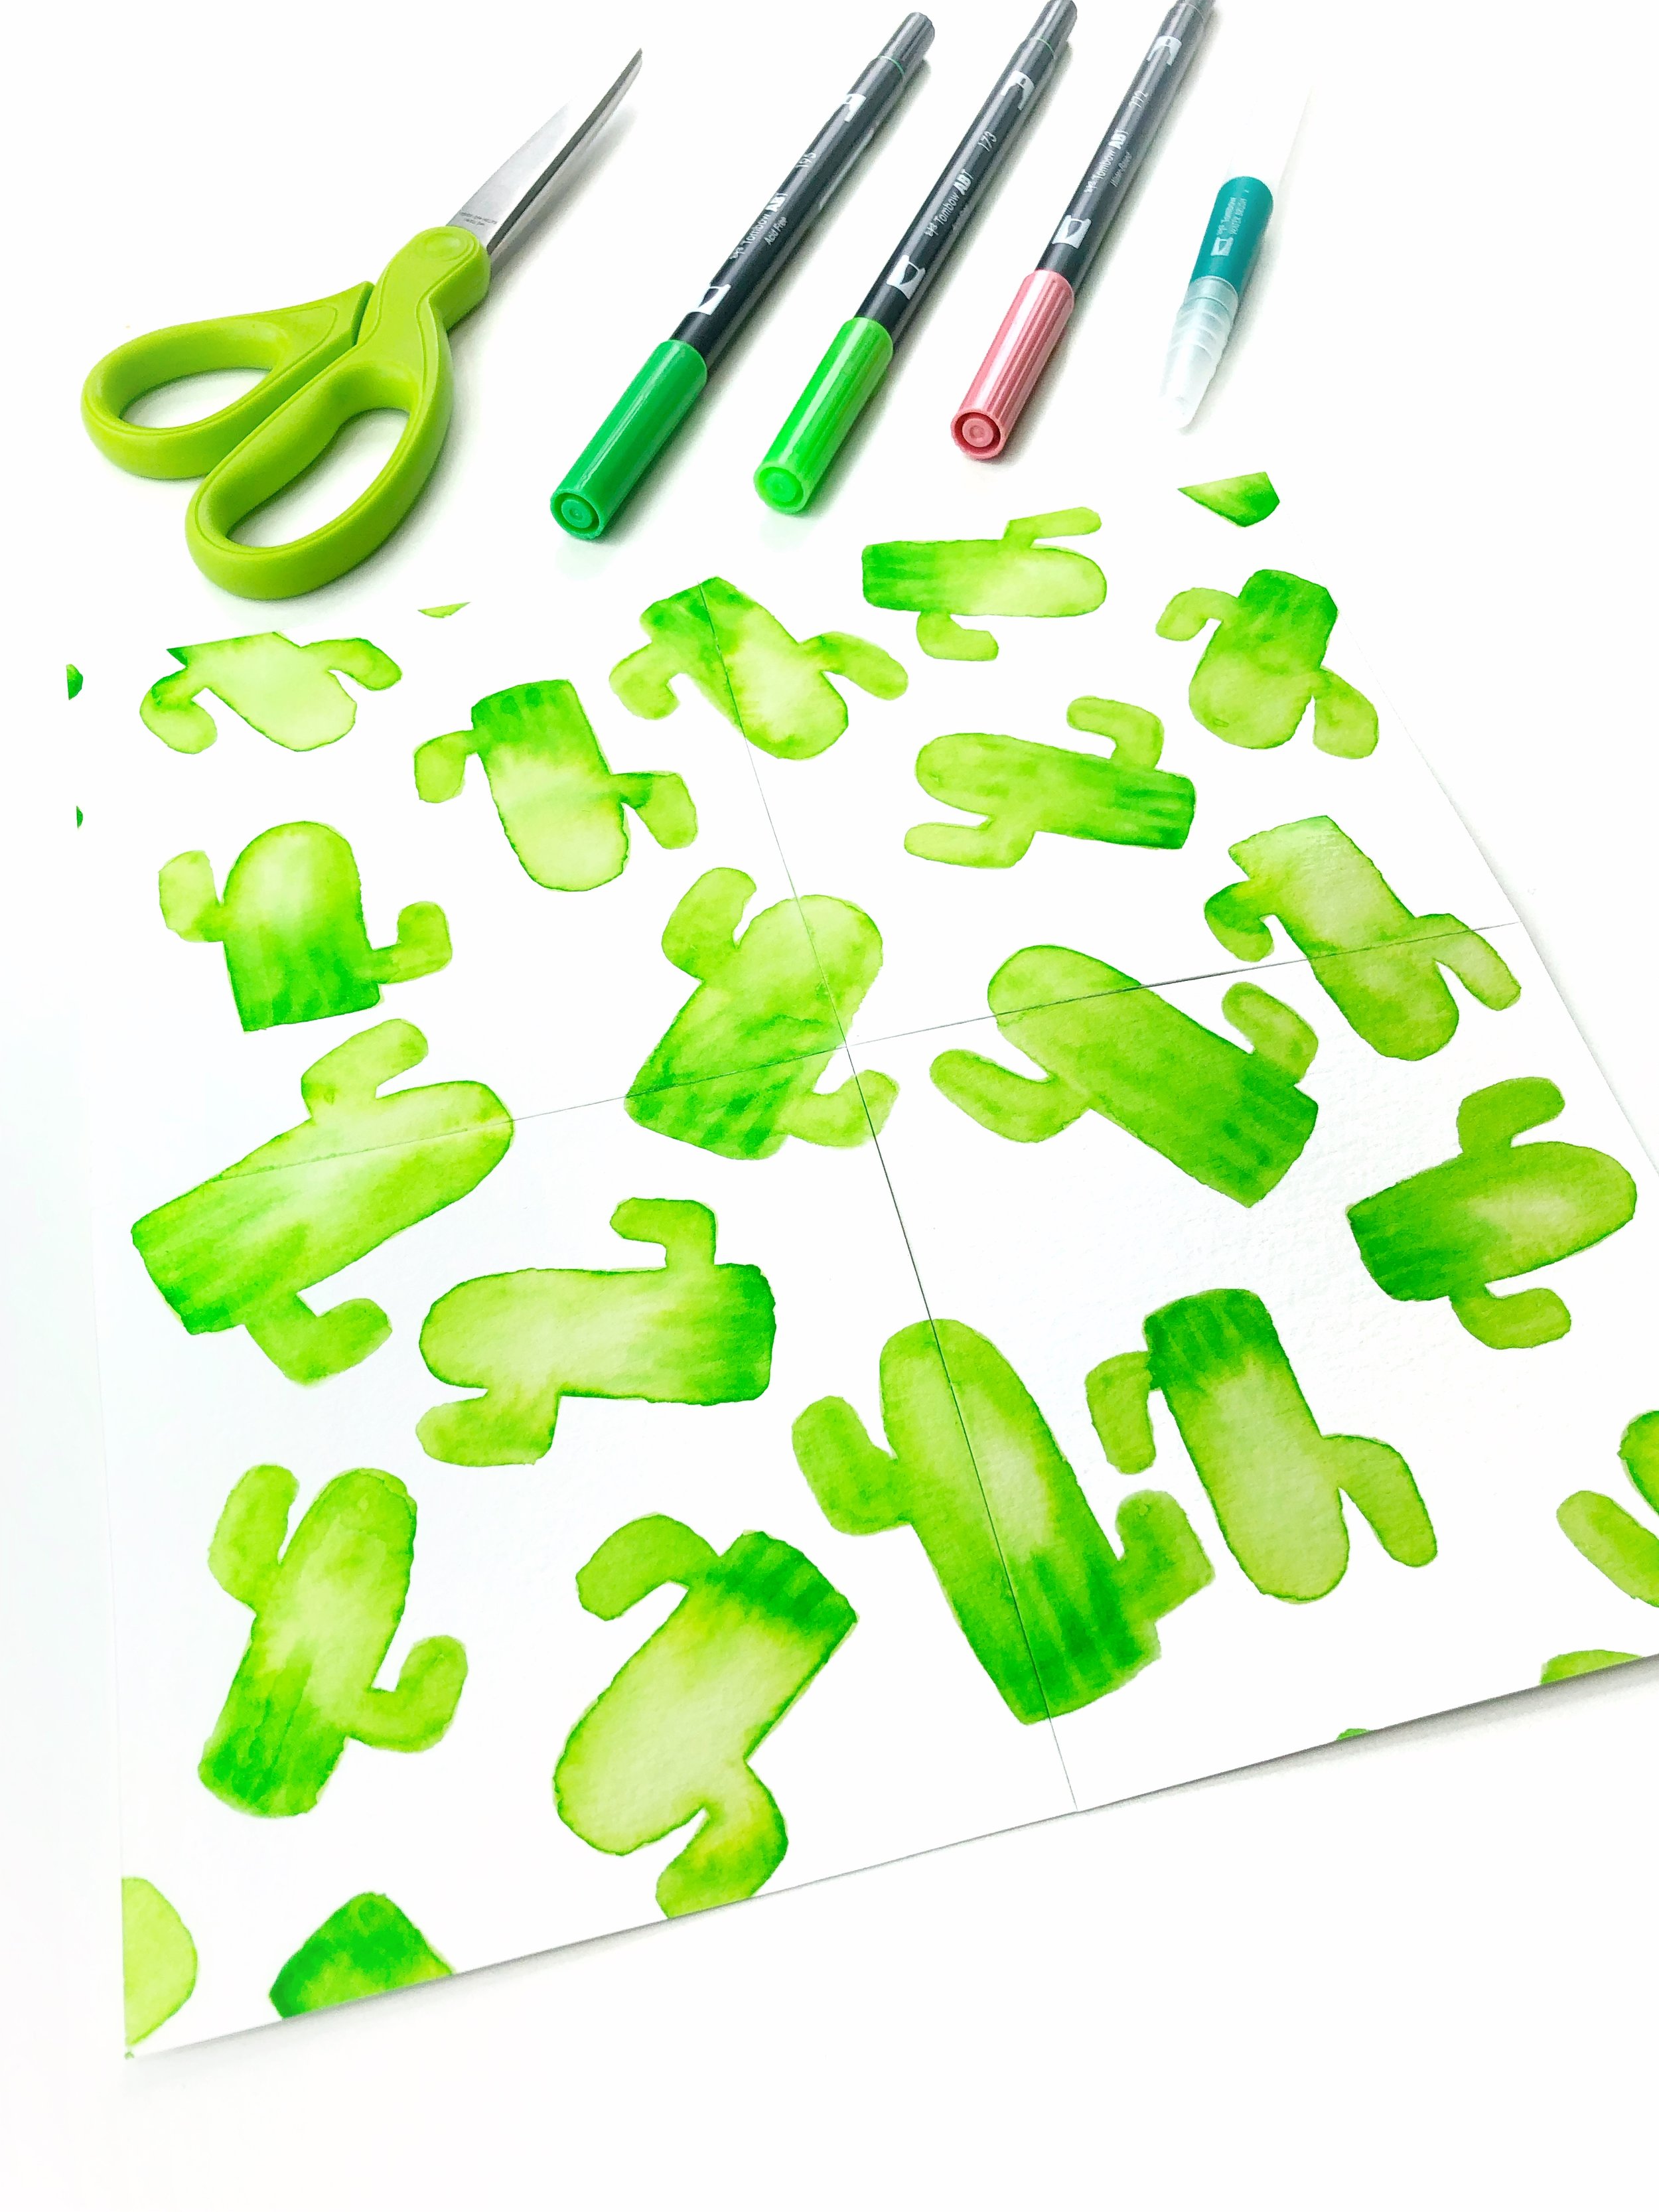
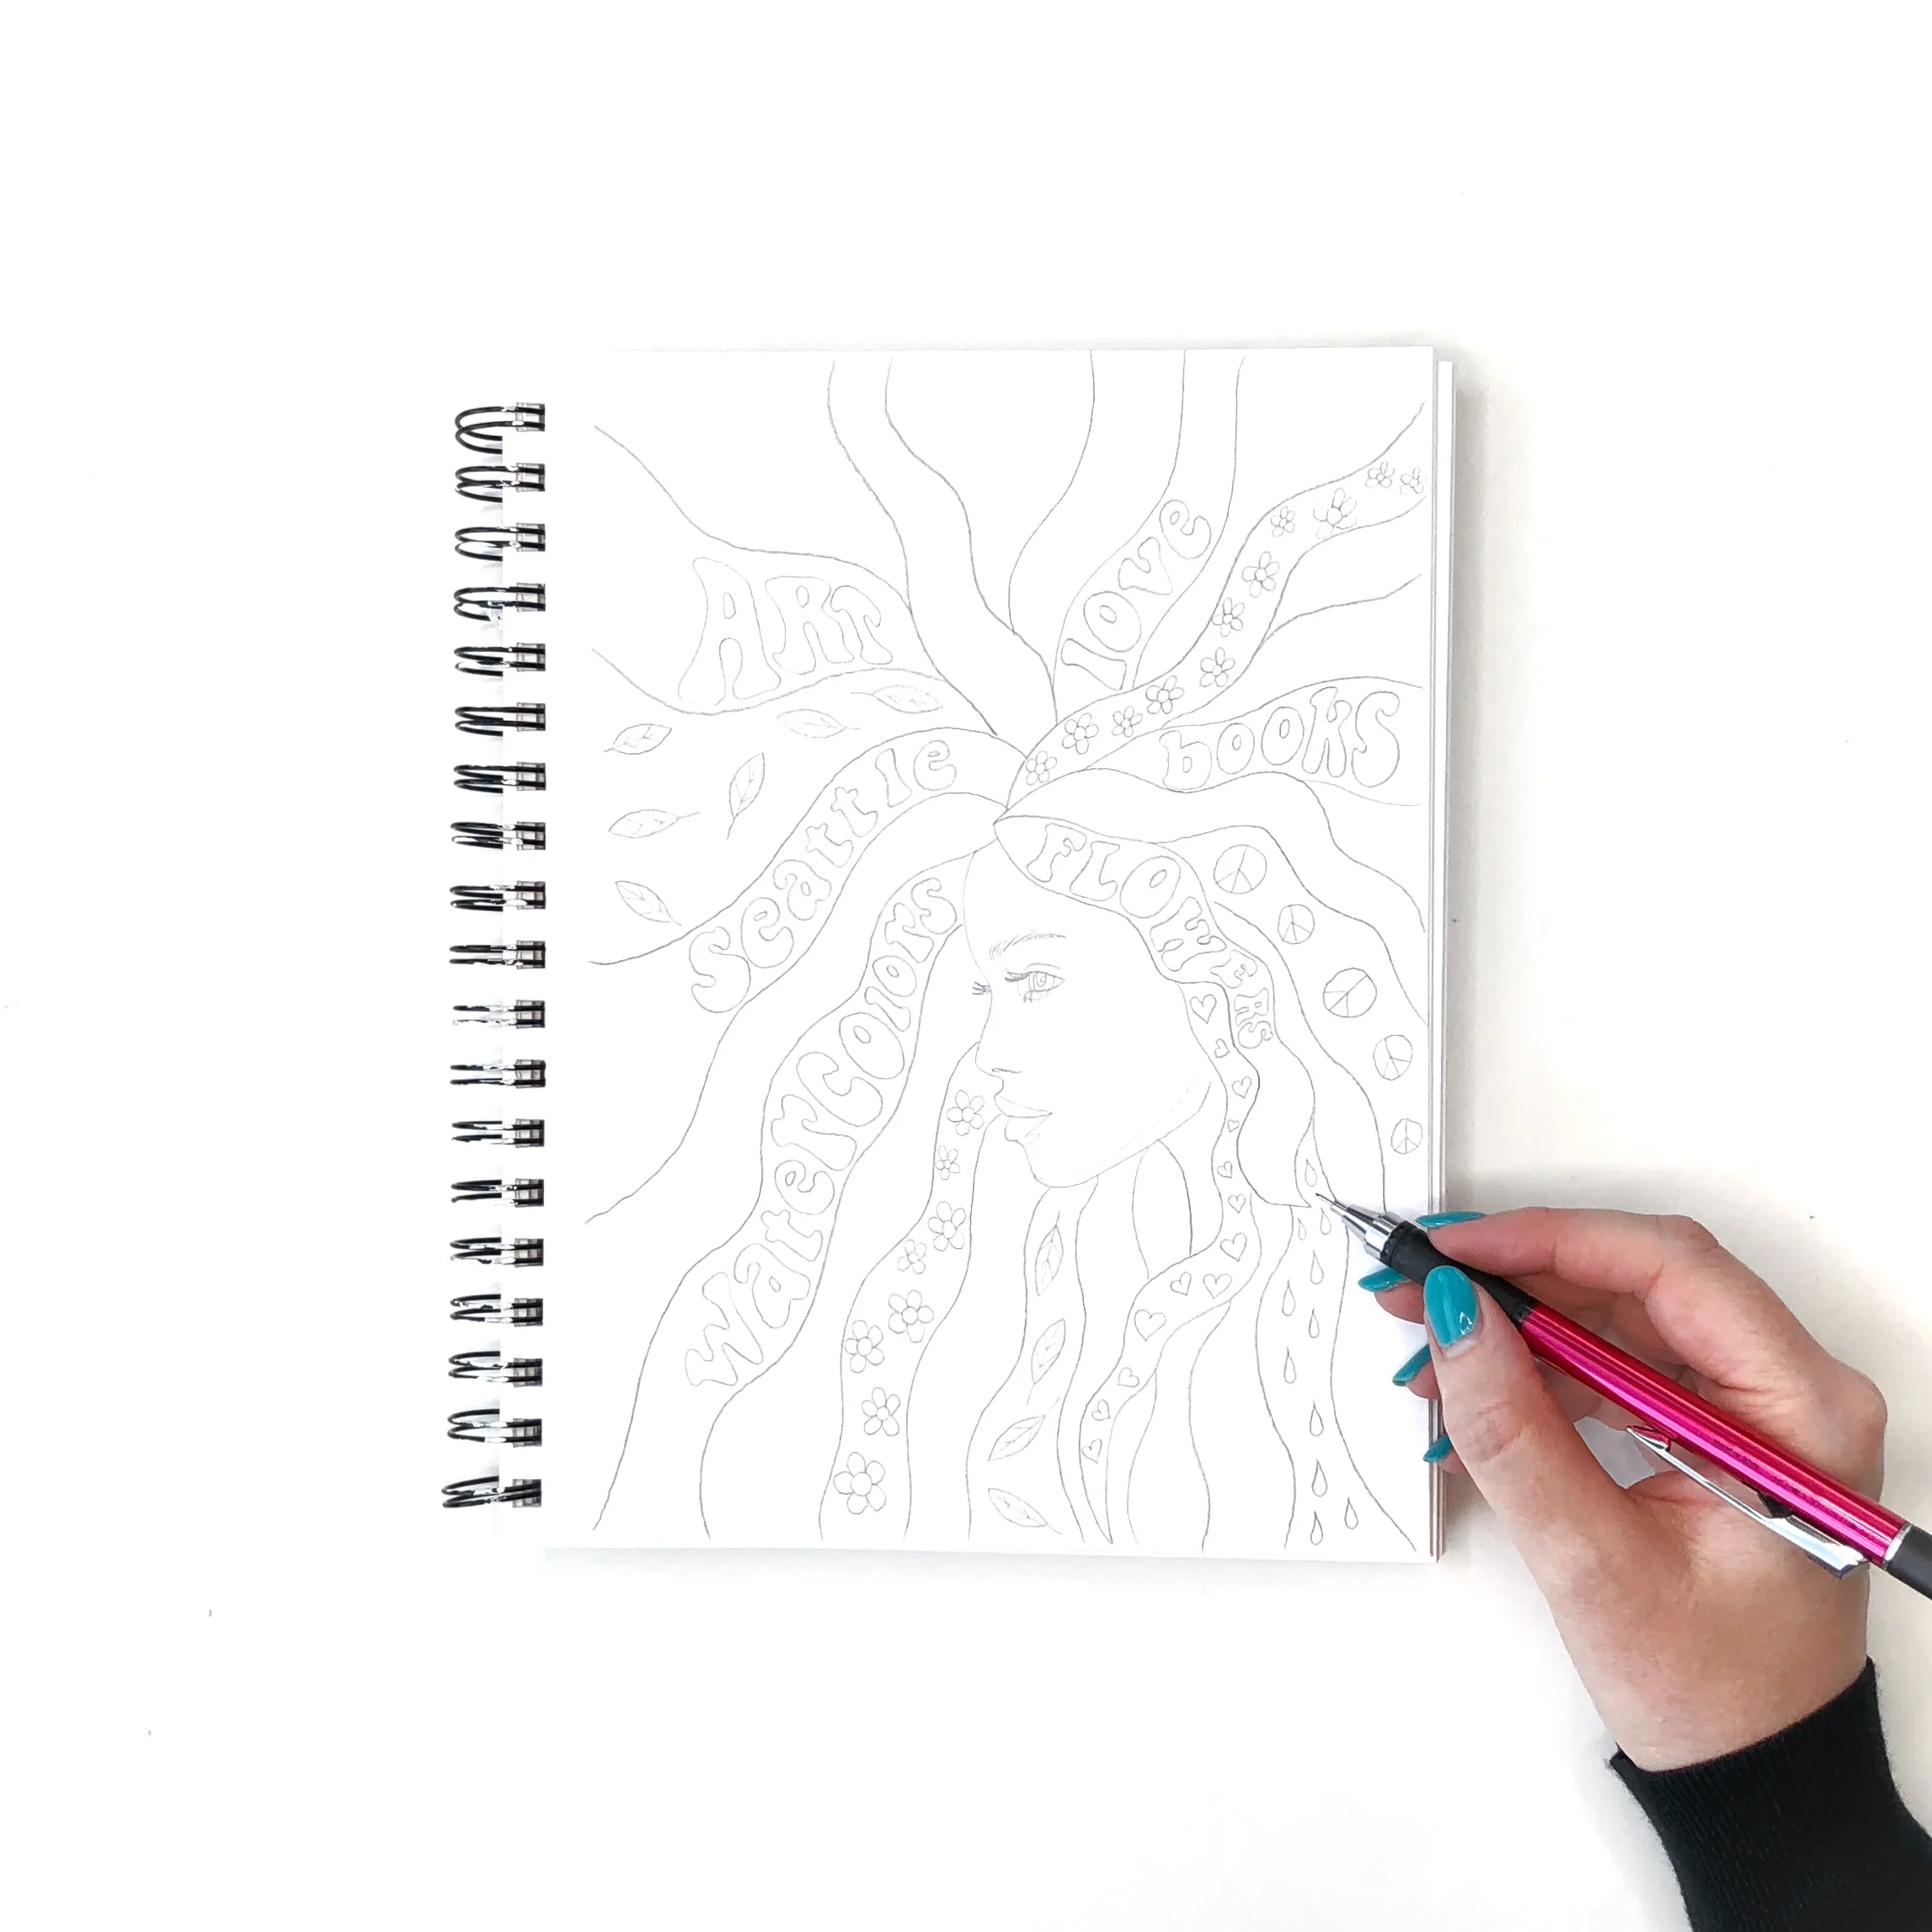
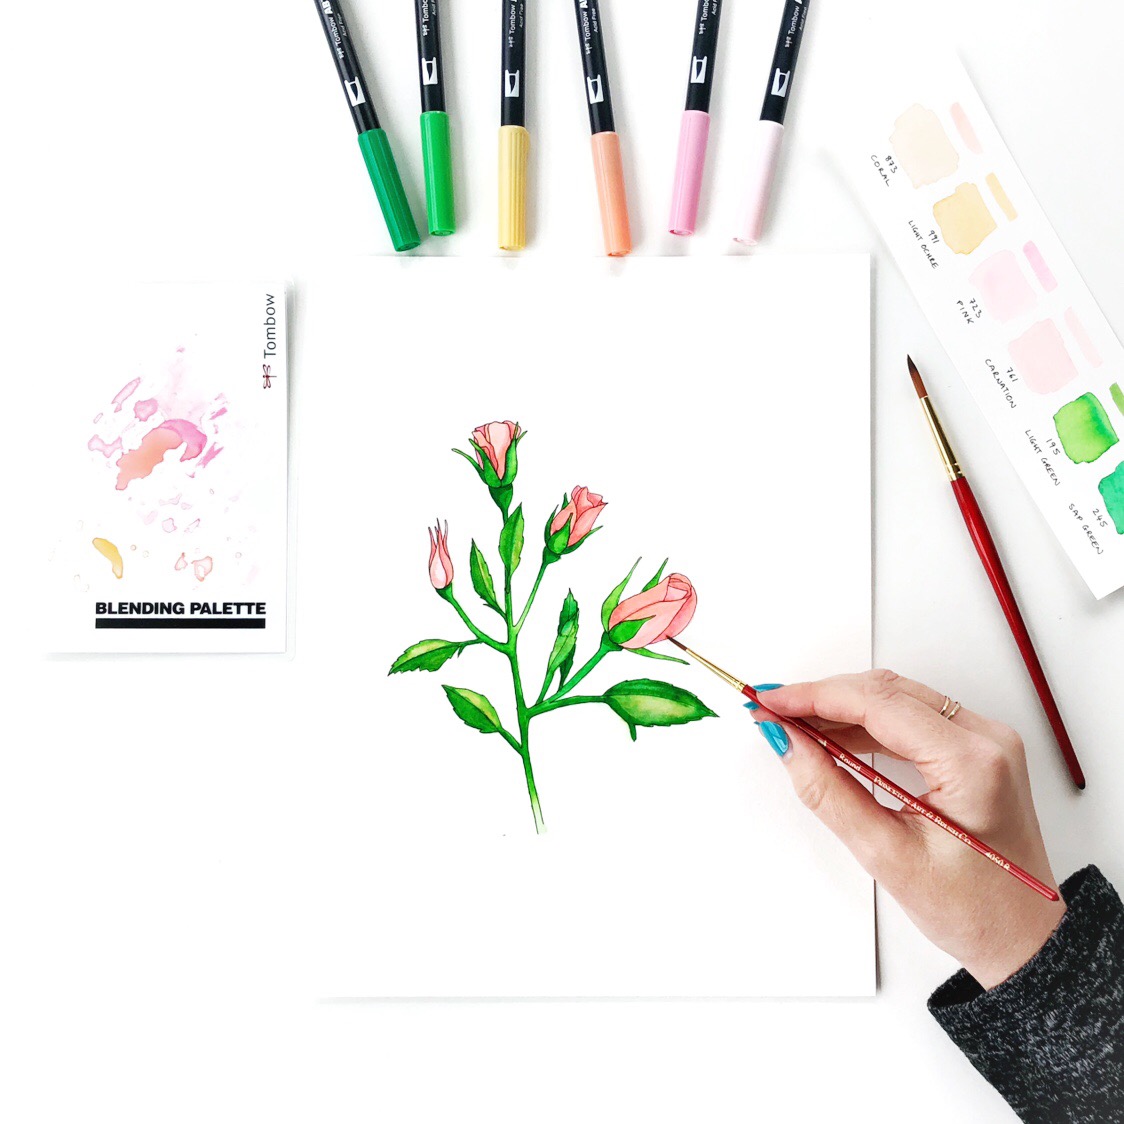
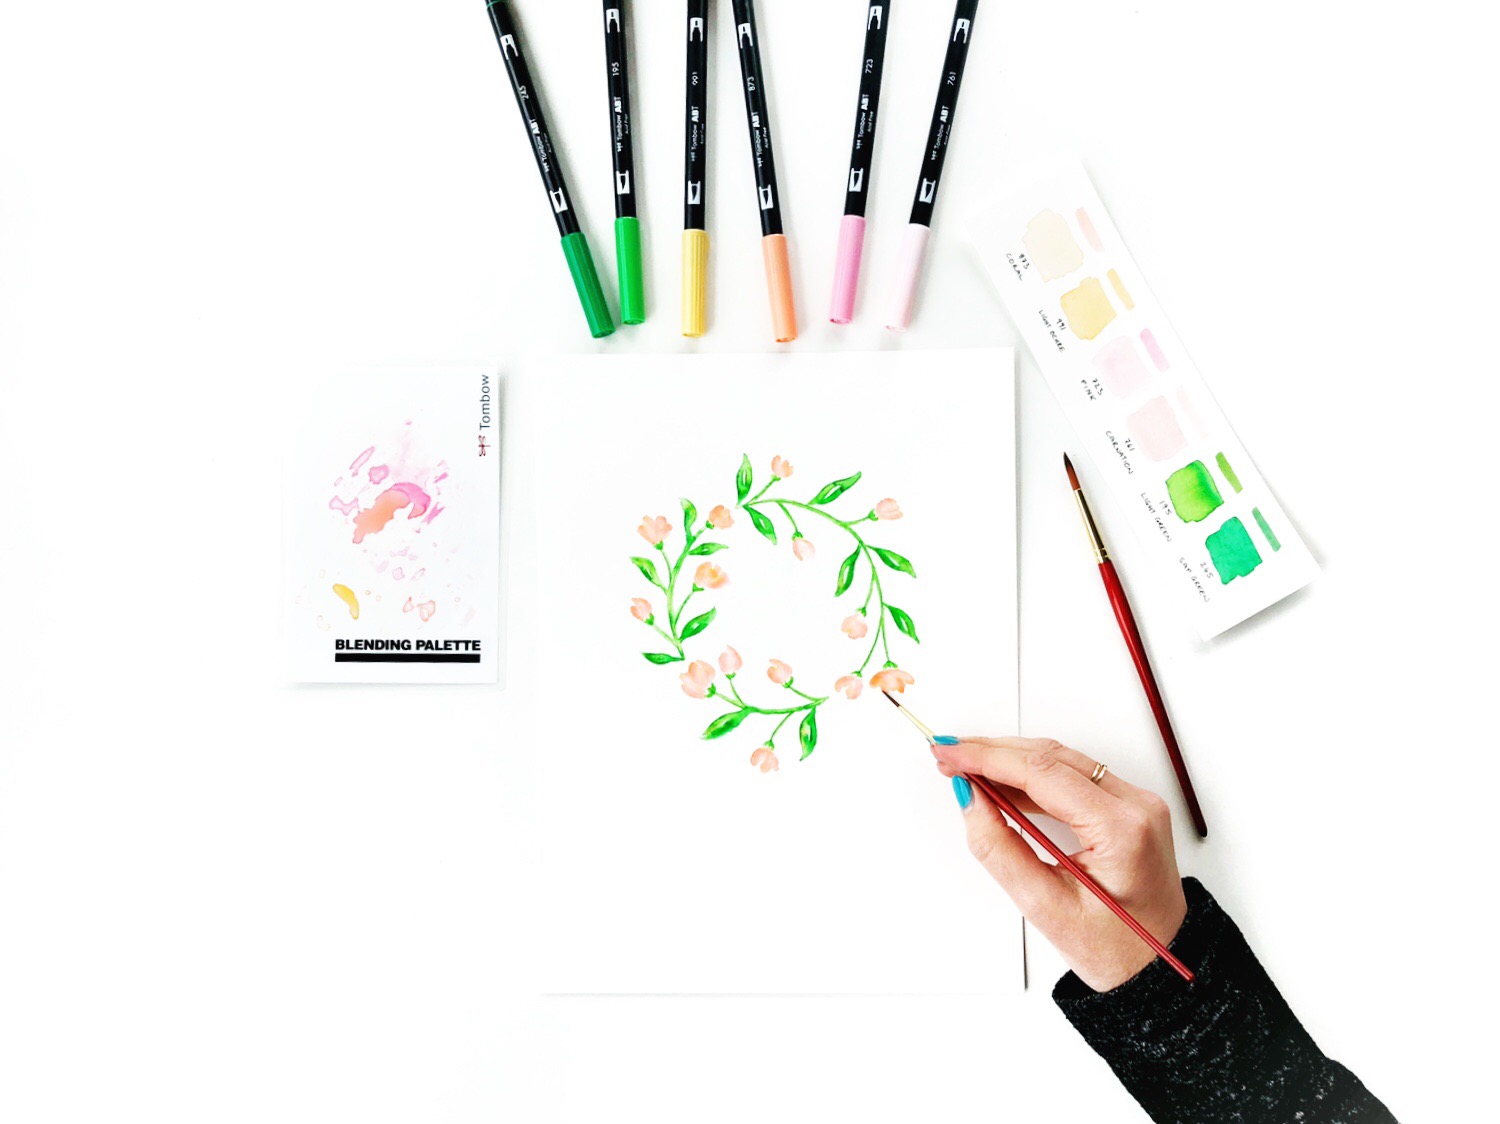
The class I’ll be teaching is How to Paint Watercolor Style Flowers Using Markers. It’s going to be so much fun! To follow along in my class you’ll only need a handful of supplies, and you can find those (along with a printable template to get you started) via the button below.

Supply List

You’re not going to want to miss Creative Retreat Live—last year’s event was basically the most fun I had all year. I left the retreat feeling inspired, connected, and energized, which was exactly what I needed in my life.

If you have any questions drop me a comment, or hit me up on Instagram.

In Ink, 1-One, Illustrations, Tutorial, Watercolor, Free Downloads
Comment

Rainbow Wreath Tutorial

December 29, 2021

Let’s paint a watercolor-look rainbow wreath together, using markers! Just drop your email in the form below to subscribe to my email list (I promise I rarely send emails and when I do, it’s only the good stuff) then you’ll see the link that will take you to the tutorial.

Let’s go!

Click here if you’re not automatically redirected to the tutorial.

In 1-One, Ink, Tutorial, Watercolor
Comment
JessicaMack-Mothers-Day-Art-8.jpg

Make Your Own Mother's Day Art

May 7, 2021

Today I’m going to show you how to create your own floral Mother's Day art. This project is designed to be tailored to the individual so it will be all the more special. Here's what you'll need to get started.

Supplies

  • Tombow MONO Drawing Pencil (4H)

  • Tombow MONO Twin Permanent Marker

  • Watercolor Paper

  • Tombow Blending Palette

  • Tombow Water Brush (Medium)

  • Ruler

  • Tombow Dual Brush Pens

  • Tombow MONO Drawing Pens

JessicaMack-Mothers-Day-Art-1.jpg

Step 1: Sketch Your Design

Choose a flower that your mom likes, or that reminds you of her. I've chosen chrysanthemums because we always grew them in the garden growing up and they would flower around Mother's Day (in Australia) and us kids would pick bunches of them for our mom.

Sketch your chosen flower onto your watercolor paper, using your MONO Drawing Pencil. I prefer to use the 4H for sketching because it's nice and light and easy to erase if you need to. You can draw your flower from memory or from reference photos.

Once you've drawn your flower, use your ruler to draw a shape around your flower. Depending on the size and layout of your drawing you might choose a triangle, square or some other shape that suits. You can even overlap the shape so that some of your flower is spilling out of the shape.

JessicaMack-Mothers-Day-Art-2.jpg

Step 2: Ink Your Drawing

Once you're happy with your pencil sketch use your MONO Twin Permanent Marker to ink over the lines of your flower. I recommend using the fine, ball-point tip for this step. The reason we're using the MONO Twin Permanent Marker and not the MONO Drawing Pens at this stage is that we're going to use wet ink over the top of the lines and we don't want any of them to smudge or blend.

JessicaMack-Mothers-Day-Art-3.jpg

Step 3: Fill In Your Background

Using the thicker, bullet tip on your MONO Twin Permanent Marker apply ink to the border of your shape and then start to fill in the background around your flower and leaves.

JessicaMack-Mothers-Day-Art-4.jpg
JessicaMack-Mothers-Day-Art-5.jpg

Step 4: Personalize Your Drawing

Now, using your MONO Drawing Pen, it's time to add a personal message or words that describe your mother in your eyes. You might choose to write them around the outside of the shape like I have, or fill in the entire white space of the paper!

JessicaMack-Mothers-Day-Art-6.jpg

Step 5: Add Color to Your Mother's Day Art

Next, you're going to color your drawing. Start by scribbling some ink from your Dual Brush Pens onto your Blending Palette. Next, use your Water Brush (filled with water) to transfer the ink from your Blending Palette to your paper. This first layer of color is designed to be fairly light because it will actually be the highlights or lightest areas of your finished artwork.

JessicaMack-Mothers-Day-Art-7.jpg

Step 6: Add the Final Layer of Color

Once your first layer of color is dry, use your Dual Brush Pens to add ink directly over the top to create the darker, more saturated areas. Think of these areas as anywhere that would have less light, so in between petals, areas of shadow etc.

JessicaMack-Mothers-Day-Art-8.jpg

Voila, you've got a personalized piece of Mother's Day art! I’d love to see what you create, so if you share it on social media tag @BrownPaperBunny. And if you're looking for more ideas, check out How to Paint Watercolor Flowers with Markers and Free Flower Coloring Pages.

In Ink, Illustrations, 1-One, Tutorial, Watercolor
Comment
Galaxy-Butterfly-1.jpg

Watercolor Galaxy Butterfly

April 26, 2021

If you’d like to learn how to make this little watercolor galaxy butterfly using Tombow Dual Brush Pens keep reading…they’re out of this world. ;)

If you’d rather paint with me via video in real-time check out my Skillshare class. Otherwise, keep reading!

Here’s what you’ll need to get started.

Supplies:

  • Tombow Dual Brush Pen Galaxy Palette

  • Watercolor Paper

  • Tombow MONO Twin Permanent Marker

  • White Gouache or Acrylic Paint

  • Tombow Water Brushes (small and medium)

  • Tombow MONO Drawing Pencil (4H)

  • Paper Towel

IMG_0540_jpg.jpg

Step 1: Draw Your Butterfly

Start by sketching out your butterfly shape in pencil, and once you’re happy with it got over the pencil lines with your MONO Twin Permanent Marker. This marker won’t bleed or run when you add water so you can paint right over the top of it. If you don’t feel confident drawing your own butterfly you can download my template below, print it and trace it onto your watercolor paper.

Download Butterfly Template
IMG_0524_jpg.jpg

Step 2: Add Color

Use your Dual Brush Pens to add color to the segments you’ve drawn on the wings. You can choose any colors and combinations that appeal to you, but here are a few of my favorite combos from the Galaxy Palette.

IMG_0551_jpg.jpg

You don’t have to be terribly neat or worry about staying in the lines too much because we’re going to cover up the white space with black at the end anyway.

IMG_0525_jpg.jpg

Step 3: Blend the Ink

Using your Medium Water Brush, or a wet paintbrush, blend the ink on your butterfly. Start with the lightest color and work your way to the darkest. Clean your brush in between segments so you don’t just spread your darkest ink over everything. I tend to keep a piece of folded paper towel handy for this purpose.

IMG_0530_jpg.jpg

Step 4: Fill in the White Space

Once your ink is completely dry you can either use the bullet tip of your MONO Twin Permanent Marker or the brush tip of your darkest Dual Brush Pen to fill in all of the white space of your butterfly. Be careful to leave the colored segments visible.

IMG_0549_jpg.jpg

Step 5: Add Stars

Once everything is completely dry it’s time to add your stars and make your butterfly truly galactic! Squeeze a small amount of white gouache or acrylic paint onto your palette and use your small Water Brush to add little dots and starbursts to the colored areas of your butterfly. Once they are all dry you can go back over any that aren’t as opaque as you’d like them to be. And voila, you have a watercolor galaxy butterfly!

IMG_0552_jpg.jpg

I’d love to see your creations, so tag @BrownPaperBunny if you share them to social media.

In Ink, Tutorial, Watercolor, 1-One
Comment
IMG_1209.jpeg

How to paint a watercolor cactus

January 27, 2021

On this little cactus you can practice blending on a palette, blending on paper, and dry ink over a wash.

I used the Tombow Watercolor Set (mine was kindly provided by Tombow but you can use my affiliate code ‘bpbunny’ to get 15% off your own).

Step 1

Scribble some 249 (Hunter Green) and some 993 (Chrome Orange) onto the Blending Palette that comes in the set. Use the Water Brush to blend some of the two colors together, leaving some of each unblended. Paint the mixed green onto your cactus, and while it’s still wet drop a little yellow into the places closest to where you imagine the sun would be, and a drop of unblended green in places furthest from your imaginary sun.

Step 2

Once the cactus is dry, use the same technique to add colors to the pot. Then wipe off your Blending Palette and scribble some 757 (Port Red) and 885 (Warm Red) onto it. Mix the ink with your Water Brush and add on some little flowers.

Step 3

After everything is dry, use your 993 Dual Brush Pen to color in the diamonds on the pot. You can then blend the ink directly on the paper, using your Water Brush. If you’d like, you can add spikes and shadow detail with the bullet tips of your Dual Brush Pens to finish it off.

In 1-One, Ink, Illustrations, Tutorial, Watercolor
Comment
Make+3D+Watercolor+Artwork+by+Jessica+Mack+of+BrownPaperBunny

Make 3D Watercolor Artwork

December 10, 2020

Today I’m going to show you how to make 3D watercolor artwork in rainbow colors! Here’s what you’ll need to get started.

Supplies:

  • Tombow Dual Brush Pens

  • Watercolor paper

  • Tombow Blending Palette

  • Tombow Foam Tape

  • Scissors

  • Tombow Water Brush (Medium)

  • Frame (optional) 

You can use my affiliate code ‘bpbunny15’ for 15% off all Tombow products.

Make 3D Watercolor Artwork by Jessica Mack of BrownPaperBunny

Step 1: Cut Out Leaves

You’re going to want to cut out at least 15-20 leaves from watercolor paper. You need enough that you can build upwards as well as out to get the 3D effect. You can either draw your design using a pencil first or just get straight to cutting out your shapes. They don’t have to look the same or be uniform. Tip: I used a large pair of scissors to cut out the basic shapes and then used these tiny and super-sharp ones to get into the smaller areas.

Make 3D Watercolor Artwork by Jessica Mack of BrownPaperBunny

Step 2: Paint Your Leaves

You can use any Dual Brush Pen colors you like. I’ve chosen Dual Brush Pens 925, 985, 296, 535, 606 and 847. Start by scribbling the ink onto your Blending Palette and then use your Water Brush to pick it up and blend it onto your leaves. This is why you need to use watercolor paper for this project. Thinner paper won’t hold up to the water-blended ink. You could either color each leaf with one color like I have in the example OR you could get really wild and make each one rainbow!

Make 3D Watercolor Artwork by Jessica Mack of BrownPaperBunny

Step 3: Add Detail

Using the bullet tip of your Dual Brush Pens, add some veins and detail to each of the leaves once they are dry. 

Make 3D Watercolor Artwork by Jessica Mack of BrownPaperBunny

Step 4: Build your 3D Watercolor Artwork

Start by laying your leaves out to get a rough idea of where you want to place them. Once you’re happy with the placement, start cutting small pieces of the Foam Tape and sticking the leaves to a separate piece of watercolor paper (or you could use card if you’d like for the backing). Make sure you build upwards as well as outwards. You can stick Foam Tape between layers of leaves to give them height or you can stick multiple pieces of tape on top of each other to create a little foam tower. Then, stick a leaf on top.

Make 3D Watercolor Artwork by Jessica Mack of BrownPaperBunny

Step 5: Frame Your Artwork!

You can use a shadow-box type frame or just leave the glass out of a regular frame so your 3D watercolor artwork has room to shine. It makes a nice gift. If you did a miniature version, you could make a pretty cool 3D card!

Make 3D Watercolor Artwork by Jessica Mack of BrownPaperBunny

I’d love to see what you made, so if you share it to social media make sure to tag @BrownPaperBunny so I can take a look.

If you’re looking for more watercolor projects, check out How to Paint Watercolor Flowers with Markers.

----------

Please note: This blog post contains affiliate links, which help pay for the upkeep of this site. That being said, I will never, ever promote anything I am not 100% in love with.

In 1-One, Ink, Tutorial, Watercolor
Comment
How to Paint Watercolor Flowers Using Markers by Jessica Mack of BrownPaperBunny

How to Paint Watercolor Flowers Using Markers

August 29, 2020

I love the way watercolor looks, but I also really love how versatile, vibrant, and easy to carry markers are. So I’m going to show you how I use water-soluble markers to get a watercolor effect. Here’s what you’ll need to get started.

Supplies:

  • Watercolor Paper 

  • Tombow Dual Brush Pens

  • Waterproof Fine-Liner

  • Watercolor Brush

  • Blending Palette

You can use my affiliate code ‘bpbunny15’ for 15% off all Tombow products.

How to Paint Watercolor Flowers Using Markers by Jessica Mack of BrownPaperBunny

Step 1: Draw Your Flower

My friend Peggy has an awesome tutorial for drawing Hydrangeas in her new book Nature Drawing and Watercolor, or you can draw your own flower from a reference photo. I recommend using waterproof fine-liner pens so you can use markers and water over the top without the ink bleeding or running. 

Step 2: Apply a Light Wash

You can use any brand and color of water-soluble markers, but the ones I’m using here are Tombow Dual Brush Pens. They have a brush on one side and a bullet tip on the other. The specific colors I’m using are 873: Coral, 991: Light Ochre, 723: Pink, 761: Carnation, 195: Light Green, and 245: Sap Green.

Scribble some of your palest color down onto your blending palette then wet it with your paintbrush. Use the wet ink to apply a light wash across all of your flower petals. Once they are dry, do the same thing with your lightest green, for the leaves and stem of the flower. 

How to Paint Watercolor Flowers Using Markers by Jessica Mack of BrownPaperBunny

Step 3: Add a Second Color to Your Petals

In order to get a more realistic watercolor effect, and have your flowers look more interesting overall I think it’s fun to add at least two or three colors to the petals of your flowers. Start with your lightest colors because you can always build the color up but it’s hard to take it away if you go too dark early. 

Once the initial wash is dry, you can use the markers directly on the paper, then soften the edges of the color using a damp paintbrush. Just let each layer dry before applying the next one. 

It helps build depth if you use your darker colors where there would be a shadow on petals and leaves that fall behind others and leave the petals and leaves at the front a little lighter. 

How to Paint Watercolor Flowers Using Markers by Jessica Mack of BrownPaperBunny

Step 4: Add Shadows to Your Leaves

Use your darkest shade of green to add a small line of color where there would be a shadow on the leaves. This is usually closest to the flower where the petals would be blocking some of the light. Then use your damp paintbrush to blend the edges of the color to soften them.

How to Paint Watercolor Flowers Using Markers by Jessica Mack of BrownPaperBunny

Step 5: Add a Third Color to Your Petals

Time for some more delicious color on those pretty flower petals. Layer on a little more color, paying attention to the centers and areas of shadow. Then soften the edges with your damp paintbrush. 

How to Paint Watercolor Flowers Using Markers by Jessica Mack of BrownPaperBunny

Step 6: Add Final Details

Once everything is dry you can use the bullet tip of your Dual Brush Pens to add some finer detail to the leaves and center of the flowers to really make them pop. Then, voila, you’re all done. You’ve got a gorgeous flower you can frame, give as a gift, add to your art journal, or any number of other fun things! 

I’d love to see yours, so tag @BrownPaperBunny on social media!


You might also like to check out my new book Watercolor with Markers.


And if you’d like to learn more about using water-soluble markers to create watercolor-look flowers head over to my Skillshare class Create Watercolor Flowers Using Markers. See you there!

----------

Please note: This blog post contains affiliate links, which help pay for the upkeep of this site. That being said, I will never, ever promote anything I am not 100% in love with.

In 1-One, Illustrations, Ink, Tutorial, Watercolor
Comment
Make Your Own Watercolor Bookmark by Jessica Mack of BrownPaperBunny

Make Your Own Watercolor Bookmarks

August 16, 2020

Today I want to show you how to make your own watercolor bookmarks. They make super cute gifts, especially when paired with a new book! Here's what you'll need to get started:

Supplies:

  • Tombow Dual Brush Pens

  • Watercolor Paper

  • Tombow Water Brush (Medium)

  • Scissors

  • Hole Punch (optional)

  • Tassel (optional)

  • White Gel Pen (optional)

Make Your Own Watercolor Bookmark by Jessica Mack of BrownPaperBunny

Step 1: Draw Your Shapes

Using your Dual Brush Pens draw shapes or images all over your watercolor paper. They don't have to be fancy, just anything that you can draw over and over will work. Try polka dots, hearts, simple flowers, leaves, lines, etc.

Make Your Own Watercolor Bookmark by Jessica Mack of BrownPaperBunny

If you'd like to have a watercolor effect, wet and blend each shape with your Water Brush. I used the Medium size for mine. Let the ink dry completely before moving on to the next step.

Make Your Own Watercolor Bookmark by Jessica Mack of BrownPaperBunny

Step 2: Add Details

The next step is to add some more details to fill in some of the white spaces. I've used leaves, but for example, if you chose hearts you can add smaller or overlapping hearts to fill some of the empty spaces.

After I drew my leaves with Dual Brush Pens I used the Water Brush again to blend the ink. Then once it was completely dry, I used a white gel pen to put a few lines on some of the darker leaves.

Make Your Own Watercolor Bookmark by Jessica Mack of BrownPaperBunny

Step 3: Cut Out Your Bookmarks

Decide how big you want your bookmarks to be and cut them out. I started with a 9x12" piece of watercolor paper and I cut it in half, and then cut each half into four equal strips.

Next, decide whether or not you want to decorate them with tassels. If you do, you'll need to punch a hole in the end and attach a tassel. You can either make your own tassels from embroidery thread or you can buy them ready-made.

Make Your Own Watercolor Bookmark by Jessica Mack of BrownPaperBunny

I can't wait to see yours! Tag @BrownPaperBunny on social media to show me!

If you're looking for more bookmark ideas check out this tutorial on Rainbow Watercolor Bookmarks.

Make Your Own Watercolor Bookmark by Jessica Mack of BrownPaperBunny

----------

Please note: This blog post contains affiliate links, which help pay for the upkeep of this site. That being said, I will never, ever promote anything I am not 100% in love with.

In 1-One, Illustrations, Ink, Pattern, Tutorial, Watercolor
Comment
Paint a Two-Tone Portrait by Jessica Mack on BrownPaperBunny

Paint a Two-Tone Portrait

May 8, 2020

I'm going to show you how to paint a two-tone portrait today.

This is a re-do of an old portrait I created back in 2018. I thought it would be fun to see if I could improve on it given the practice I've had since then.

Here's the original. You can see I was a bit heavy-handed with the water, and I blended most of the shadow areas together into one dark mess. Let's see if we can improve on that!

Paint a Two-Tone Portrait by Jessica Mack on BrownPaperBunny

Follow along with me and let's make a two-tone portrait together! Here's what you'll need to get started.

Supplies:

  • Tombow MONO Graph Mechanical Pencil

  • Watercolor Paper

  • Tombow Dual Brush Pens

  • Artist's Tape

  • Tombow Water Brush (Medium)

  • Tombow Blending Palette

Paint a Two-Tone Portrait by Jessica Mack on BrownPaperBunny

Step 1: Sketch Out Your Face

Find a good reference photo that has clearly defined shadow and light areas. If it's black and white, that's even better because we're going to be sticking to two main colors anyway. Pay particular attention to where the main light source or sun appears to be coming from. You'll find the shadows get darker in the areas that are furthest from that source.

Stick your watercolor paper onto your table to keep it from warping once you add water. Then sketch your face using your MONO Graph Mechanical Pencil. If you're not confident with your people-drawing skills, you can use tracing paper to transfer the basic shapes and location of the features onto your paper.

Paint a Two-Tone Portrait by Jessica Mack on BrownPaperBunny

Step 2: Find the Shadows

Choose the two main colors that you want to use for your portrait. I've chosen blues and teals, but you could choose any colors that blend nicely together. For example, blue and purple, orange and pink, yellow and green etc.

Locate the darkest areas of shadow on your reference photo. Then, scribble some dark ink onto the Blending Palette and use your Water Brush to transfer the ink and map out those darkest areas on your watercolor paper.

Paint a Two-Tone Portrait by Jessica Mack on BrownPaperBunny

Step 3: Layer Colors

Once your first layer is dry you can add additional colors or tones over the top. Work your way around the portrait, making sure to let the areas you've just painted dry before you paint the areas next to them, otherwise, the ink will bleed together (like in my original portrait). Use your darkest shades for shadows and your lightest colored Dual Brush Pens on the lightest parts of your portrait. Try to leave some of the paper free of color in the absolute lightest areas to provide more contrast.

Paint a Two-Tone Portrait by Jessica Mack on BrownPaperBunny

Step 4: Add Details

Once you've added the bigger areas of color you can use the brush tip or the bullet tip on your Dual Brush Markers to add some smaller details like eyelashes, lip creases etc. You can also go over your darker areas of shadow with Dual Brush Pen directly for added impact and depth.

Paint a Two-Tone Portrait by Jessica Mack on BrownPaperBunny

Step 5: Add a Background to Your Two-Tone Portrait

This step is optional, but you can add a soft wash to the background if you don't want to leave it white. For mine, I kept the right half lighter because that is where my light source was coming from, and gradually got darker as I moved to the right of the portrait.

Paint a Two-Tone Portrait by Jessica Mack on BrownPaperBunny

Once everything is dry you're ready to snap a photo and share it with me on social media! Tag @BrownPaperBunny so I can see!

And if you're looking for more tutorials on portraits, or drawing people, check out my tutorial on How to Draw Lips.

In 1-One, Illustrations, Ink, Tutorial, Watercolor
1 Comment
Make a Carrot Banner for Easter by Jessica Mack on BrownPaperBunny

Make a Carrot Banner for Easter

March 30, 2020

Today I’m going to you how to make a cute carrot banner for Easter. This is a great project to get the kids involved in, and looks super cute strung across a mantle or above a window or door. Here's what you'll need to get started.

Supplies:

  • Tombow MONO Graph Mechanical Pencil

  • Tombow Dual Brush Pens (Pastel 10-Pack)

  • Watercolor Paper

  • Tombow Water Brush

  • Tombow MONO Drawing Pens

  • Scissors

  • Tombow MONO Multi XL Liquid Glue

  • Ribbon or thick string 

Make a Carrot Banner for Easter by Jessica Mack on BrownPaperBunny

Step 1: Draw and Color Your Carrots

The first step is to use your MONO Graph Mechanical Pencil to draw some carrot shapes onto your watercolor paper. Then, using your pastel Dual Brush Pens, color in each carrot. I made the tops of each one green, but you can go crazy with the colors however you'd like!

Next, blend the Dual Brush Pen ink using your Water Brush, to get a watercolor-look.

Make a Carrot Banner for Easter by Jessica Mack on BrownPaperBunny

Step 2: Add Details

Once the first layer of ink is dry, use the bullet tip end of your Dual Brush Pens to add some details to each carrot.

Make a Carrot Banner for Easter by Jessica Mack on BrownPaperBunny

Then use your MONO Drawing Pens to draw cute little faces onto each carrot. I like to add freckles to mine. ;)

Make a Carrot Banner for Easter by Jessica Mack on BrownPaperBunny

Step 3: Cut Them Out

Using your scissors, carefully cut around each of your carrots, to get them ready for the final step.

Make a Carrot Banner for Easter by Jessica Mack on BrownPaperBunny

Step 4: Glue Them Onto Ribbon

Using your MONO XL Multi Liquid Glue, glue each carrot onto ribbon or string. I like to put a little piece of scrap paper on the table when I'm gluing, just to keep my work surface clean. Also, it's best to let the carrot banner dry with the carrots facing down onto the table (the glue side facing up) to prevent them sticking to the table.

Make a Carrot Banner for Easter by Jessica Mack on BrownPaperBunny

Once it's dry, you're ready to hang up your carrot banner for Easter!

Make a Carrot Banner for Easter by Jessica Mack on BrownPaperBunny

I’d love to see how yours come out. Tag @BrownPaperBunny on social media so I can check it out!

If you’re looking for more Easter ideas, check out this tutorial on making watercolor Easter cards.

----------

Please note: This blog post contains affiliate links, which help pay for the upkeep of this site. That being said, I will never, ever promote anything I am not 100% in love with!

In Ink, Illustrations, Tutorial, Watercolor, 1-One
12 Comments
Make a Watercolor Planner Bookmark by Jessica Mack on BrownPaperBunny

Make a Watercolor Planner Bookmark

January 31, 2020

Today I’m going to show you how to make a watercolor planner bookmark for your Passion Planner. Passion Planners are built around a system to help you achieve your goals, focusing on the ones that will make the biggest difference in your life. After mapping out my Passion Plan I created a bookmark as an every-day reminder of what I'm working towards, and I want to show you how to make your own. Here's what you'll need to get started.

Supplies:

  • Tombow Dual Brush Pens (I chose the Landscape Palette 10-Pack)

  • Watercolor Paper

  • Passion Planner (Dated Forest Green pictured)

  • Tombow Water Brush (Medium)

  • Scissors

  • Tombow MONO Drawing Pencil (4H)

Make a Watercolor Planner Bookmark by Jessica Mack on BrownPaperBunny

Step 1: Sketch Your Design

After completing your Passion Roadmap and determining your Game Changer goal, pick a word that will remind you of that goal. Sketch it out on your watercolor paper, using a 4H MONO Drawing Pencil. You can choose to draw a pattern around the word, or images that relate to it, it's up to you. The word I'm using here is 'Create' with a honeycomb-patterned background.

Make a Watercolor Planner Bookmark by Jessica Mack on BrownPaperBunny

Step 2: Color Your Design

Once you're happy with your pencil sketch, use your Dual Brush Pens to add color to your background. Then blend each section of ink with your Water Brush. If you're right-handed I suggest working from left to right so you don't smear your ink while it's wet, and remember to clean your water brush in between each colored section (unless you'd like to mix the colors together). I usually have a piece of folded paper towel on hand for cleaning my brush.

Make a Watercolor Planner Bookmark by Jessica Mack on BrownPaperBunny

Step 3: Color Your Word

Once the background is completely dry it is time to add color to the word that you chose. I outlined the letters using the bullet tip on my Dual Brush Pen and then filled them in with the brush tip. And, if you want your word to be extra dark, wait a few minutes for the first layer to dry completely and then go back over it again. 

Make a Watercolor Planner Bookmark by Jessica Mack on BrownPaperBunny

Step 4: Cut Out Your Bookmark

The only thing left to do is cut out your bookmark and start using it as a daily reminder in your Passion Planner! Happy goal achieving!

Make a Watercolor Planner Bookmark by Jessica Mack on BrownPaperBunny

Come visit me on Instagram (@BrownPaperBunny) and tell me what tutorial you’d like to see next!

----------

Please note: This blog post contains affiliate links, which help pay for the upkeep of this site. That being said, I will never, ever promote anything I am not 100% in love with!

In Ink, May 2019, Portraits, Tutorial, Type, Watercolor
6 Comments
Watercolor Thanksgiving Cards

Watercolor Thanksgiving Cards

November 14, 2019

I’m loving the new Tombow Watercolor Set, and am basically using it for everything right now, including making Thanksgiving cards.

The MONO Twin Permanent Marker has a thick and a thin bullet tip perfect for lettering or adding line work. You can add watercolor over the top of it because it’s permanent. Awesome right?!

Watercolor Thanksgiving Cards

Here’s another Thanksgiving card I created using the new Tombow Watercolor Set. I drew the black outlines with the MONO Twin Permanent Marker, then added color using the Dual Brush Pens and blended it all together with the Water Brush that is included in the set. I’m going to send these out to friends and family and tell them why I’m thankful for them.

Watercolor Thanksgiving Cards

And the video below walks you through the steps to make this Thanksgiving card, which you could also turn into a cute place card if you’re hosting this year!

You’ll need some watercolor paper, masking tape, and the new Tombow Watercolor Set.

Start by masking off an area (where you’ll add some text at the end), then mix up some color using the Dual Brush Pens, Water Brush and Blending Palette that come in the set.

Paint on some leaves, or flowers, around your masked-off area. Once the ink has dried, go back over the top with a Dual Brush Pen to create darker shapes.

Remove the tape, add a message, and voila you’ve got yourself a quick and easy Thanksgiving card.

Drop me a comment and tell me your favorite thing about Thanksgiving.

----------

Please note: This blog post contains affiliate links, which help pay for the upkeep of this site. That being said, I will never, ever promote anything I am not 100% in love with!

In Ink, May 2019, Tutorial, Watercolor, Type
10 Comments
How to Make Watercolor Bookmarks by Jessica Mack on BrownPaperBunny

How to Make Watercolor Bookmarks

November 7, 2019

Today I’m going to show you how to make watercolor bookmarks using Tombow's Advanced Lettering Set. These make really cute gifts, especially when tucked inside a new book! Here's what you'll need to get started.

Supplies:

  • Tombow Advanced Lettering Set

  • Watercolor Paper

  • Tombow Water Brush (Medium)

  • Scissors

  • Hole Punch

  • Embroidery Thread 

How to Make Watercolor Bookmarks by Jessica Mack on BrownPaperBunny

Step 1: Pick Your Colors from the Advanced Lettering Set

Use two Dual Brush Pens from your Advanced Lettering Set to draw some color onto each end of your watercolor paper. All three of the colored pens included in the set blend nicely together so experiment with different color combinations.

How to Make Watercolor Bookmarks by Jessica Mack on BrownPaperBunny

Step 2: Blend

Now use your Water Brush to start blending the colors towards each other. To keep the brush tip wet just squeeze lightly on the barrel while you're working. Once the colors are blended in the middle, set the paper aside and wait for the ink to dry.

How to Make Watercolor Bookmarks by Jessica Mack on BrownPaperBunny

Step 3: Decorate Your Bookmarks

Use the MONO Drawing Pencil that comes in the set to sketch out any pictures or words you want to decorate your bookmarks with. Then use the Dual Brush Pens, Fudenosuke Brush Pens, or MONO Twin Permanent Marker over the top. Try a book-related quote, a stack of book spines, or maybe a pattern.

How to Make Watercolor Bookmarks by Jessica Mack on BrownPaperBunny

Step 4: Add a Tassel (optional)

Cut out your bookmarks and either leave them as is, or punch a hole in the top and make a tassel from embroidery thread to add to your bookmark.

How to Make Watercolor Bookmarks by Jessica Mack on BrownPaperBunny

I’d love to see your wonderful creations so tag @BrownPaperBunny on social media. Happy reading!

----------

Please note: This blog post contains affiliate links, which help pay for the upkeep of this site. That being said, I will never, ever promote anything I am not 100% in love with.

In Ink, May 2019, Tutorial, Watercolor, Type
3 Comments
Haunted House Silhouette by Jessica Mack on BrownPaperBunny

Create a Haunted House Silhouette with Markers

September 22, 2019

Please note: This blog post contains affiliate links, which help pay for the upkeep of this site. That being said, I will never, ever promote anything I am not 100% in love with!

----------

Halloween is just around the corner, so today I’m going to show you how to make this spookily fun and easy haunted house silhouette which can you can use to make your own Halloween cards, window decor, party invitations etc. Here's what you'll need to get started.

Supplies:

  • Tombow Dual Brush Pens

  • Watercolor Paper

  • Tombow Water Brush

  • Tombow MONO Graph Mechanical Pencil

  • Haunted House Silhouette (or you can draw your own)

  • Tombow MONO Drawing Pens

Haunted House Silhouette by Jessica Mack on BrownPaperBunny

Step 1: Color Your Background

Use your Dual Brush Pens to color your background. I chose 603-Periwinkle ,636-Imperial Purple, 569-Jet Blue, and N15-Black but you could use oranges and yellows, or any other color combination to color your sky. Start with the lightest color in the middle and work your way out to the darkest around the edges. Your coloring doesn't have to be precise or even because you're about to blend it all together with water.

Haunted House Silhouette by Jessica Mack on BrownPaperBunny

Step 2: Blend the Ink

Starting in the middle, use your Water Brush to blend the Dual Brush Pen ink together. By starting from your lightest color and working your way outwards you'll avoid all of the colors becoming too dark as they blend.

Haunted House Silhouette by Jessica Mack on BrownPaperBunny

Step 3: Draw Your Haunted House Silhouette

Use your MONO Graph Mechanical Pencil to draw the outlines of your silhouette. You can make up your own, or download this one I've drawn for you and trace it onto your background.

Download Template
IMG_1978.jpg

Step 4: Color in the Silhouette

Using your 05 MONO Drawing Pen, draw around the outlines of your haunted house silhouette, then color it in with your N15 Dual Brush Pen. Spookily fun right?!

Pro tip: if you can still see some of the background color through the silhouette, wait for the ink to dry completely then go over it again to make it even darker.

IMG_5916.JPG

I’d love to see your haunted house silhouettes, so tag @BrownPaperBunny on social media!

In Illustrations, Ink, May 2019, Tutorial, Watercolor
4 Comments
Exclusive Tombow Dual Brush Pen Packs for Michael's by Jessica Mack of BrownPaperBunny

Exclusive Tombow Dual Brush Pen Packs for Michael's

August 12, 2019

A while back I worked with Tombow on some Dual Brush Pen packs, exclusive to Michaels Stores.

There is a Botanical Illustration, a Fashion Illustration, and a Watercolor Favorite's pack that are available now! I've been dying to share this project with you, but was waiting for them to show up in stores first!

Exclusive Tombow Dual Brush Pen Packs for Michael's by Jessica Mack of BrownPaperBunny

I worked on the packaging artwork and layout, and even helped select the colors for the fashion illustration pack. I also put together promotional artwork and videos.

Exclusive Tombow Dual Brush Pen Packs for Michael's by Jessica Mack of BrownPaperBunny

It’s no secret that I love Tombow Dual Brush Pens, so being part of this project was such a wonderful experience!

In Fashion Illustration, Illustrations, Ink, May 2019, Watercolor
5 Comments
public.jpeg

Art Journal Page with Markers

July 27, 2019

Please note: This blog post contains affiliate links, which help pay for the upkeep of this site. That being said, I will never, ever promote anything I am not 100% in love with!

----------

Here’s an easy way to make an art journal page with markers! Water soluble markers are vibrant and versatile and can give you a huge variety of different effects! Here's what you'll need to get started.

SUPPLIES:

  • Tombow Dual Brush Pens

  • Watercolor Paper or sketchbook

  • Tombow Water Brush

  • Fudenosuke Brush Pen (hard tip)

  • MONO Air Correction Tape

public.jpeg

Step 1: Create a Background

Scribble ink onto the page with your Dual Brush Pens, choosing colors that will blend together nicely (greens and blues, or oranges and pinks for example).

Next, use your Water Brush to blend the ink together.

Step 2: Add Background Pattern

Once the background color is dry, it’s time to add a pattern to your art journal page. Use the bullet tip of your markers to create a repeating pattern. I did scales, but you could use anything: Stars, hearts, flowers, leaves, shapes etc.

public.jpeg

Step 3: Add a Quote

The next step is to use your correction tape to create white lines for you to write on, then use your Fudenosuke Pen to add your favorite quote, or some words of your own!

public.jpeg

Do you have a favorite quote? Let me know in the comments!

In Ink, May 2019, Pattern, Tutorial, Type, Watercolor
4 Comments
How to Make a Repeat Pattern on Paper by Jessica Mack of BrownPaperBunny

How to Make a Repeat Pattern on Paper

July 15, 2019

Please note: This blog post contains affiliate links, which help pay for the upkeep of this site. That being said, I will never, ever promote anything I am not 100% in love with!

----------

Today I’m going to show you how to turn the cactus emoji into a repeat pattern on paper. The cactus emoji is one of my personal favorites, and it's so simple to draw that you'll easily be able to do it over and over to get a repeating pattern. Here's what you'll need to get started.

Supplies:

  • Tombow Dual Brush Pens

  • Watercolor Paper

  • Tombow Water Brush

  • Scissors

  • Tape

  • A Phone, Camera, or Scanner 

How to Make a Repeat Pattern on Paper by Jessica Mack of BrownPaperBunny

Step 1: Draw Your Cactus

Starting in the middle of your watercolor paper, draw cactus emojis facing in different directions. I used Dual Brush Pen 173 for the first layer, but you can use any color you like. Then use a darker color (I used 195) to draw some lines at the bottom of each cactus, before using your Tombow Water Brush to blend the ink together. Leave white space around the outside edges of the paper, we'll fill those in later.

How to Make a Repeat Pattern on Paper by Jessica Mack of BrownPaperBunny

Step 2: Cut Your Paper in Quarters

Once the ink is dry on your cactus emojis, cut your paper into four even quarters. Be sure to get the measurements exact or your repeat pattern won't work at the end. To prepare for the next step it helps to put a small number on the back of each quarter in case they get mixed up.

How to Make a Repeat Pattern on Paper by Jessica Mack of BrownPaperBunny

Step 3: Shift Each Quarter

This bit seems a bit tricky but just follow the numbers if you get confused. Move your top two quarters to the bottom, then move your left two quarters to the right side. Here's what you'll end up with. All of your cacti should be around the outsides and the middle of your paper should be blank.

How to Make a Repeat Pattern on Paper by Jessica Mack of BrownPaperBunny

Step 4: Tape Everything Back Together

Carefully turn over your drawing, making sure the quarters stay in the same order. Line up the edges and tape it back together.

How to Make a Repeat Pattern on Paper by Jessica Mack of BrownPaperBunny

Step 5: Fill in the Middle

Using the same technique as in Step 1, draw more cacti to fill in the middle space of your paper.

How to Make a Repeat Pattern on Paper by Jessica Mack of BrownPaperBunny

Step 6: Add Extra Details

This step is optional, but if you'd like to make your cacti look a little fancier, use the bullet tips on your Dual Brush Pens to add some small details. Cactus needles, flowers etc.

How to Make a Repeat Pattern on Paper by Jessica Mack of BrownPaperBunny

Step 7: Photograph or Scan

Using your phone, camera or scanner, digitize your repeat pattern tile. If you're taking a photo make sure you've got good, bright lighting. Adjust the brightness until the cut marks are minimized.

Step 8: Put it on Everything

You can frame your finished artwork, or upload the digital copy to any number of web services that will let you put it on mugs, t-shirts, throw cushions, rugs and more! Here are just a few examples I made, using Society6.

How to Make a Repeat Pattern on Paper by Jessica Mack of BrownPaperBunny

I’d love to see what you make, tag @BrownPaperBunny on social media!


In Illustrations, Ink, May 2019, Pattern, Tutorial, Watercolor
9 Comments
Paint a Watercolor Peach with markers. By Jessica Mack of BrownPaperBunny.

Paint a Watercolor Peach

June 30, 2019

Please note: This blog post contains affiliate links, which help pay for the upkeep of this site. That being said, I will never, ever promote anything I am not 100% in love with!

----------

Today I'm going to show you how to use Dual Brush Pens to paint a watercolor peach that you can use on recipe cards, greeting cards, or in your planner or art journal. Here's what you'll need to get started.

Watercolor Peach Supplies:

  • Tombow Dual Brush Pens

  • Watercolor Paper

  • Tombow Water Brush

You can choose whichever Dual Brush Colors you like, but for this project I used 772, 885, and 985 for the peach and 173 and 195 for the leaves.

Paint a Watercolor Peach with markers. By Jessica Mack of BrownPaperBunny.

Step 1: Draw Your Peach

Use your first color to draw a rough peach shape. The pink I'm using here is 772.

Paint a Watercolor Peach with markers. By Jessica Mack of BrownPaperBunny.

Step 2: Color Your Peach

Use your other colors (I'm using 985 and 885 here) to fill in the rest of your peach shape. There's no need to be precise with this stage because you're going to blend the colors together in the next step.

Paint a Watercolor Peach with markers. By Jessica Mack of BrownPaperBunny.

Step 3: Blend With Water

Use your Tombow Water Brush to blend the colors together on your watercolor peach. I like to start with the lighter color and then move over to the darker shades. Keep blending gently until you have a result you like, but don't scrub too much because the paper becomes more fragile when it's wet.

Paint a Watercolor Peach with markers. By Jessica Mack of BrownPaperBunny.

Step 4: Draw the Leaves

Use your lightest green shade to draw in a long, skinny peach leaf. Then use the water brush to go over it and blend the ink together.

Paint a Watercolor Peach with Markers. By Jessica Mack of BrownPaperBunny.

Step 5: Add Details to Your Watercolor Peach

Once your peach and leaves are dry you can add details with the bullet tip end of your Dual Brush Pens.

Paint a Watercolor Peach with Markers. By Jessica Mack of BrownPaperBunny.

Voila, you've got a fun watercolor peach which you can turn into a greeting card, use on a recipe card, in your planner etc.

Paint a Watercolor Peach with Markers. By Jessica Mack of BrownPaperBunny.
In Illustrations, Ink, May 2019, Tutorial, Watercolor
Comment
FullSizeRender.jpg

'60s Inspired Art Journal Page

May 27, 2019

Please note: This blog post contains affiliate links, which help pay for the upkeep of this site. That being said, I will never, ever promote anything I am not 100% in love with!

----------

This week I’m creating projects with a retro vibe, so I’m going to show you how to make an art journal page that looks like a ‘60s band poster.

SUPPLIES:

  • Tombow Dual Brush Pens

  • MONO Drawing Pens

  • MONO Graph Mechanical Pencil

  • Art Journal or Sketchbook

FullSizeRender.jpg

Step 1: Draw Your Outlines

The first step is to draw (or trace) a face profile, use your own for a fun self portrait. Then fill in the whole page with wavy hair.

FullSizeRender.jpg

Step 2: Add Some Lettering

Next, use some retro lettering to write words into the hair (I wrote things that make me happy). Fill blank hair sections with doodles of hearts, and daisies.

FullSizeRender.jpg

Step 3: Add Color

Using a retro color palette it’s time to use your Dual Brush Pens to color each section of the hair and lettering. To get a watercolor look you can blend the ink in each section with a damp paintbrush. What words would you write into the hair?

FullSizeRender.jpg
FullSizeRender.jpg

Step 4: Pull Out Details

Once you’ve finished coloring your journal page, you can go over the facial features with the bullet tip of one of your Dual Brush Pens for more definition. Voila, you have a ‘60s inspired journal page!

FullSizeRender.jpg

Let me know what your favorite decade is and why in the comments! 

In Tutorial, Type, Ink, May 2019, Illustrations, Watercolor
4 Comments
Create Watercolor Flowers Using Markers by Jessica Mack of BrownPaperBunny.

Create Watercolor Flowers Using Markers

May 20, 2019

I love the look of watercolor, but I also love the portability and vibrancy of markers. So in my latest Skillshare class I’ll teach you how to create watercolor-look flowers using markers.

The class is perfect for beginners, or more experienced artists looking to try some new techniques.

I’ll walk you through the three main techniques I use with the markers, and blending with water, then for the class project you’ll create your very own floral wreath!

Create Watercolor Flowers Using Markers by Jessica Mack of BrownPaperBunny.

Tombow has been kind enough to give students of the class a 15% off all products, and if you are new to Skillshare you can get your first two months for free by using this link! I can’t wait to see what you make!

View the Class
In May 2019, Watercolor, Tutorial, Illustrations, Ink
9 Comments
Older Posts →

Subscribe

Sign up to receive social media tips, freebies, special promotions, and art tutorials!

Thank you!

Please click confirm in the email you were just sent!

Directory of Illustration Jessica Mack

Shop my work on Society6

Watercolor World Map by Jessica Mack of BrownPaperBunny

Follow on Instagram

For the 100 Days Project this year I’m keeping it super low pressure. I’ve got a very busy couple of months coming up and want to set myself up to be able to stick with it, while still making sure I do something creative every day. You ca

See my classes on Skillshare

Skillshare Classes by Jessica Mack

Popular Posts

Popular Posts
CRL-Horizontal-Laptop-Beige-Floral-Painting.jpg
Creative Retreat Live
Rainbow-Watercolor-Wreath-Using-Markers.JPG
Rainbow Wreath Tutorial
15 Ways to Journal by Jessica on BrownPaperBunny
15 Ways to Journal
Tombow Brush Pen Markers and Colored Pencils
Brown Paper Bunny

Privacy + Terms of Use

Shop

Watercolor with Markers Book

Classes

Art Tutorials

Art & Illustration Portfolio

About

Contact

Custom Book Print

Custom Book Mug

How to Paint Watercolor Flowers Using Markers

Free Fashion Croquis

Start an Art Journal

6 Easy Flowers to Draw with Tombow Markers

Make Your Own Watercolor Bookmarks