• Book
    • Watercolor with Brush Pens
    • Watercolor Flowers Using Markers
    • Paint a Watercolor Galaxy Butterfly with Markers
    • Paint Watercolor Galaxy Bookmarks using Markers
    • Timelapse Video for Artists
  • Shop
  • Society6 Store
  • Blog
  • Portfolio
  • About
  • Contact
Menu

Brown Paper Bunny Studio

Art & Fashion Illustration
  • Book
  • Classes
    • Watercolor with Brush Pens
    • Watercolor Flowers Using Markers
    • Paint a Watercolor Galaxy Butterfly with Markers
    • Paint Watercolor Galaxy Bookmarks using Markers
    • Timelapse Video for Artists
  • Shop
  • Society6 Store
  • Blog
  • Portfolio
  • About
  • Contact
Make a Watercolor Planner Bookmark by Jessica Mack on BrownPaperBunny

Make a Watercolor Planner Bookmark

January 31, 2020

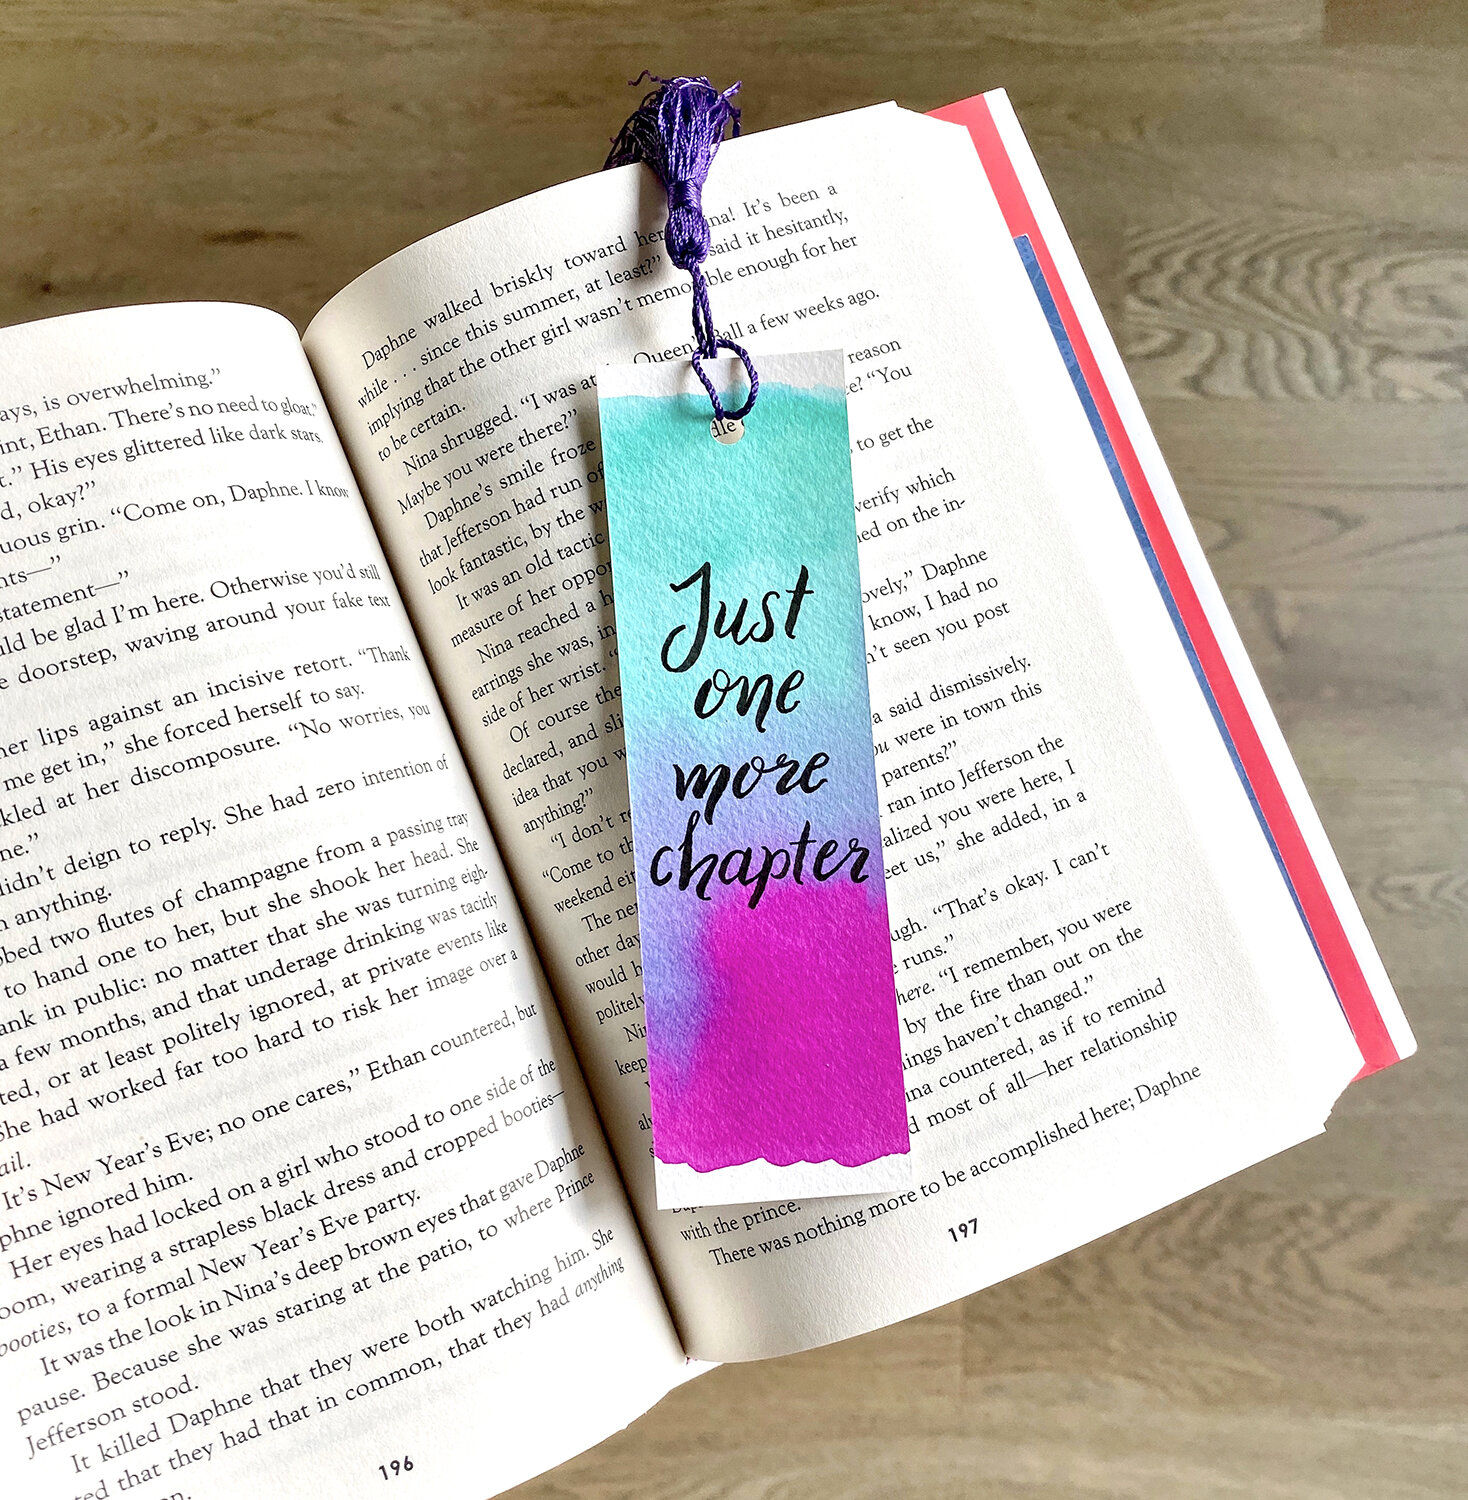
Today I’m going to show you how to make a watercolor planner bookmark for your Passion Planner. Passion Planners are built around a system to help you achieve your goals, focusing on the ones that will make the biggest difference in your life. After mapping out my Passion Plan I created a bookmark as an every-day reminder of what I'm working towards, and I want to show you how to make your own. Here's what you'll need to get started.

Supplies:

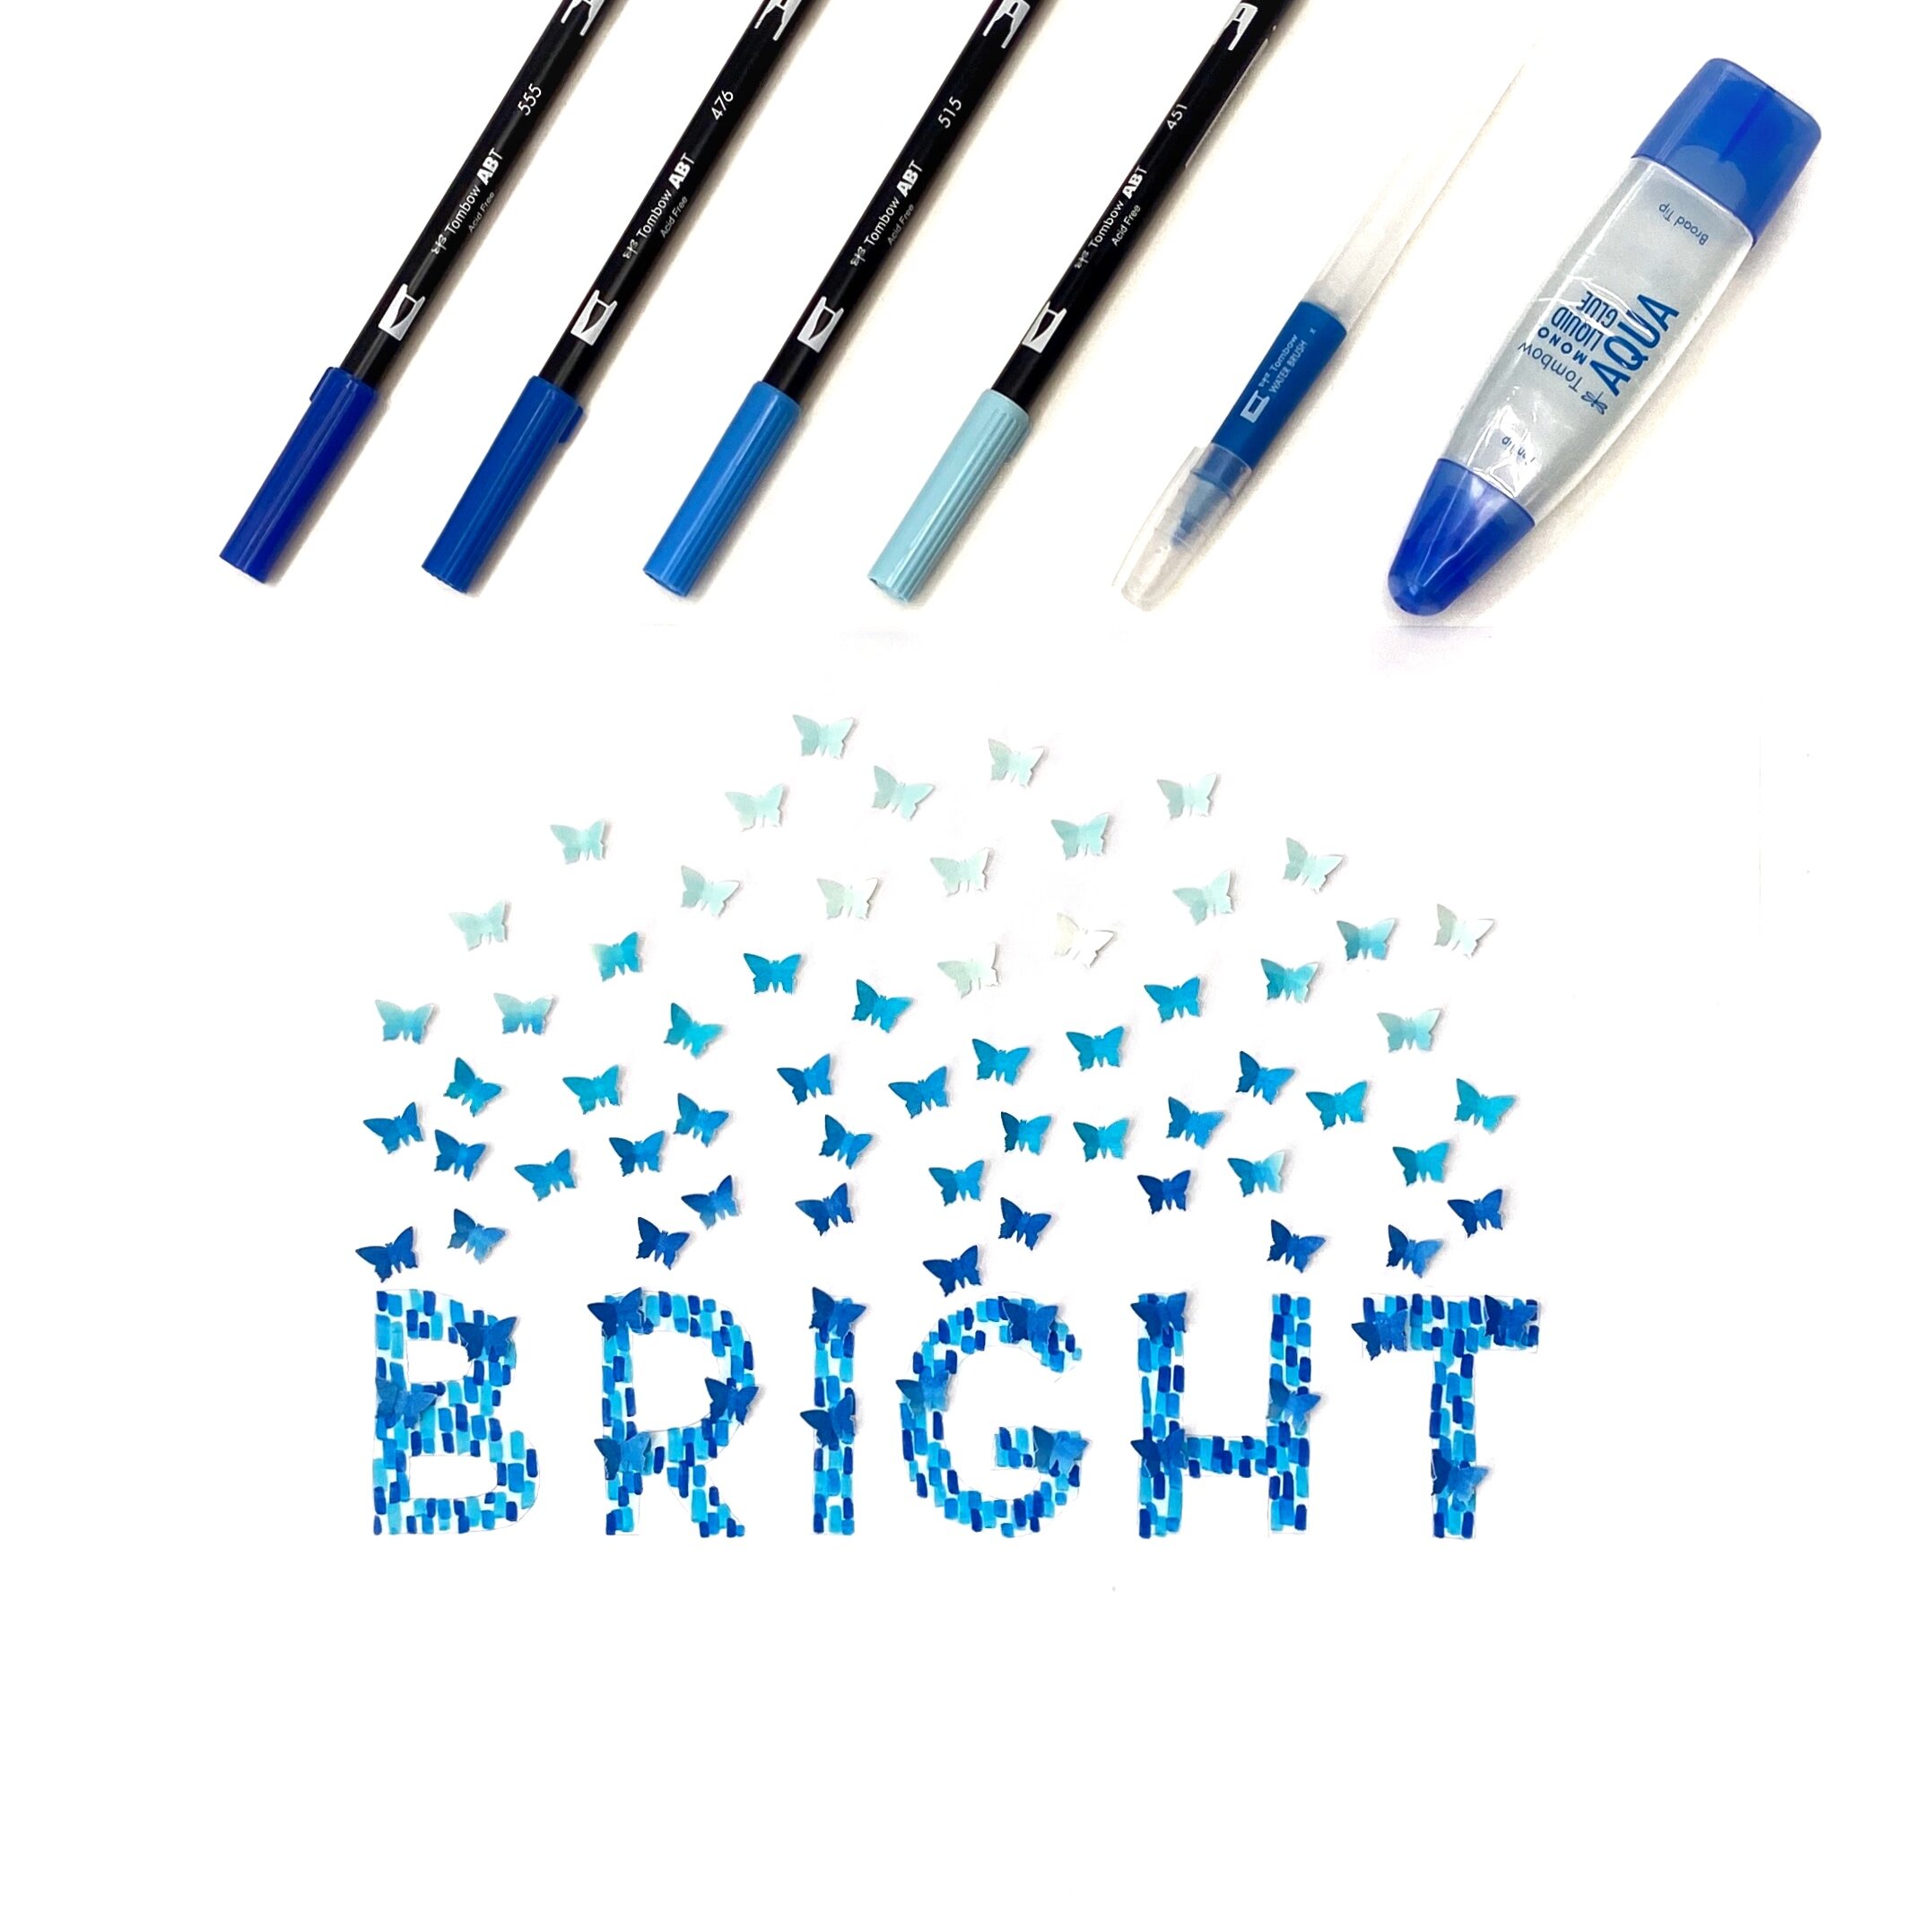
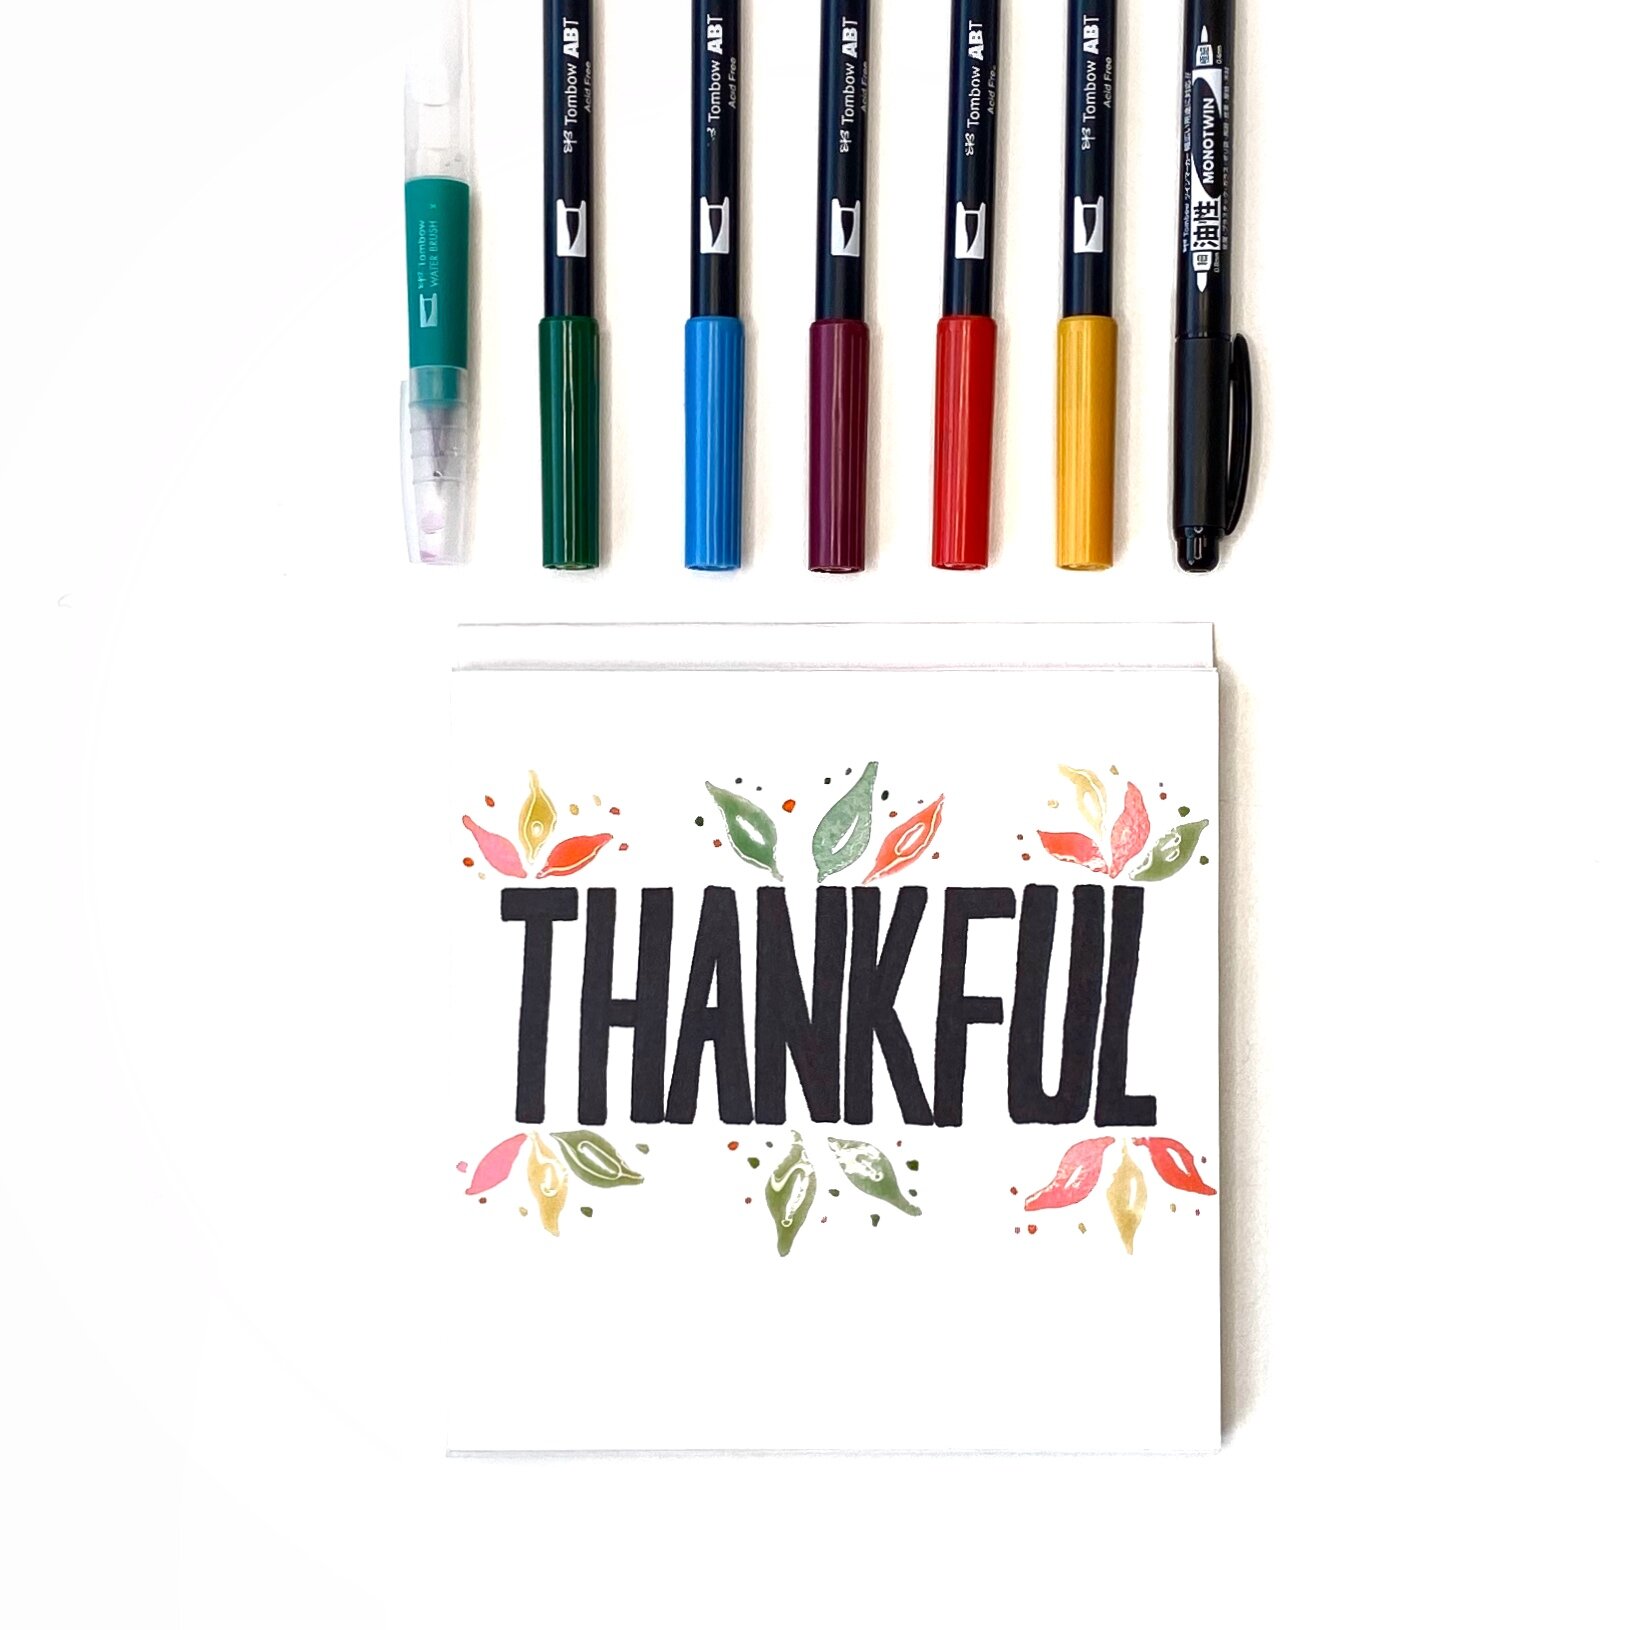
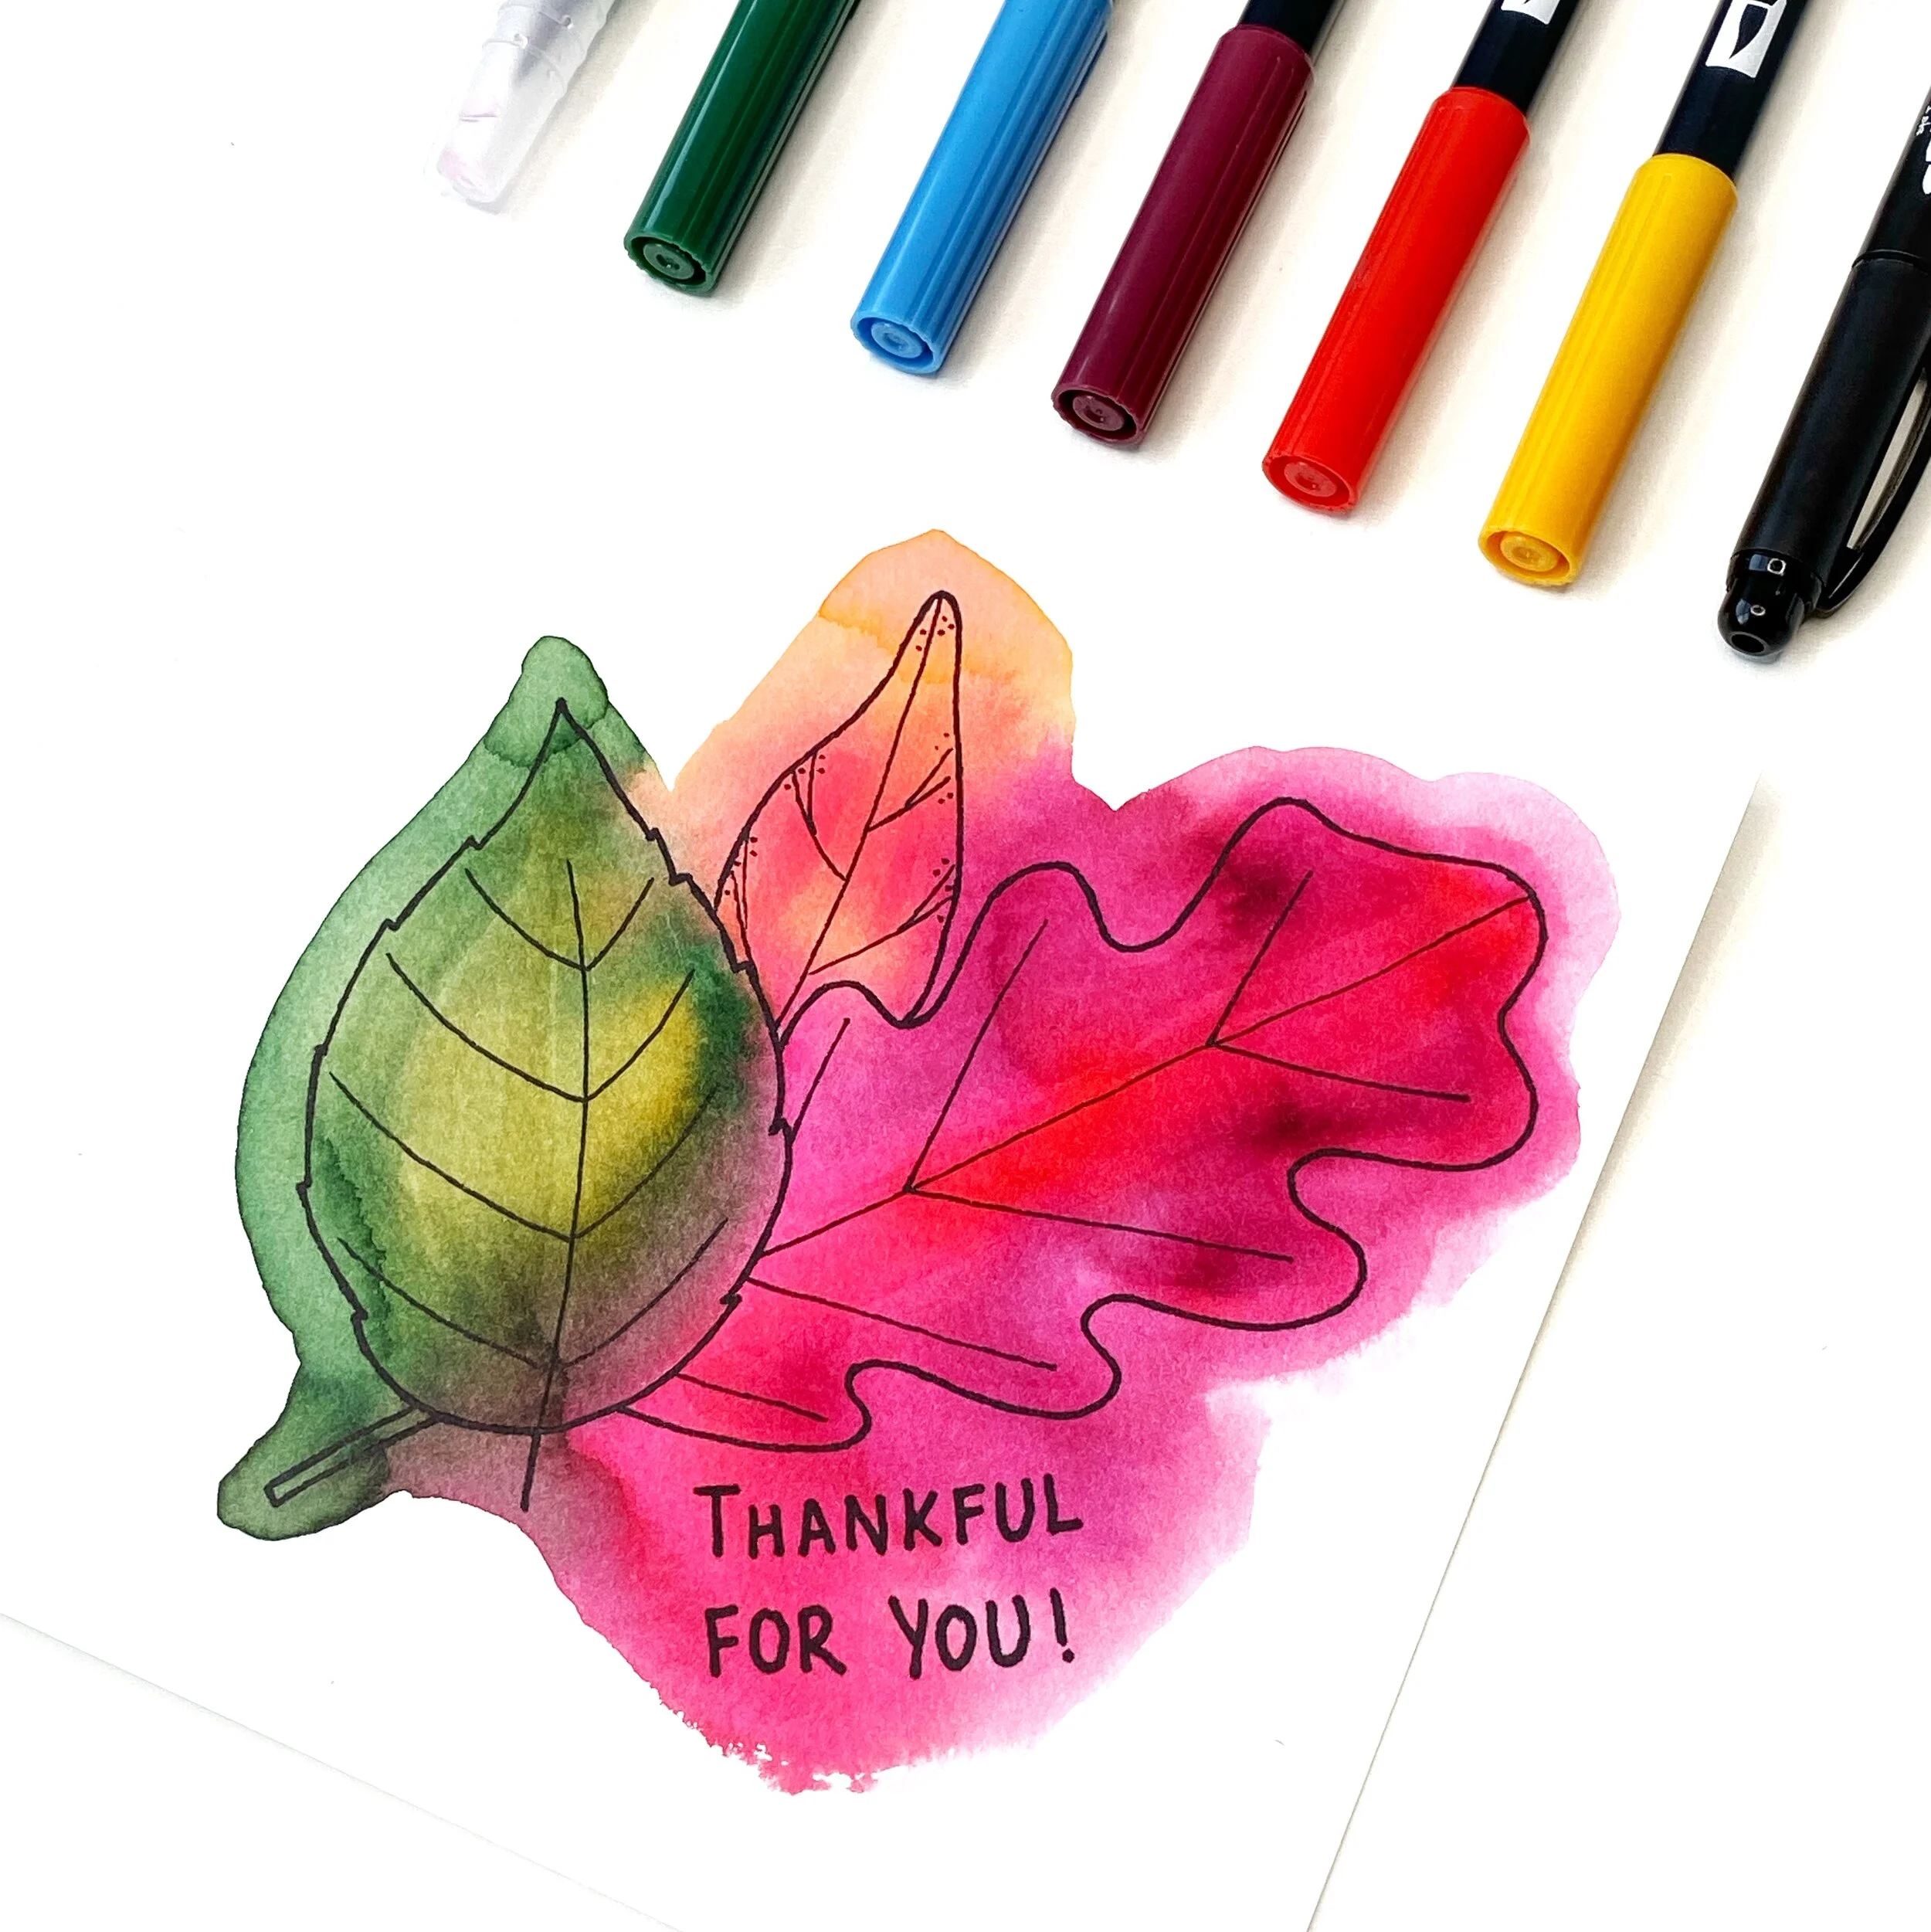
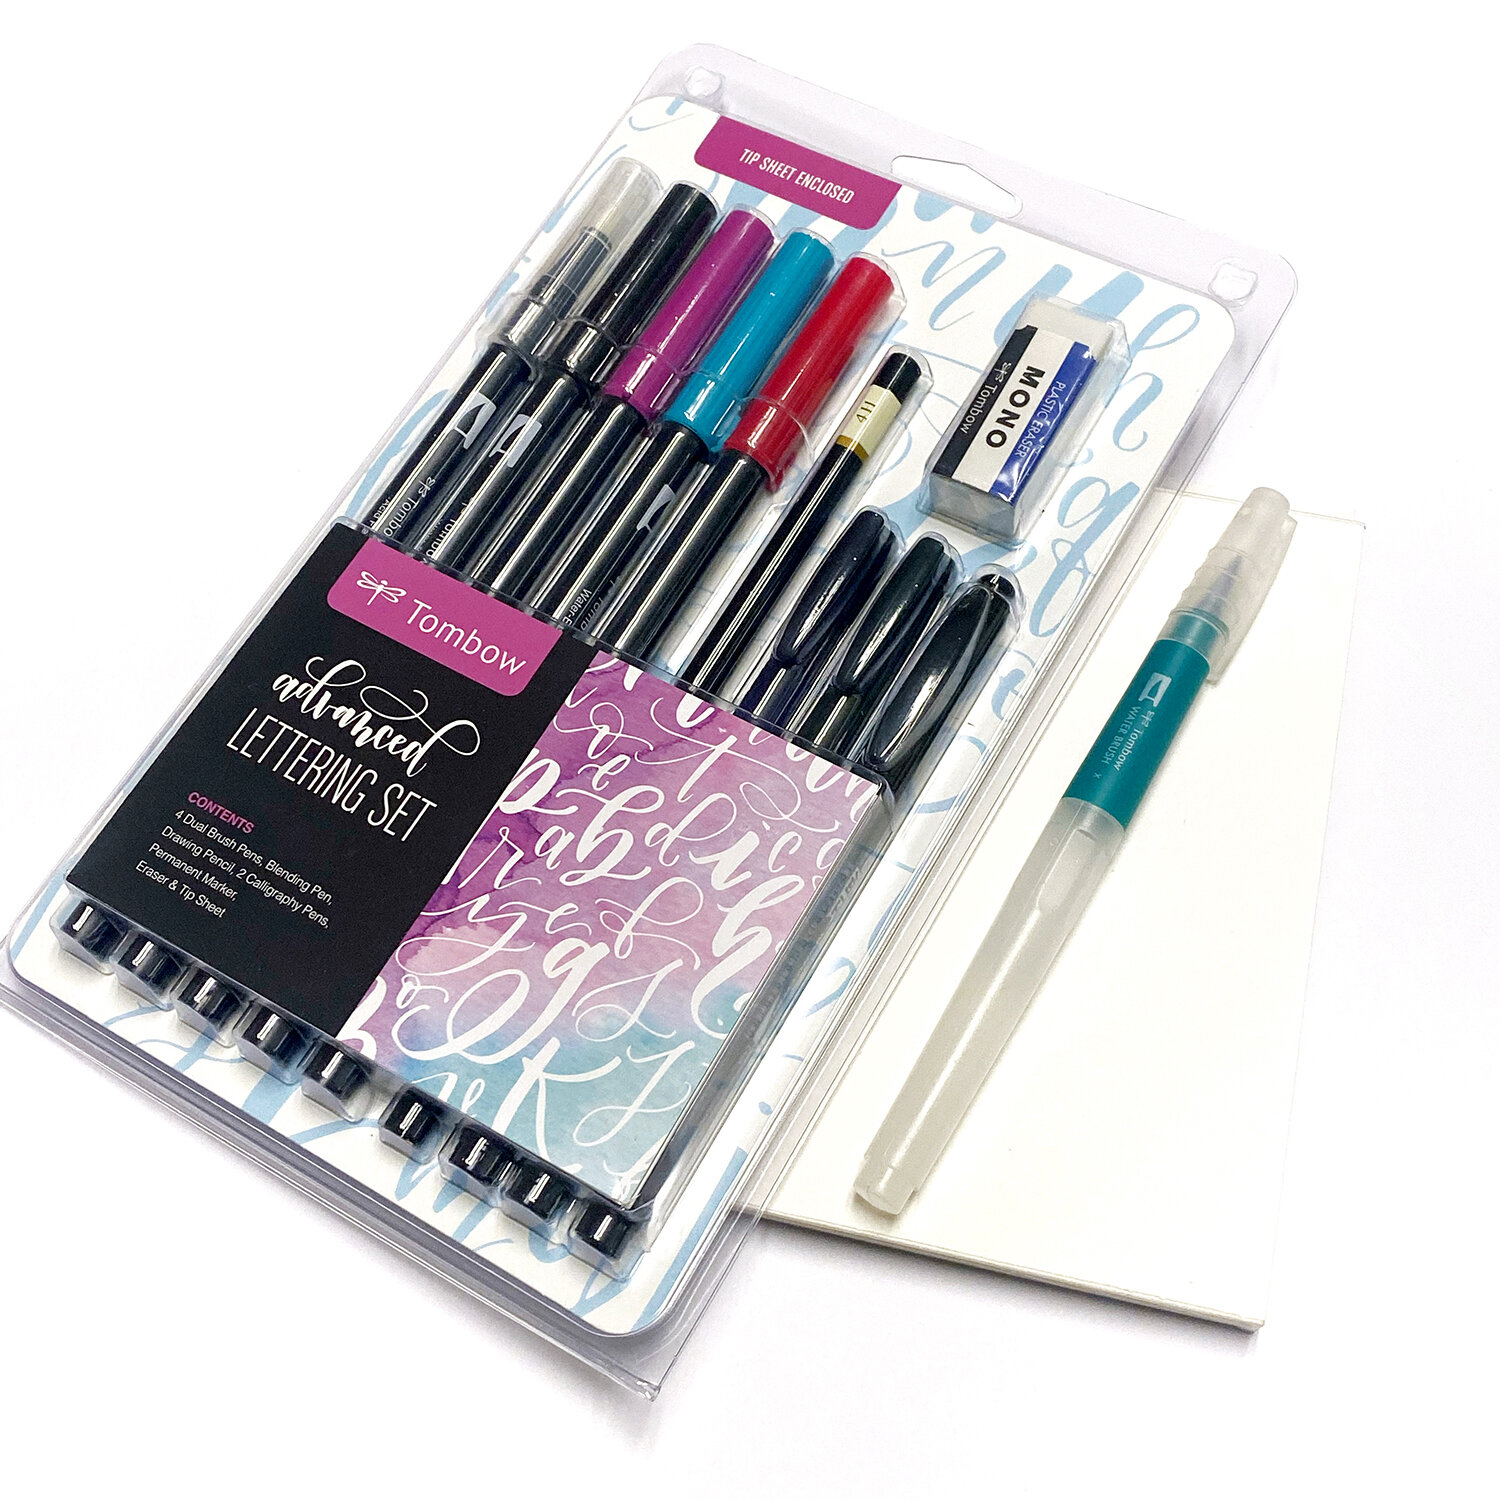
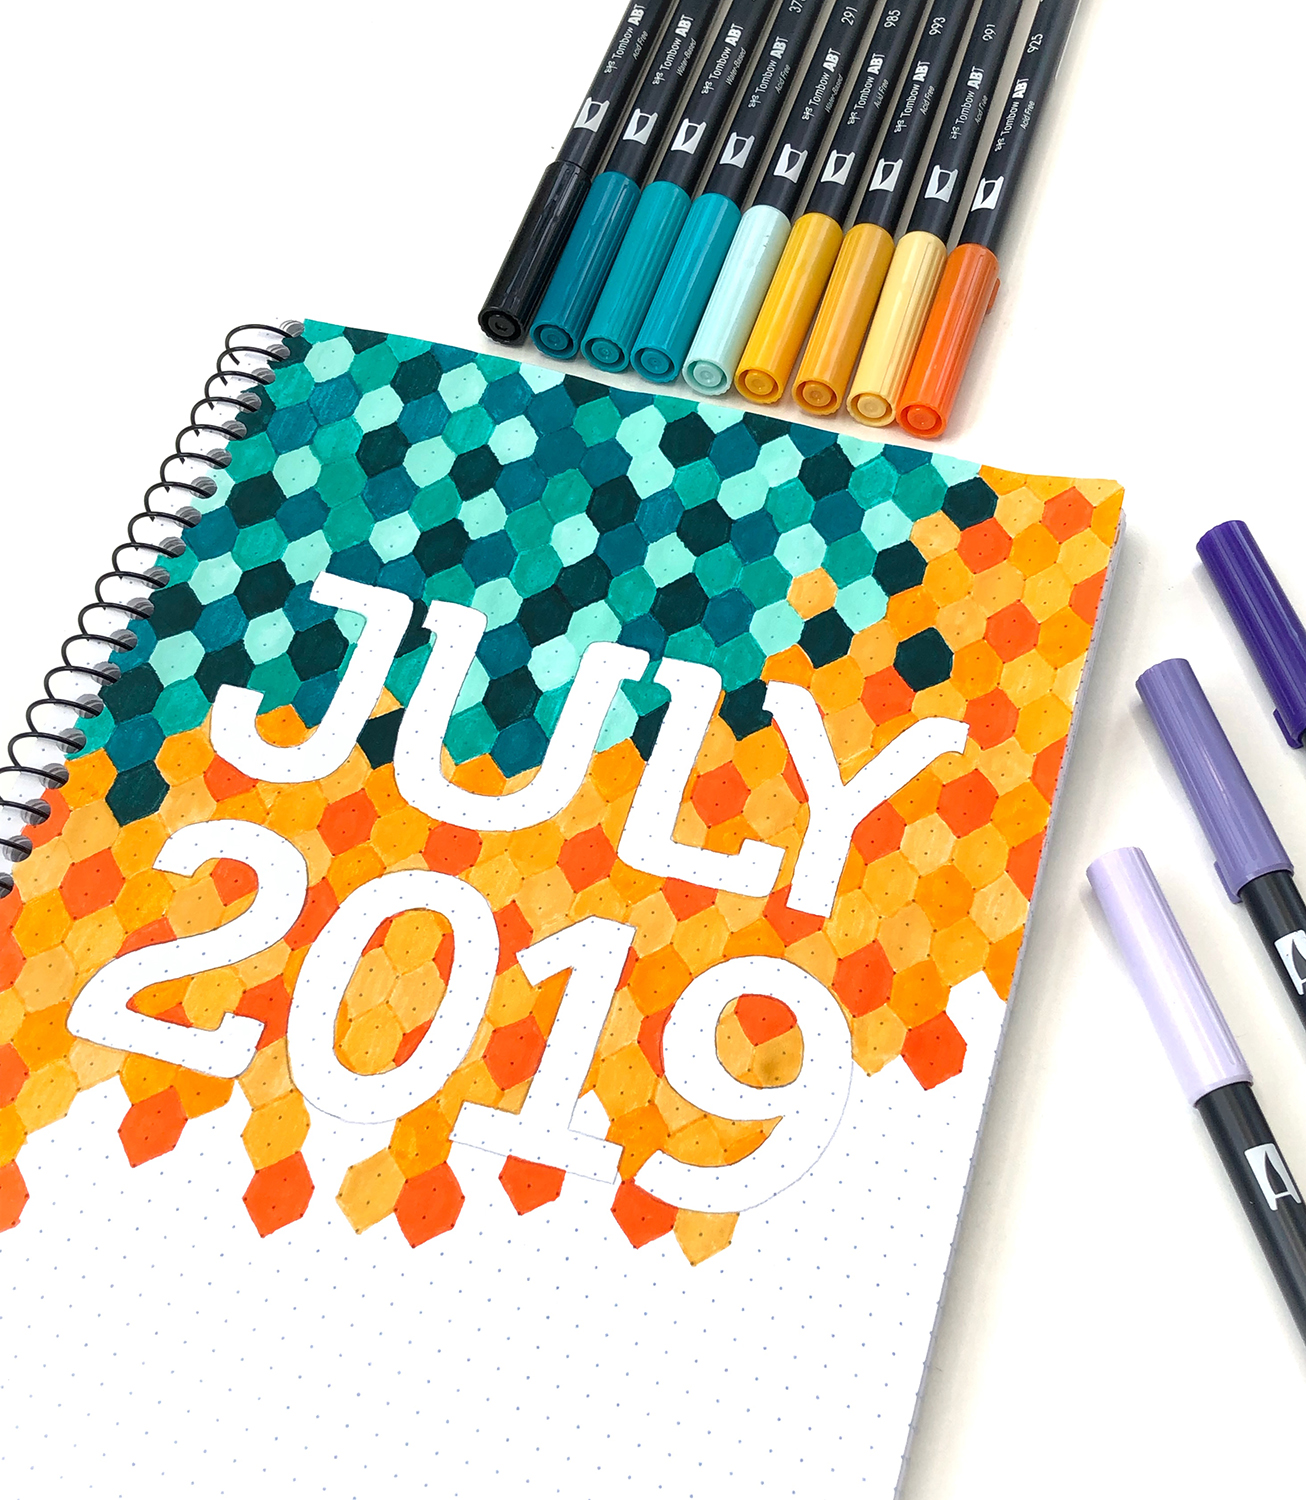
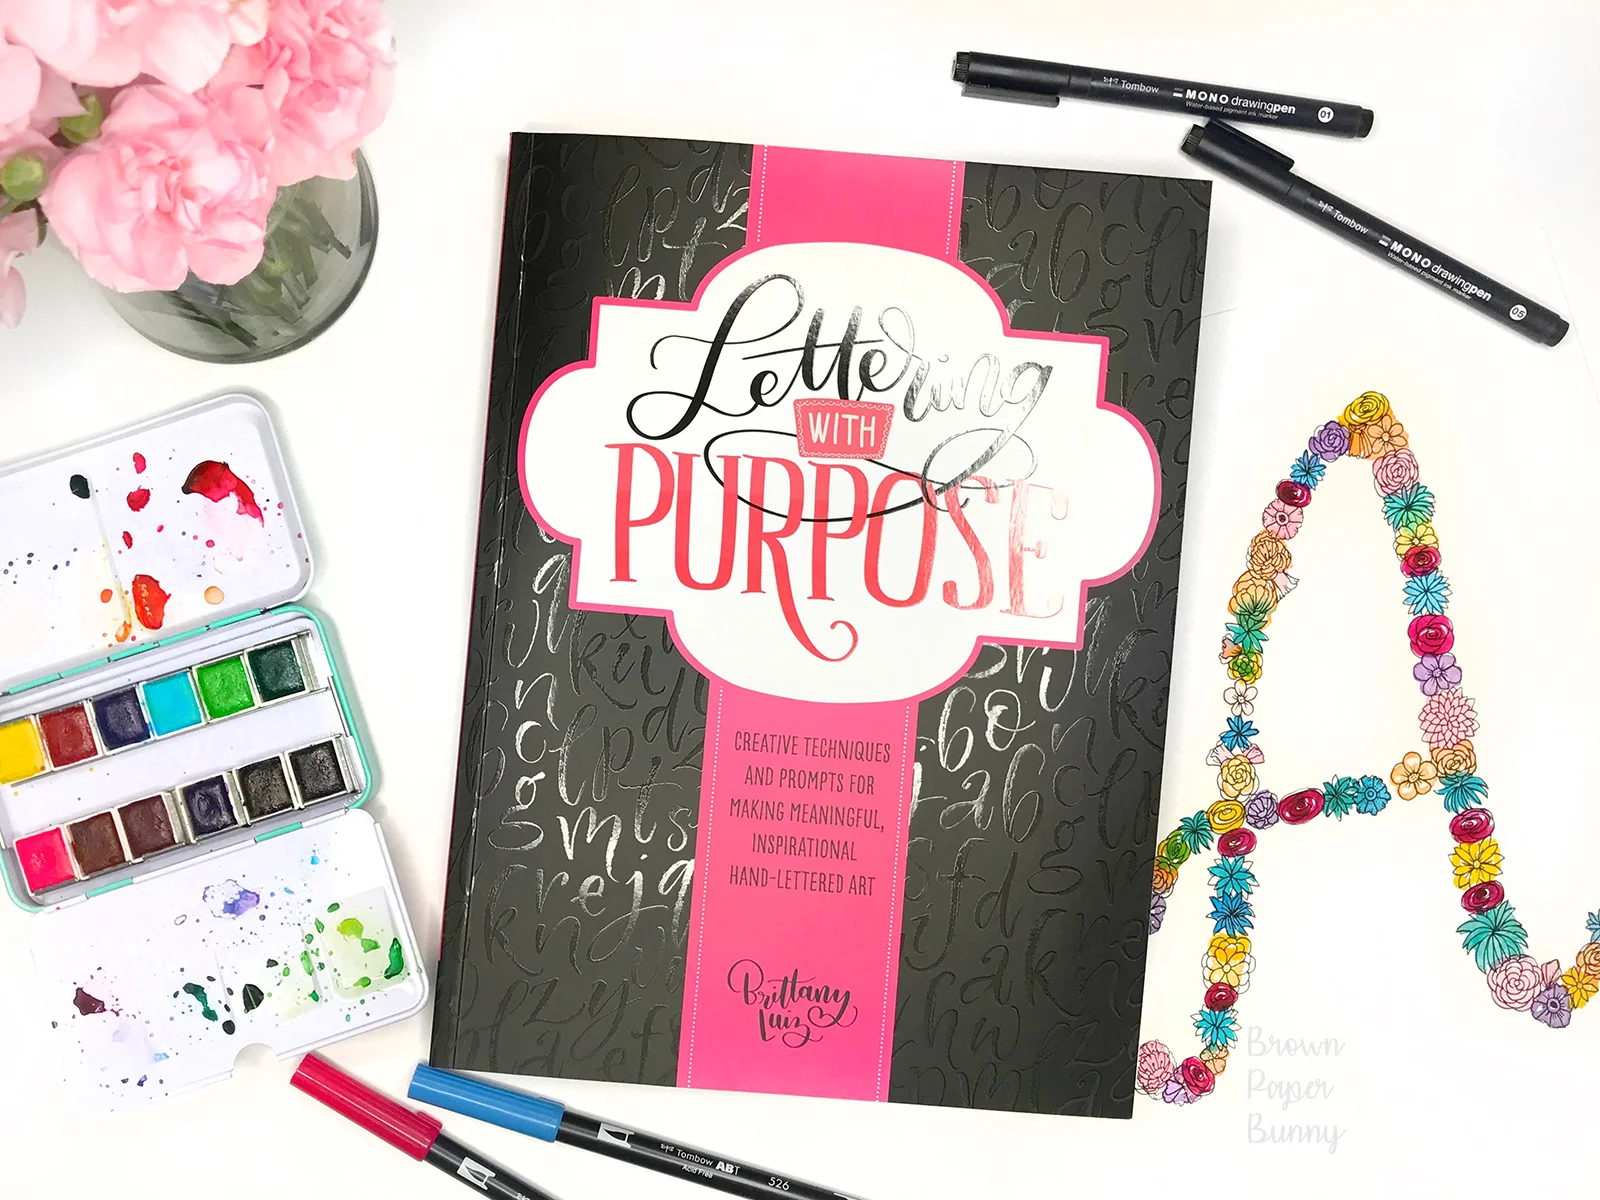
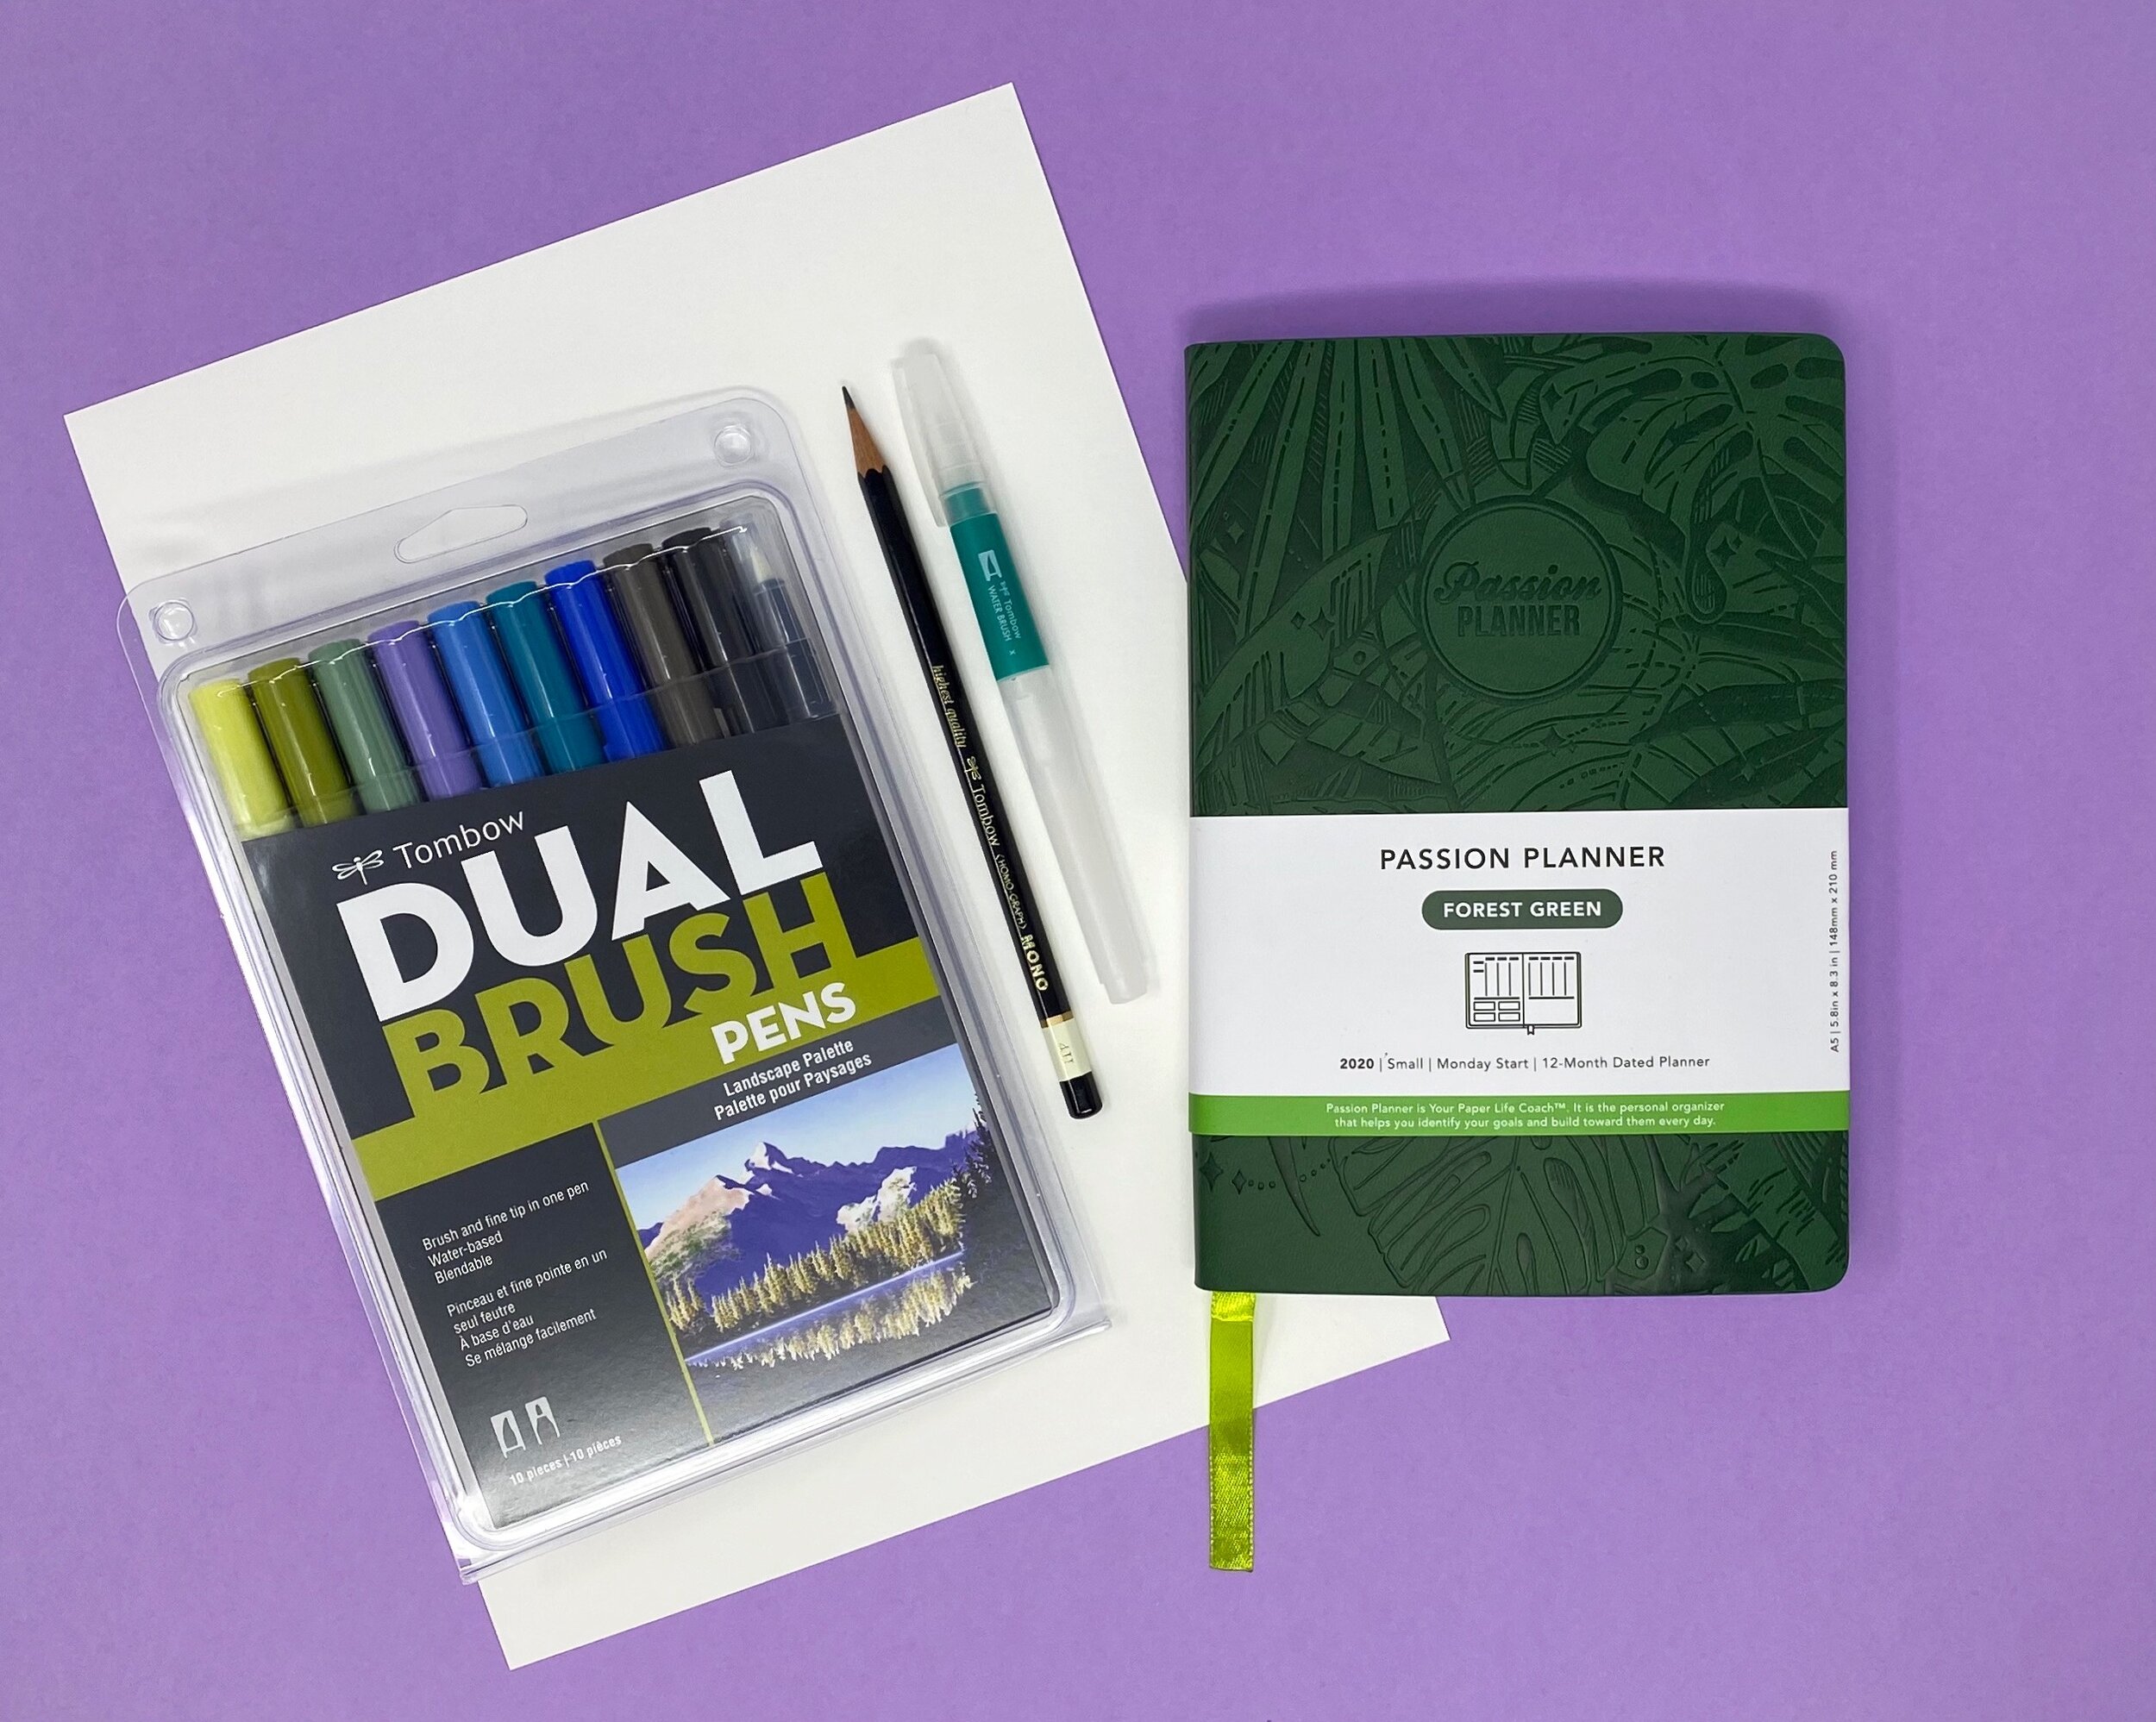
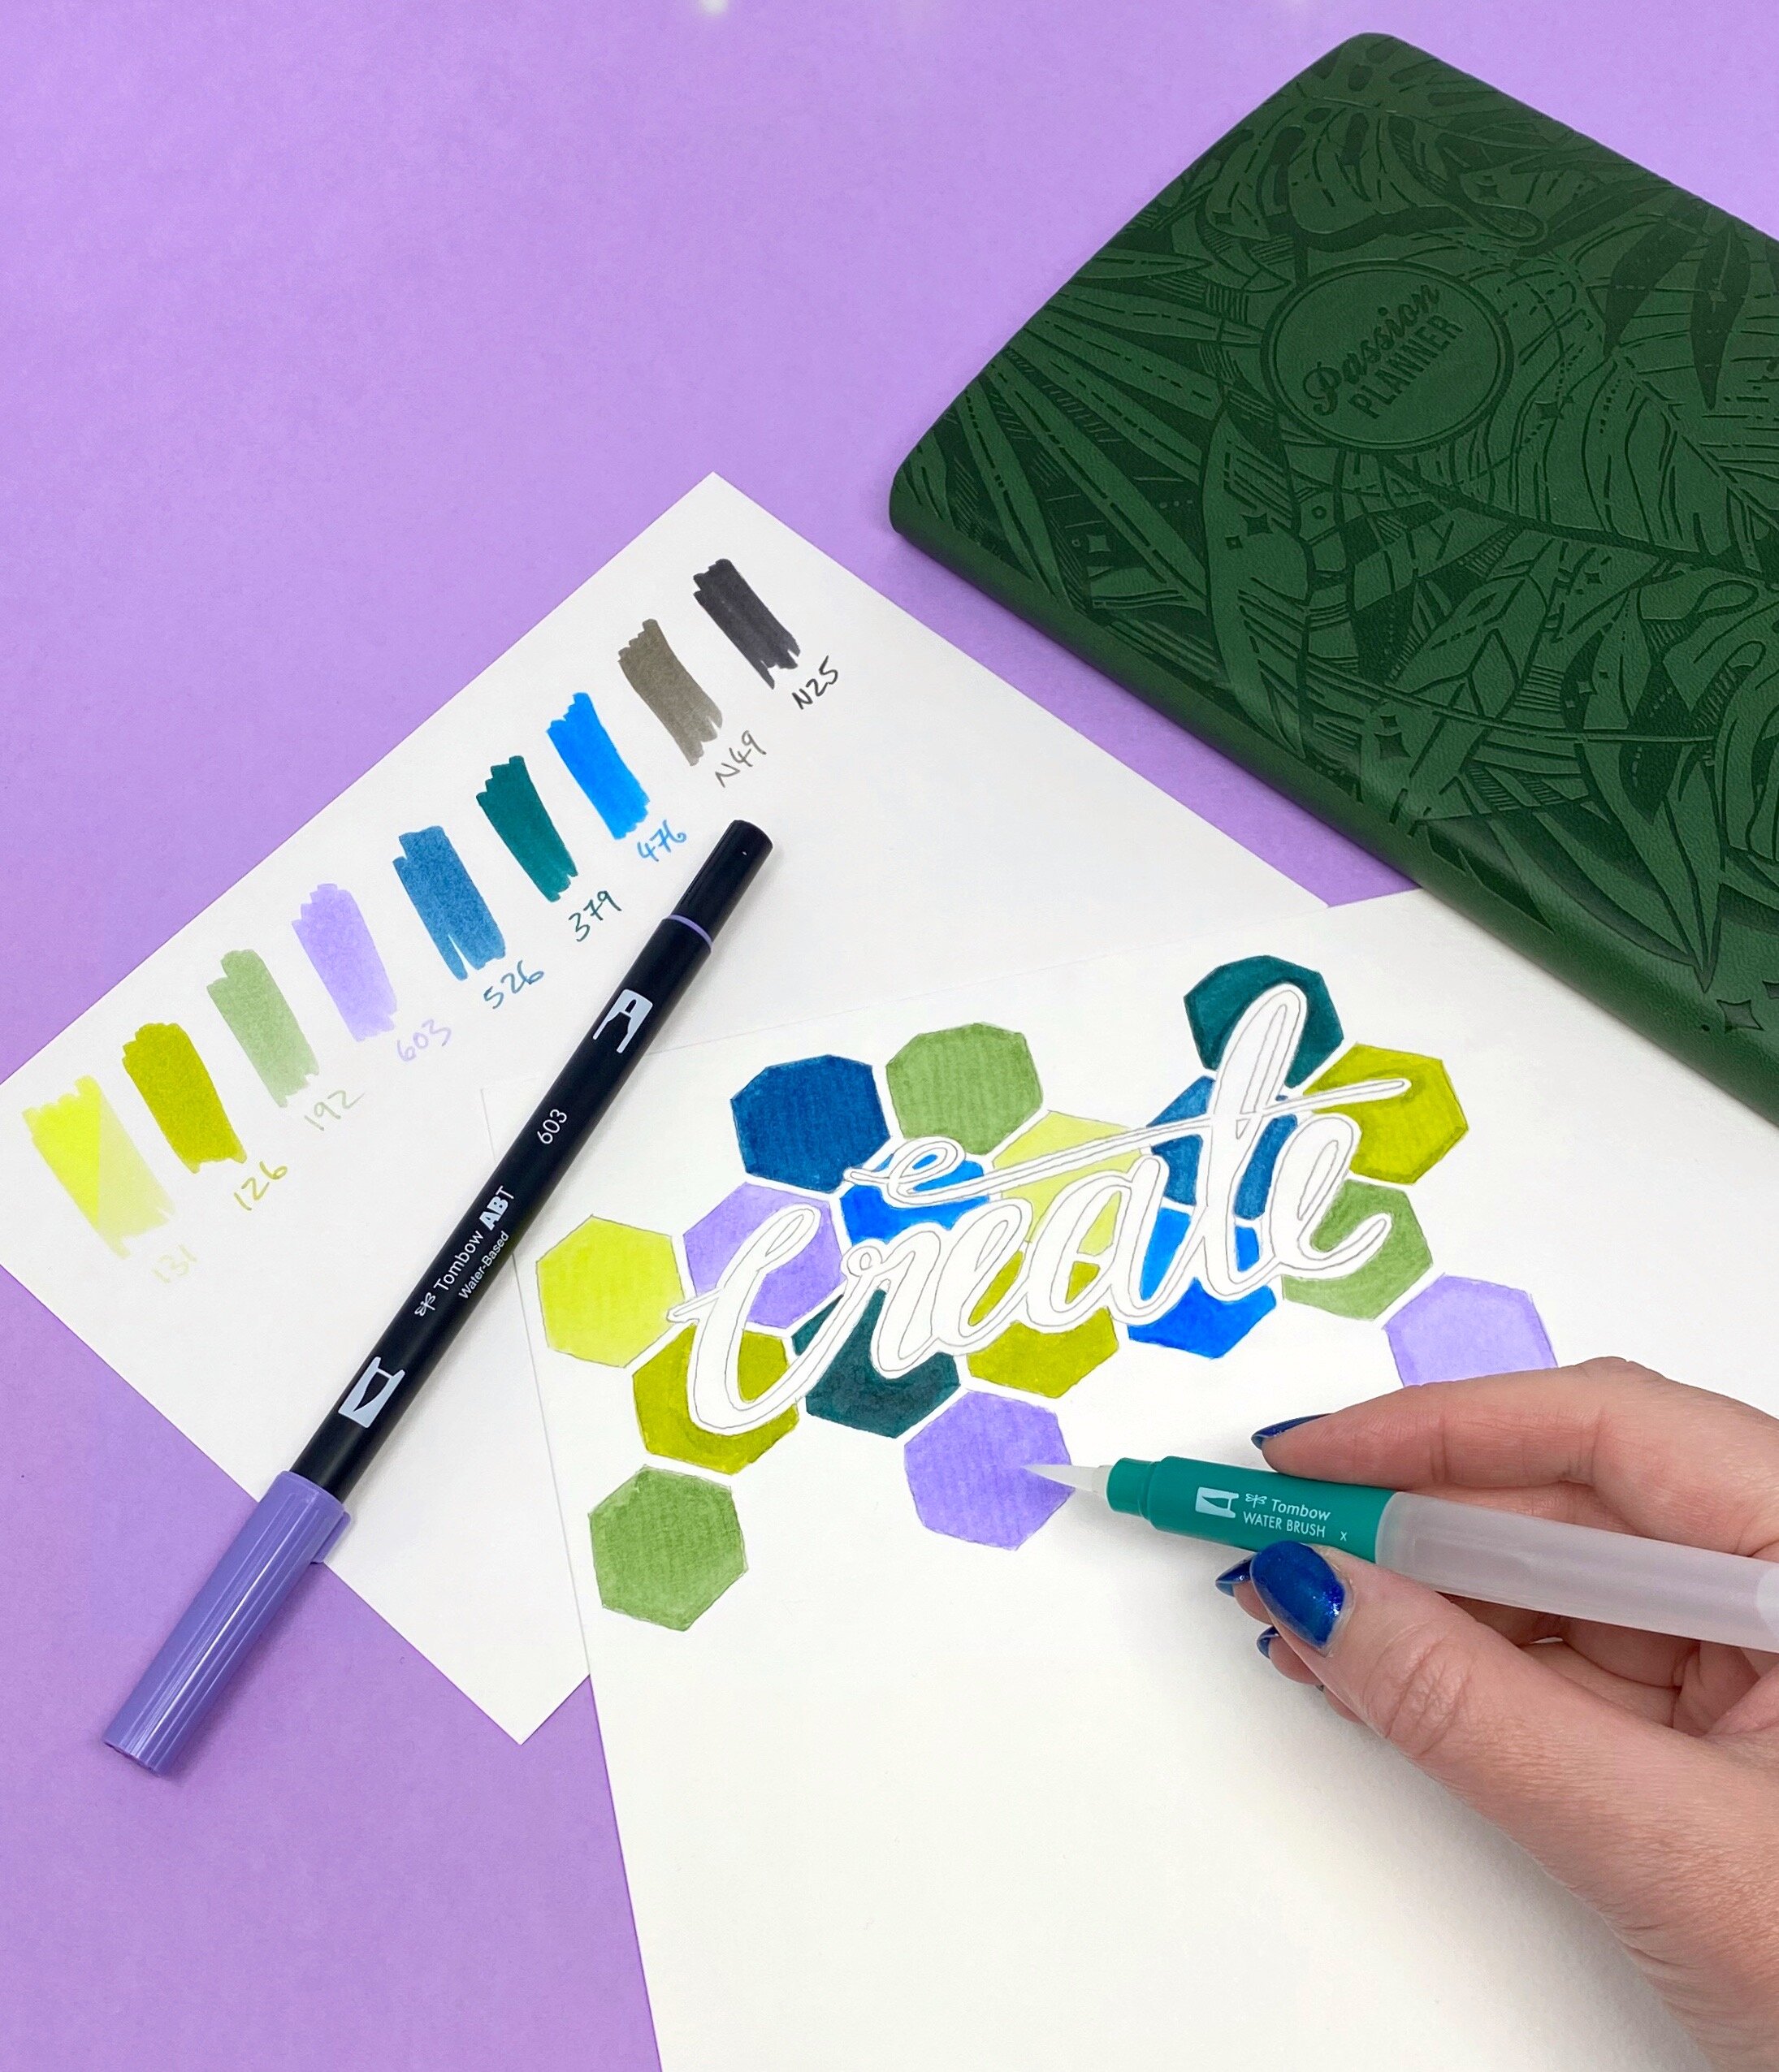
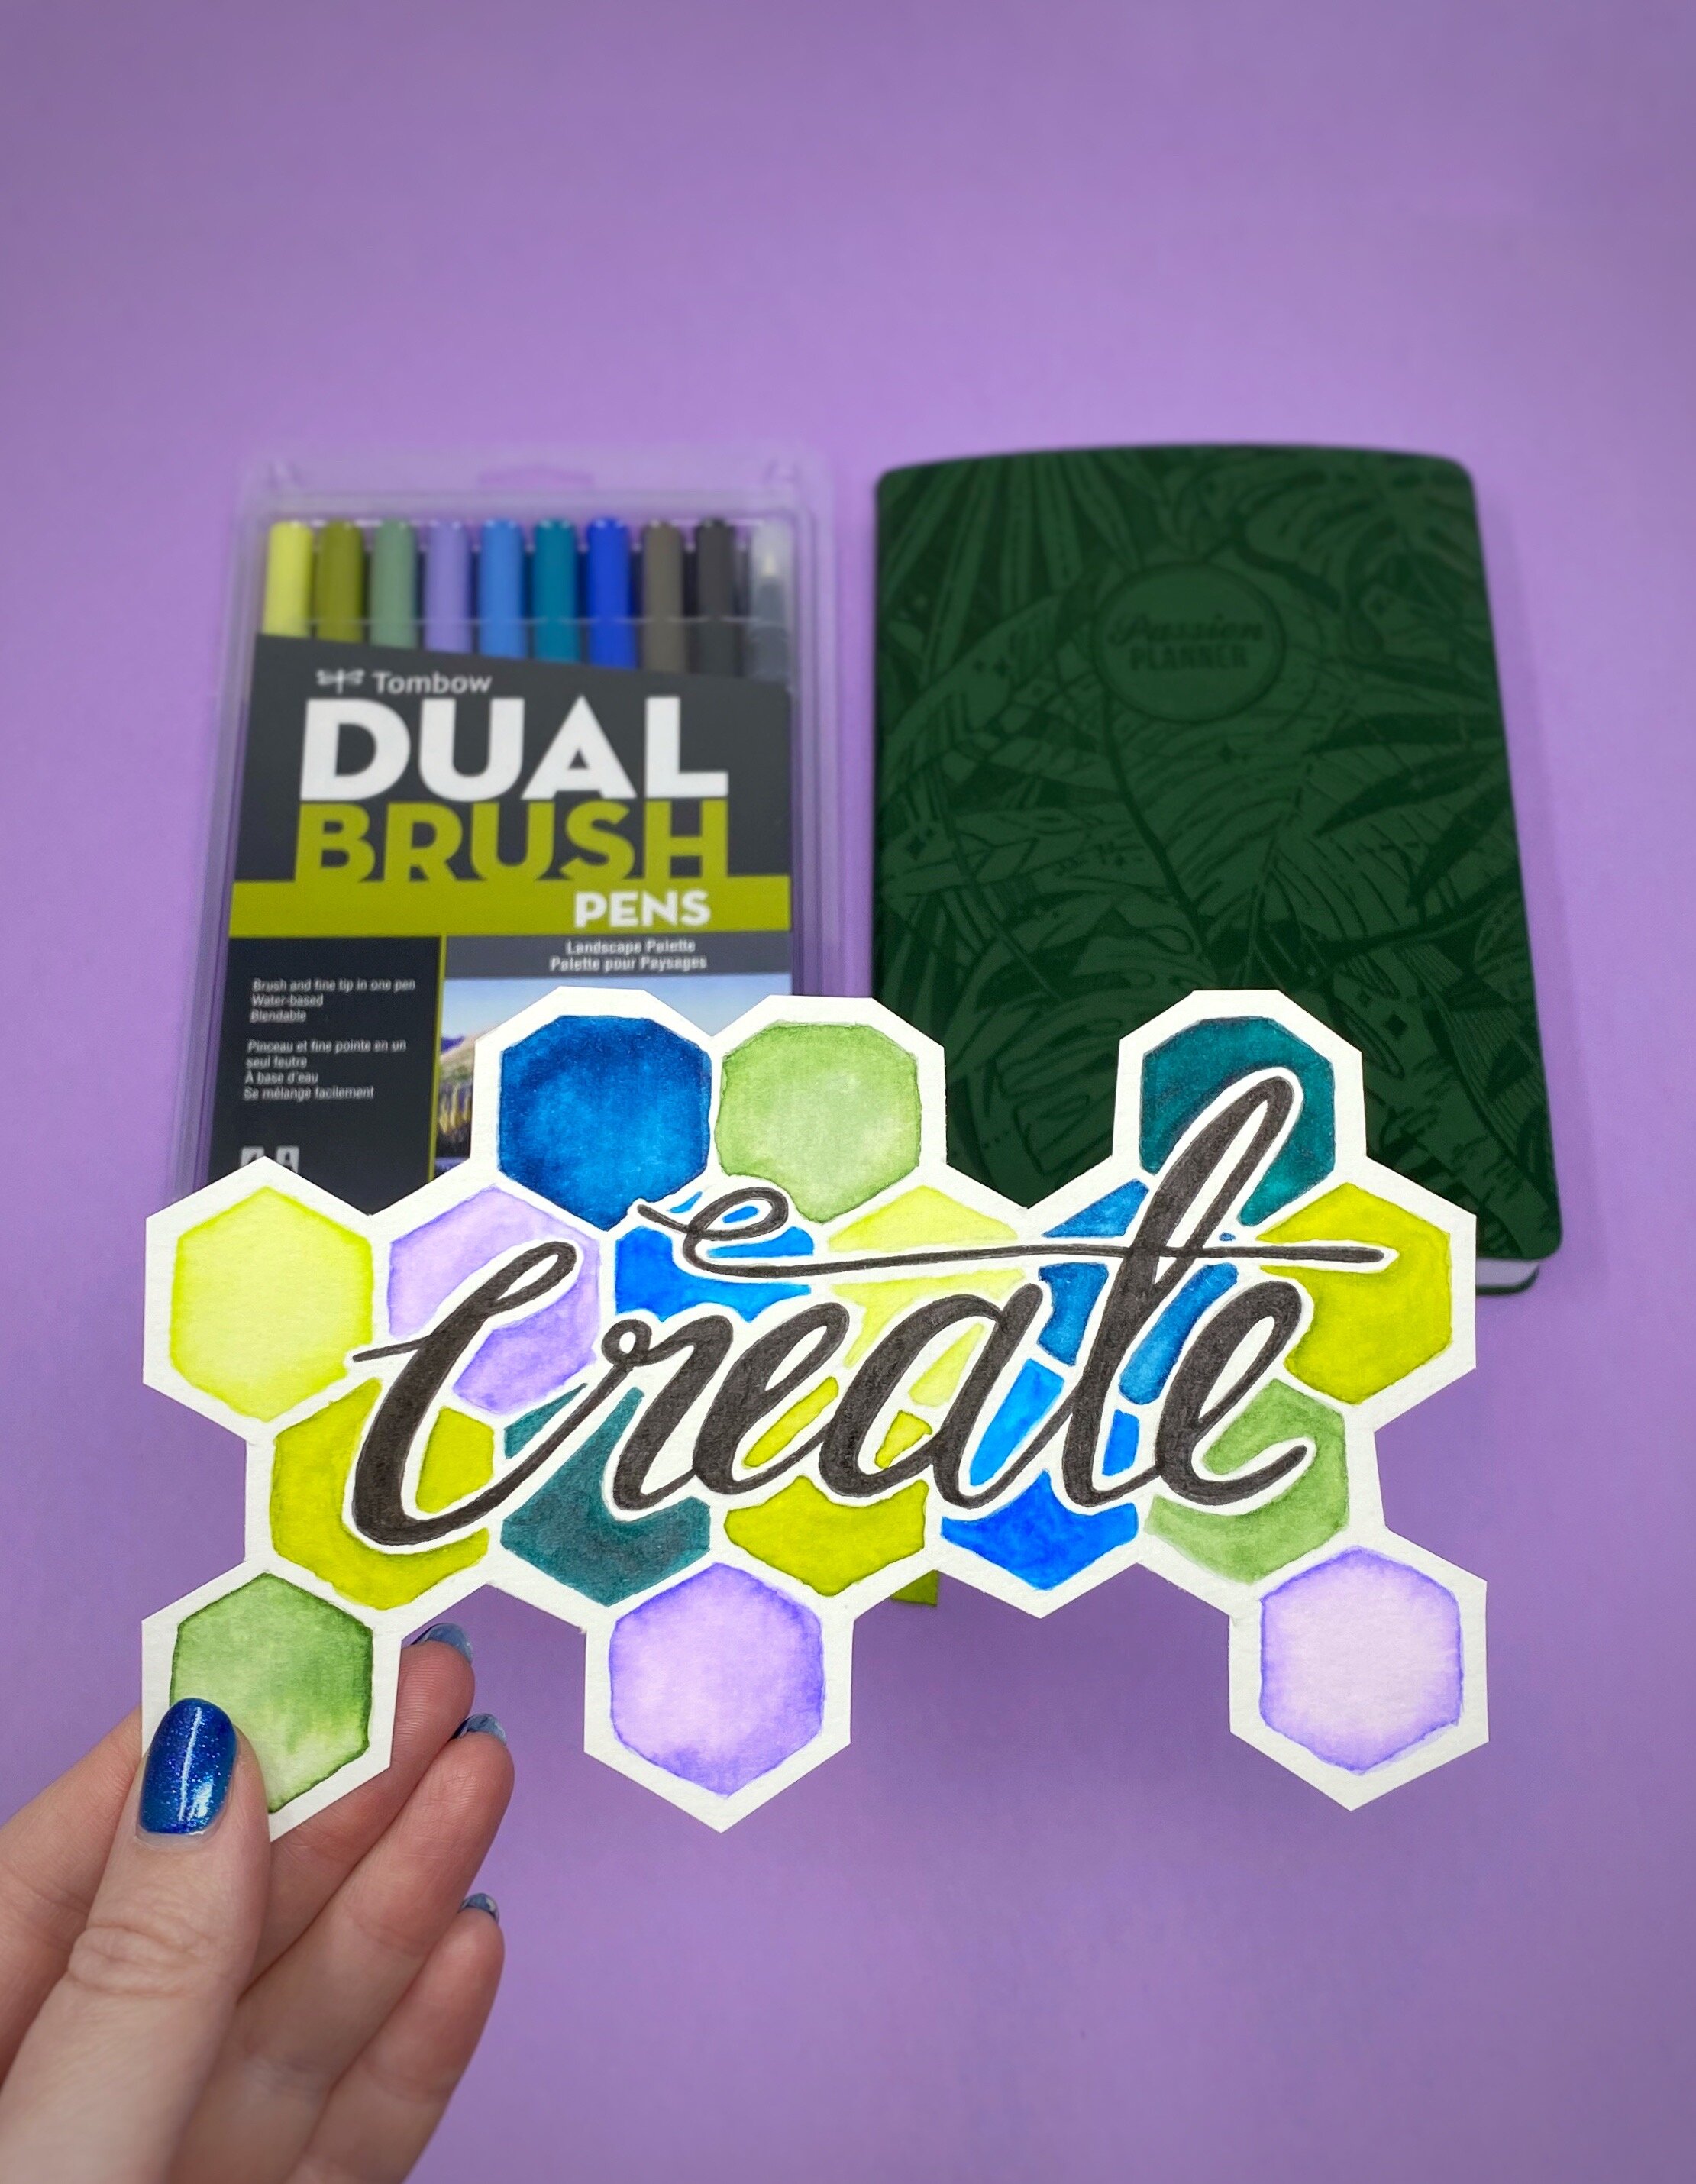
  • Tombow Dual Brush Pens (I chose the Landscape Palette 10-Pack)

  • Watercolor Paper

  • Passion Planner (Dated Forest Green pictured)

  • Tombow Water Brush (Medium)

  • Scissors

  • Tombow MONO Drawing Pencil (4H)

Make a Watercolor Planner Bookmark by Jessica Mack on BrownPaperBunny

Step 1: Sketch Your Design

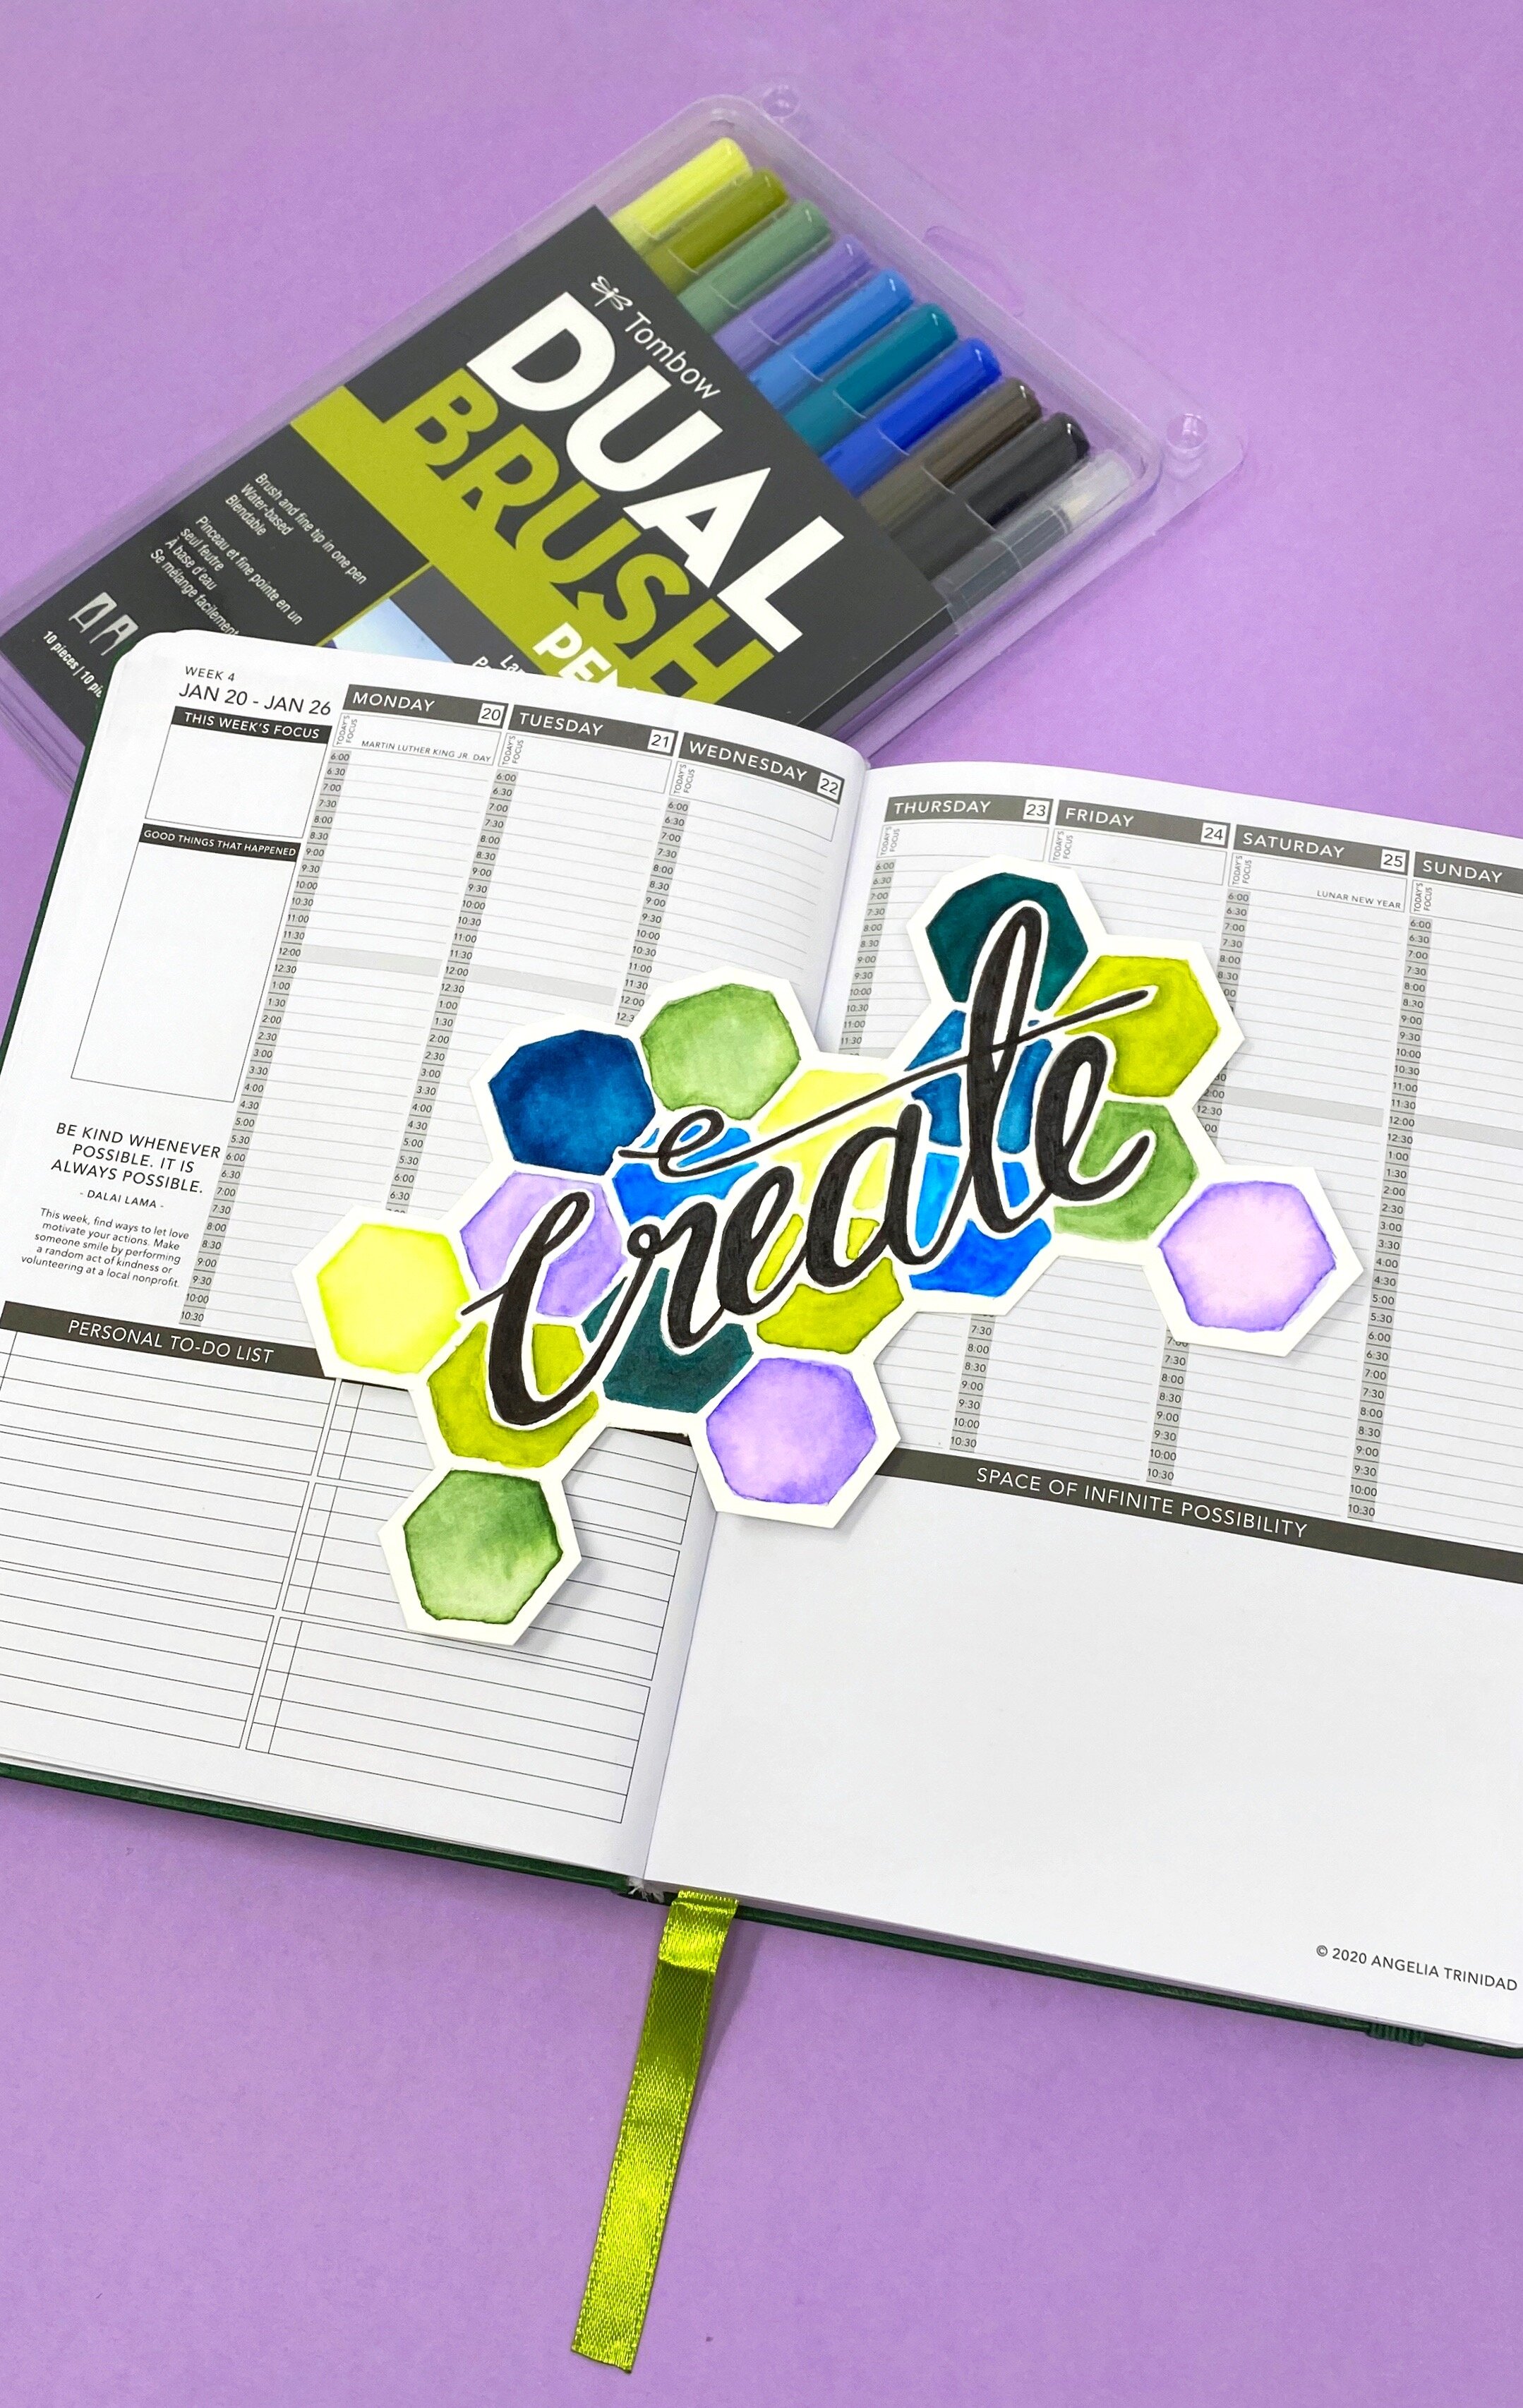
After completing your Passion Roadmap and determining your Game Changer goal, pick a word that will remind you of that goal. Sketch it out on your watercolor paper, using a 4H MONO Drawing Pencil. You can choose to draw a pattern around the word, or images that relate to it, it's up to you. The word I'm using here is 'Create' with a honeycomb-patterned background.

Make a Watercolor Planner Bookmark by Jessica Mack on BrownPaperBunny

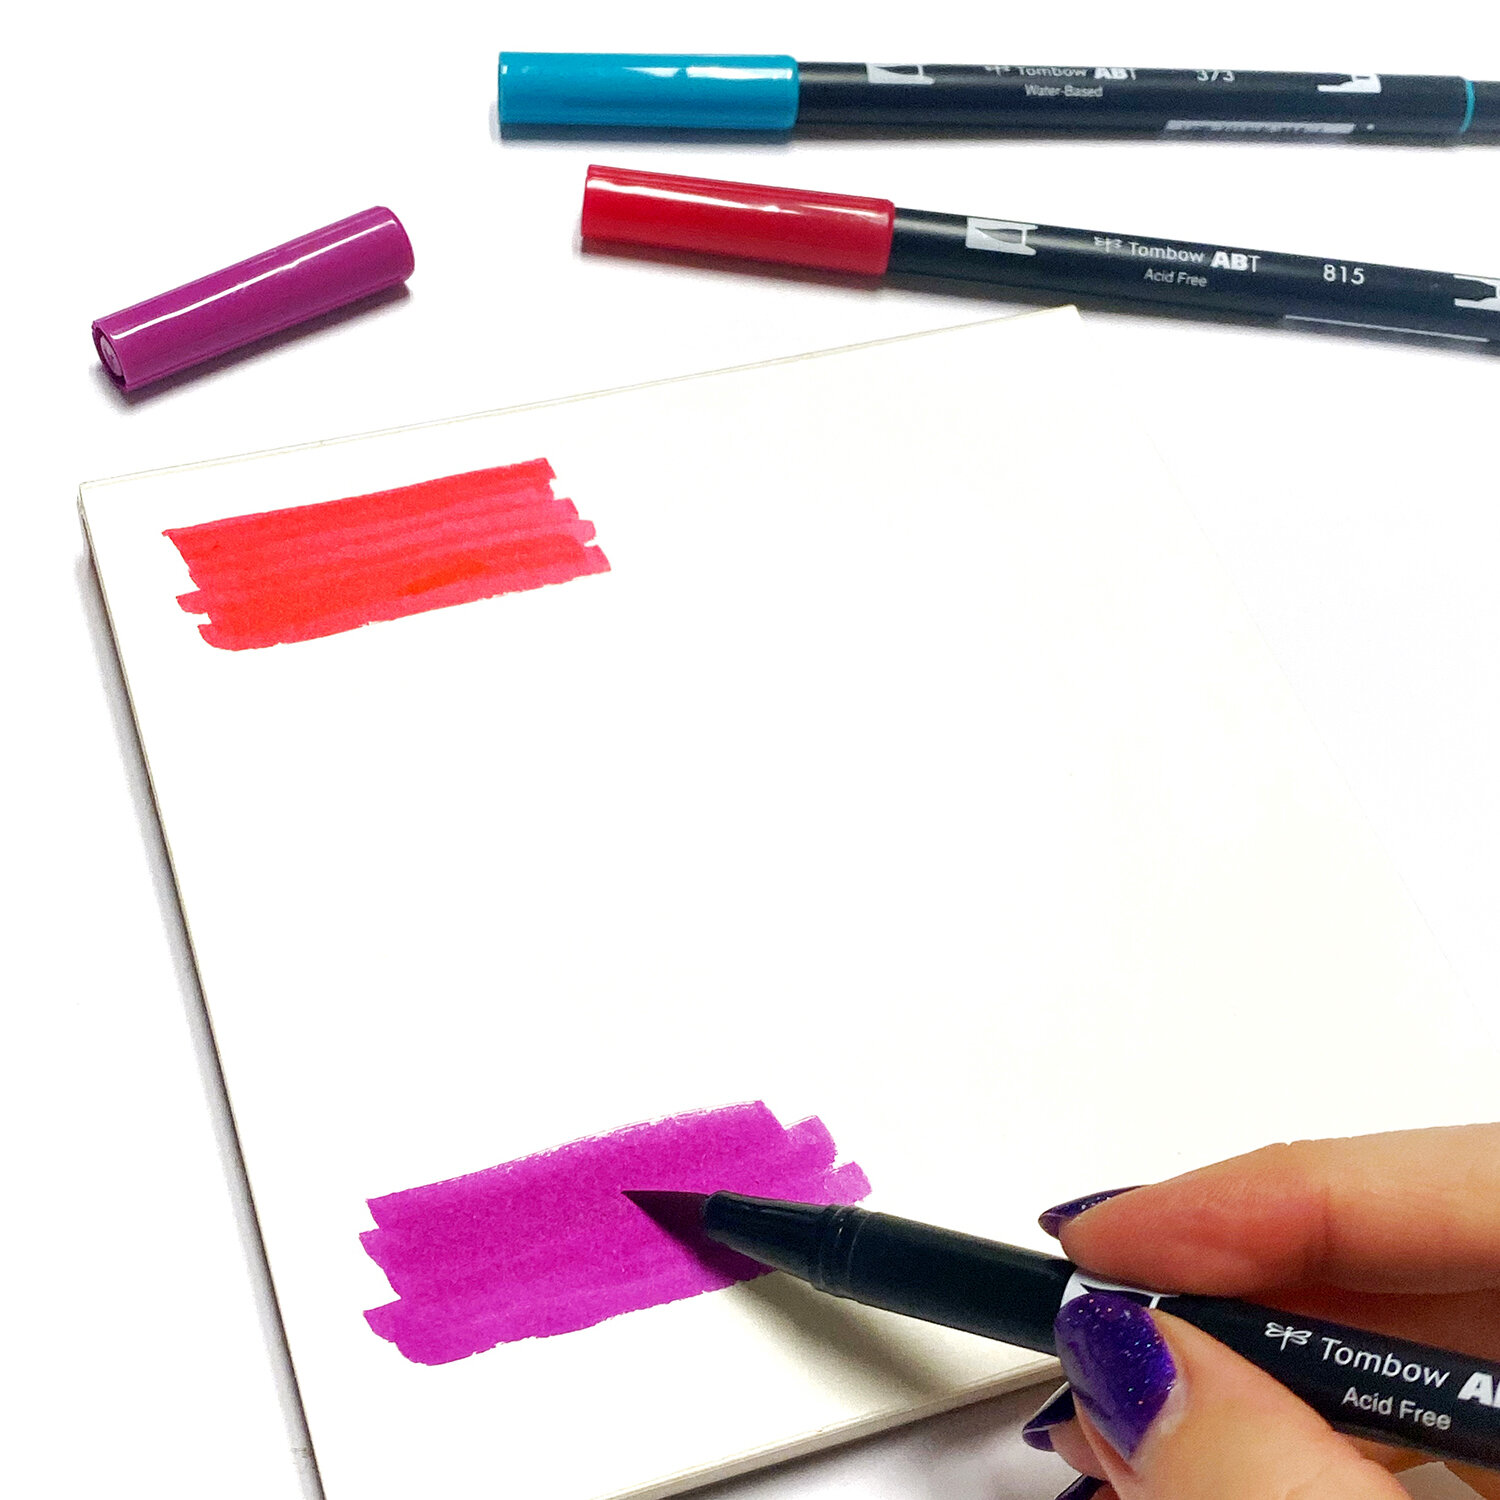
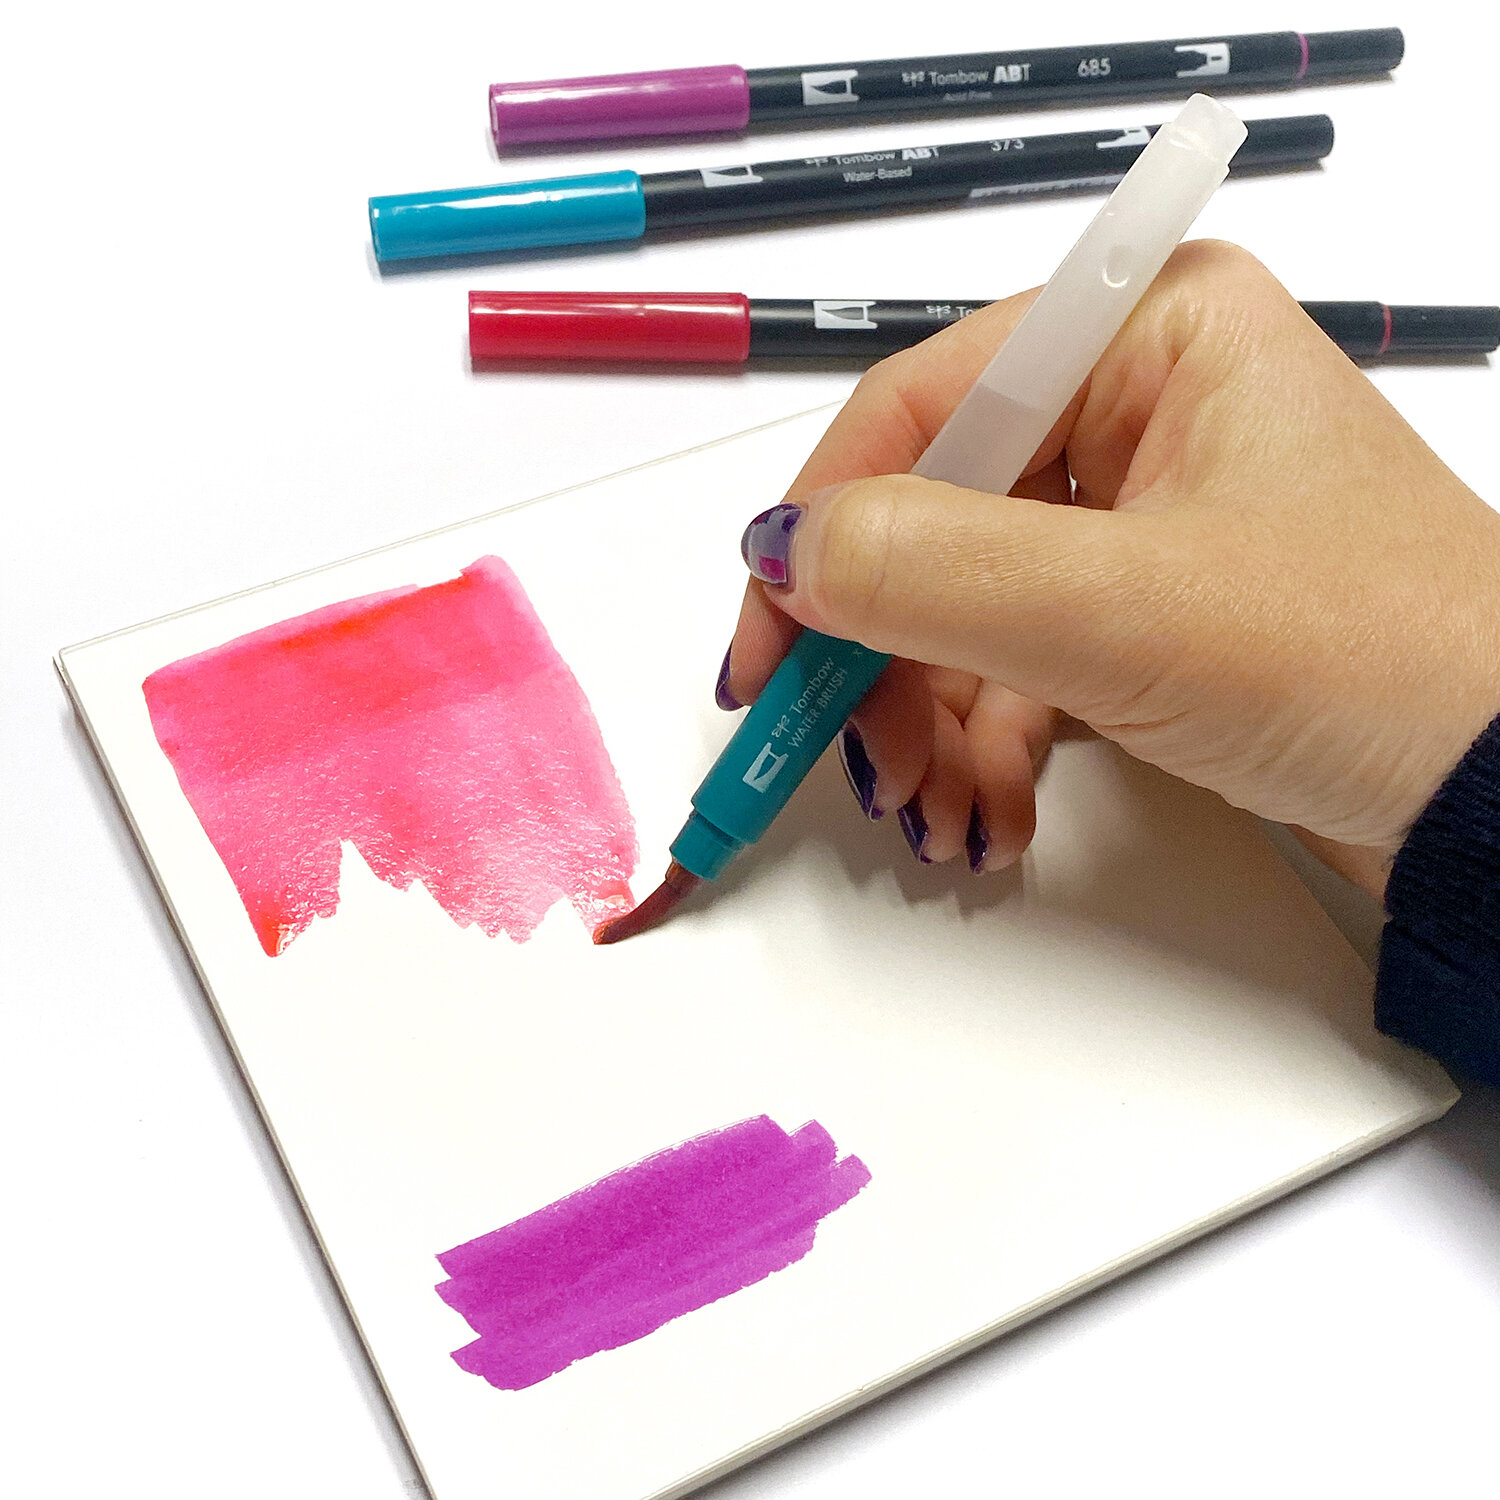
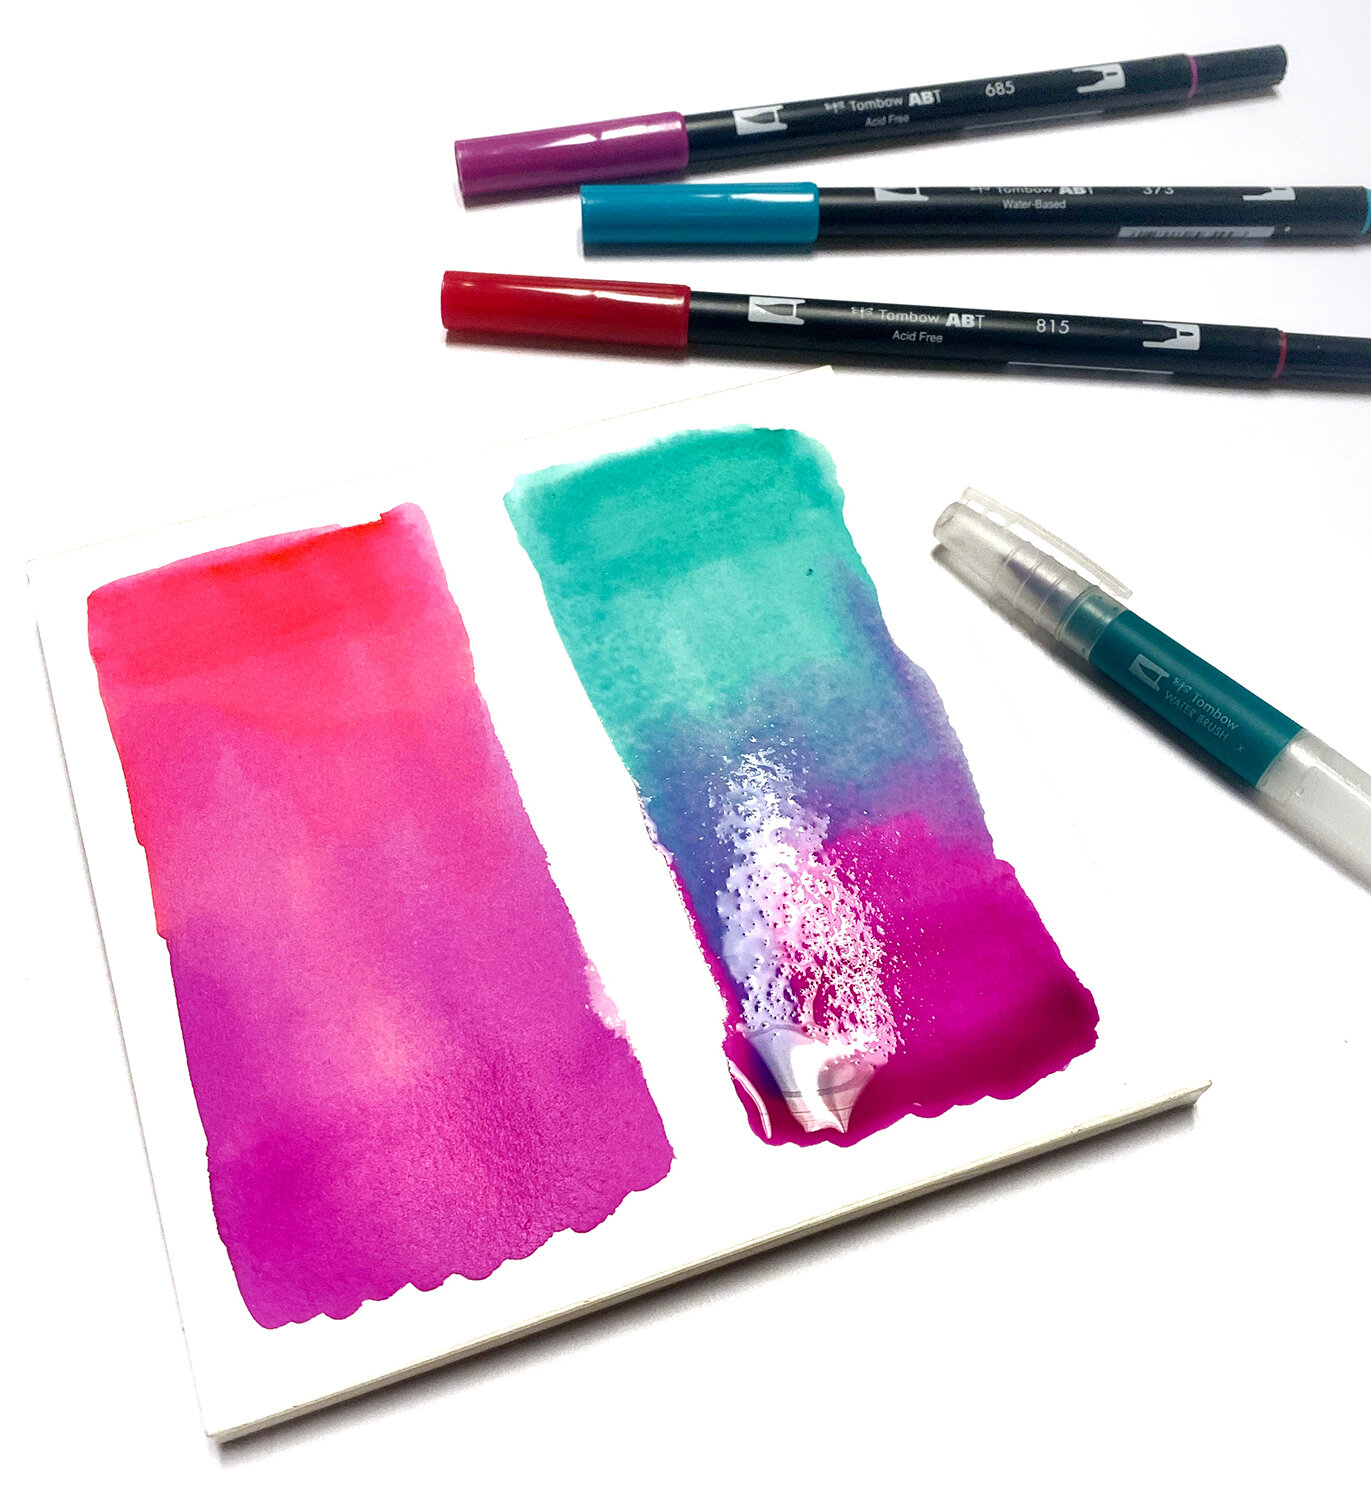
Step 2: Color Your Design

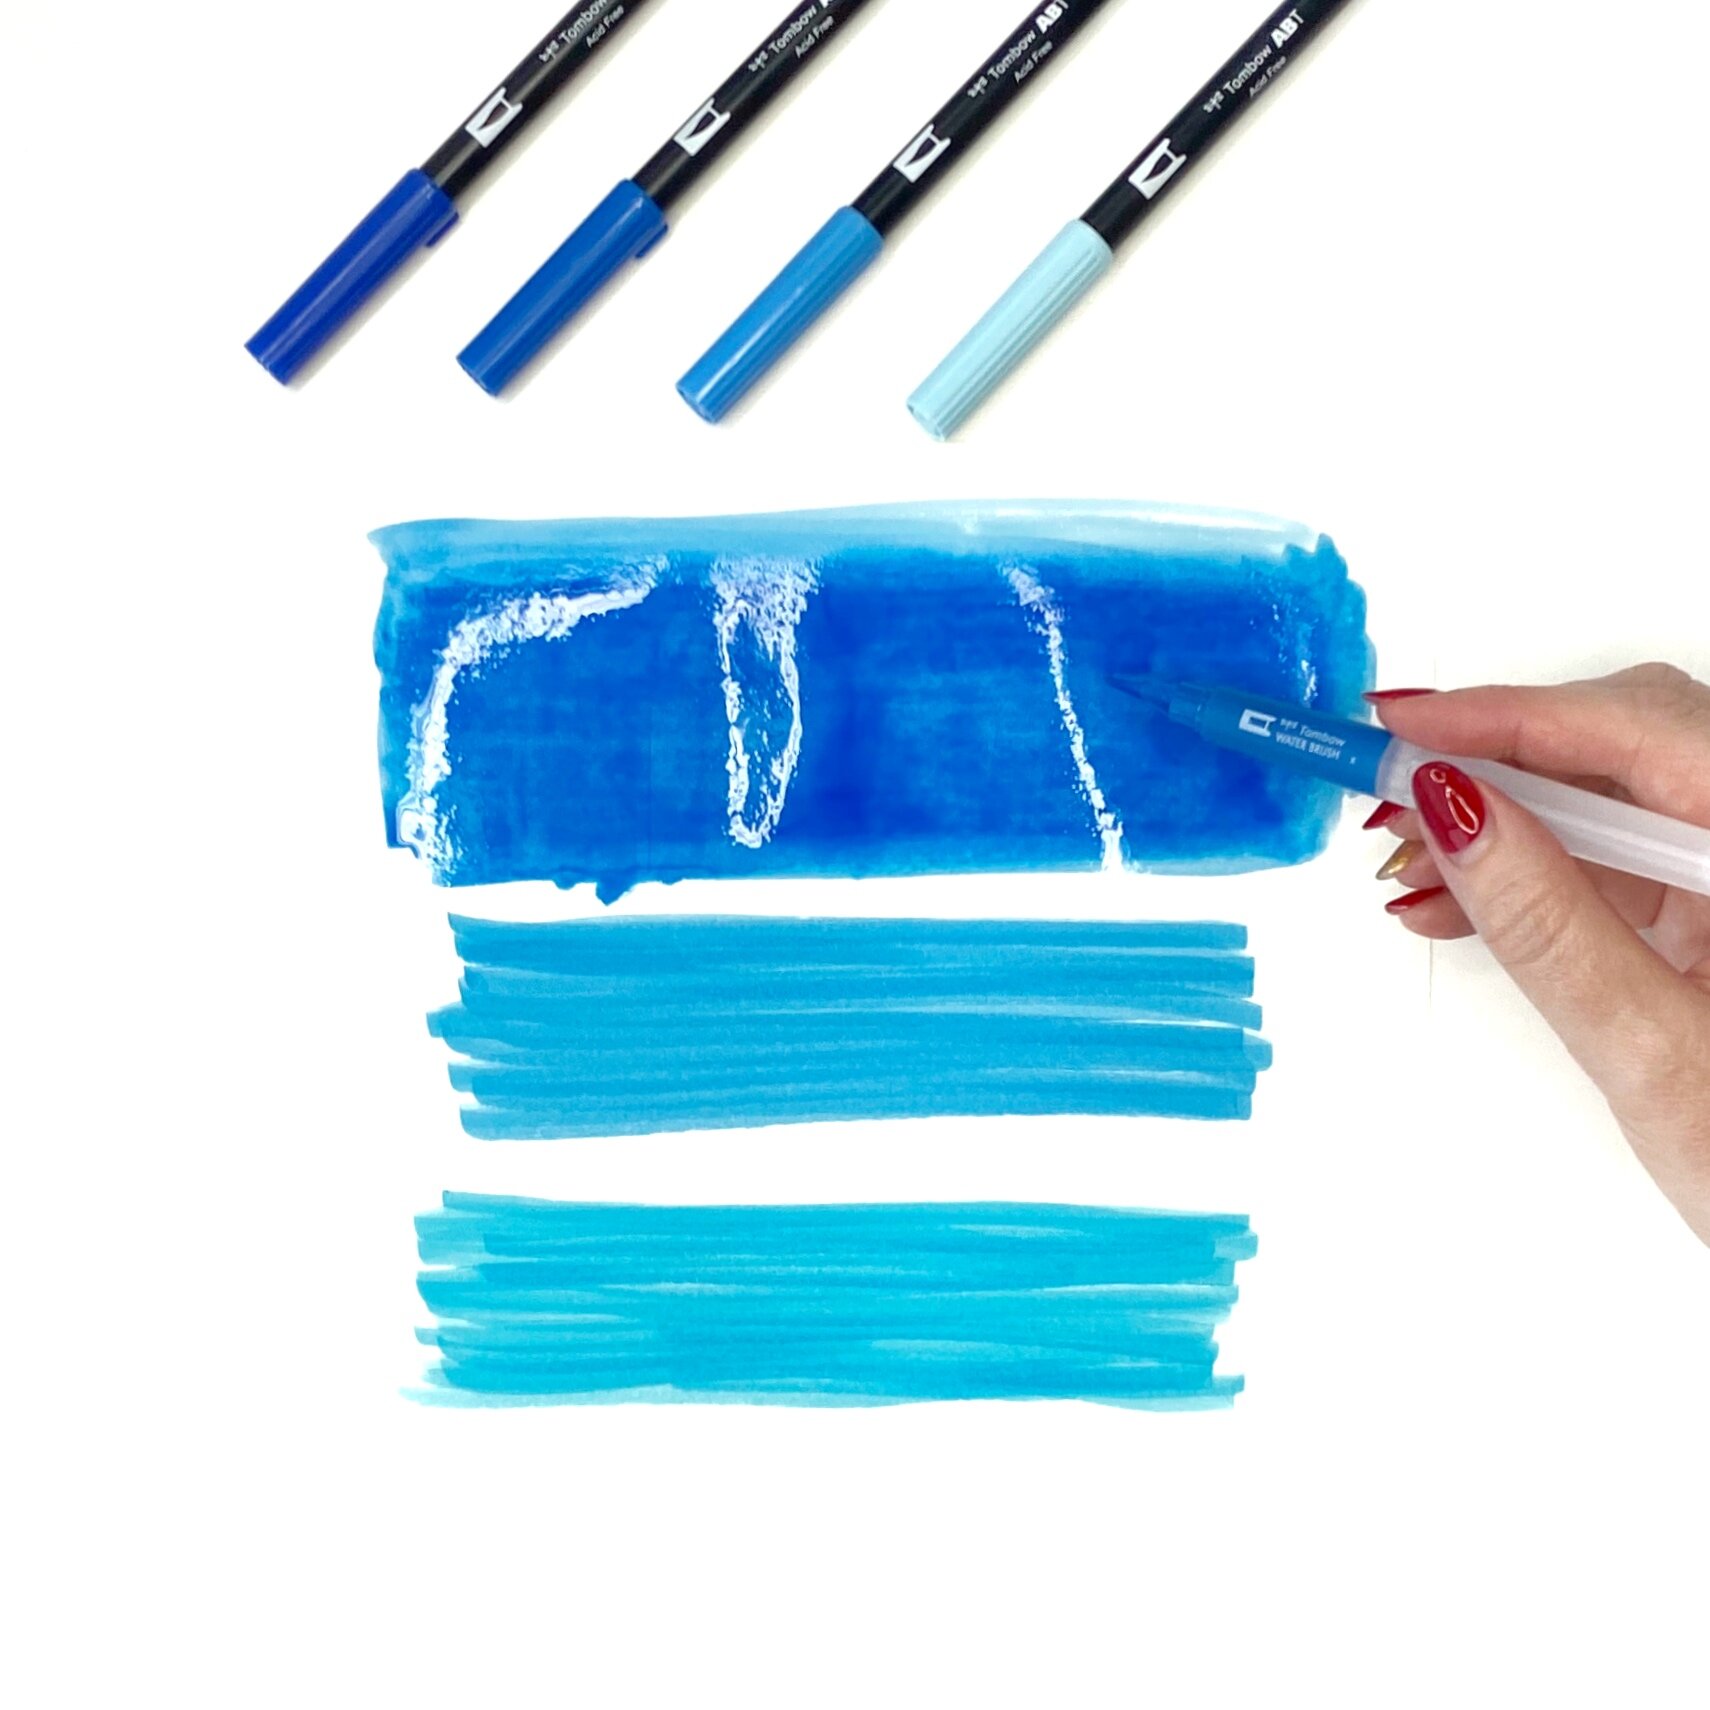
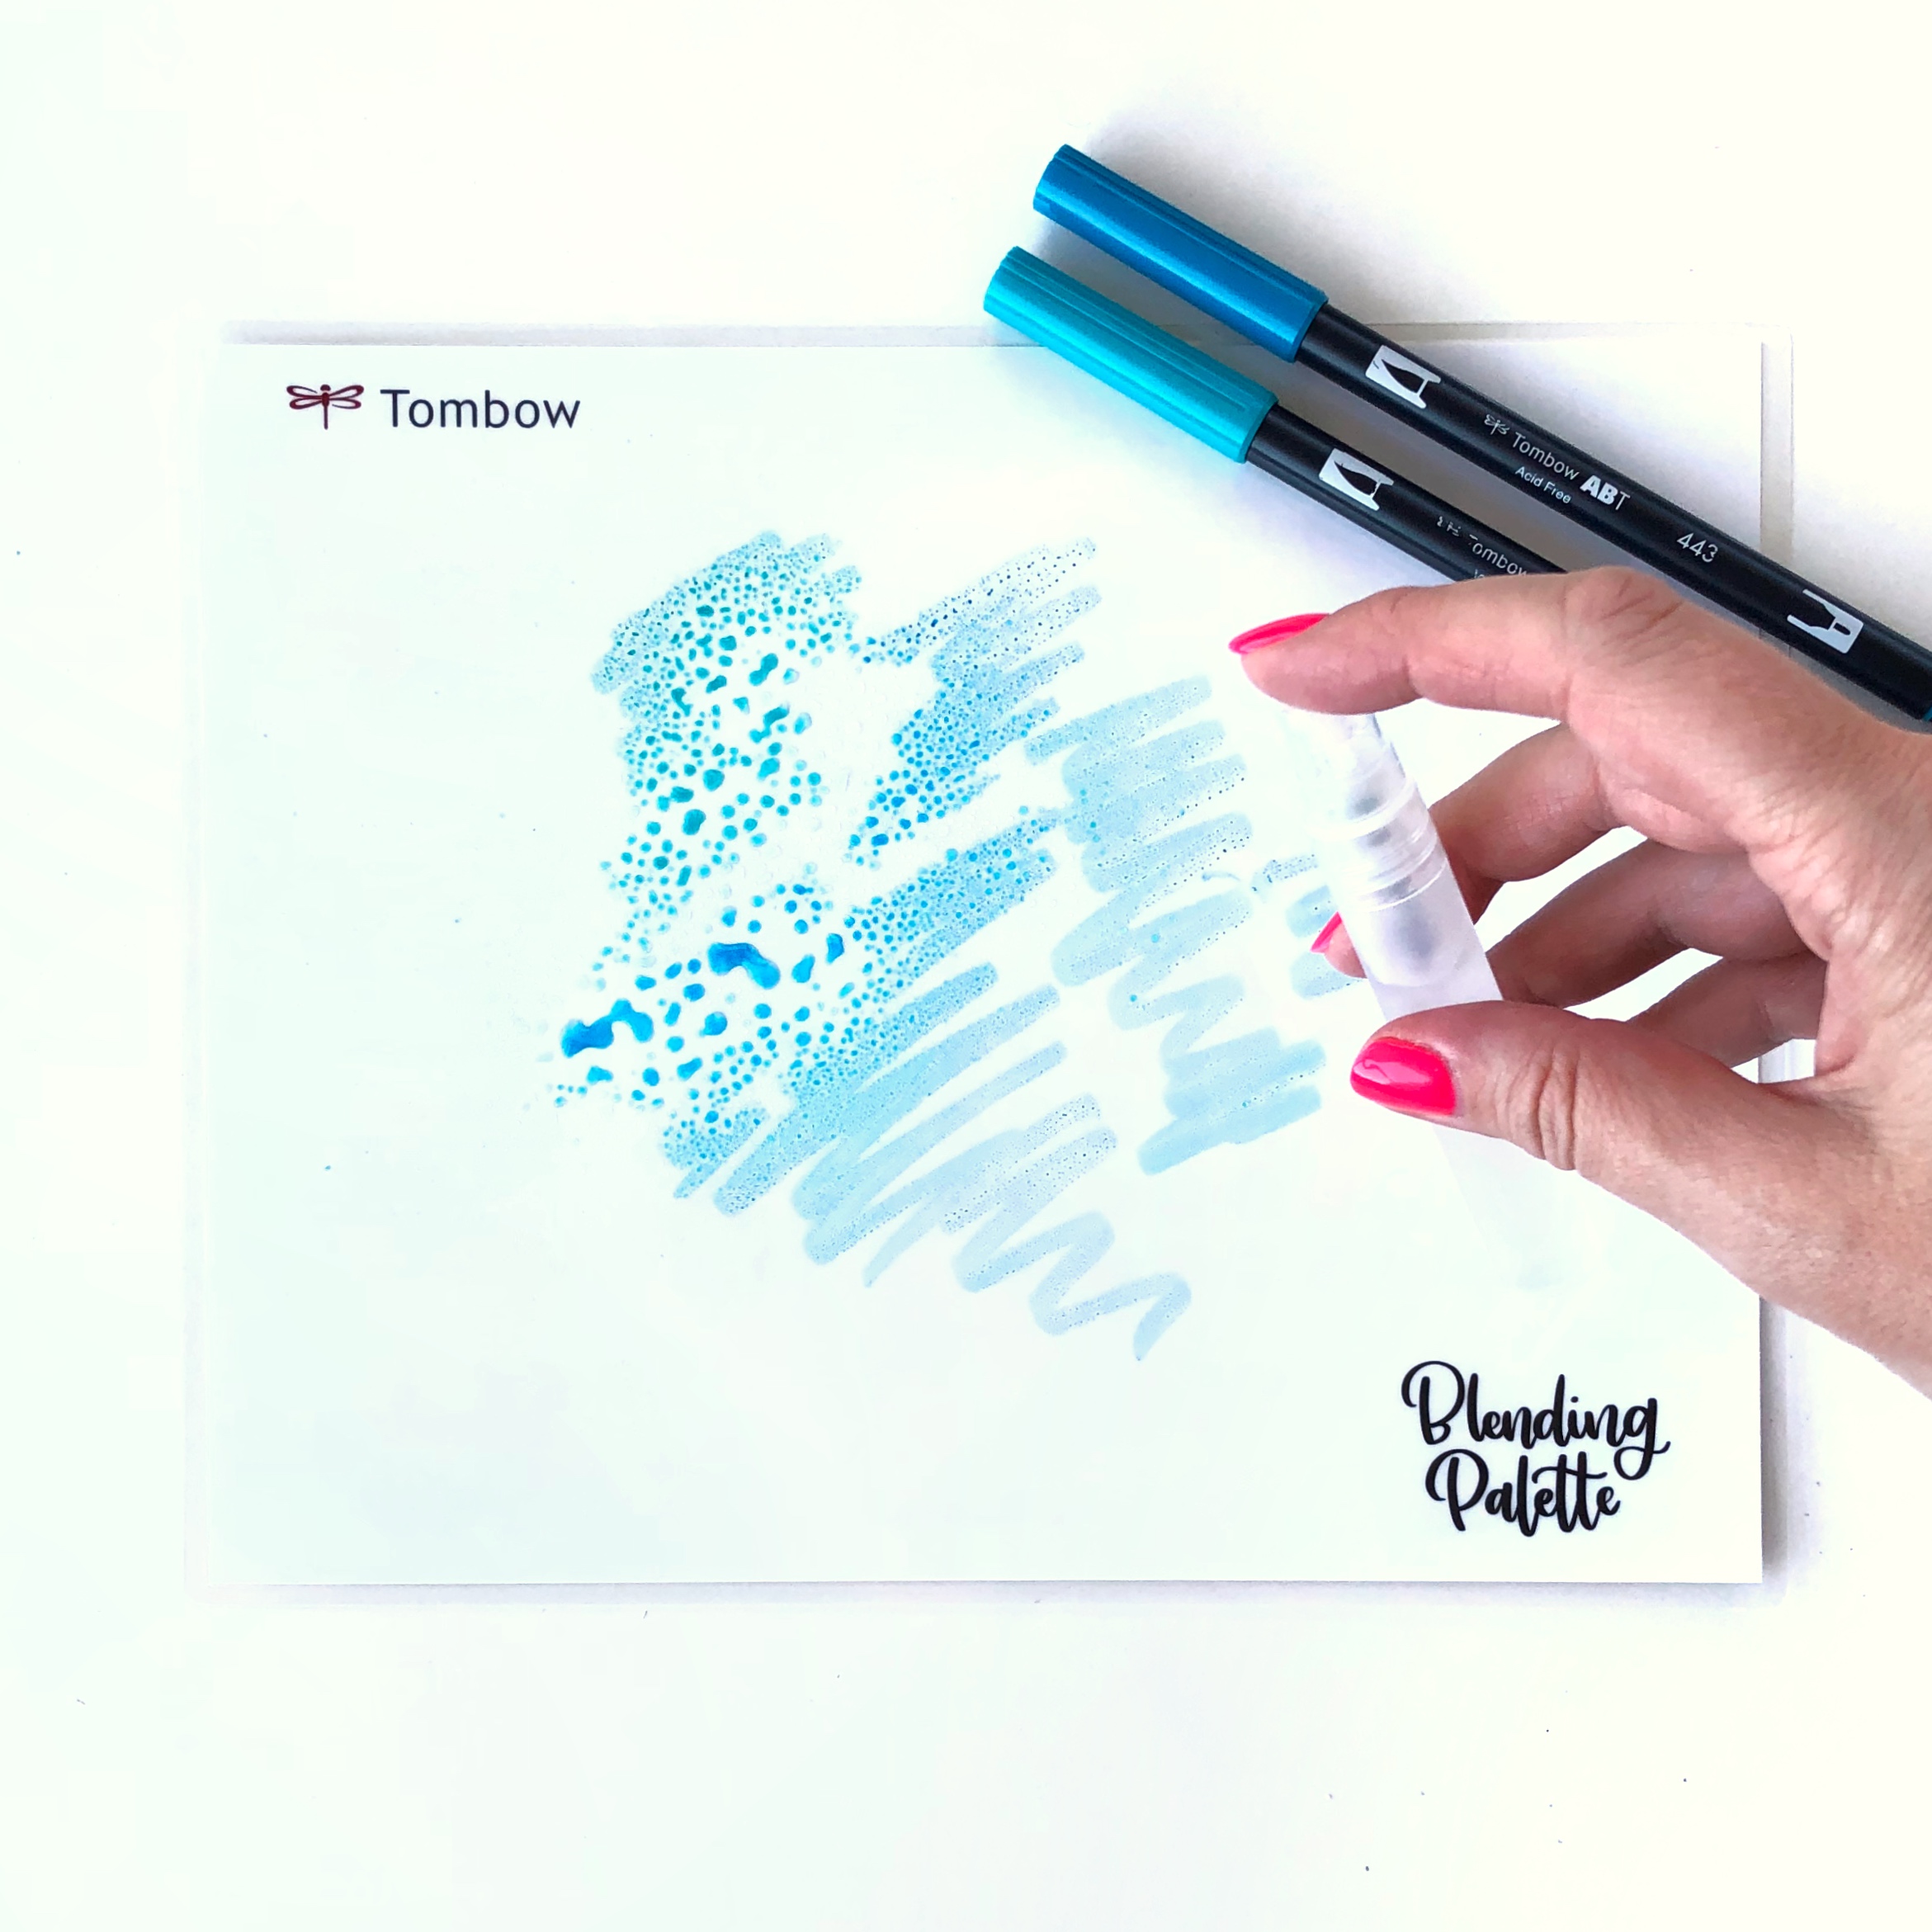
Once you're happy with your pencil sketch, use your Dual Brush Pens to add color to your background. Then blend each section of ink with your Water Brush. If you're right-handed I suggest working from left to right so you don't smear your ink while it's wet, and remember to clean your water brush in between each colored section (unless you'd like to mix the colors together). I usually have a piece of folded paper towel on hand for cleaning my brush.

Make a Watercolor Planner Bookmark by Jessica Mack on BrownPaperBunny

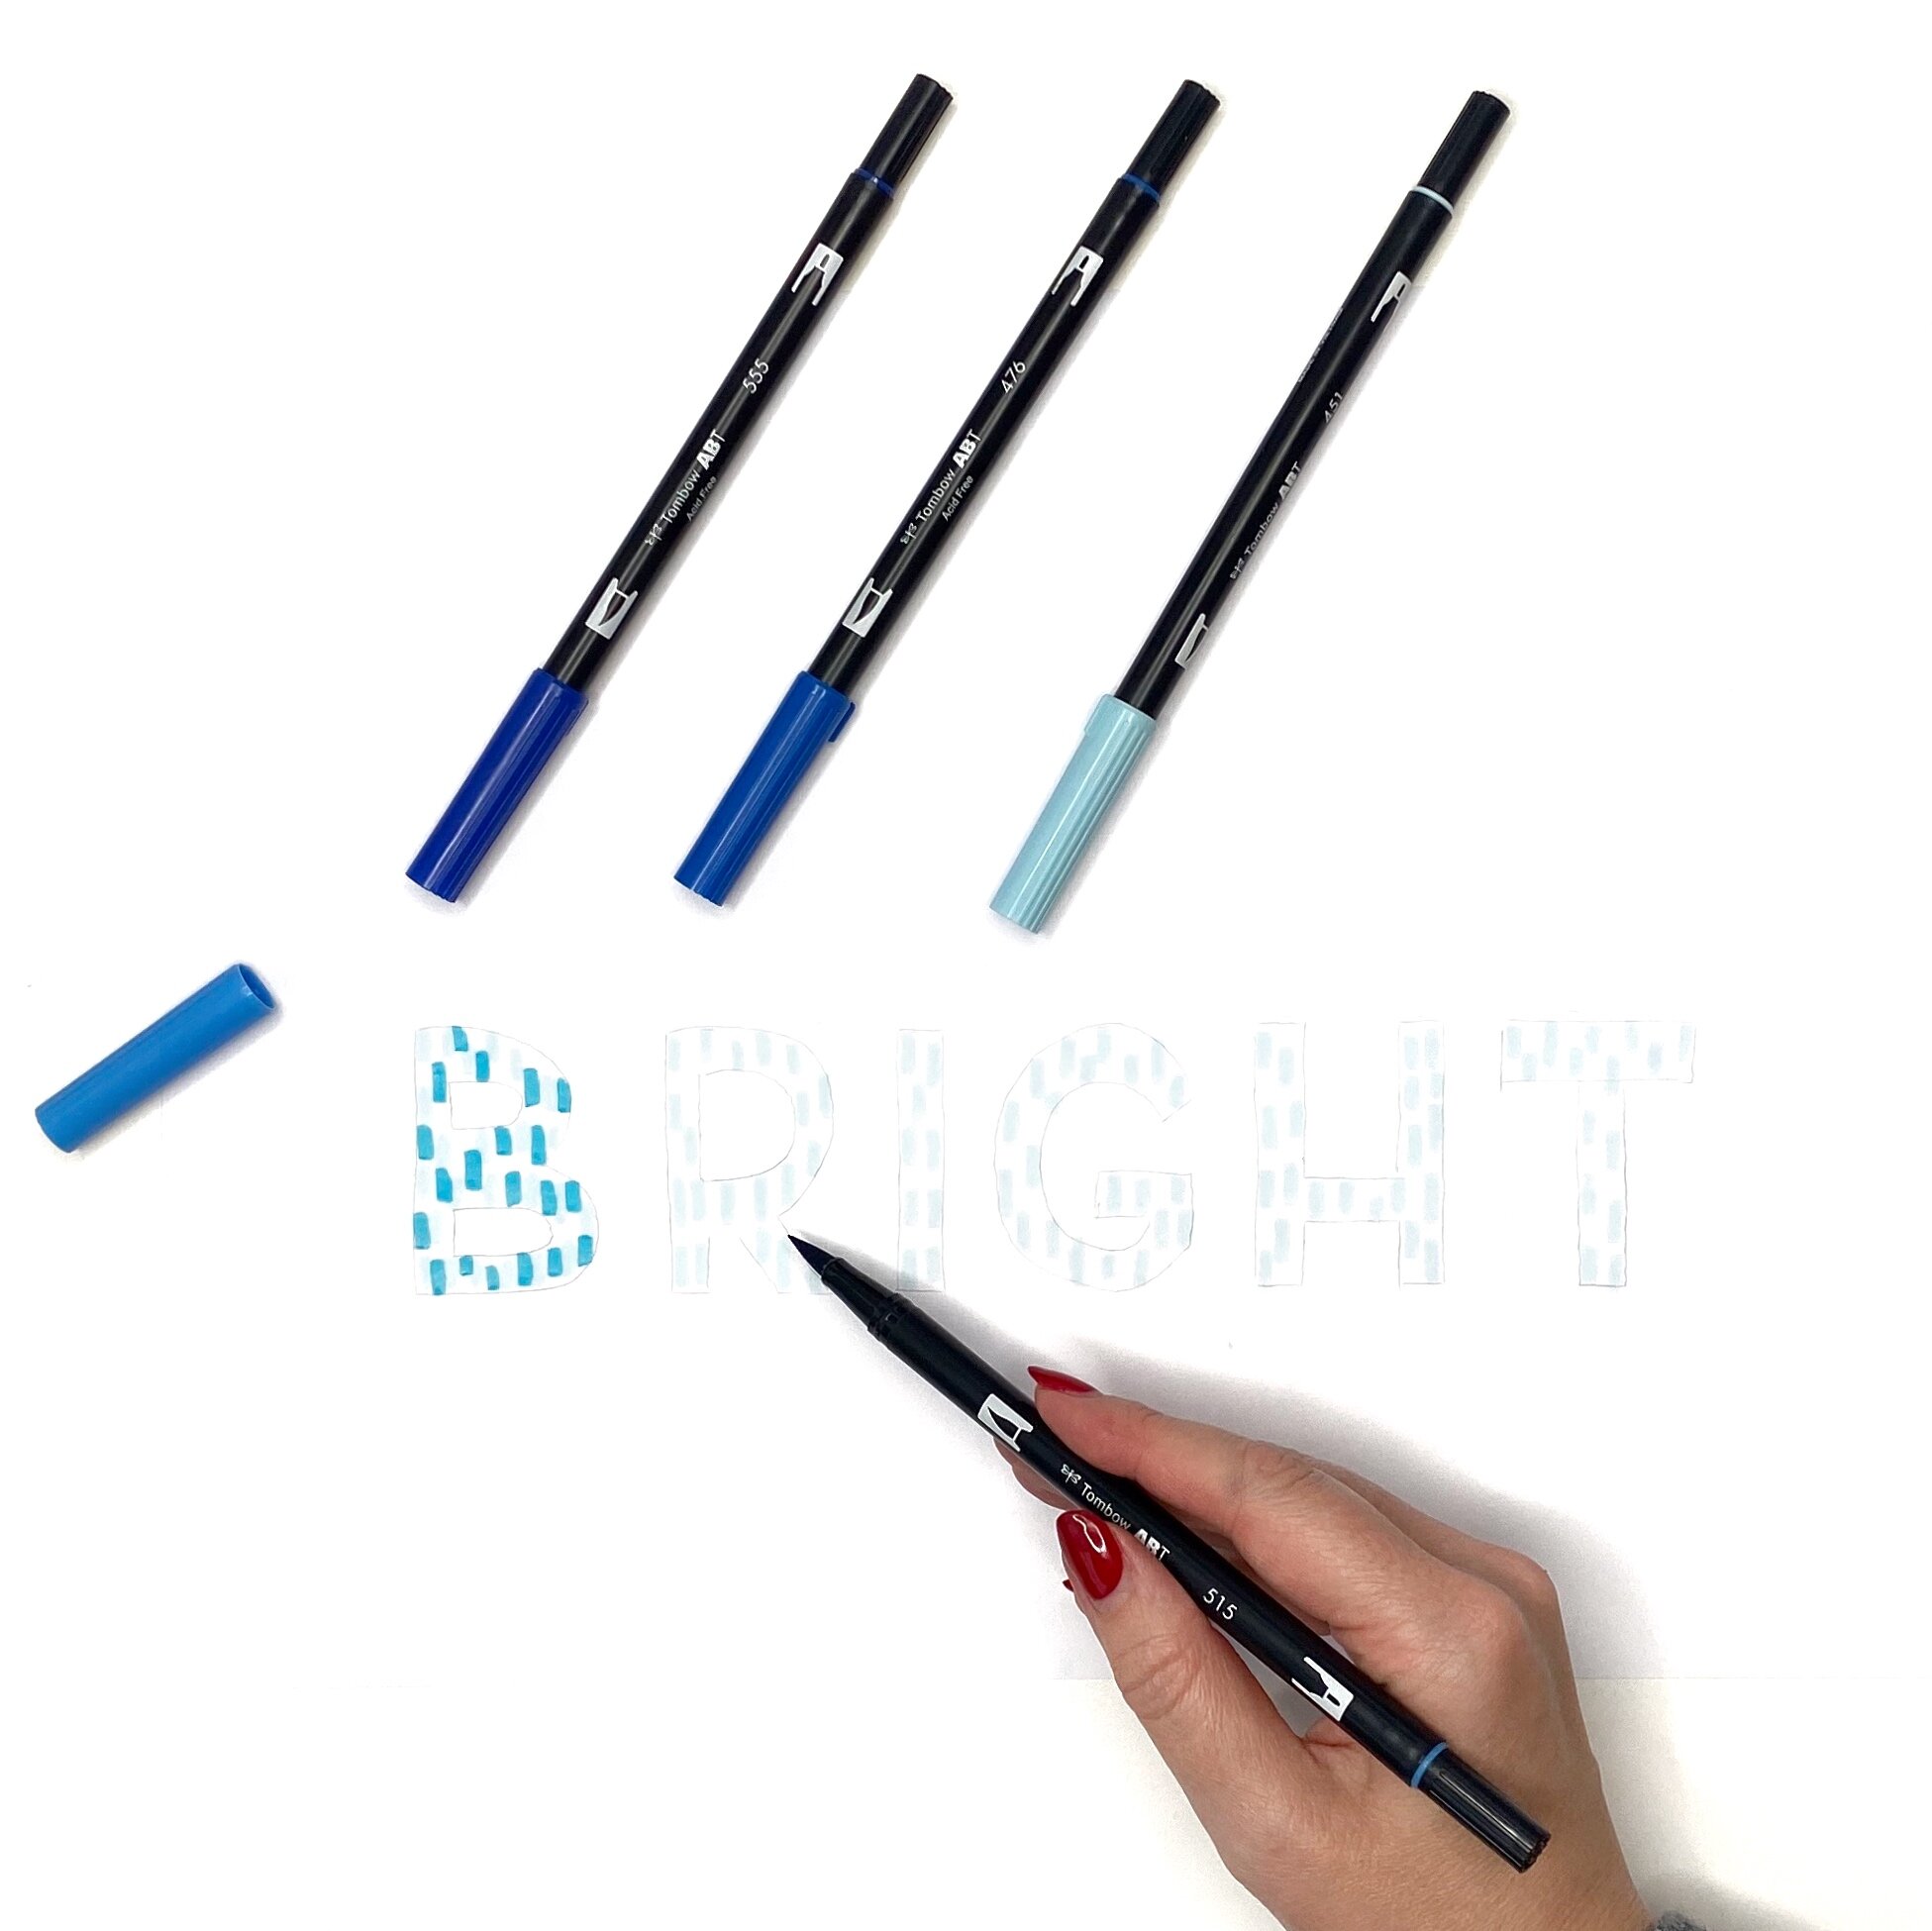
Step 3: Color Your Word

Once the background is completely dry it is time to add color to the word that you chose. I outlined the letters using the bullet tip on my Dual Brush Pen and then filled them in with the brush tip. And, if you want your word to be extra dark, wait a few minutes for the first layer to dry completely and then go back over it again. 

Make a Watercolor Planner Bookmark by Jessica Mack on BrownPaperBunny

Step 4: Cut Out Your Bookmark

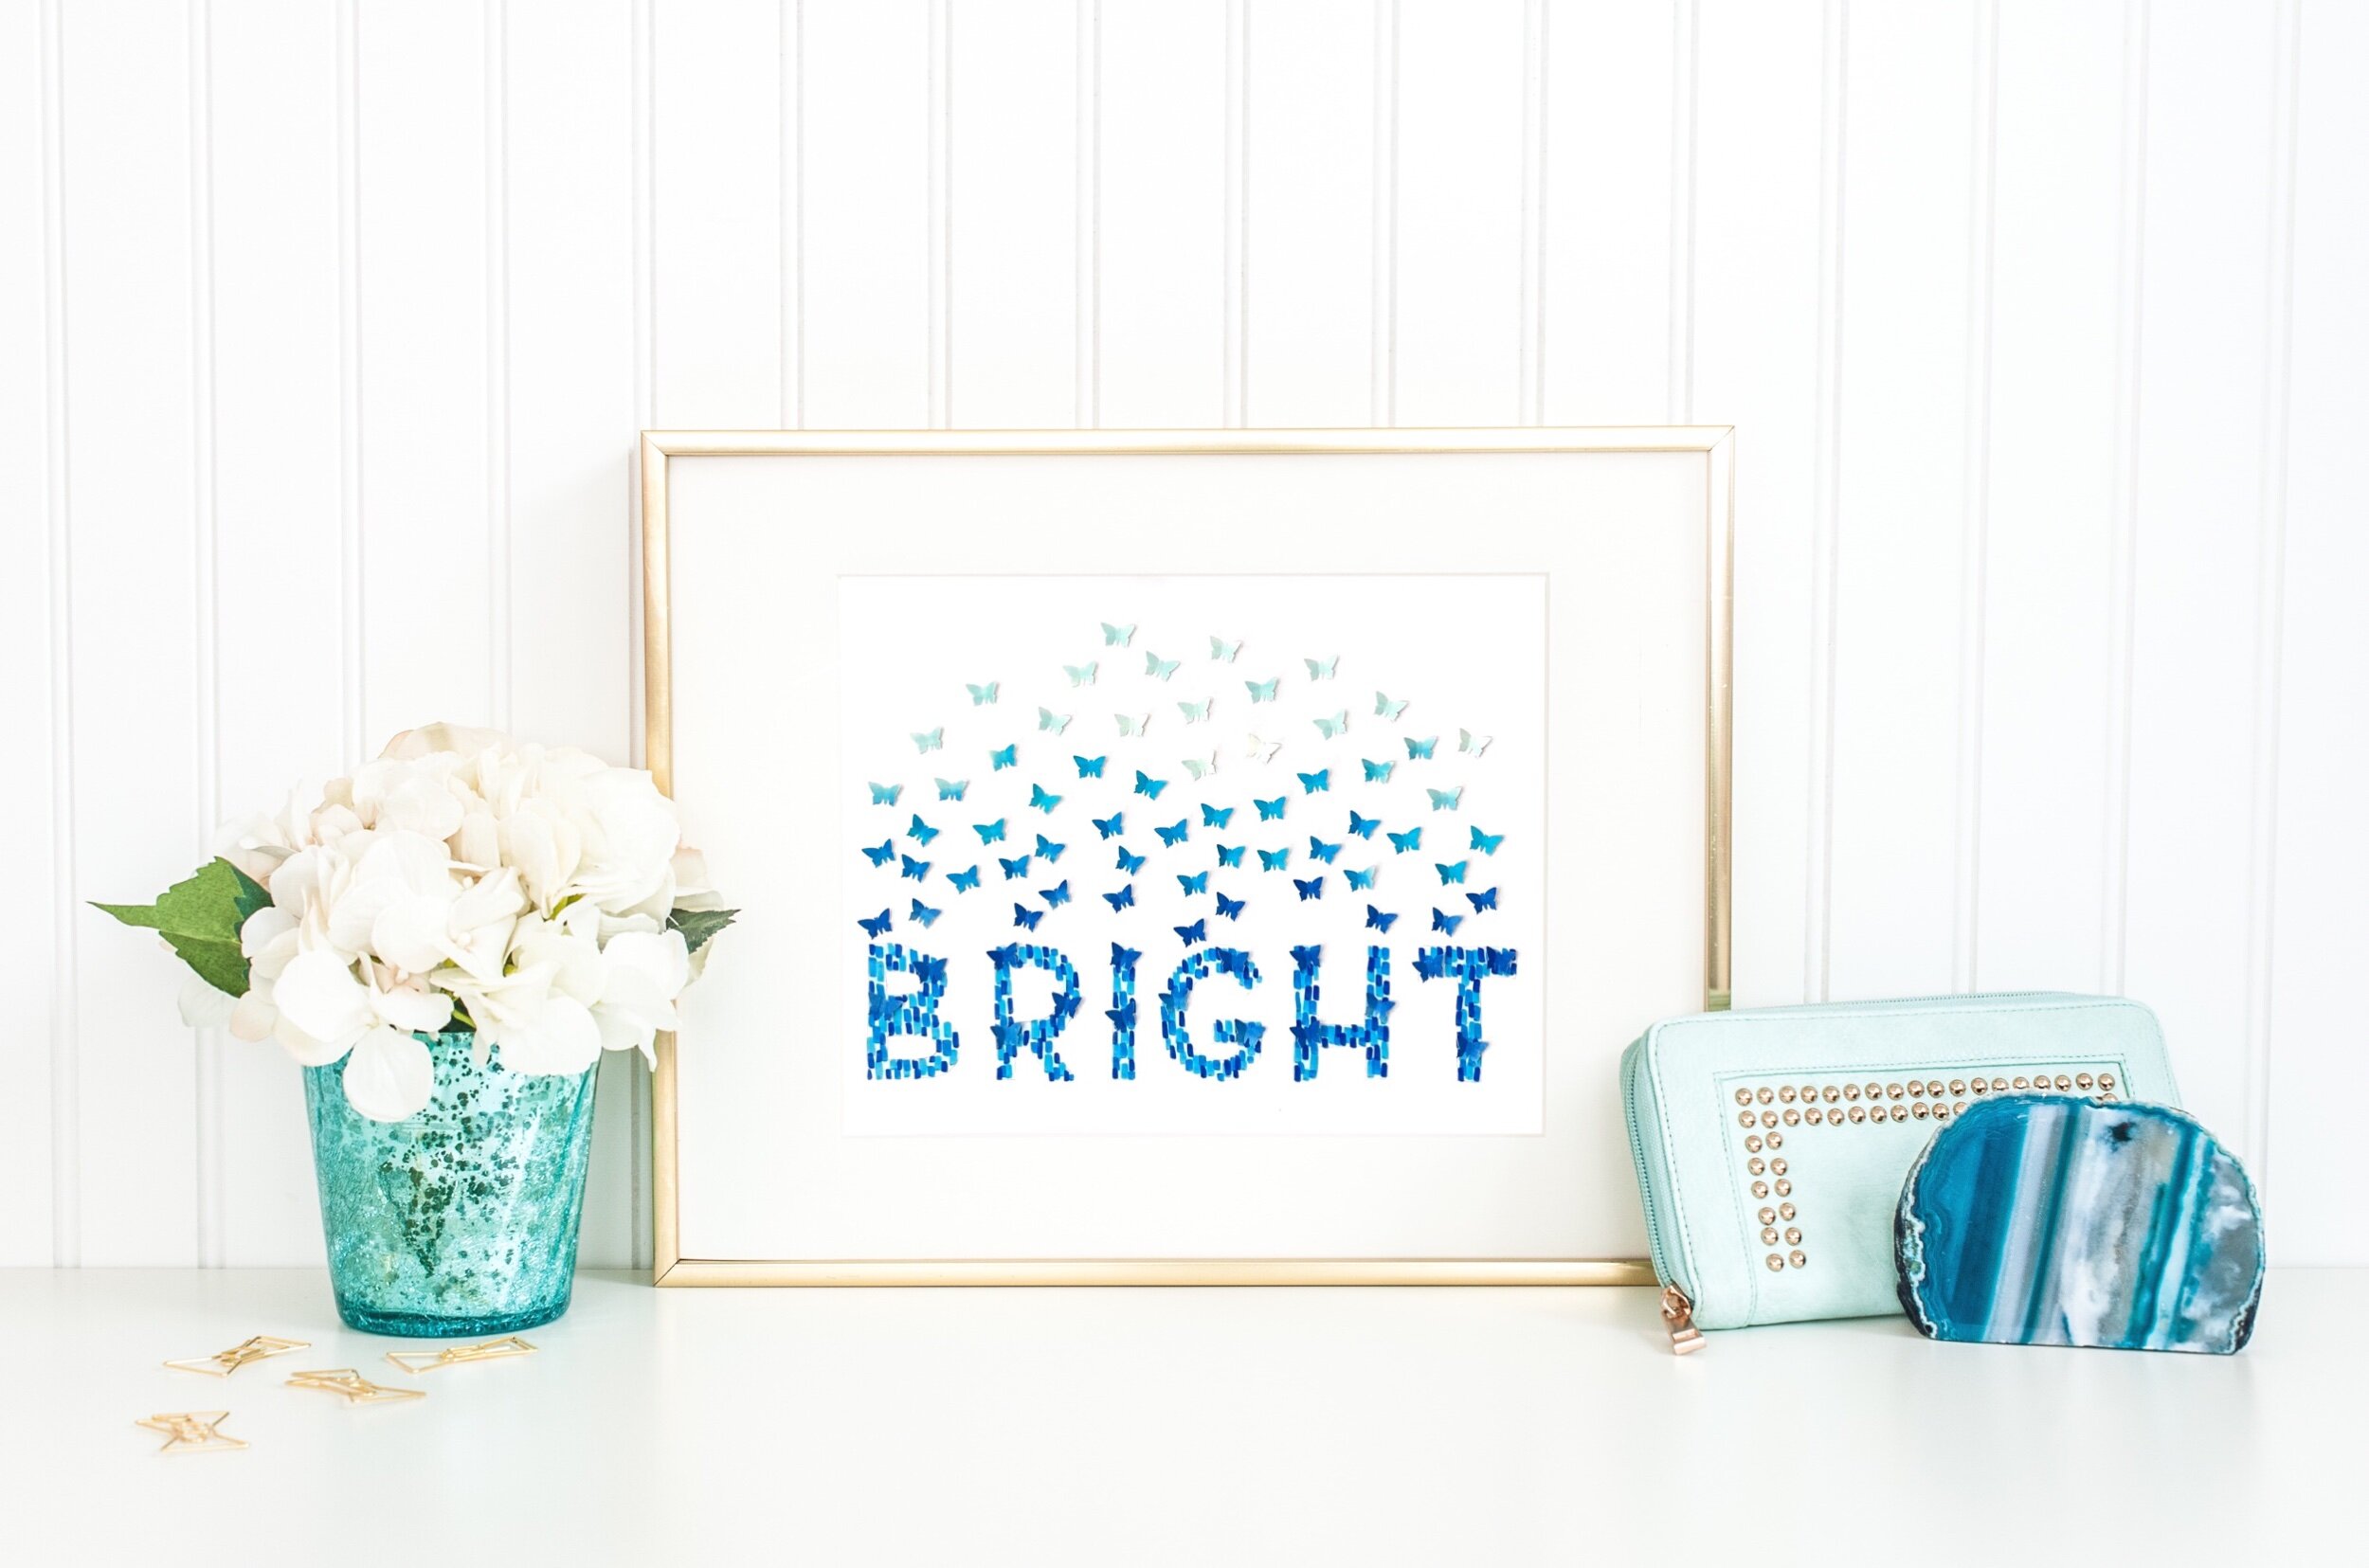
The only thing left to do is cut out your bookmark and start using it as a daily reminder in your Passion Planner! Happy goal achieving!

Make a Watercolor Planner Bookmark by Jessica Mack on BrownPaperBunny

Come visit me on Instagram (@BrownPaperBunny) and tell me what tutorial you’d like to see next!

----------

Please note: This blog post contains affiliate links, which help pay for the upkeep of this site. That being said, I will never, ever promote anything I am not 100% in love with!

In Ink, May 2019, Portraits, Tutorial, Type, Watercolor
6 Comments
IMG_6248.jpeg

Word of the Year Butterfly Art

January 9, 2020

Today I want to talk about making word of the year artwork. These days I rarely set New Year's resolutions, but I do choose one word to be my word of the year, and then I like to turn it into an art piece I can display somewhere prominent as a reminder. In case you are wondering how I choose my word of the year, I start by thinking about the overall feeling I want my life and year to have. It's part mood, part ambition, part commitment. I brainstorm words that come to me, then narrow them down into a shortlist and sit with the list for a few days to see which feels right for me that year. And voila, my word of the year is Bright. I'm going to walk you through how I turned the word into a piece of artwork. Here's what you'll need to get started.

Supplies:

  • Tombow Dual Brush Pens (in a range of shades of the same color)

  • Mixed Media paper (Two sheets)

  • Pencil

  • Tombow Water Brush

  • Butterfly Punch

  • Tombow MONO Aqua Liquid Glue

Adjustments.jpeg

Step 1: Sketch Your Word of the Year

Use your pencil to sketch out your word of the year, onto one of the sheets of multimedia paper.

IMG_6247.jpeg

Step 2: Fill Your Letters

Working from lightest to darkest, fill your letters using your Dual Brush Pens to make little dabs or dots of color.

Keep working until you have multiple layers of color and the letters are mostly filled in. You want to be able to read the letters easily, so make sure you have enough dabs of color along the edges to help with legibility.

Adjustments.jpeg
Adjustments.jpeg

Step 3: Create Watercolor Swatches

On your second piece of multimedia paper, color swatches using your Dual Brush Pens, then blend each one with your Water Brush. Once it dries you'll have a nice watercolor effect.

Adjustments.jpeg
Adjustments.jpeg

Step 4: Punch Out Your Butterflies

Using your butterfly punch, work your way through each dried watercolor swatch, until you have as many butterflies as you think you'll need to decorate your word and the space above it.

Adjustments.jpeg

You should have a gradient of colored butterflies to choose from. 

Adjustments.jpeg

Step 5: Glue Your Butterflies On

Use light pressure to gently bend the wings of the butterflies up, so they have more of a 3D look. Then, add a dab of your Mono Aqua Liquid Glue to the back of each butterfly and start sticking them to the paper with your word of the year on it.

Adjustments.jpeg

I started with a few of the darkest butterflies on the letters themselves, and then stuck more of them above the letters, with the very lightest ones at the top of the page.

Adjustments.jpeg

Once you're finished, don't forget to frame it or hang it somewhere you'll see it every day!

I’d love to see the word of the year you choose for yourself, and how you turn it into art. So tag @BrownPaperBunny on social media.

----------

Please note: This blog post contains affiliate links, which help pay for the upkeep of this site. That being said, I will never, ever promote anything I am not 100% in love with!

In Illustrations, Ink, May 2019, Type
8 Comments
Watercolor Thanksgiving Cards

Watercolor Thanksgiving Cards

November 14, 2019

I’m loving the new Tombow Watercolor Set, and am basically using it for everything right now, including making Thanksgiving cards.

The MONO Twin Permanent Marker has a thick and a thin bullet tip perfect for lettering or adding line work. You can add watercolor over the top of it because it’s permanent. Awesome right?!

Watercolor Thanksgiving Cards

Here’s another Thanksgiving card I created using the new Tombow Watercolor Set. I drew the black outlines with the MONO Twin Permanent Marker, then added color using the Dual Brush Pens and blended it all together with the Water Brush that is included in the set. I’m going to send these out to friends and family and tell them why I’m thankful for them.

Watercolor Thanksgiving Cards

And the video below walks you through the steps to make this Thanksgiving card, which you could also turn into a cute place card if you’re hosting this year!

You’ll need some watercolor paper, masking tape, and the new Tombow Watercolor Set.

Start by masking off an area (where you’ll add some text at the end), then mix up some color using the Dual Brush Pens, Water Brush and Blending Palette that come in the set.

Paint on some leaves, or flowers, around your masked-off area. Once the ink has dried, go back over the top with a Dual Brush Pen to create darker shapes.

Remove the tape, add a message, and voila you’ve got yourself a quick and easy Thanksgiving card.

Drop me a comment and tell me your favorite thing about Thanksgiving.

----------

Please note: This blog post contains affiliate links, which help pay for the upkeep of this site. That being said, I will never, ever promote anything I am not 100% in love with!

In Ink, May 2019, Tutorial, Watercolor, Type
10 Comments
How to Make Watercolor Bookmarks by Jessica Mack on BrownPaperBunny

How to Make Watercolor Bookmarks

November 7, 2019

Today I’m going to show you how to make watercolor bookmarks using Tombow's Advanced Lettering Set. These make really cute gifts, especially when tucked inside a new book! Here's what you'll need to get started.

Supplies:

  • Tombow Advanced Lettering Set

  • Watercolor Paper

  • Tombow Water Brush (Medium)

  • Scissors

  • Hole Punch

  • Embroidery Thread 

How to Make Watercolor Bookmarks by Jessica Mack on BrownPaperBunny

Step 1: Pick Your Colors from the Advanced Lettering Set

Use two Dual Brush Pens from your Advanced Lettering Set to draw some color onto each end of your watercolor paper. All three of the colored pens included in the set blend nicely together so experiment with different color combinations.

How to Make Watercolor Bookmarks by Jessica Mack on BrownPaperBunny

Step 2: Blend

Now use your Water Brush to start blending the colors towards each other. To keep the brush tip wet just squeeze lightly on the barrel while you're working. Once the colors are blended in the middle, set the paper aside and wait for the ink to dry.

How to Make Watercolor Bookmarks by Jessica Mack on BrownPaperBunny

Step 3: Decorate Your Bookmarks

Use the MONO Drawing Pencil that comes in the set to sketch out any pictures or words you want to decorate your bookmarks with. Then use the Dual Brush Pens, Fudenosuke Brush Pens, or MONO Twin Permanent Marker over the top. Try a book-related quote, a stack of book spines, or maybe a pattern.

How to Make Watercolor Bookmarks by Jessica Mack on BrownPaperBunny

Step 4: Add a Tassel (optional)

Cut out your bookmarks and either leave them as is, or punch a hole in the top and make a tassel from embroidery thread to add to your bookmark.

How to Make Watercolor Bookmarks by Jessica Mack on BrownPaperBunny

I’d love to see your wonderful creations so tag @BrownPaperBunny on social media. Happy reading!

----------

Please note: This blog post contains affiliate links, which help pay for the upkeep of this site. That being said, I will never, ever promote anything I am not 100% in love with.

In Ink, May 2019, Tutorial, Watercolor, Type
3 Comments
Create a BuJo Book Tracker by Jessica Mack of BrownPaperBunny

Create a BuJo Book Tracker

July 28, 2019

Please note: This blog post contains affiliate links, which help pay for the upkeep of this site. That being said, I will never, ever promote anything I am not 100% in love with!

----------

This year I challenged myself to read more, a lot more. Setting goals and keeping track of the books I've read has really helped keep me motivated and organized. Last year I read a total of 12 books, so far this year I've read 48 and we're only half-way through! Here's how you can create a book tracker for yourself.

Supplies:

  • Tombow Dual Brush Pens

  • Notebook (mine is from Archer & Olive)

  • Tombow MONO Twin Permanent Marker

  • Tombow MONO Drawing Pens

Create a BuJo Book Tracker by Jessica Mack of BrownPaperBunny

Step 1: Draw Your Book Outlines

Add a title to the top of your notebook page, then, using the smallest tip on your MONO Twin Permanent Marker draw some book outlines underneath. Add some page lines as details. Make sure to leave three areas to write the title, author and your rating on each book. I like to draw at least one or two more blank books than I'll think I'll be able to read, to push myself a little. Tip: The MONO Twin Permanent Marker can be used under Tombow Dual Brush Pens, or watercolor and it won't bleed or smudge.

Create a BuJo Book Tracker by Jessica Mack of BrownPaperBunny

Step 2: Populate Your Book Tracker

As you finish each book, add some color to the book cover and page details with your Dual Brush pens. I'm using Dual Brush Pens from the Desert Flora palette but you can use any colors you like. The next step is to use your MONO Drawing Pens to write in the title, author and either a rating or a few words about the book.

Create a BuJo Book Tracker by Jessica Mack of BrownPaperBunny

Step 3: Read and Repeat!

Not only will your book tracker push you to read more, but months or years from now you'll be able to flip back through and be reminded of the books you've read and what you thought of them! I'd love to see your book tracker and hear about your latest great read, so tag @TombowUSA and @BrownPaperBunny on social media!

In Illustrations, Ink, May 2019, Tutorial, Type
6 Comments
public.jpeg

Art Journal Page with Markers

July 27, 2019

Please note: This blog post contains affiliate links, which help pay for the upkeep of this site. That being said, I will never, ever promote anything I am not 100% in love with!

----------

Here’s an easy way to make an art journal page with markers! Water soluble markers are vibrant and versatile and can give you a huge variety of different effects! Here's what you'll need to get started.

SUPPLIES:

  • Tombow Dual Brush Pens

  • Watercolor Paper or sketchbook

  • Tombow Water Brush

  • Fudenosuke Brush Pen (hard tip)

  • MONO Air Correction Tape

public.jpeg

Step 1: Create a Background

Scribble ink onto the page with your Dual Brush Pens, choosing colors that will blend together nicely (greens and blues, or oranges and pinks for example).

Next, use your Water Brush to blend the ink together.

Step 2: Add Background Pattern

Once the background color is dry, it’s time to add a pattern to your art journal page. Use the bullet tip of your markers to create a repeating pattern. I did scales, but you could use anything: Stars, hearts, flowers, leaves, shapes etc.

public.jpeg

Step 3: Add a Quote

The next step is to use your correction tape to create white lines for you to write on, then use your Fudenosuke Pen to add your favorite quote, or some words of your own!

public.jpeg

Do you have a favorite quote? Let me know in the comments!

In Ink, May 2019, Pattern, Tutorial, Type, Watercolor
4 Comments
Geometric Bullet Journal Month Page by Jessica Mack on BrownPaperBunny.

Geometric Bullet Journal Month Page

June 17, 2019

Please note: This blog post contains affiliate links, which help pay for the upkeep of this site. That being said, I will never, ever promote anything I am not 100% in love with!

----------

Today I’m going to show you how to create an easy geometric bullet journal month page for July. It's a great way to mark the start of a new month in a pretty way. Here's what you'll need to get started.

Supplies:

  • Tombow Dual Brush Pens

  • Dot Grid Notebook (I'm using a Michael Roger Dot Grid Decomposition Notebook)

  • Tombow MONO Graph Mechanical Pencil

I love Michael Roger's Decomposition notebooks because they use 100% recycled post-consumer waste recycled paper and although the paper is nice and thin, Tombow Dual Brush Pens still don't bleed through to the other side, so they're the perfect companions!

Geometric Bullet Journal Month Page by Jessica Mack on BrownPaperBunny.

Step 1: Write the Month

Use your MONO Graph Mechanical Pencil to write the month (and year if you'd like) onto the page of your task journal. You can use the dot grid to help you map out where the letters should go.

Geometric Bullet Journal Month Page by Jessica Mack on BrownPaperBunny.

Step 2: Pick a Shape

The great thing about the dot grid pattern is that you can use it to easily draw out little geometric shapes. Try triangles, chevrons, rectangles etc. Geometric task journal pages look great and are super easy to make. In this example, I used the dot grid to create a squished hexagon pattern using purples, yellows, and teals.

Alternate the different shades for a bit of variety.

Geometric Bullet Journal Month Page by Jessica Mack on BrownPaperBunny.

Step 3: Add Additional Colors

Move down the page, adding new colors as you go. Experiment with working from the top down, sideways, or at an angle for a different look.

Geometric Bullet Journal Month Page by Jessica Mack on BrownPaperBunny.

Once you've finished the whole page you can either leave it there or move on to the next, optional, step.

Geometric Bullet Journal Month Page by Jessica Mack on BrownPaperBunny.

Step 4: Color in the Text (optional)

This step is optional, but if you don't want any paper showing through on the page you can go over your month with Dual Brush Pen as well.

Geometric Bullet Journal Month Page by Jessica Mack on BrownPaperBunny.
In Ink, May 2019, Tutorial, Type
1 Comment
FullSizeRender.jpg

'60s Inspired Art Journal Page

May 27, 2019

Please note: This blog post contains affiliate links, which help pay for the upkeep of this site. That being said, I will never, ever promote anything I am not 100% in love with!

----------

This week I’m creating projects with a retro vibe, so I’m going to show you how to make an art journal page that looks like a ‘60s band poster.

SUPPLIES:

  • Tombow Dual Brush Pens

  • MONO Drawing Pens

  • MONO Graph Mechanical Pencil

  • Art Journal or Sketchbook

FullSizeRender.jpg

Step 1: Draw Your Outlines

The first step is to draw (or trace) a face profile, use your own for a fun self portrait. Then fill in the whole page with wavy hair.

FullSizeRender.jpg

Step 2: Add Some Lettering

Next, use some retro lettering to write words into the hair (I wrote things that make me happy). Fill blank hair sections with doodles of hearts, and daisies.

FullSizeRender.jpg

Step 3: Add Color

Using a retro color palette it’s time to use your Dual Brush Pens to color each section of the hair and lettering. To get a watercolor look you can blend the ink in each section with a damp paintbrush. What words would you write into the hair?

FullSizeRender.jpg
FullSizeRender.jpg

Step 4: Pull Out Details

Once you’ve finished coloring your journal page, you can go over the facial features with the bullet tip of one of your Dual Brush Pens for more definition. Voila, you have a ‘60s inspired journal page!

FullSizeRender.jpg

Let me know what your favorite decade is and why in the comments! 

In Tutorial, Type, Ink, May 2019, Illustrations, Watercolor
4 Comments
Books books books by Jessica Mack of BrownPaperBunny

Books, Books, Books

May 2, 2019

I’ve always been a big reader, but lately I’ve been reading (and listening to so many audio books) that I felt compelled to start a whole new Instagram (or Bookstagram) account just to share them all. If you’re interested you can check it out at @LatestBookCrush

I’ve even been drawing and painting books, they’re just taking over my life lately!

What are you reading right now? Leave me a comment and let me know if you ever use books or book pages to create art!

949bba1389ca075f38f2e5ae4c205e364be4064587fe8efab6

In Dec 2018, Book Review, Illustrations, Type
6 Comments
Draw a Fall Wreath in Jewel Tones by Jessica Mack of BrownPaperBunny

Draw a Fall Wreath in Jewel Tones

November 16, 2018

Please note: This blog post contains affiliate links, which help pay for the upkeep of this site. That being said, I will never, ever promote anything I am not 100% in love with!

----------

Hello hello! Today I’m going to show you how to draw a fall wreath in jewel tones. While I love the colors of changing leaves at this time of year I thought it would be fun to branch out (pun intended) and try some brighter jewel tones that are a little less associated with fall. This wreath is super easy to draw and looks great on cards, your art journal, or in your planner. Here's what you'll need to get started.

Supplies:

  • Tombow Dual Brush Pens (I chose 312, 346, 528, 606, and 946)

  • Watercolor paper or thick paper or card

  • Tombow Mono Drawing Pencil (2H or 4H)

  • Paintbrush

  • Water

Draw a Fall Wreath in Jewel Tones by Jessica Mack of BrownPaperBunny

Step 1: Sketch Your Wreath in Pencil

The first step is to sketch out your wreath, using a pencil. I chose a 4H pencil because it is super light. You can sketch in some flowers, leaves, and fruit at this stage, or just draw the basic circle you plan to follow.

Step 2: Create a Soft First Layer

Next you're going to use your lighter colors to draw in some lose branch shapes around the wreath. These are going to end up being your background branches to add depth to your drawing.

Draw a Fall Wreath in Jewel Tones by Jessica Mack of BrownPaperBunny

Go over them with a wet paintbrush to soften them and blend the ink together a little.

Draw a Fall Wreath in Jewel Tones by Jessica Mack of BrownPaperBunny

Step 3: Add Your Largest Leaves and Shapes

Once your background branches are dry, it's time to start adding your larger shapes. These can be flowers, large leaves, fruit etc. If you want to have a watercolor-look you can use your wet paintbrush to go over these shapes as well, to blend your marker strokes together. To see how I do this, watch the time-lapse video at the end of this blog post. 

Draw a Fall Wreath in Jewel Tones by Jessica Mack of BrownPaperBunny

Step 4: Creating Details

Once everything is dry it's time to go back in and add more details. You can use the brush or the fine tip of your Dual Brush Pens to create more leaves, branches, add detail to your flowers etc.

Draw a Fall Wreath in Jewel Tones by Jessica Mack of BrownPaperBunny

Step 5: Lettering

The final step is to add some lettering to the middle of your wreath. You could simply write the word 'Fall' like I did, or add your favorite quote, someone's name, or a holiday greeting.

Draw a Fall Wreath in Jewel Tones by Jessica Mack of BrownPaperBunny

Watch the video below to see how this wreath all came together. And share your own wreath on social media! Tag @BrownPaperBunny so I can see!

In Watercolor, Illustrations, Aug 2017, Tutorial, Ink, Type
3 Comments
DIY Happy Mail with Mixbook and Tombow by Jessica Mack of BrownPaperBunny

DIY Happy Mail with Mixbook and Tombow

October 19, 2018

Please note: This blog post contains affiliate links, which help pay for the upkeep of this site. That being said, I will never, ever promote anything I am not 100% in love with!

----------

Hello hello! This week I’m going to show you how to make some fun travel-themed happy mail with Mixbook and Tombow supplies. I think the world would be a happier place in general if we all sent a little more snail mail to each other!

Supplies:

  • Tombow Fudenosuke Color Brush Pens

  • Mixbook Invitation Cards

  • Tombow Mono Drawing Pen

  • Map or travel photo

  • Tombow Mono Adhesive + Permanent

  • Plain paper

  • Scissors

DIY Happy Mail with Mixbook and Tombow by Jessica Mack of BrownPaperBunny

Step 1: Write Your Greeting

Use your colored Fudenosuke brush pens to write your greeting onto a separate piece of paper. Have some fun with the colors and try some different writing styles!

DIY Happy Mail with Mixbook and Tombow by Jessica Mack of BrownPaperBunny

Step 2: Cut Everything Out

Cut out your greeting, and trim down your map or travel photos so they fit just inside the border of your Mixbook invitation cards.

Step 3: Stick the Pieces Together

Using your Mono Permanent + Adhesive stick your map or photos to the card, then layer your greeting on top. Use your Fudenosuke brush pens to add some fun details or finishing touches then write on the back with your Mono Drawing Pen and your DIY Mixboook happy mail is ready to be sent!

DIY Happy Mail with Mixbook and Tombow by Jessica Mack of BrownPaperBunny

To put a little extra sparkle in your recipient's day why not decorate the envelope as well. Use your Fudenosuke or Mono Drawing Pens to continue the travel theme on the outside.

I’d love to see your happy mail, tag @BrownPaperBunny on social media so I can take a look!

In Tutorial, Type, Ink, Aug 2017
2 Comments
Make a Book Quote Wall Hanging with Jessica Mack of BrownPaperBunny

Make a Book Quote Wall Hanging

September 8, 2018

Please note: This blog post contains affiliate links, which help pay for the upkeep of this site. That being said, I will never, ever promote anything I am not 100% in love with!

----------

This week I am all about literature, so I’m going to show you an easy way to turn your favorite book quote into a wall hanging.

Supplies:

  • Tombow Dual Brush Pens
  • A page of text from the book (typed or handwritten)
  • Tombow Mono Drawing Pen
  • Pencil
  • A cute frame

The first step in creating your literature-inspired wall hanging is to letter your favorite quote onto your page of text. Using a separate sheet of paper I got my lettering just how I wanted then used a light-box to trace it onto my page filled with text.

Make a Book Quote Wall Hanging with Jessica Mack of BrownPaperBunny

Once your text is dry repeat the quote in a darker shade, and offset it slightly. This will create a fun drop shadow effect.

Make a Book Quote Wall Hanging with Jessica Mack of BrownPaperBunny

Once it is dry you can outline the words with your Mono Drawing Pen for extra impact. Then it’s time to frame it and hang it on the wall. I used a cute magnetic frame for mine.

Make a Book Quote Wall Hanging with Jessica Mack of BrownPaperBunny

What's your all-time favorite book? Let me know in the comments!


In Ink, Aug 2017, Tutorial, Type
9 Comments
How to Create a Watercolor Background for Your Lettering by Jessica Mack of BrownPaperBunny

How to Create a Watercolor Background for Your Lettering

September 1, 2018

Please note: This blog post contains affiliate links, which help pay for the upkeep of this site. That being said, I will never, ever promote anything I am not 100% in love with!

----------

I just love using Tombow Dual Brush Pens to create a watercolor effect and the new XL Blending Palette is perfect for that! Today I’m going to show you how I create watercolor backgrounds for lettering projects. You’ll need the XL Blending Palette, Dual Brush Pens in your favorite colors, a water mister, watercolor paper, and Mono Drawing Pen or Fudenosuke Pen.

How to Create a Watercolor Background for Your Lettering by Jessica Mack of BrownPaperBunny

To create your watercolor background start by adding some ink to your XL Blending Palette with your Dual Brush Pens. Spray a little water over the ink then press your watercolor paper down onto the palette. Blot any extra water with some paper towel, and if you want the color to run a little more you can spray water directly onto your paper. While you’re waiting for your paper to dry, wipe down your blending palette with damp paper towel and you’re ready to start again! What are your favorite colors to blend together?

How to Create a Watercolor Background for Your Lettering by Jessica Mack of BrownPaperBunny

Here's a video of the whole process.

Once your watercolor background is dry you’re ready to start your lettering project. I used Mono Drawing Pens, Dual Brush Pens and my Fudenosuke to create the lettering on this project. Do you have a favorite quote, let me know in the comments!

In Type, Ink, Watercolor, Aug 2017, Tutorial, Sketchbook
6 Comments
Easy watercolor word art by Jessica Mack of BrownPaperBunny

Easy Watercolor Word Art

July 14, 2018

Please note: This blog post contains affiliate links, which help pay for the upkeep of this site. That being said, I will never, ever promote anything I am not 100% in love with!

----------

When I think of the color indigo I think of stargazing on warm summer nights. I just love the inky color of sky after the sun has completely disappeared. Today I'm going to show you how to make this easy watercolor word art so you can dream of the stars anytime you like.

Supplies:

  • Tombow Dual Brush Pens (N25 and 565)
  • 140 lb Watercolor paper
  • Tombow Mono Plastic Eraser
  • Paintbrush and water
  • Tombow Mono Drawing Pencil (4H)
Easy watercolor word art by Jessica Mack of BrownPaperBunny

Step 1: Sketch Your Words in Pencil

Use a nice light pencil (2H or 4H works well) to sketch in your words and stars. You'll be able to erase any visible lines at the end so don't worry about it being too neat at this stage.

Easy watercolor word art by Jessica Mack of BrownPaperBunny

Step 2: Outline Your Words

Outline your words and stars in black or charcoal Dual Brush Pen ink. This gives you greater contrast around the letters once everything is blended together.

Easy watercolor word art by Jessica Mack of BrownPaperBunny

Step 3: Color in the Background

Using your dark blue Dual Brush Pen (I used 565) fill in the background around your stars and words. You don't need to fill in every tiny space, it's ok if there is some white showing through. In the next step you're going to blend it all together anyway.

Easy watercolor word art by Jessica Mack of BrownPaperBunny

Step 4: Blend the Ink With Water

Using your paintbrush and some water start blending the ink together. I find it easiest to start with the fiddly bits around the letters and stars first and then fill in the larger areas. The ink won't be perfectly uniform, it will have dark areas and water marks, which gives you that great watercolor look.

Easy watercolor word art by Jessica Mack of BrownPaperBunny

Once you're happy with the way it is blended, let it dry, erase any visible pencil lines, and you're ready to frame your watercolor word art!

In Watercolor, Type, Ink, Tutorial, Aug 2017
2 Comments
52 Quote Challenge by Jessica Mack of BrownPaperBunny

52 Quote Challenge

May 22, 2018

I decided I didn't already have enough going on right now ;) so this year I'm participating in Smitha Katti's 52 Quote Challenge. We use a list of quotes she put together and do one a week through 2018. I'm carrying my little sketchbook around with me and working in it when I have a few moments, and photographing each layout on my walks around Seattle. There are so many beautiful trees and flowers blossoming everywhere still, so I've had plenty of pretty backdrops to choose from! 

Here are a few of the quotes I've completed so far.

A post shared by Jessica 🎨 Seattle Artist (@brownpaperbunny) on Apr 2, 2018 at 9:37pm PDT

A post shared by Jessica 🎨 Seattle Artist (@brownpaperbunny) on Apr 6, 2018 at 6:16am PDT

A post shared by Jessica 🎨 Seattle Artist (@brownpaperbunny) on Apr 12, 2018 at 7:59am PDT

A post shared by Jessica 🎨 Seattle Artist (@brownpaperbunny) on Apr 16, 2018 at 4:43pm PDT

A post shared by Jessica 🎨 Seattle Artist (@brownpaperbunny) on Apr 27, 2018 at 7:08am PDT

A post shared by Jessica 🎨 Seattle Artist (@brownpaperbunny) on May 13, 2018 at 6:41pm PDT

52 Quote Challenge by Jessica Mack of BrownPaperBunny

Do you ever do hand lettering as part of your artwork?

In Aug 2017, Ink, Sketchbook, Type
14 Comments
Easy Ways to Create Mail Art by Jessica Mack of BrownPaperBunny

3 Mail Art Techniques

March 4, 2018

Please note: This blog post contains affiliate links, which help pay for the upkeep of this site. That being said, I will never, ever promote anything I am not 100% in love with!

----------

One of my favorite creative hobbies is mail art, AND one of my 2018 resolutions is to send more snail mail, so I’m going to walk you through three easy-to-create types of mail art.

The first technique is decorating the envelope with patterns or doodles. You’ll need some blank envelopes, Tombow MONO Drawing Pens, Dual Brush Pens, a ruler, MONO Eraser and pencil (if you’re like me and have trouble writing in a straight line without guides). 

Easy Ways to Create Mail Art by Jessica Mack of BrownPaperBunny

This technique focuses more on fun lettering and a little less on envelope decoration (although you could always combine the two for that extra WOW factor). Make the name of the recipient really stand out and have some fun with your lettering! Just make sure the address is still legible. The supplies you’ll need are blank envelopes, your Tombow Dual Brush Pens, MONO Drawing Pens, pencil, eraser, and a ruler.

Easy Ways to Create Mail Art by Jessica Mack of BrownPaperBunny

And now for my all-time favorite mail art technique. This one has the name and address of the recipient inside a drawing. This fun balloon design would be great with a birthday card, and click through on the Instagram post below to see how to use the Tombow Dual Brush Pens to create a watercolor-look umbrella design. For this technique you’ll need thick envelopes, a paint-brush, jar of water, Tombow Blending Palette, MONO Drawing Pens, pencil, eraser, and of course Dual Brush Pens in your favorite colors. Will you be creating any mail art in 2018?

Easy Ways to Create Mail Art by Jessica Mack of BrownPaperBunny

A post shared by Jessica 🎨 Fashion Illustration (@brownpaperbunny) on Jan 29, 2018 at 7:31pm PST

In Aug 2017, Illustrations, Ink, Tutorial, Type, Watercolor
21 Comments
Easy to Make Ultra Violet Nursery Wall Art by Jessica Mack of BrownPaperBunny

Easy-to-Make Ultra Violet Nursery Art

March 4, 2018

Today I've got a little tutorial to show you how to easily incorporate the 2018 Pantone Color of the Year, Ultra Violet, into your nursery or children's room. These easy-to-make nursery art pieces look great framed, and will only take you a few minutes to put together.

Here are the supplies you'll need to get started.

Supplies:

  • Watercolor paper
  • Tombow Dual Brush Pens in numbers 606-Violet, and 603-Periwinkle for accents.
  • A white paint pen, or if you want black lines use your N-15 Black Tombow Dual Brush Pen
  • Tombow MONO Glue Pen
  • Plastic freezer bag, or other large piece of plastic
  • Paper towel
  • Water Spray Mister
  • Scissors
  • Frames
Easy to Make Ultra Violet Nursery Wall Art by Jessica Mack of BrownPaperBunny

Now let's get started!

Step 1:

I used the MONO Glue Pen to draw some stars and other little details onto my watercolor paper. Once the glue dries it acts like a resist and will keep that area of the paper free from color.

Easy to Make Ultra Violet Nursery Wall Art by Jessica Mack of BrownPaperBunny

Step 2:

Scribble some ink from your Dual Brush Pens onto your freezer bag. I added a few dots of Dual Brush Pen 528-Navy Blue for interest but that's entirely optional.

Easy to Make Ultra Violet Nursery Wall Art by Jessica Mack of BrownPaperBunny

Step 3:

User your spray mister to wet the freezer bag and ink. It pays to put some paper towel underneath in case any of the water or ink jumps off the bag unintentionally.

Easy to Make Ultra Violet Nursery Wall Art by Jessica Mack of BrownPaperBunny

Step 4:

Place your watercolor paper down onto the bag and press the back in circular motions to make sure the ink covers the whole front of the paper. Carefully lift the paper from the bag, and place it (ink-side up) on some spare paper towel to dry.

Easy to Make Ultra Violet Nursery Wall Art by Jessica Mack of BrownPaperBunny

Step 5:

Draw your designs onto the dried watercolor paper. You can draw or write whatever you'd like. I chose an outline of Washington State with 'Home Sweet Home', a Kawaii cacti, and the words 'Twinkle Twinkle Little Star' surrounded by stars. You can also cut the paper into fun shapes to make them a little different. This is where I used the 603-Periwinkle Dual Brush Pen to outline the letters and help them stand out a little more.

Easy to Make Ultra Violet Nursery Wall Art by Jessica Mack of BrownPaperBunny
Nursery-Jessica-Mack-8.jpg

And you're done! Frame those babies and add a little Ultra Violet color to your walls!

I'd love to see what you create, tag @BrownPaperBunny on social media to show me.

In Aug 2017, Illustrations, Ink, Tutorial, Watercolor, Type
Comment
May Designs Be Kind it's Gangster by BrownPaperBunny

Monday Motivation with May Designs

September 21, 2017

Please note: This blog post contains affiliate links, which help pay for the upkeep of this site. That being said, I will never, ever promote anything I am not 100% in love with!

----------

I've been a fan of May Designs notebooks for a while now, so when they asked me to create some artwork for their Monday Motivation feature I said 'yes please'!

If you watch the news it's easy to think the world is completely falling apart, so my two thoughts for the week are that we need to be kinder to ourselves and kinder to each other. 

A post shared by Jessica Mack 🎨 Colorado Artist (@brownpaperbunny) on Sep 11, 2017 at 9:53am PDT

I used Tombow Dual Brush Pens and Mono Drawing Pens to create both spreads. I love that Tombows don't go through even super thin paper, which makes them perfect for sketching, doodling, hand-lettering, journalling and planners. 

Recently I went on a bit of a road-trip and I used my Tombows and May Designs notebook as a travel journal to document the journey. Here are a few of my stops. 

A post shared by Jessica Mack 🎨 Colorado Artist (@brownpaperbunny) on Aug 3, 2017 at 9:20am PDT

A post shared by Jessica Mack 🎨 Colorado Artist (@brownpaperbunny) on Aug 4, 2017 at 6:58am PDT

A post shared by Jessica Mack 🎨 Colorado Artist (@brownpaperbunny) on Aug 5, 2017 at 10:21am PDT

A post shared by Jessica Mack 🎨 Colorado Artist (@brownpaperbunny) on Aug 5, 2017 at 7:44pm PDT

A post shared by Jessica Mack 🎨 Colorado Artist (@brownpaperbunny) on Aug 6, 2017 at 7:01pm PDT

Have you ever kept a travel (or regular) journal? Leave me a comment and let me know! 

In Aug 2017, Illustrations, Ink, Sketchbook, Type
24 Comments
Lettering with Purpose by Brittany Luiz Review by BrownPaperBunny

Lettering with Purpose

August 28, 2017

Please note: This blog post contains affiliate links, which help pay for the upkeep of this site. That being said, I will never, ever promote anything I am not 100% in love with!

----------

I was sent a copy of Brittany Luiz's new book Lettering with Purpose, and OH MY GOSH...it is truly the penultimate hand-lettering book!

I have quite the collection of lettering books in my studio, and it's safe to say...without reservation, that this is by far the most useful (and beautiful). 

Brittany is not only a lettering pro, but she's a really great teacher. She's obviously given a lot of thought to what would be most useful, so you can expect to find advice on everything from the best materials to use for hand-lettering, to how to choose colors, to how to pair fonts together and create stunning quote layouts. 

She also shows you how to achieve a huge range of different lettering styles and techniques from blending with brush markers to chalk lettering, to this cute watercolor flower letter (which I obviously had to try immediately)!


If you'd like to learn how to make and edit time-lapse videos of your own art, check out my online class. It's easy, and you can do it using only your phone!

Learn More

Want to learn about modern calligraphy script, bounce lettering, or need some sample alphabets to practice with, they're all in there, along with 100 prompts for when you're stuck on what to actually letter!

Her book officially comes out in just a couple of days and you can grab it over on Amazon now!

Lettering with Purpose By Brittany Luiz Review by BrownPaperBunny
In Product Reviews, Type, Watercolor, Illustrations, Ink, Aug 2017
16 Comments
National Handwriting Day - Bounce Lettering with Tombow Brush Markers

National Handwriting Day

January 22, 2017

Please note: This blog post contains affiliate links, which help pay for the upkeep of this site. That being said, I will never, ever promote anything I am not 100% in love with!

Today is National Handwriting Day, and I don't know about you but this year I'm really trying to improve my lettering skills. So, lately I've been practicing my bounce brush lettering using Tombow dual-brush markers. I still need a lot of practice but I'm certainly having fun with it!

Tombow is actually having a sale right now to celebrate National Handwriting Day, you can check it out here if you're interested. 

Celebrating National Handwriting Day with Tombow Brush markers and some bounce lettering!

Leave a comment below and let me know what your favorite type of handwriting or lettering is. Calligraphy, block lettering, graffiti style, bubble letters? 


You might also like these posts:

Featured
Make a Watercolor Planner Bookmark by Jessica Mack on BrownPaperBunny
Make a Watercolor Planner Bookmark
IMG_6248.jpeg
Word of the Year Butterfly Art
Watercolor Thanksgiving Cards
How to Make Watercolor Bookmarks by Jessica Mack on BrownPaperBunny
How to Make Watercolor Bookmarks
Create a BuJo Book Tracker by Jessica Mack of BrownPaperBunny
Create a BuJo Book Tracker
public.jpeg
Art Journal Page with Markers
In Type, Jan 2017
Comment
Older Posts →

Subscribe

Sign up to receive social media tips, freebies, special promotions, and art tutorials!

Thank you!

Please click confirm in the email you were just sent!

Directory of Illustration Jessica Mack

Shop my work on Society6

Watercolor World Map by Jessica Mack of BrownPaperBunny

Follow on Instagram

For the 100 Days Project this year I’m keeping it super low pressure. I’ve got a very busy couple of months coming up and want to set myself up to be able to stick with it, while still making sure I do something creative every day. You ca

See my classes on Skillshare

Skillshare Classes by Jessica Mack

Popular Posts

Popular Posts
CRL-Horizontal-Laptop-Beige-Floral-Painting.jpg
Creative Retreat Live
Rainbow-Watercolor-Wreath-Using-Markers.JPG
Rainbow Wreath Tutorial
15 Ways to Journal by Jessica on BrownPaperBunny
15 Ways to Journal
Tombow Brush Pen Markers and Colored Pencils
Brown Paper Bunny

Privacy + Terms of Use

Shop

Watercolor with Markers Book

Classes

Art Tutorials

Art & Illustration Portfolio

About

Contact

Custom Book Print

Custom Book Mug

How to Paint Watercolor Flowers Using Markers

Free Fashion Croquis

Start an Art Journal

6 Easy Flowers to Draw with Tombow Markers

Make Your Own Watercolor Bookmarks