• Book
    • Watercolor with Brush Pens
    • Watercolor Flowers Using Markers
    • Paint a Watercolor Galaxy Butterfly with Markers
    • Paint Watercolor Galaxy Bookmarks using Markers
    • Timelapse Video for Artists
  • Shop
  • Society6 Store
  • Blog
  • Portfolio
  • About
  • Contact
Menu

Brown Paper Bunny Studio

Art & Fashion Illustration
  • Book
  • Classes
    • Watercolor with Brush Pens
    • Watercolor Flowers Using Markers
    • Paint a Watercolor Galaxy Butterfly with Markers
    • Paint Watercolor Galaxy Bookmarks using Markers
    • Timelapse Video for Artists
  • Shop
  • Society6 Store
  • Blog
  • Portfolio
  • About
  • Contact
Watermelon Planner Spread by Jessica Mack on BrownPaperBunny

Watermelon Planner Spread

May 20, 2019

Please note: This blog post contains affiliate links, which help pay for the upkeep of this site. That being said, I will never, ever promote anything I am not 100% in love with!

----------

I think one of the best things about summer is all the delicious fruit, especially watermelon! So I’m going to show you a super fast, watermelon layout you can use in your planner.
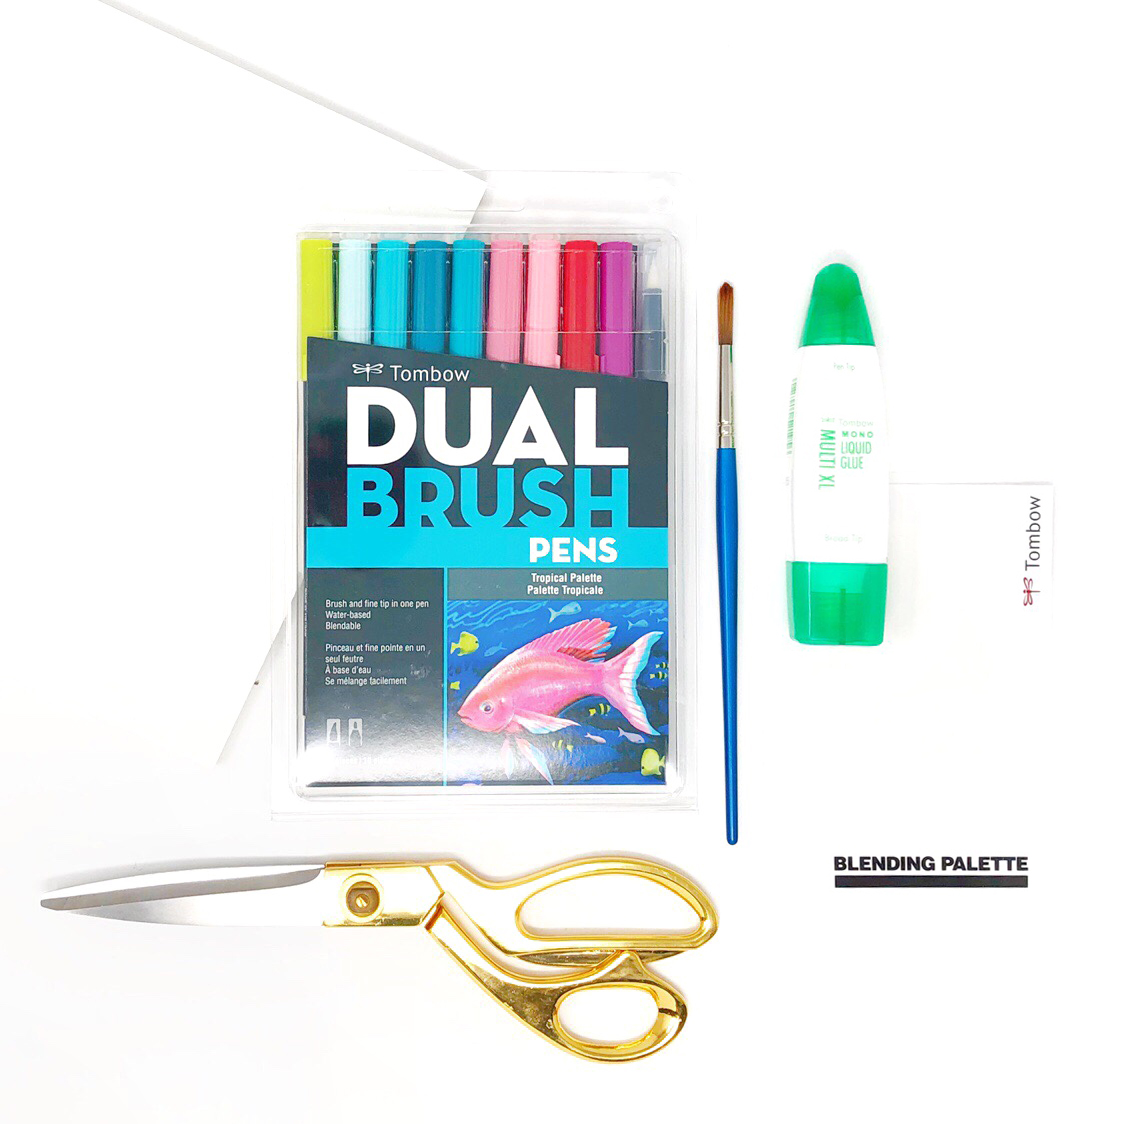
Supplies:

  • Tombow Dual Brush Pens 853 (Persimmon), 195 (Light Green), and N15 (Black)

  • MONO Drawing Pens

  • Ruler

  • MONO Graph Mechanical Pencil

  • Dot Grid Notebook or Planner (mine is from Archer & Olive)

Watermelon Planner Spread by Jessica Mack on BrownPaperBunny

Step 1: Section Out Your Spread

To start your watermelon planner layout divide your spread up into eight rectangles, and add Dual Brush Pen 853 (Persimmon) across the top of the first seven (for the days of the week).

Step 2: Decorate With Watermelon

Draw little slices, or halves of watermelon in a few of the corners and add some additional seeds with your MONO Drawing Pen.

Step 3: Days of the Week

Next, write the days of the week, and fill in the last rectangle with a quote, tracker, or anything else you’ll find useful during the week. Outline the days with black Dual Brush Pen and you’re ready to fill in your spread with all the fun things you’ll be doing as the weather gets warmer. You could also use any fruit you like if watermelon isn’t your thing, or experiment with fun colors. Blue strawberries, purple watermelon, or pink pineapples perhaps.

Watermelon Planner Spread by Jessica Mack on BrownPaperBunny

Do you have any fun summer plans yet? Tell me in the comments.

In Dec 2018, Ink, Tutorial
Comment
How to Draw a Cute Popsicle Character by Jessica Mack of BrownPaperBunny.

How to Draw a Cute Popsicle Character

May 20, 2019

Please note: This blog post contains affiliate links, which help pay for the upkeep of this site. That being said, I will never, ever promote anything I am not 100% in love with!

----------

The weather is getting warmer and I'm already dreaming about sunshine, BBQs and fruity popsicles. So today I'm going to show you how to draw a cute popsicle character, which makes a cute task journal decoration, fun summer greeting card, or something cute to pop into the kids' bags when you send them off to their last days of school for the year.

Supplies:

  • Tombow 1500 Series Colored Pencils

  • Tombow MONO Graph Mechanical Pencil

  • Paper

  • Tombow Dual Brush Pen Colorless Blender (optional)

  • Tombow MONO Drawing Pen

How to Draw a Cute Popsicle Character by Jessica Mack of BrownPaperBunny.

Step 1: Draw Your Outlines

Using your MONO Graph Mechanical Pencil, draw a rectangle for the main part of your popsicle and a thinner rectangle for the stick. You can use a ruler or just free-hand them both.

How to Draw a Cute Popsicle Character by Jessica Mack of BrownPaperBunny.

Step 2: Sketch the Details

Again, using your pencil, sketch rounded corners and the indents in the middle of the popsicle. Also, curve the bottom of the popsicle stick. If you want your popsicle to look a little more 3D you can add an edge on one side. Then erase any lines you no longer need. 

How to Draw a Cute Popsicle Character by Jessica Mack of BrownPaperBunny.

Step 3: First Pencil Layer

Using your lightest pink pencil, color in the popsicle shape. For even color, make soft circular motions with the pencil held at an angle, rather than straight up. Add the first layer of color for the stick in light brown.

How to Draw a Cute Popsicle Character by Jessica Mack of BrownPaperBunny.

Step 4: Blend in a Second Color

To make your popsicle a little more interesting, go over the first layer with an additional color, like a yellow or orange. Softly blend it into the first layer of color in circular motions. Do the same on the popsicle stick.

How to Draw a Cute Popsicle Character by Jessica Mack of BrownPaperBunny.

Step 5: Add Shadows

Next, use a darker pink or red to add bolder color where there would be shadows on the popsicle. I imagined the light was coming from the right, creating shadows in the indents and along the left edge. In a darker brown, add a shadow where the stick meets the popsicle.

How to Draw a Cute Popsicle Character by Jessica Mack of BrownPaperBunny.

Step 6: One More Layer

Keep blending colors into the popsicle and stick until they are as dark as you'd like them to be.

How to Draw a Cute Popsicle Character by Jessica Mack of BrownPaperBunny.

Step 7: Blending

This step is optional, but if you really want to smooth out your pencil lines and have the colors blend nicely together you can go over them softly with the Dual Brush Pen Colorless Blender.

How to Draw a Cute Popsicle Character by Jessica Mack of BrownPaperBunny.

Step 8: Some Additional Cuteness

To add a little bit of extra cuteness to your summer popsicle, trace around the lines with your MONO Drawing Pen and add little eyes and a mouth, turning it into a little character.

How to Draw a Cute Popsicle Character by Jessica Mack of BrownPaperBunny.

I’d love to see your summer drawings, so tag @BrownPaperBunny on social media!

In Dec 2018, Illustrations, Tutorial
2 Comments
FullSizeRender.jpg

Lunchtime Illustrations

May 9, 2019

I carry around little scraps of watercolor paper and a tiny travel watercolor tin I made, so that when an opportunity to sketch or paint presents itself I can take advantage. Today it was too sunny to be indoors so I made this little watercolor sketch while eating my lunch in the sun, between running errands.

Do you carry art supplies around with you too? 

In Dec 2018, Illustrations, Watercolor, Fashion Illustration
5 Comments
Easy DIY Birthday Banner by Jessica Mack of BrownPaperBunny

DIY Birthday Banner

May 9, 2019

Please note: This blog post contains affiliate links, which help pay for the upkeep of this site. That being said, I will never, ever promote anything I am not 100% in love with!

----------

This week our little girl turns two, so to celebrate I’m going to show you how to whip up an easy birthday banner. Here’s what you’ll need to get started:

Supplies:

  • Tombow Dual Brush Pens

  • Scissors

  • Pennant shapes cut out of card

  • String

  • A pencil

  • MONO Drawing Pen (size 5)

  • A hole punch

Easy DIY Birthday Banner by Jessica Mack of BrownPaperBunny

Step 1: Add Color

The first step in creating your birthday banner is to color the bottom half of each pennant using your Dual Brush Pens. For extra color depth let each one dry fully then go over it again.

Step 2: Draw Your Letters

Next, use a pencil to draw in your letters and outline them with your MONO Drawing Pen (size 05). Then, fill in the letters with your black Dual Brush Pen.

Easy DIY Birthday Banner by Jessica Mack of BrownPaperBunny

Step 3: String up Your Banner

Once all of the ink is dry, punch holes in the top corners of each pennant and thread them onto the string. Then you’re ready to hang it!

Easy DIY Birthday Banner by Jessica Mack of BrownPaperBunny

Have you ever made your own party decorations or cards before? Let me know in the comments!

In Ink, Tutorial, Dec 2018
Comment
Books books books by Jessica Mack of BrownPaperBunny

Books, Books, Books

May 2, 2019

I’ve always been a big reader, but lately I’ve been reading (and listening to so many audio books) that I felt compelled to start a whole new Instagram (or Bookstagram) account just to share them all. If you’re interested you can check it out at @LatestBookCrush

I’ve even been drawing and painting books, they’re just taking over my life lately!

What are you reading right now? Leave me a comment and let me know if you ever use books or book pages to create art!

949bba1389ca075f38f2e5ae4c205e364be4064587fe8efab6

In Dec 2018, Book Review, Illustrations, Type
6 Comments
Watercolor Flowers Using Tombow Dual Brush Pens by Jessica Mack of BrownPaperBunny

Watercolor Flowers Using Tombow Dual Brush Pens

April 25, 2019

Please note: This blog post contains affiliate links, which help pay for the upkeep of this site. That being said, I will never, ever promote anything I am not 100% in love with!

----------

Over on Instagram I’ve been creating a lot of watercolor flowers using Tombow Dual Brush Pens lately — in case you can’t tell from my blog, using Dual Brush Pens to make a watercolor effect is one of my favorite things.

View this post on Instagram

A post shared by Jessica 🎨 Seattle Artist (@brownpaperbunny) on Apr 21, 2019 at 7:06pm PDT

For these flowers and leaves I mixed several colors together to provide greater variation and also because I just really enjoy mixing whole new colors. I also waited for each layer to dry before adding another on top to give it a bit more depth.

View this post on Instagram

A post shared by Jessica 🎨 Seattle Artist (@brownpaperbunny) on Apr 22, 2019 at 7:15pm PDT

Have you ever used water soluble markers before? (Tombow Dual Brush Pens or something else) Would you like me to post some tutorials in how to use them to create different watercolor-look florals? Let me know in the comments!

View this post on Instagram

A post shared by Jessica 🎨 Seattle Artist (@brownpaperbunny) on Apr 23, 2019 at 7:06am PDT

In Dec 2018, Ink, Illustrations, Sketchbook, Tutorial, Watercolor
10 Comments
Camp Grandma by Marianne Waggoner Day. Book review by Jessica Mack on BrownPaperBunny

Book Review: Camp Grandma

April 24, 2019

Camp Grandma: Next Generation Grandparenting — Beyond Babysitting

By Marianne Waggoner Day

I received a free review copy of Camp Grandma from BookSparks. However, all opinions are my own.

Not being a grandmother myself I wasn’t sure I would get much out of this book. But by the end of the first chapter I knew I was wrong. Not only did the author help me look at my own daughter’s needs in a new way, but I realized that my parents were only just learning about their own role and working out how they fit into our new family. As soon as I finished the book I shipped it off to my mother, knowing she’ll get a tremendous amount out of it.

This book talks about grandparents not as babysitters but rather as caretakers, role models, teachers, historians, storytellers, confidants, mentors and trusted examples of how to love and be loved.

Thinking about my own grandmother, I’m inclined to agree with the author that multigenerational distance gives grandparents a perspective that is very different (and valuable) to that of parents. And also, that characteristics often to skip a generation, making children much more similar to their grandparents than their own parents. That is certainly the case with my own daughter, where she even looks just like her two grandparents, but nothing like my husband and myself.

Kids thrive on structure, and Marianne’s Camp Grandma, which is structured similarly to a corporate retreat, helps them learn a host of skills that will serve them later in life. She helps her grandchildren set agendas and goals, and talk about their expectations. Then they split their time with her into three main categories:

1. Presentations: where they show and tell, teaching them preparation, public speaking, communication, and listening skills.

2. Things to Learn: where they might focus on manners, family history, or resume building. You might think writing a resume is a strange thing for a child to do, but it helps them identify their skills, areas of strength and the experiences they’ve had so far, all of which help build confidence and pride.

3. Activity Time, which can include swimming, baking, crafts or any other activities they vote onto the agenda. These activities allow for physical movement, develop motor skills, teamwork and allow them to express themselves.

The book is written in a story-telling way that is entertaining to read while being clearly segmented for ease of finding information. It would make a wonderful gift to new and established grandparents alike.

Get the Book
In Dec 2018, Book Review
Comment
How to Make a Floral Shadow Box by Jessica Mack of BrownPaperBunny

How to Make a Floral Shadow Box

April 16, 2019

Howdy! Today I want to show you how to make a floral shadow box out of paper. You can personalize these for friends or family as a really fun gift. Here's what you'll need to get started.

Supplies:

  • Tombow Foam Tape

  • Small Shadow Box Frame

  • Tombow MONO Graph Mechanical Pencil

  • Scissors

  • Red Paper and Card

  • Tombow MONO Drawing Pen (for optional details) 

How to Make a Floral Shadow Box by Jessica Mack of BrownPaperBunny

Step 1: Cut Out Your Main Shape

Use your pencil to draw the shape you want for the very front of your frame. This shape will go right up against the glass, and be the 'window' you look through to see all the other layers. I used a girl's profile, but you could use a flower, heart, or any other shape you like. Once you're happy with the shape you've drawn, cut it out (making sure you leave enough of a border for it to fit nicely into the frame). 

How to Make a Floral Shadow Box by Jessica Mack of BrownPaperBunny

Step 2: Cut Out Your Floral Shapes

Next, start cutting flower and leaf shapes out of your paper or card, and arrange them behind your main cut-out shape until you like the way they look together. 

How to Make a Floral Shadow Box by Jessica Mack of BrownPaperBunny

Step 3: Stick Everything Down

The last step is to cut little squares of your Tombow Foam Tape and start sticking all your layers into the shadow box frame. Build extra space between the layers by stacking two or three pieces of foam on top of each other. The whole thing will look a bit messy from the back, but if you're careful about where you stick your foam tape you won't see any of that from the front. If your frame is particularly deep you might need to add extra foam tape layers in the corners to make sure your first shape stays flat against the glass when you close it all up. Once you're finished, close up your frame and it's ready to be displayed!

How to Make a Floral Shadow Box by Jessica Mack of BrownPaperBunny

I’d love to see your creations! Tag @BrownPaperBunny on social media so we can see!


In Tutorial, Dec 2018
9 Comments
How to Make an Abstract Collage by Jessica Mack of BrownPaperBunny

How to Make an Abstract Collage

April 10, 2019

Please note: This blog post contains affiliate links, which help pay for the upkeep of this site. That being said, I will never, ever promote anything I am not 100% in love with!

----------

World Art Day is coming up (April 15) so I’m going to show you an easy and fun way to make some abstract art for your walls. Here’s what you’ll need to get started:

Supplies:

  • Tombow Dual Brush Pens

  • Watercolor Paper

  • Paintbrush

  • Blending Palette

  • Scissors

  • MONO Multi XL Liquid Glue

How to Make an Abstract Collage by Jessica Mack of BrownPaperBunny

Step 1: Make Color Blocks

The first step for making your abstract art is to use the Blending Palette and a wet paintbrush to transfer Dual Brush Pen ink onto your watercolor paper (watch the video below to see how I do it).

Step 2: Cut Out Shapes

Once all of your color blocks are dry, start cutting out shapes. Try geometric shapes, some squiggles, flowers etc. Go with your first instincts...do you find yourself gravitating towards circles? Maybe triangles are more your thing?

How to Make an Abstract Collage by Jessica Mack of BrownPaperBunny

Step 3: Arrange The Shapes

Once all of your shapes are cut out, start arranging them on a new piece of paper until you have a combination you like. Try a minimalist layout with just two or three shapes, then try one with lots of shapes and colors.

Step 4: Glue Everything Down

Once you have a layout you like, use your MONO Multi XL Liquid Glue to stick all the pieces down. Once everything is dry you can frame your masterpiece and hang it on the wall!

How to Make an Abstract Collage by Jessica Mack of BrownPaperBunny

Comment below and tell me if you have any of your own art hanging up at home. If not, why not?!

In Ink, Tutorial, Dec 2018, Watercolor
9 Comments
How to Make a Watercolor Easter Card by Jessica Mack of BrownPaperBunny

How to Make a Watercolor Easter Card

April 4, 2019

Please note: This blog post contains affiliate links, which help pay for the upkeep of this site. That being said, I will never, ever promote anything I am not 100% in love with!

----------

Today I’m going to show you how to make a watercolor Easter card in pastel Dual Brush Pen colors. We're also going to use embossing powder because it resists ink nicely to give you white outlines. Here's what you'll need to get started.

Supplies:

  • Tombow Dual Brush Pens Pastel Palette

  • White Embossing Pen & Powder

  • Heat Gun

  • Watercolor Paper (140lb)

  • Tombow MONO Graph Mechanical Pencil

  • Paint Brush & Water

How to Make a Watercolor Easter Card by Jessica Mack of BrownPaperBunny

Step 1: Bunnies

Start by drawing a bunny template on a plain piece of paper. Think of them as snowmen with ears...a big circle for the body and a smaller one for the head, then two ears and a fluffy tail. Use your template to trace bunnies onto the right-hand side of your watercolor paper (when you fold it that will be the front) using your MONO Graph Mechanical Pencil. This is a good time to write a greeting on the front too. I chose a simple Happy Easter.

How to Make a Watercolor Easter Card by Jessica Mack of BrownPaperBunny

Step 2: Embossing

Follow the directions for your particular embossing pen, powder and heat gun. The general steps are usually to draw / write with the pen, sprinkle the powder on top of the ink, shake off any excess then heat with the gun for around 15 seconds until the powder melts and looks 'embossed'. Emboss over all of your pencil lines for the bunnies and your greeting.

Step 3: Adding Color

This is the really fun step. You get to choose how you'll color your bunnies. Will you pick one color for each, or blend all of the pastel colors to make a rainbow? I choose to pair up the pinks, yellows, blues and purples to make each bunny two-tone, and used the green for the greeting at the bottom. You can color directly onto your watercolor paper, right over the embossing once it is cool. Then to get the watercolor look, use a damp paintbrush to go over the ink and blend it together.

How to Make a Watercolor Easter Card by Jessica Mack of BrownPaperBunny

And there you go, once your ink is dry your card can hop on over to its intended recipient!

How to Make a Watercolor Easter Card by Jessica Mack of BrownPaperBunny

I’d love to see your card, share it with me by tagging @BrownPaperBunny on social media!

In Dec 2018, Illustrations, Ink, Tutorial, Watercolor
8 Comments
Spring Flower Letters with Tombow Dual Brush Pens by Jessica Mack of BrownPaperBunny

Spring Flower Letters with Tombow Dual Brush Pens

March 18, 2019

Please note: This blog post contains affiliate links, which help pay for the upkeep of this site. That being said, I will never, ever promote anything I am not 100% in love with!

----------

Are you as excited as I am about spring?! I'm so excited that I've been creating lots of spring flower letters with Tombow Dual Brush Pens and I want to show you how to make them. Here's what you'll need to get started.

Supplies:

  • Tombow Dual Brush Pens

  • Watercolor Paper (140lb)

  • Tombow MONO Drawing Pens

  • A small paintbrush

  • A pencil

Spring Flower Letters with Tombow Dual Brush Pens by Jessica Mack of BrownPaperBunny

Step 1: Draw Your Letter Shape

Start by drawing the shape of your letter, lightly, in pencil. You can choose to draw either an uppercase or lowercase letter. Next, add your first spring flower. I like to draw one larger flower near the top of my letter as a focal point. Keep it nice and loose, starting with the lightest color first. Add small amounts of different shades to give it some variety. The colors I chose were 873 Coral, 991 Light Ochre, 723 Pink, 761 Carnation, 195 Light Green, and 245 Sap Green). 

Spring Flower Letters with Tombow Dual Brush Pens by Jessica Mack of BrownPaperBunny

Step 2: Draw Your Stems

Next, draw flower stems along the penciled shape of your letter, leaving some spaces for smaller flowers and buds to be drawn in between them.

Spring Flower Letters with Tombow Dual Brush Pens by Jessica Mack of BrownPaperBunny

Step 3: Add Buds and Smaller Flowers

Start filling in the spaces at the ends of the stems with flower bud shapes and small, slightly open flowers. Follow the same approach as you did for the first flower, by adding different colors to each flower for variety. Don't worry if they don't look much like flowers at this stage, and it's ok if they're a little messy. After all your flowers have been drawn you can fill in any gaps with leaves.

Spring Flower Letters with Tombow Dual Brush Pens by Jessica Mack of BrownPaperBunny

Step 4: Add Water

Next, it's time to add water. Start with either the stems and leaves or the flowers, but don't do everything at once or it will run together into a muddy mess! With a damp paintbrush gently brush over the ink, blending colors together a little until you have a watercolor look. Once your first part is dry then you can start on the next bit.

Spring Flower Letters with Tombow Dual Brush Pens by Jessica Mack of BrownPaperBunny

Step 5: Adding Detail

If you'd like you can leave your spring letter at the last, watercolor stage. But if you'd like to add some small details, grab your MONO Drawing Pens and add thin lines to suggest where the petals are, and which direction they are going in. You can add some lines to the outsides of the stems and leaves as well. To keep it looking loose and fresh I recommend not closing all of the petal and leaf shapes completely, but leaving some gaps here and there.

Spring Flower Letters with Tombow Dual Brush Pens by Jessica Mack of BrownPaperBunny

Voila, you're finished! Now you can frame it and hang it on your wall, or give it as a gift! I’d love to see your spring flower letters, so be sure to tag @BrownPaperBunny if you share them on social media!

In Dec 2018, Ink, Illustrations, Tutorial, Watercolor
3 Comments
Make Me Up by Jessica Mack of BrownPaperBunny

Make Me Up

March 15, 2019

This hero image and repeat pattern was created for use on a series of products, from t-shirts to backpacks. The make-up pieces were drawn digitally with vintage gouache brushes to give them a retro feel. Scroll down to see the different colorways and their product applications.

Make Me Up repeat pattern by Jessica Mack of BrownPaperBunny
Make Me Up pattern by Jessica Mack of BrownPaperBunny
Make Me Up illustrated tote bag by Jessica Mack of BrownPaperBunny
Make Me Up illustrated phone case by Jessica Mack of BrownPaperBunny
Make Me Up illustrated make-up bag / pencil case / pouch by Jessica Mack of BrownPaperBunny
Make Me Up illustrated greeting card by Jessica Mack of BrownPaperBunny
Make Me Up illustrated backpack by Jessica Mack of BrownPaperBunny
Make Me Up illustrated makeup tray / drawer organizer by Jessica Mack of BrownPaperBunny
In Dec 2018, Fashion Illustration, Illustrations, Pattern
Comment
Blog Cover BrownPaperBunny.jpg

Watercolor Portrait Using Markers

March 11, 2019

Please note: This blog post contains affiliate links, which help pay for the upkeep of this site. That being said, I will never, ever promote anything I am not 100% in love with!

----------

This week I’m redoing an old watercolor portrait from 2011, using skills and knowledge I’ve learned since then to try and improve upon it.

I’ve always loved messy watercolor portraits with ink lines so I wanted to re-do that style. If you’d like to create along with me, here are the materials I’m using:

  • MONO Graph Mechanical Pencil

  • Tombow Dual Brush Pens

  • MONO Drawing Pens

  • Fudenosuke Brush Pen (hard tip)

  • Watercolor paper

  • A Paintbrush

Re-doing a watercolor portrait from 2011 by Jessica Mack of BrownPaperBunny

A few things I’ve learned since creating my 2011 portrait are not to mix too many different colors or everything will get muddy and brown. I’ve also learned that using different line weights gives you more interest. AND I discovered that if you color across the whites of someone’s eyes they look really weird and creepy.

So I’m using a limited color palette, I’ve got my 01, 03, 05 MONO Drawing Pens and Fudenosuke Brush Pen for the line work, and I’m avoiding washes near the eyes.

Re-doing a watercolor portrait from 2011 by Jessica Mack of BrownPaperBunny

To start, sketch out your portrait in pencil, then either transfer ink from a Blending Palette with a wet paintbrush (like I did for the cheeks and lips) or use the Dual Brush Pens directly onto the watercolor paper then go back and wet it. I made sure to let the color run together a little, and added some extra water splotches. You can watch each step in the video below.

What do you think, did I improve on my 2011 effort? Have you ever recreated an old project? Or is there one you’d like to re-do? Let me know in the comments!

Re-doing a watercolor portrait from 2011 by Jessica Mack of BrownPaperBunny

If you’re new here, I’m Jessica — a watercolor artist and fashion illustrator, living in Seattle. I’d love to connect on social media, come say hi on Instagram, Facebook or Twitter @BrownPaperBunny! 

You might also like these blog posts:

Featured
Make a Watercolor Planner Bookmark by Jessica Mack on BrownPaperBunny
Make a Watercolor Planner Bookmark
Fashion Illustration Inspired by Food. By Jessica Mack of BrownPaperBunny.
Fashion Illustrations Inspired by Food
Watercolor portrait by Jessica Mack of BrownPaperBunny using different watercolor techniques
Watercolor Techniques
In Watercolor, Illustrations, Ink, Dec 2018, Tutorial
8 Comments
Loose Watercolor Florals in Living Coral by Jessica Mack of BrownPaperBunny

Loose Watercolor Florals in Living Coral

March 4, 2019

Please note: This blog post contains affiliate links, which help pay for the upkeep of this site. That being said, I will never, ever promote anything I am not 100% in love with!

----------

Howdy! Today I’m going to show you how to create some loose watercolor florals in living coral (try saying that five times fast). Living Coral is the Pantone Color of the Year for 2019. These florals are super easy to make and I'll be showing you how to use Tombow Dual Brush Pens to get a watercolor look and add line work. Here's what you'll need to get started.

Supplies:

  • Tombow Dual Brush Pens

  • Round Paintbrush (Size 8)

  • Tombow Blending Palette

  • Watercolor Paper (140 lb)

Loose Watercolor Florals in Living Coral by Jessica Mack of BrownPaperBunny

Step 1: Mix Your Colors

The first step is to scribble some ink onto your blending palette. Dual Brush Pen 905 is pretty close to the color Living Coral already, but I wanted to add a little punch of pink so I used a touch of 815 in the mix. Experiment with blending different quantities of each color until you get a shade you love.

Loose Watercolor Florals in Living Coral by Jessica Mack of BrownPaperBunny

Once you've got your ink onto the blending palette wet it with your paintbrush.

Loose Watercolor Florals in Living Coral by Jessica Mack of BrownPaperBunny

Step 2: Create Loose Petal Shapes

Using your paintbrush, transfer ink from the blending palette onto your watercolor paper. Start making loose flower petal shapes around in a circle. Leave a little white space so the paper can show through. And don't worry if it looks pretty messy at this stage, we're going to add detail at the end, and they are meant to be loose florals after all. ;)

Loose Watercolor Florals in Living Coral by Jessica Mack of BrownPaperBunny

Step 3: Drop in a Third Color

To add a little more variety to your base color, drop in a few dots of yellow ink using the same technique as before. Let them spread into the living coral color while it is still wet.

Loose Watercolor Florals in Living Coral by Jessica Mack of BrownPaperBunny

Step 4: Add a Stem and Leaves

On your blending palette, mix up some green for the stem and leaves. I used colors 177 and 228. Using your paintbrush, transfer the ink from the blending palette to create a stem and leaves coming down from your flowers.

Loose Watercolor Florals in Living Coral by Jessica Mack of BrownPaperBunny

Here's what mine looks like so far.

Loose Watercolor Florals in Living Coral by Jessica Mack of BrownPaperBunny

Step 5: Adding Detail

Once the ink is completely dry, use your Dual Brush Pens to add detail to the petals and leaves. Experiment with the brush tip and the bullet tip and see which you're more comfortable with.

Loose Watercolor Florals in Living Coral by Jessica Mack of BrownPaperBunny

And voila, you've got some loose florals in living coral. These would make a nice framed art piece, or look great in your journal, or on a card to someone special.

Loose Watercolor Florals in Living Coral by Jessica Mack of BrownPaperBunny

I’d love to see your flowers! Share them on social media and tag @BrownPaperBunny so I can see!

In Dec 2018, Illustrations, Watercolor, Tutorial, Ink
19 Comments
Art Cruise by Jessica Mack of BrownPaperBunny

Creative Cruise!

February 28, 2019

Yep, you read that right…we’re going on a cruise, AND holding creative classes in lettering, watercolor florals etc. on days when we’re not in port.

And the best part?! We want you to come with us! You can find all of the details on The Lettering Companion’s website, but the basics are:

  • When: December 15-22, 2019

  • Cruise line: Royal Caribbean Cruises

  • Ship: Harmony of the Seas

  • Destinations:
    - Leaving from Orlando, Florida
    - Philipsburg, St. Maarten
    - San Juan, Puerto Rico
    - Cococay, Bahamas
    - Returning to Orlando, Florida

While the cruise isn’t for a few months, spots are filling up fast. You can put down a deposit with our travel agent and then you don’t have to pay the remainder until closer to departure. We’d love to have you, so if you’re interested, get over to The Lettering Companion’s site for all the details!

Naturally, I’m so excited that I had to paint a watercolor piece to celebrate. I used Prima’s Tropicals Watercolor Confection Set (you can still get 15% off their products with my code BrownPaperBunny15%), on Canson XL Watercolor paper.

Just think, that could be you standing on a gorgeous beach, with a bag full of art supplies, ready to relax and create! ;)

In Dec 2018, Tutorial, Watercolor
11 Comments
DIY Collage Plant Card by Jessica Mack of BrownPaperBunny

DIY Collage Plant Card

February 26, 2019

Please note: This blog post contains affiliate links, which help pay for the upkeep of this site. That being said, I will never, ever promote anything I am not 100% in love with!

----------

Craft month is coming up, and I’m getting right into card making, so today I’m going to show you how to make this collage plant card.

Supplies:

  • Tombow Dual Brush Pens

  • Scissors

  • Blending palette

  • Paint brush

  • MONO Aqua Liquid Glue

  • Mixed media paper

  • Pencil

  • Blank card

DIY Collage Plant Card by Jessica Mack of BrownPaperBunny

Step 1: Color

The first step in creating your collage plant card is to scribble some Dual Brush Pen ink onto your blending palette then paint it onto mixed media paper with a wet paintbrush. Note: Mixed media paper is great for this because it can withstand a light ink and water wash but isn’t too thick to cut easily.

DIY Collage Plant Card by Jessica Mack of BrownPaperBunny

Step 2: Draw Your Shapes

Once the ink is dry, draw some leaf and pot shapes over the color, in pencil.

DIY Collage Plant Card by Jessica Mack of BrownPaperBunny

Step 3: Cut Everything Out

Next, cut out all your leaf and pot shapes. You can also cut out some details to add extra dimension to the pots.

DIY Collage Plant Card by Jessica Mack of BrownPaperBunny

Step 4: Glue Time

The final step is to use MONO Aqua Liquid Glue to stick each piece down onto your blank card. Overlap some of the leaves and pots for a little extra depth, and voila, you’re ready to send it to the plant-lover in your life!

DIY Collage Plant Card by Jessica Mack of BrownPaperBunny

Do you have a favorite plant? Let me know in the comments.

In Ink, Dec 2018, Tutorial
Comment
Free Downloadable Fashion Illustration Figure Croquis by Jessica Mack of BrownPaperBunny

Free Fashion Croquis

February 23, 2019

I’ve been working on getting faster with my fashion illustrations, and the best way to cut time off each sketch is to use a fashion illustration croquis or figure. Croquis are also a great way to get started illustrating fashion if you aren’t confident drawing figures yet.

With awards season in full swing, one of my favorite things is to illustrate outfits from the red carpet. With the Oscars around the corner I thought it would be fun to share a set of my fashion illustration croquis so you can illustrate the red carpet with me.

Enter your email to download and print this set of free croquis. Then use the figure croquis to illustrate your favorite outfits. Tag @BrownPaperBunny and #BPBcroquis on Instagram so I can see your finished sketches!

Download Croquis

Enter your email to get the download link for these free croquis

I respect your privacy, and rarely send emails (but when I do I promise they’ll be fun)!

Download Fashion Illustration Croquis

Fine print: These croquis are for your own personal use and not for licensing, resale, or commercial use.

If you’d like to see some of my fashion illustrations for inspiration, check out these posts.

Featured
Fashion Illustration with Collage by Jessica Mack of BrownPaperBunny
Fashion Illustration with Collage
Fashion from Found Objects by Jessica Mack on BrownPaperBunny
Fashion From Found Objects
Free Fashion Flatlay Coloring Pages by Jessica Mack on BrownPaperBunny
Free Coloring Pages: Fashion Flatlays
Free Coloring Pages: Shoes by Jessica Mack on BrownPaperBunny
Free Coloring Pages: Shoes
Live+Fashion+Illustration+by+Jessica+Mack
Live Fashion Illustration: How To
Bloomtober 2019 Day 1 Portrait by Jessica Mack of BrownPaperBunny
Bloomtober 2019
Fall Fashion Illustration by Jessica Mack of BrownPaperBunny
Fall Fashion Illustration
Exclusive Tombow Dual Brush Pen Packs for Michael's by Jessica Mack of BrownPaperBunny
Exclusive Tombow Dual Brush Pen Packs for Michael's
Fashion Illustration Inspired by Food. By Jessica Mack of BrownPaperBunny.
Fashion Illustrations Inspired by Food
Fashion Illustration inspired by Dragonfruit drink at Starbucks. By Jessica Mack of BrownPaperBunny.
Inspired by Dragonfruit
FullSizeRender.jpg
Lunchtime Illustrations

(c) BrownPaperBunny

In Fashion Illustration, Dec 2018, Illustrations, Free Downloads, Watercolor
Comment
Watercolor portrait by Jessica Mack of BrownPaperBunny using different watercolor techniques

Watercolor Techniques

February 21, 2019

This week I was challenged to use multiple watercolor techniques in one portrait. I took that challenge and not only used multiple techniques but as many as I could think! Can you spot them all in my portrait above? Let me know, in the comments, if you think of any I missed!

Salt with Watercolor

Dropping kosher salt into almost-dry watercolor paint gives you a fun starburst effect. You have to experiment a little because if the paint is too wet or too dry it won’t work.

Watercolor and Salt by Jessica Mack of BrownPaperBunny

Wet on Wet Watercolor

This technique is fairly self explanatory. You wet your paper first, then add wet paint onto the wet paper, and watch it spread in a deliciously unpredictable way!

Wet on Wet Watercolor by Jessica Mack of BrownPaperBunny

Wet on Dry Watercolor

Wet paint, onto dry paper gives you a controlled, precise finish.

Wet on dry watercolor by Jessica Mack of BrownPaperBunny

Flat Wash

Flat washes give you a nice even area of color. I usually create mine with a really wet brush, onto dry paper.

Flat Wash Watercolor by Jessica Mack of BrownPaperBunny

Watercolor Fade Technique

This technique has a few different names, but I like the term ‘fade’. It’s where you add a little wet paint to your dry paper, then rinse your brush and use it to pull the paint down the paper. You can then rinse and repeat until the color is faded completely.

Watercolor Fade Technique by Jessica Mack of BrownPaperBunny

Graduated Wash

A graduated wash can be achieved via wet-on-wet and controlling the spread of paint by tilting the paper or blotting with paper towel. Or you can get this look by similarly to the fade technique but by using more water and rinsing your brush less in between each cross stroke (more of a dip than a rinse).

Graduated Wash using Watercolor by Jessica Mack of BrownPaperBunny

Glazing

A watercolor glaze is a thin wash applied over dry paint. It’s useful in unifying a painting with a similar color, or if you need to reduce the contrast of an area etc.

Watercolor Glazing by Jessica Mack of BrownPaperBunny

Scumbling

Watercolor scumbling is a technique I only learned recently, and it’s great for adding texture — especially to your underpainting. Scumbling is basically scribbling, or loose dots which let some of the paper show through.

Watercolor Scumbling by Jessica Mack of BrownPaperBunny

Crosshatching with Watercolor

Most used with pencil or ink, crosshatching can either be a fun or madening watercolor technique. Too wet and it turns into a muddy mess, but just a little bleeding together can make for a very cool effect and give you lots of texture.

Crosshatching with Watercolor by Jessica Mack of BrownPaperBunny

Here’s an example of an entire portrait I created using watercolor crosshatching.

View this post on Instagram

A post shared by Jessica 🎨 Seattle Artist (@brownpaperbunny) on Feb 1, 2019 at 7:19am PST

Doodling with Watercolor Paint

If you have a fine brush, doodling on a painting can be really fun and is a great way to add some detail or areas of interest.

Doodling with Watercolor by Jessica Mack of BrownPaperBunny

Using Masking Fluid

Masking fluid is a liquid rubber that once dry can be painted over, preserving (masking) the area underneath until it is removed. It’s great for highlights or details you want to keep while applying a wash or big area of color to the rest of your paper. Make sure you dip your brush in soap before you use it with masking fluid, and clean it immediately afterwards or else it will dry and in your brush and ruin it. You can also use masking fluid pens or dip a toothpick into it instead of risking your brushes.

Masking Fluid with Watercolor by Jessica Mack of BrownPaperBunny

Lifting off

Lifting off is great if you want a lighter area, or you made a mistake. It can be done with a clean dry brush (or paper towel) into almost dry paint, or you can gently use a sand eraser or razor blade to remove areas of dried paint (these last two will damage the paper though and you won’t be able to paint over the top).

Lifting off Watercolor by Jessica Mack of BrownPaperBunny

I often get asked what brands of watercolor, paper, and brushes I use, so I created a list for you here.


More watercolor tutorials:

Featured
CRL-Horizontal-Laptop-Beige-Floral-Painting.jpg
Creative Retreat Live
Rainbow-Watercolor-Wreath-Using-Markers.JPG
Rainbow Wreath Tutorial
JessicaMack-Mothers-Day-Art-8.jpg
Make Your Own Mother's Day Art
In Tutorial, Illustrations, Watercolor, Dec 2018, Portraits
12 Comments
Invisible Ink Invitations by Jessica Mack of BrownPaperBunny

Invisible Ink Invitations

February 21, 2019

Please note: This blog post contains affiliate links, which help pay for the upkeep of this site. That being said, I will never, ever promote anything I am not 100% in love with!

----------

In honor of our little girl’s upcoming birthday I’m going to show you how to get an invisible ink effect with Tombow’s new Fudenosuke Colors Brush Pens. I don’t know about you but when I was a kid I was obsessed with invisible ink, codes, and spy gadgets. I guess I never grew up because I still love those things! Recently, I discovered that you can use Fudenosuke Brush Pens under water-soluble ink (such as Dual Brush Pens) to create hidden text and drawings that can be revealed later. Here’s how!

Supplies:

  • Tombow Fudenosuke Colors 10-Pack

  • Watercolor Paper (140lb works best)

  • Tombow Dual Brush Pens in matching colors

  • Paintbrush and water 

Invisible Ink Invitations by Jessica Mack of BrownPaperBunny

Step 1: Create Your Hidden Layer

Use your Fudenosuke Colors Brush Pens to create your hidden text, drawing, or designs on the watercolor paper. This technique would be a fun way to write a letter to someone, create an invitation, a birthday card, a little note or a drawing. 

Invisible Ink Invitations by Jessica Mack of BrownPaperBunny

Step 2: Create Your Top Layer

Let your first layer dry completely. Then use Dual Brush Pens in colors that match the Fudenosukes to cover the first layer. The Dual Brush Pen colors I found that matched well were: 856 for Red, 946 for Orange, 055 for Yellow, 195 for Green, 476 for Blue, 636 for Purple, 725 for Pink, 969 for Brown, N65 for Grey, and N15 for Black.

If you can still see the Fudenosuke ink through the first layer of Dual Brush Pen, let it dry completely and add a second layer.

Invisible Ink Invitations by Jessica Mack of BrownPaperBunny

Step 3: The Big Reveal

You’re finished, and you can send your creation off with instructions to wet each color with a paintbrush and water. Here’s what the rainbow invitation looked like after I wet each top layer color and the Fudenosuke ink emerged.

Invisible Ink Invitations by Jessica Mack of BrownPaperBunny
In Dec 2018, Ink, Tutorial, Watercolor
8 Comments
Crated With Love Date Night in a Box by Jessica Mack of BrownPaperBunny

Date Night in a Box

February 14, 2019

Recently Crated With Love sent me one of their kits to test out, and I wanted to share my experience with you.

What is it?

Essentially it’s a date night in a box.

The kit we received was a fun safari game complete with game pieces, spinner, cards, a magnet and a host of other fun stuff.

Crated With Love Date Night in a Box by Jessica Mack of BrownPaperBunny

What do you do with it?

You use it to foster a bit of fun and bonding with your significant other!

What’s it like?

My husband and I had great child-care when we lived in Colorado so we made date nights out a regular occurrence, but since moving to Seattle we have yet to find our dream babysitter so date nights tend to consist of Netflix and take-out. Crated With Love is the perfect excuse to turn off the TV and give your partner your undivided attention, for a fun and romantic night in.

Ours couldn’t have arrived at a more perfect time too. During the Seattle Snowpocolypse of 2019 we were without power AND internet (the horror). We couldn’t leave the house, and frankly it was so cold and miserable outside we didn’t want to anyway. With Baby snuggled in bed we lit some candles (well, a LOT of candles because it was dark y’all) and pulled out our Crated With Love date night in a box.

At first I was a little skeptical about whether or not it would be fun or just cheesy, and it’s safe to say my husband had an even higher level of skepticism. But just a few minutes into the game we’d already laughed, recounted some favorite memories, and made plans for future trips, adventures, and date nights. Throughout the game we were prompted to whisper sweet things to each other, recall funny moments we’d shared, and set couple’s goals.

All-in-all I give Crated With Love two thumbs up. It would even be a fun activity for a double date!

Crated With Love Date Night in a Box by Jessica Mack of BrownPaperBunny

Having been with my husband for over 10 years now I can say that a happy relationship doesn’t just magically happen, you have to invest in it. Spending focused time together (not just separately scrolling Instagram while sitting next to each other on the couch) helps strengthen your bond…plus it should be fun! Definitely check out some of Crated With Love’s previous boxes, they have some pretty fun ones!

In Dec 2018
Comment
Older Posts →

Subscribe

Sign up to receive social media tips, freebies, special promotions, and art tutorials!

Thank you!

Please click confirm in the email you were just sent!

Directory of Illustration Jessica Mack

Shop my work on Society6

Watercolor World Map by Jessica Mack of BrownPaperBunny

Follow on Instagram

For the 100 Days Project this year I’m keeping it super low pressure. I’ve got a very busy couple of months coming up and want to set myself up to be able to stick with it, while still making sure I do something creative every day. You ca

See my classes on Skillshare

Skillshare Classes by Jessica Mack

Popular Posts

Popular Posts
CRL-Horizontal-Laptop-Beige-Floral-Painting.jpg
Creative Retreat Live
Rainbow-Watercolor-Wreath-Using-Markers.JPG
Rainbow Wreath Tutorial
15 Ways to Journal by Jessica on BrownPaperBunny
15 Ways to Journal
Tombow Brush Pen Markers and Colored Pencils
Brown Paper Bunny

Privacy + Terms of Use

Shop

Watercolor with Markers Book

Classes

Art Tutorials

Art & Illustration Portfolio

About

Contact

Custom Book Print

Custom Book Mug

How to Paint Watercolor Flowers Using Markers

Free Fashion Croquis

Start an Art Journal

6 Easy Flowers to Draw with Tombow Markers

Make Your Own Watercolor Bookmarks