• Book
    • Watercolor with Brush Pens
    • Watercolor Flowers Using Markers
    • Paint a Watercolor Galaxy Butterfly with Markers
    • Paint Watercolor Galaxy Bookmarks using Markers
    • Timelapse Video for Artists
  • Shop
  • Society6 Store
  • Blog
  • Portfolio
  • About
  • Contact
Menu

Brown Paper Bunny Studio

Art & Fashion Illustration
  • Book
  • Classes
    • Watercolor with Brush Pens
    • Watercolor Flowers Using Markers
    • Paint a Watercolor Galaxy Butterfly with Markers
    • Paint Watercolor Galaxy Bookmarks using Markers
    • Timelapse Video for Artists
  • Shop
  • Society6 Store
  • Blog
  • Portfolio
  • About
  • Contact
How to Create a Watercolor Background for Your Lettering by Jessica Mack of BrownPaperBunny

How to Create a Watercolor Background for Your Lettering

September 1, 2018

Please note: This blog post contains affiliate links, which help pay for the upkeep of this site. That being said, I will never, ever promote anything I am not 100% in love with!

----------

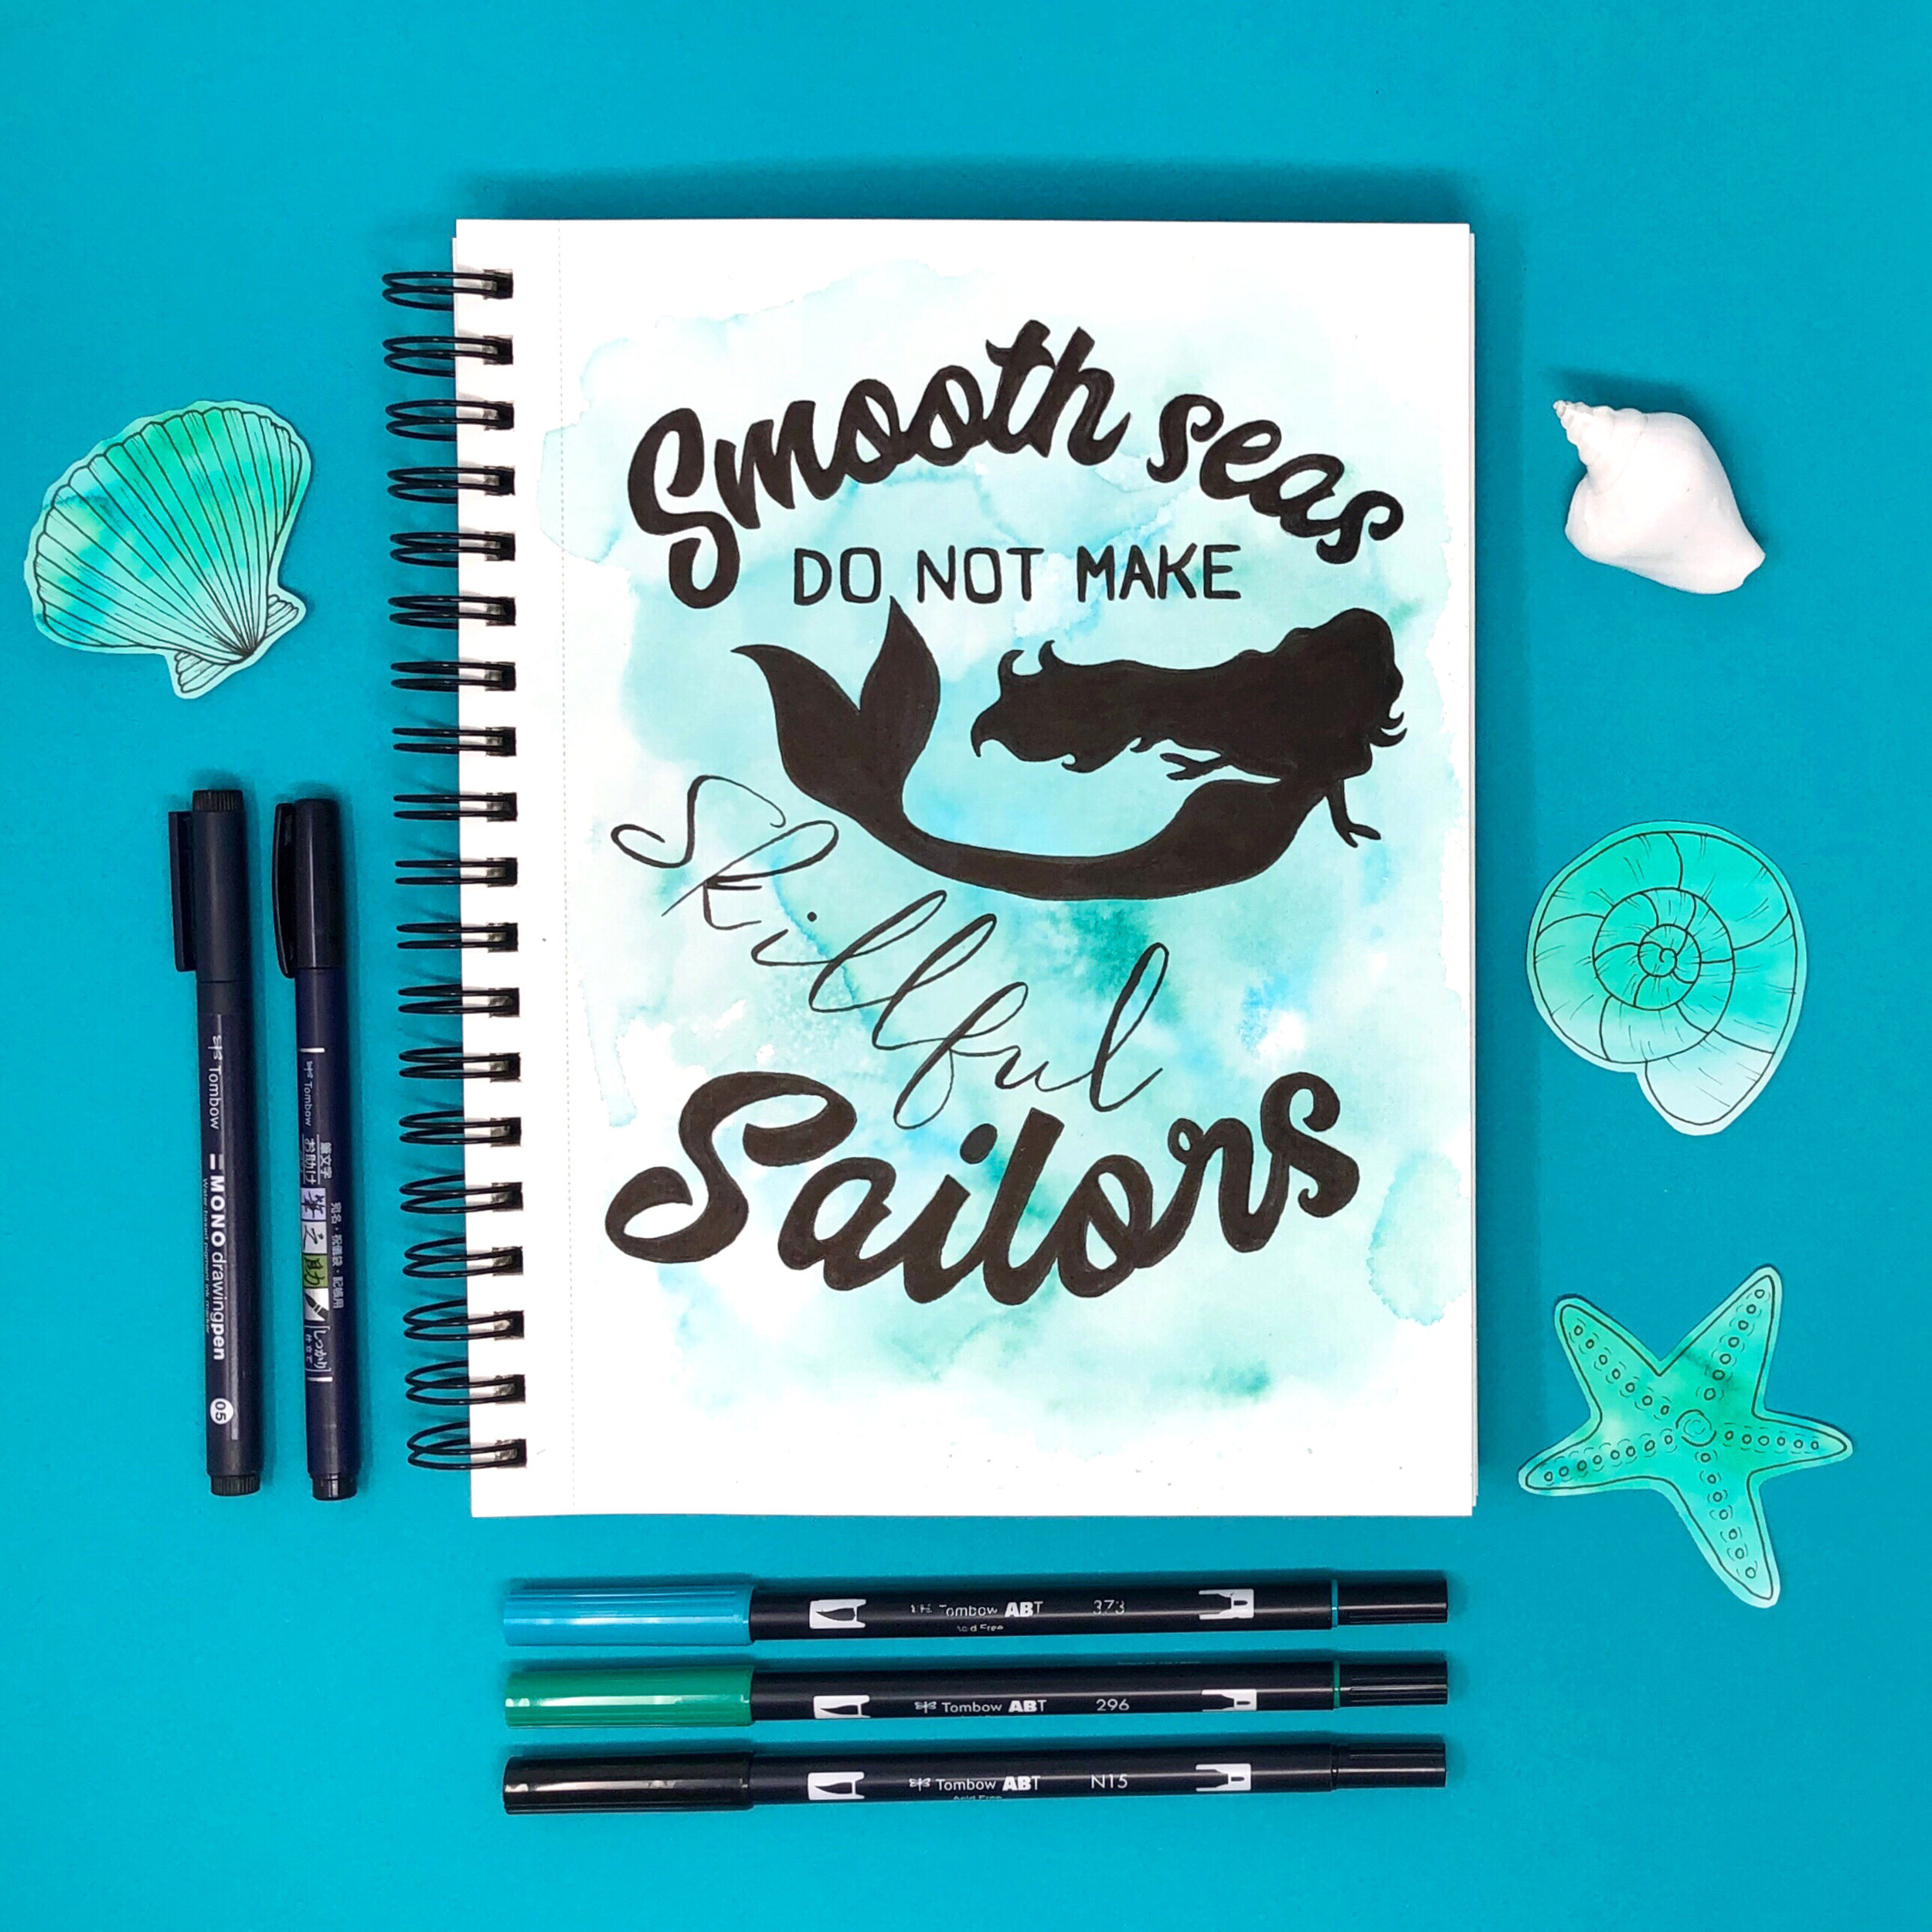
I just love using Tombow Dual Brush Pens to create a watercolor effect and the new XL Blending Palette is perfect for that! Today I’m going to show you how I create watercolor backgrounds for lettering projects. You’ll need the XL Blending Palette, Dual Brush Pens in your favorite colors, a water mister, watercolor paper, and Mono Drawing Pen or Fudenosuke Pen.

How to Create a Watercolor Background for Your Lettering by Jessica Mack of BrownPaperBunny

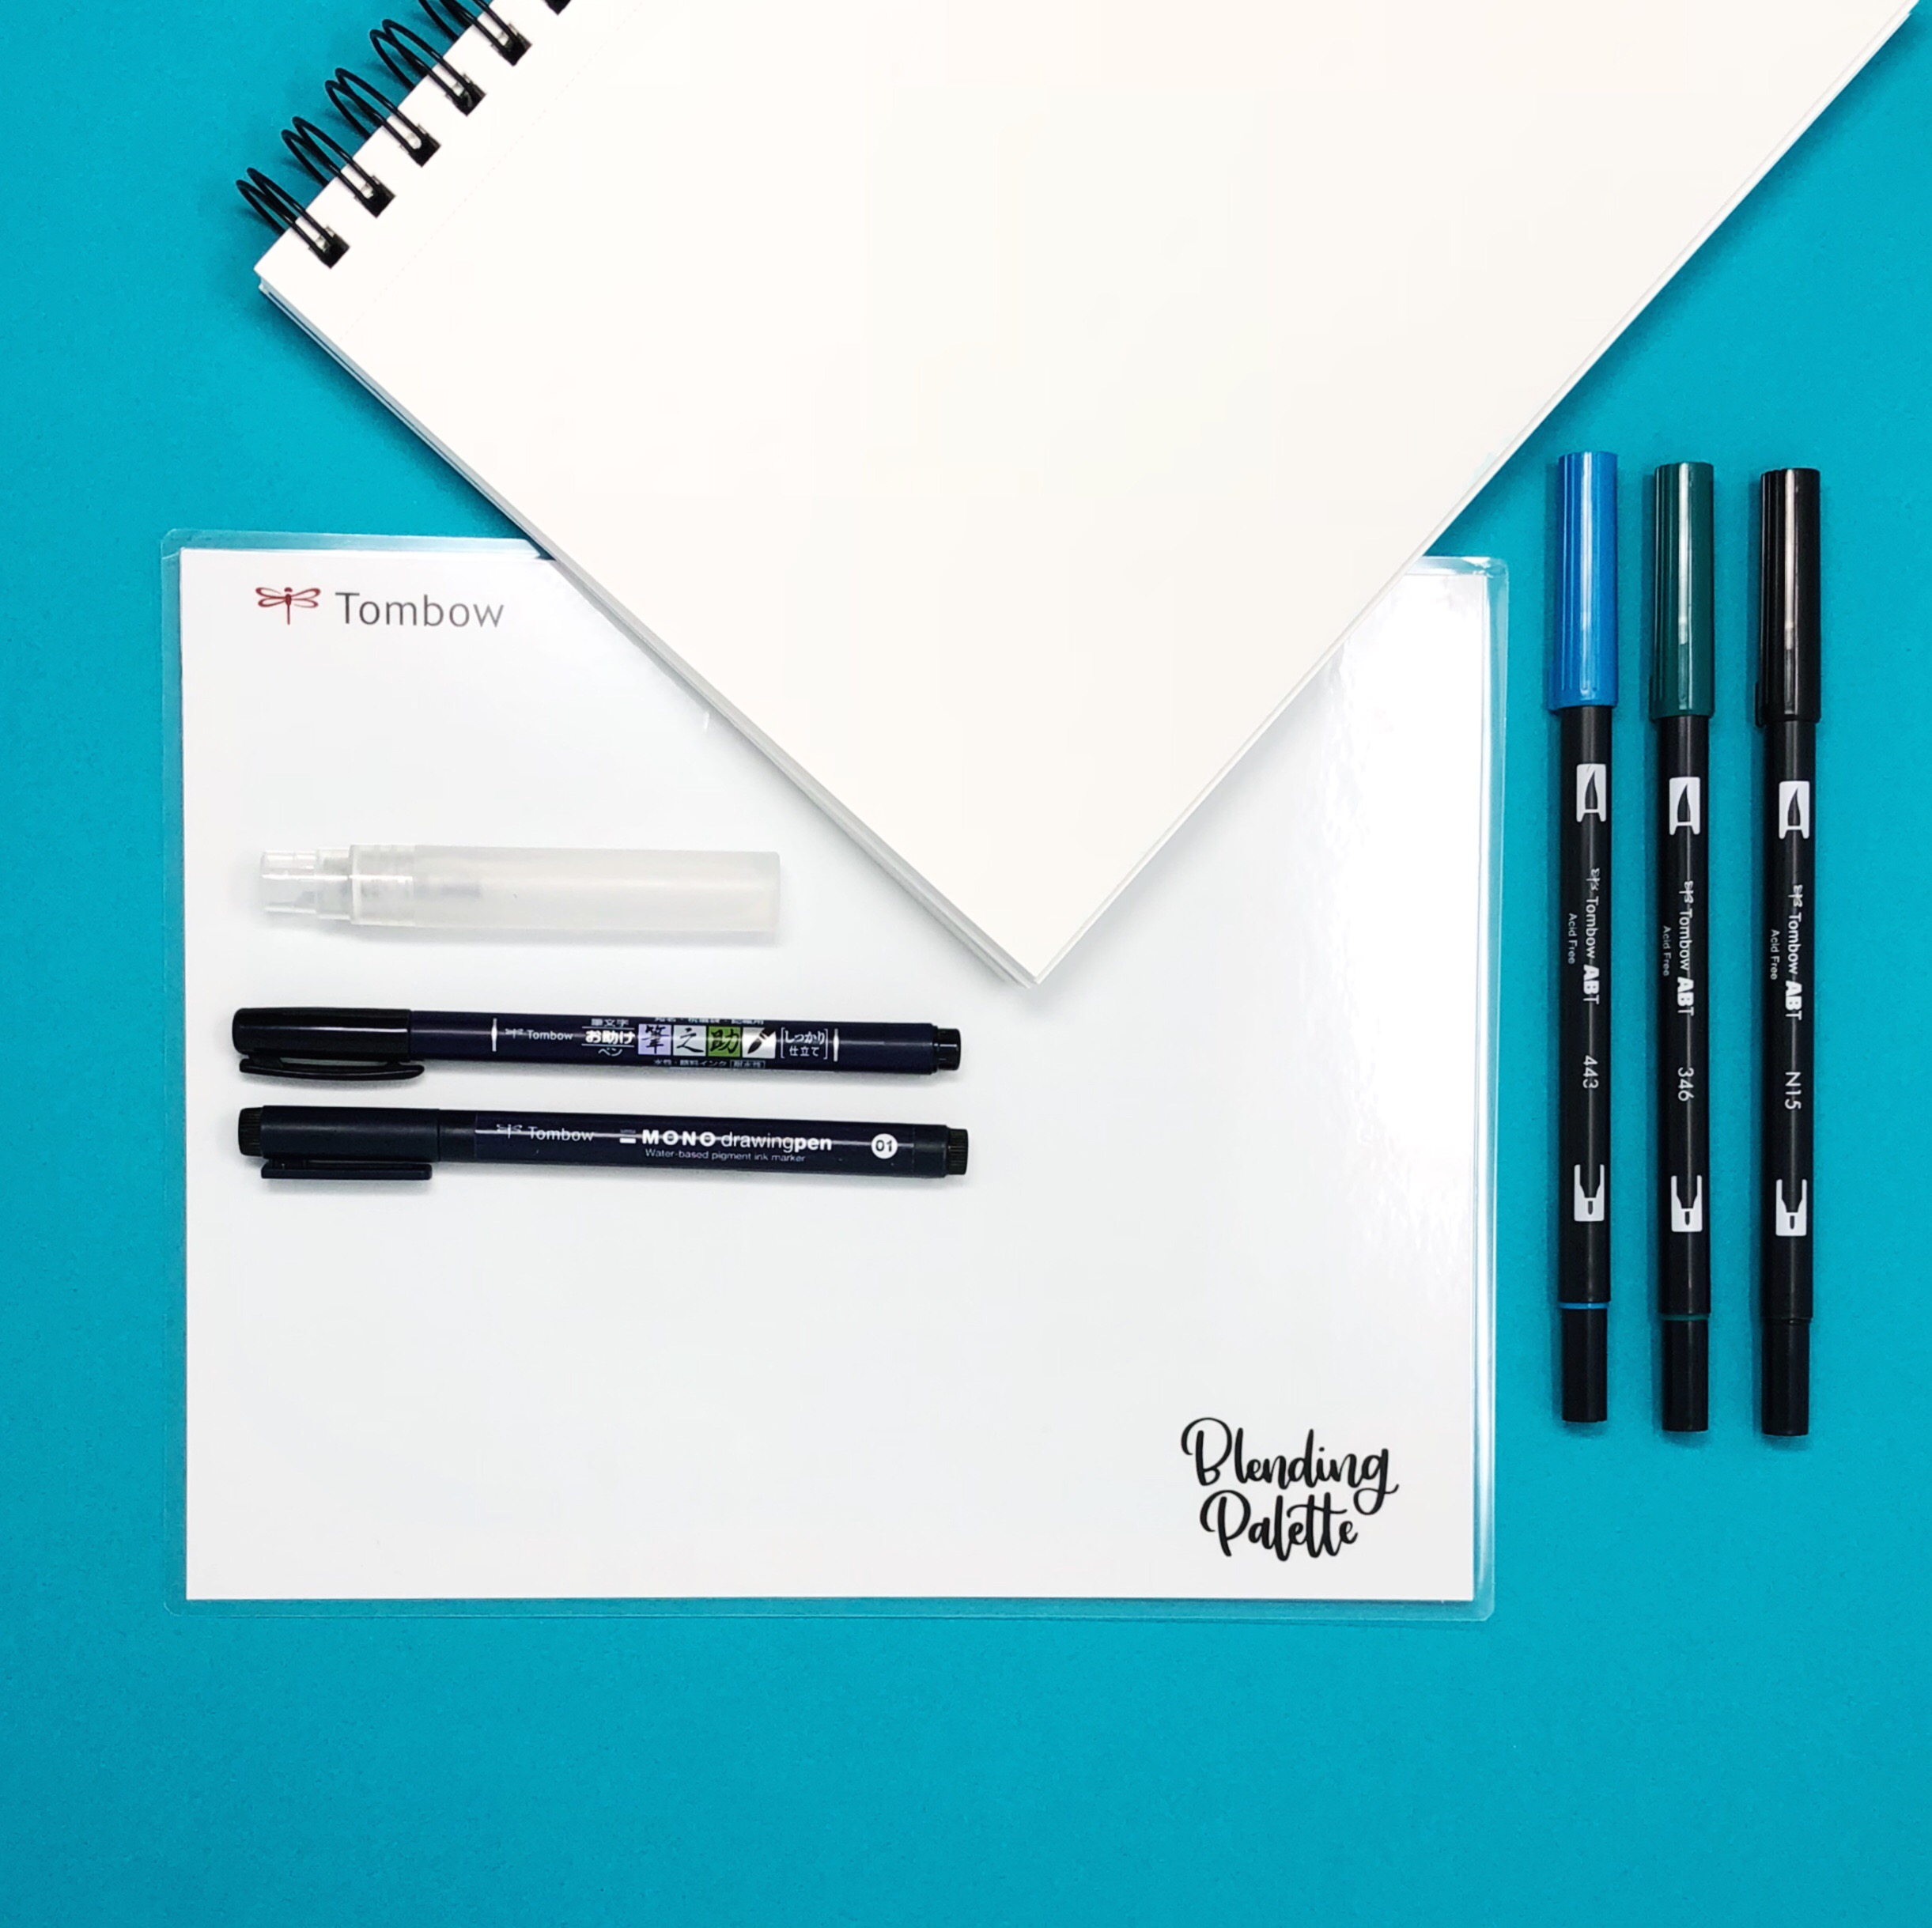
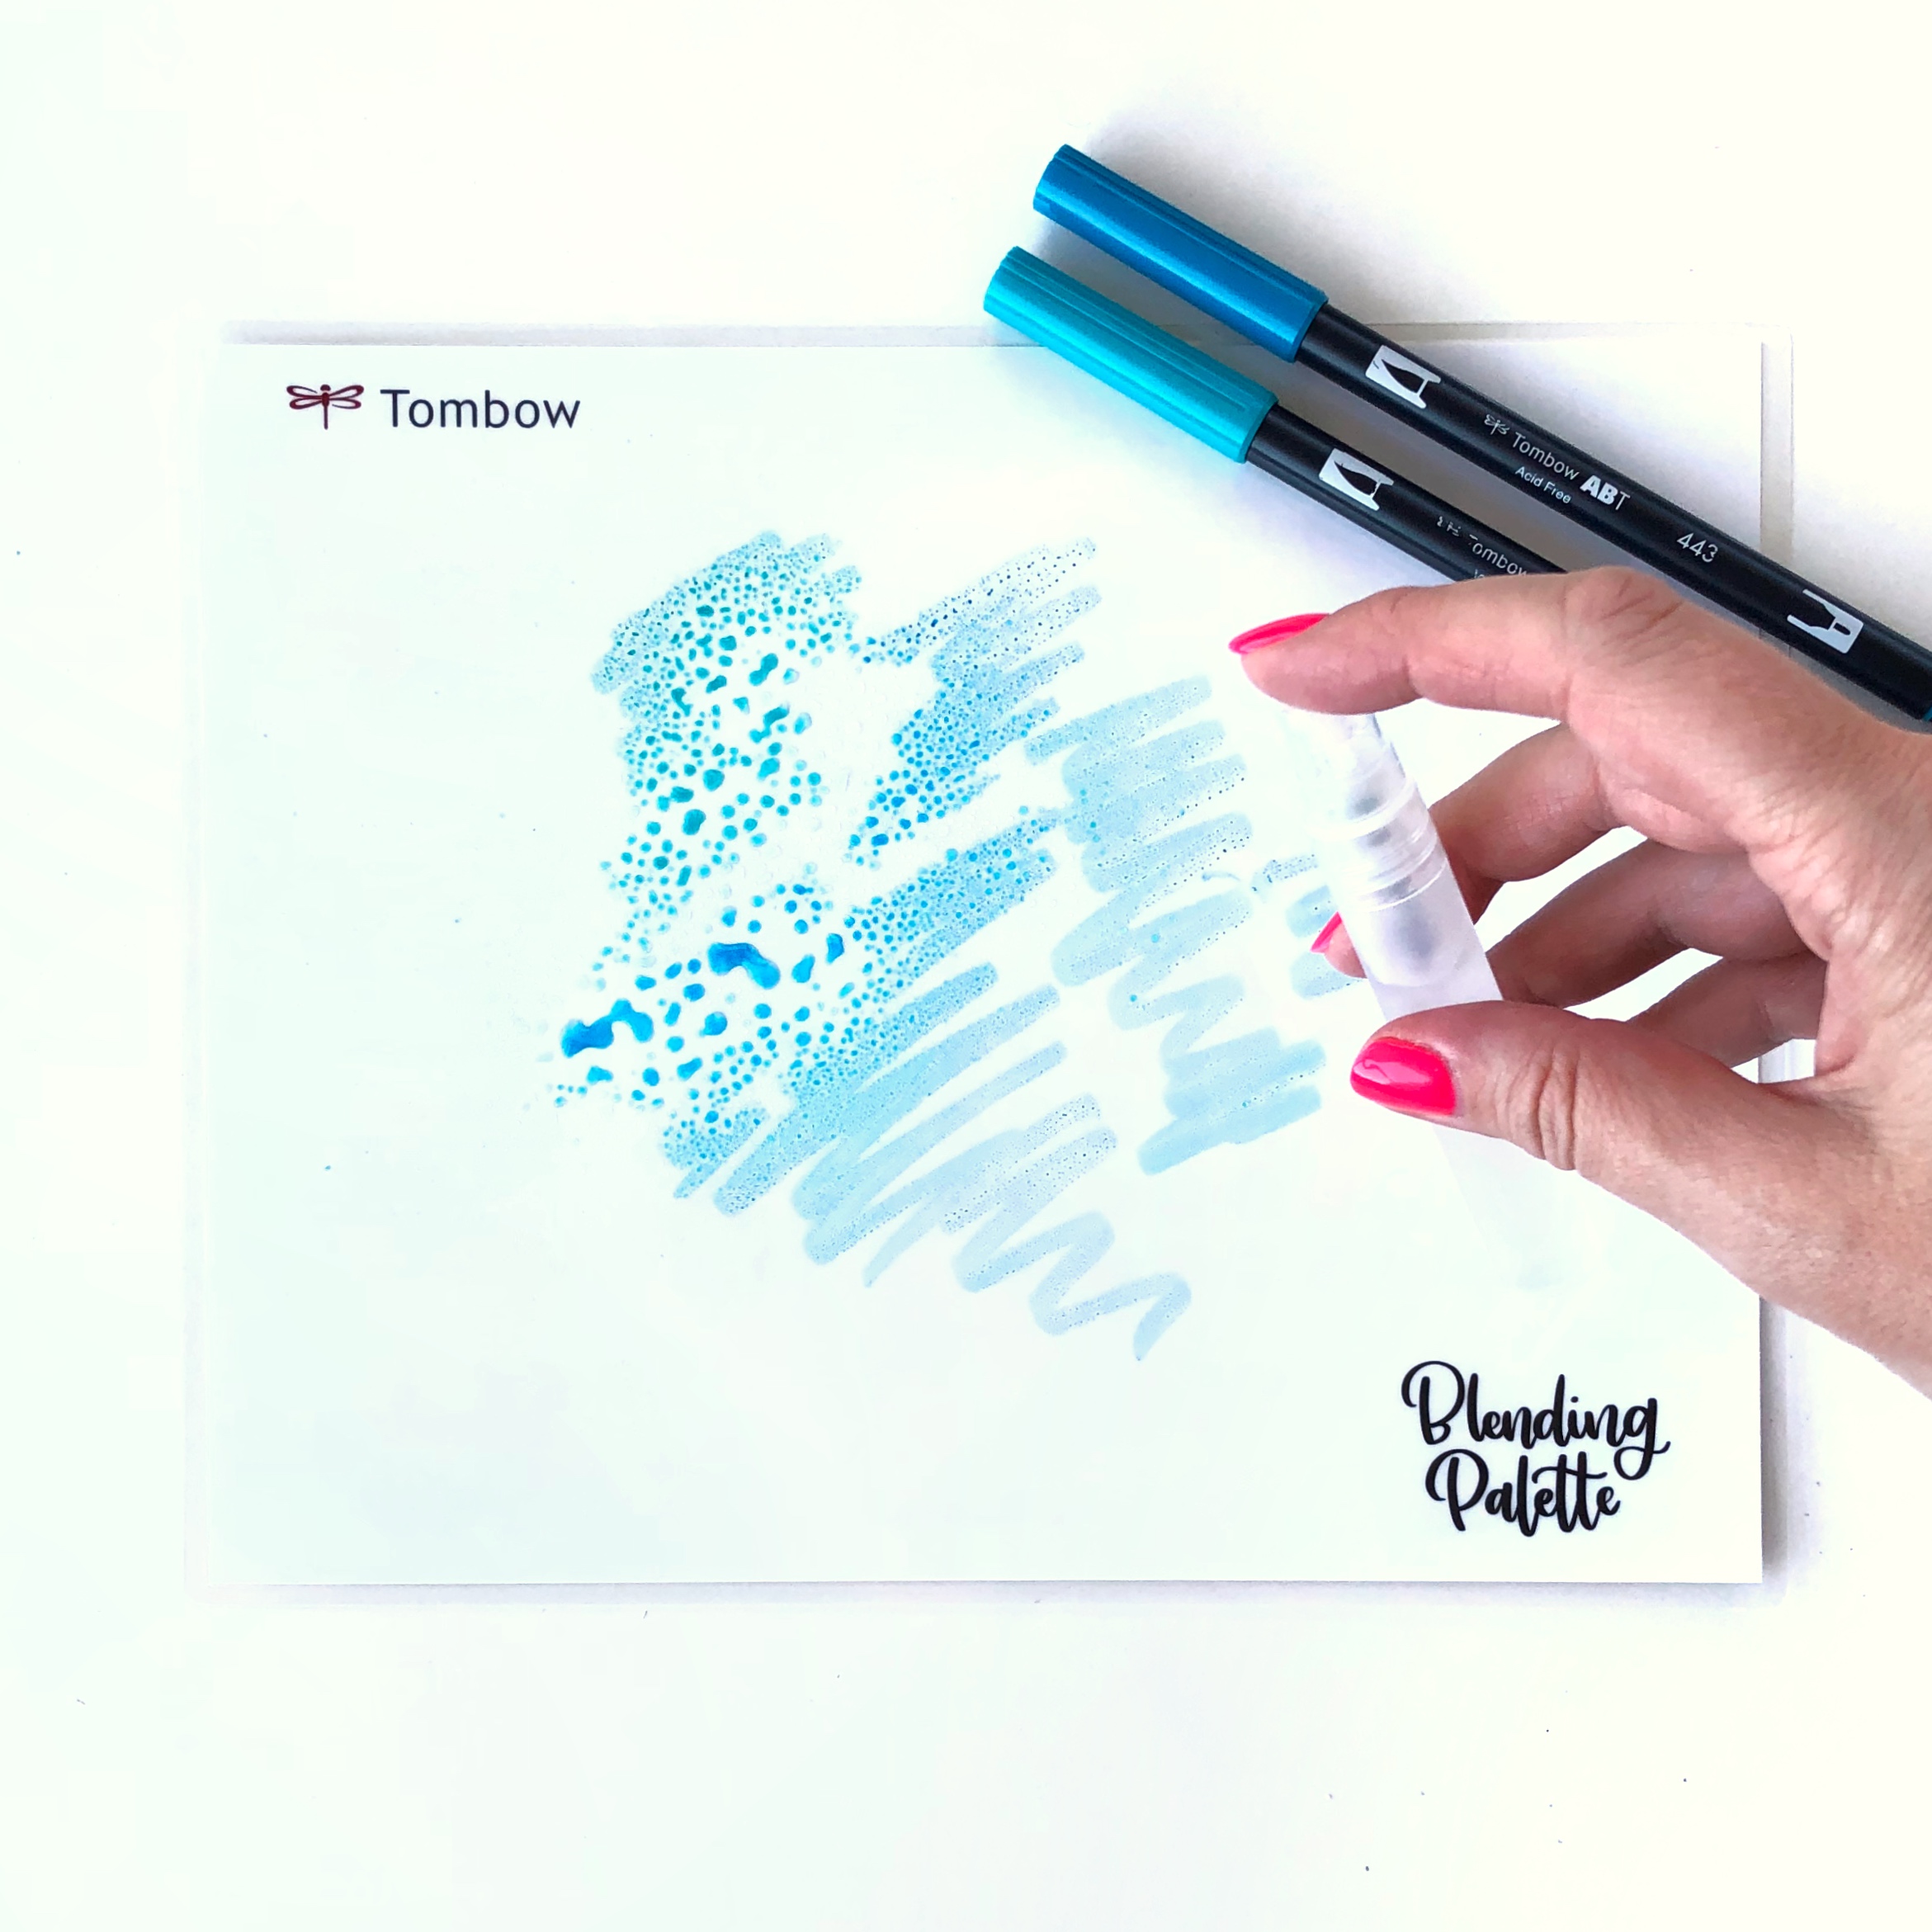
To create your watercolor background start by adding some ink to your XL Blending Palette with your Dual Brush Pens. Spray a little water over the ink then press your watercolor paper down onto the palette. Blot any extra water with some paper towel, and if you want the color to run a little more you can spray water directly onto your paper. While you’re waiting for your paper to dry, wipe down your blending palette with damp paper towel and you’re ready to start again! What are your favorite colors to blend together?

How to Create a Watercolor Background for Your Lettering by Jessica Mack of BrownPaperBunny

Here's a video of the whole process.

Once your watercolor background is dry you’re ready to start your lettering project. I used Mono Drawing Pens, Dual Brush Pens and my Fudenosuke to create the lettering on this project. Do you have a favorite quote, let me know in the comments!

In Type, Ink, Watercolor, Aug 2017, Tutorial, Sketchbook
← Art Journaling with the Tombow XL Blending PaletteMake a Pencil Housewarming Card →

Subscribe

Sign up to receive social media tips, freebies, special promotions, and art tutorials!

Thank you!

Please click confirm in the email you were just sent!

Directory of Illustration Jessica Mack

Shop my work on Society6

Watercolor World Map by Jessica Mack of BrownPaperBunny

Follow on Instagram

For the 100 Days Project this year I’m keeping it super low pressure. I’ve got a very busy couple of months coming up and want to set myself up to be able to stick with it, while still making sure I do something creative every day. You ca

See my classes on Skillshare

Skillshare Classes by Jessica Mack

Popular Posts

Popular Posts
CRL-Horizontal-Laptop-Beige-Floral-Painting.jpg
Creative Retreat Live
Rainbow-Watercolor-Wreath-Using-Markers.JPG
Rainbow Wreath Tutorial
15 Ways to Journal by Jessica on BrownPaperBunny
15 Ways to Journal
Tombow Brush Pen Markers and Colored Pencils
Brown Paper Bunny

Privacy + Terms of Use

Shop

Watercolor with Markers Book

Classes

Art Tutorials

Art & Illustration Portfolio

About

Contact

Custom Book Print

Custom Book Mug

How to Paint Watercolor Flowers Using Markers

Free Fashion Croquis

Start an Art Journal

6 Easy Flowers to Draw with Tombow Markers

Make Your Own Watercolor Bookmarks