

Today I’m going to you how to make a cute carrot banner for Easter. This is a great project to get the kids involved in, and looks super cute strung across a mantle or above a window or door. Here's what you'll need to get started.
Supplies:
Tombow Dual Brush Pens (Pastel 10-Pack)
Scissors
Ribbon or thick string

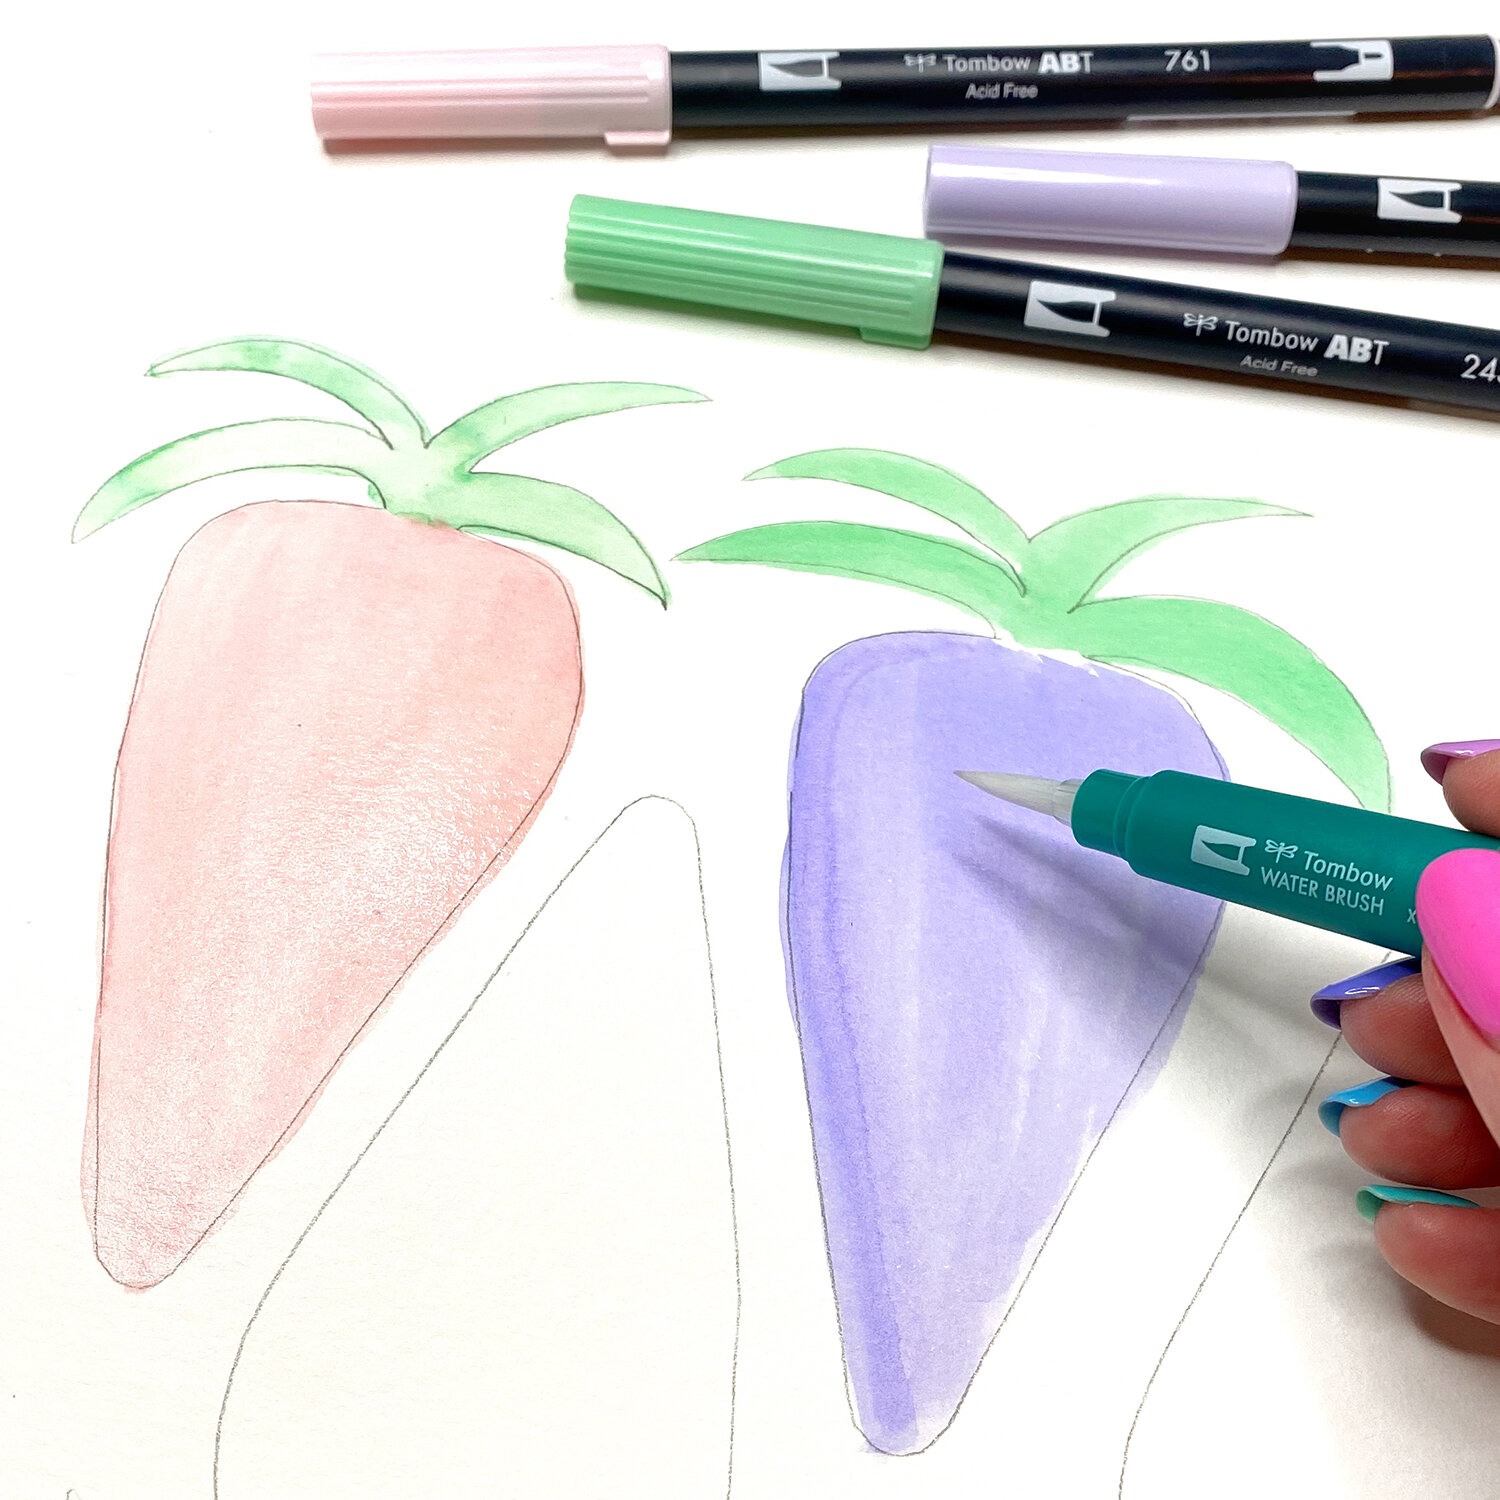
Step 1: Draw and Color Your Carrots
The first step is to use your MONO Graph Mechanical Pencil to draw some carrot shapes onto your watercolor paper. Then, using your pastel Dual Brush Pens, color in each carrot. I made the tops of each one green, but you can go crazy with the colors however you'd like!
Next, blend the Dual Brush Pen ink using your Water Brush, to get a watercolor-look.
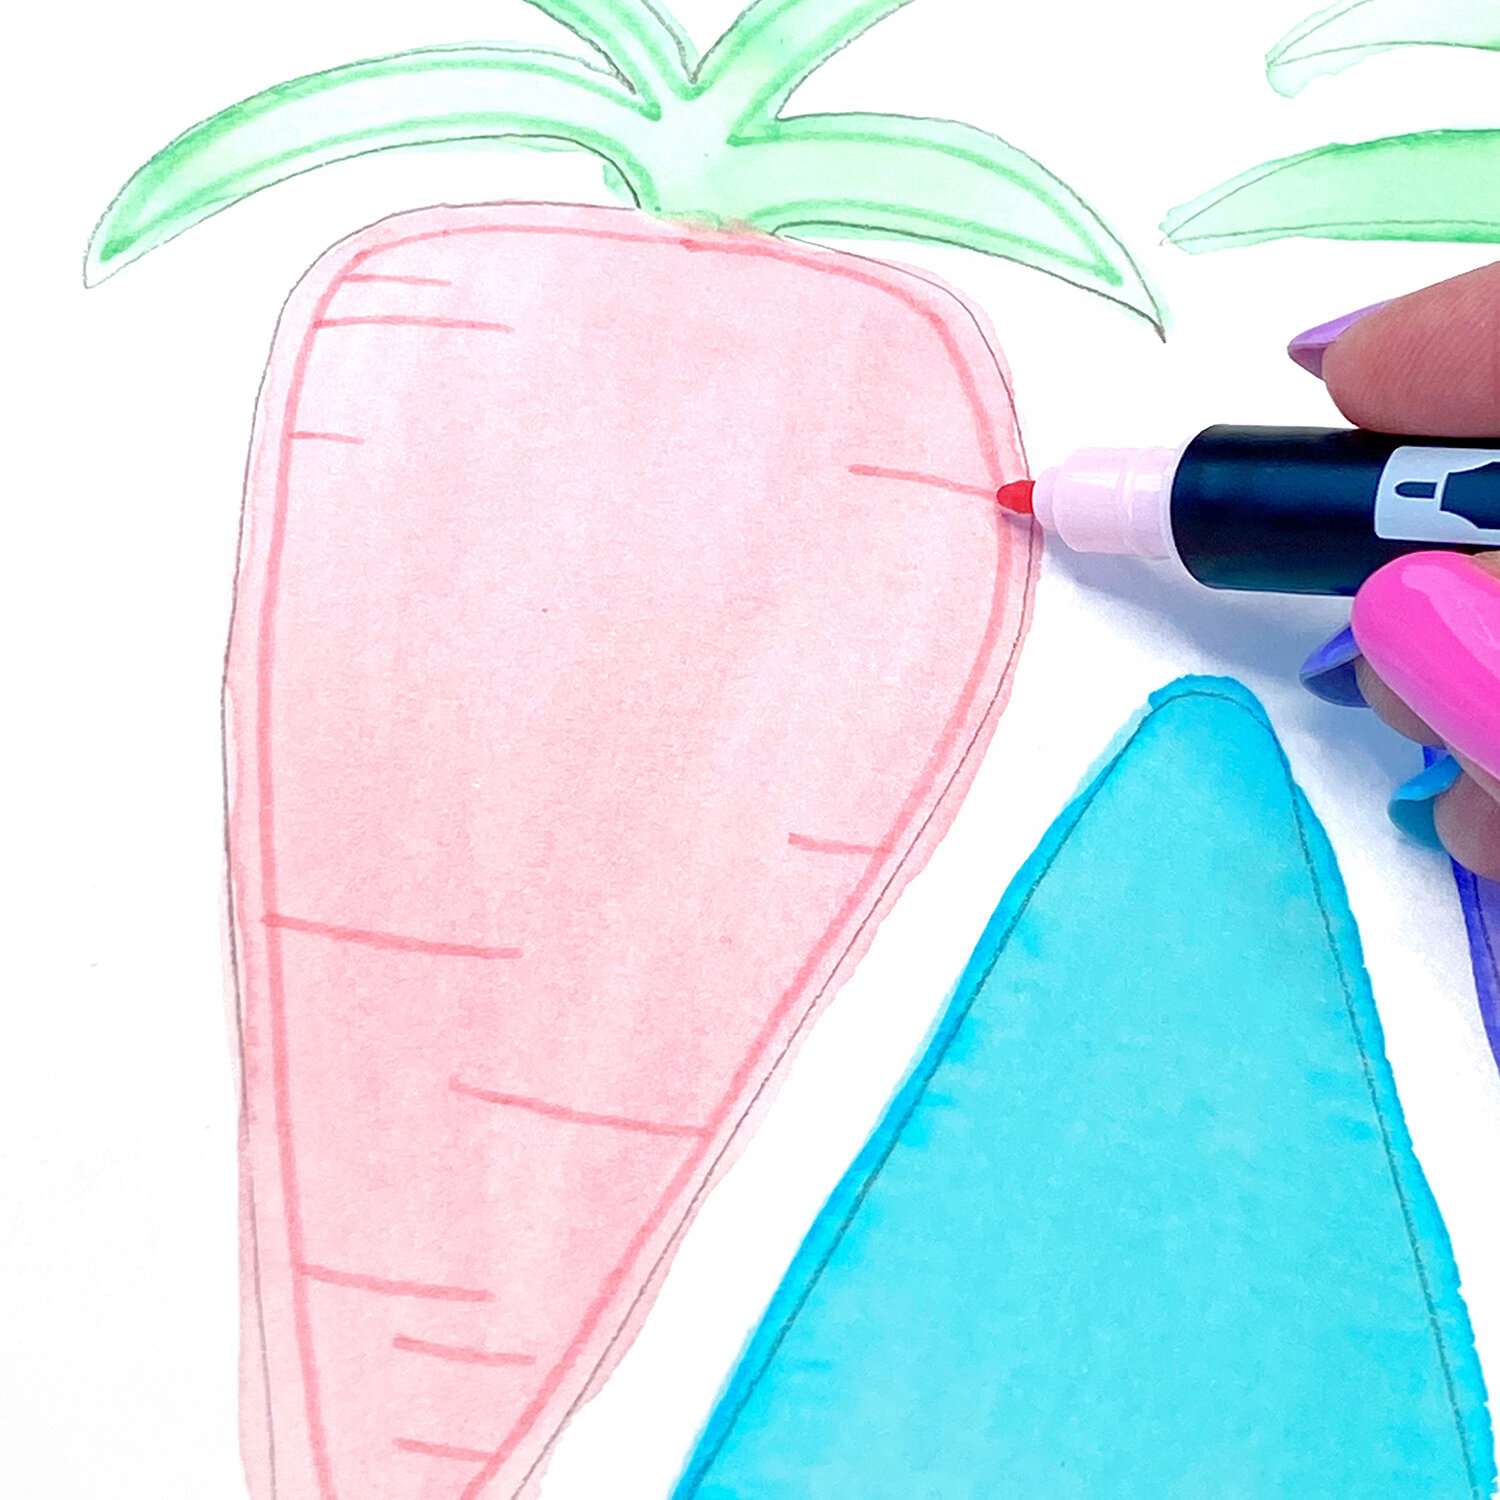
Step 2: Add Details
Once the first layer of ink is dry, use the bullet tip end of your Dual Brush Pens to add some details to each carrot.
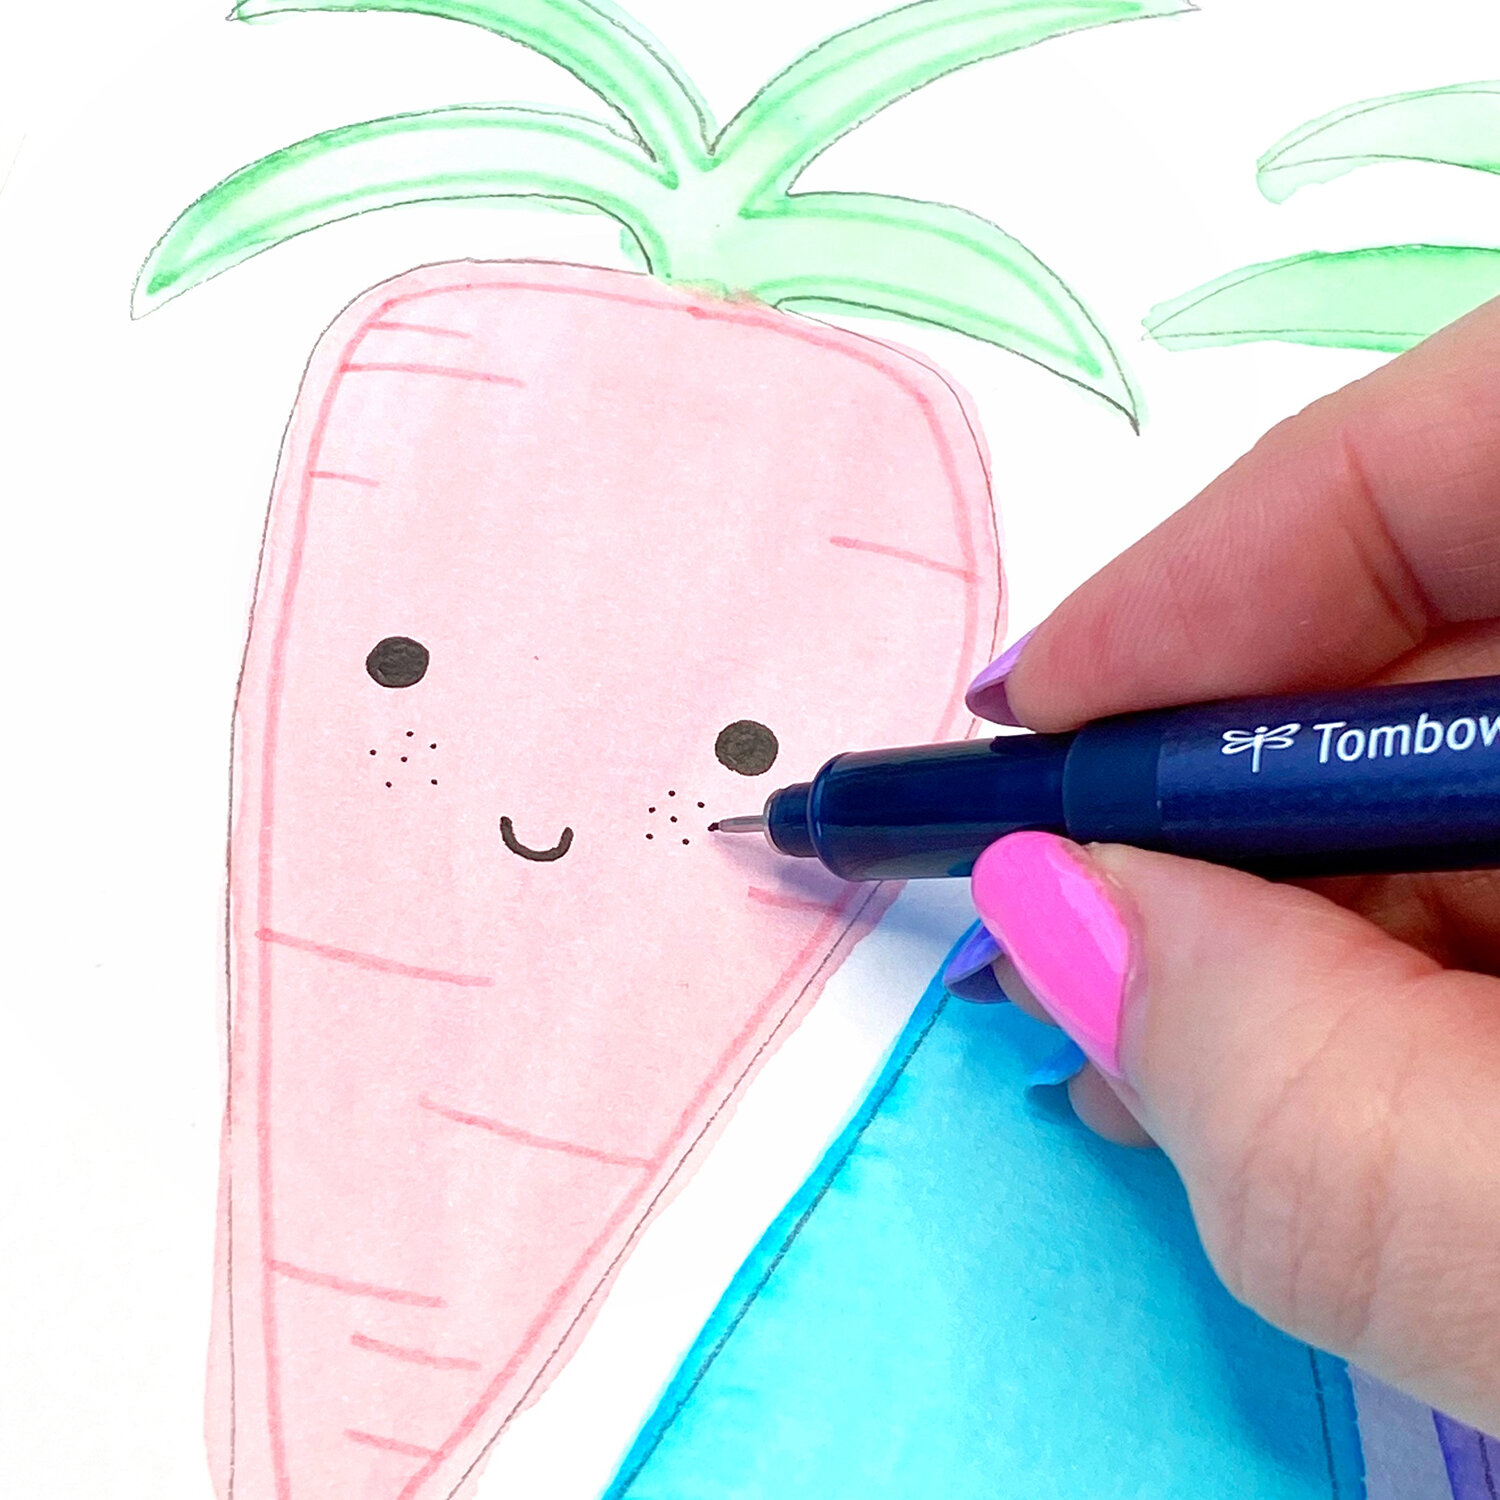
Then use your MONO Drawing Pens to draw cute little faces onto each carrot. I like to add freckles to mine. ;)
Step 3: Cut Them Out
Using your scissors, carefully cut around each of your carrots, to get them ready for the final step.

Step 4: Glue Them Onto Ribbon
Using your MONO XL Multi Liquid Glue, glue each carrot onto ribbon or string. I like to put a little piece of scrap paper on the table when I'm gluing, just to keep my work surface clean. Also, it's best to let the carrot banner dry with the carrots facing down onto the table (the glue side facing up) to prevent them sticking to the table.

Once it's dry, you're ready to hang up your carrot banner for Easter!

I’d love to see how yours come out. Tag @BrownPaperBunny on social media so I can check it out!
If you’re looking for more Easter ideas, check out this tutorial on making watercolor Easter cards.
----------
Please note: This blog post contains affiliate links, which help pay for the upkeep of this site. That being said, I will never, ever promote anything I am not 100% in love with!