• Book
    • Watercolor with Brush Pens
    • Watercolor Flowers Using Markers
    • Paint a Watercolor Galaxy Butterfly with Markers
    • Paint Watercolor Galaxy Bookmarks using Markers
    • Timelapse Video for Artists
  • Shop
  • Society6 Store
  • Blog
  • Portfolio
  • About
  • Contact
Menu

Brown Paper Bunny Studio

Art & Fashion Illustration
  • Book
  • Classes
    • Watercolor with Brush Pens
    • Watercolor Flowers Using Markers
    • Paint a Watercolor Galaxy Butterfly with Markers
    • Paint Watercolor Galaxy Bookmarks using Markers
    • Timelapse Video for Artists
  • Shop
  • Society6 Store
  • Blog
  • Portfolio
  • About
  • Contact
public.jpeg

Art Journal Page with Markers

July 27, 2019

Please note: This blog post contains affiliate links, which help pay for the upkeep of this site. That being said, I will never, ever promote anything I am not 100% in love with!

----------

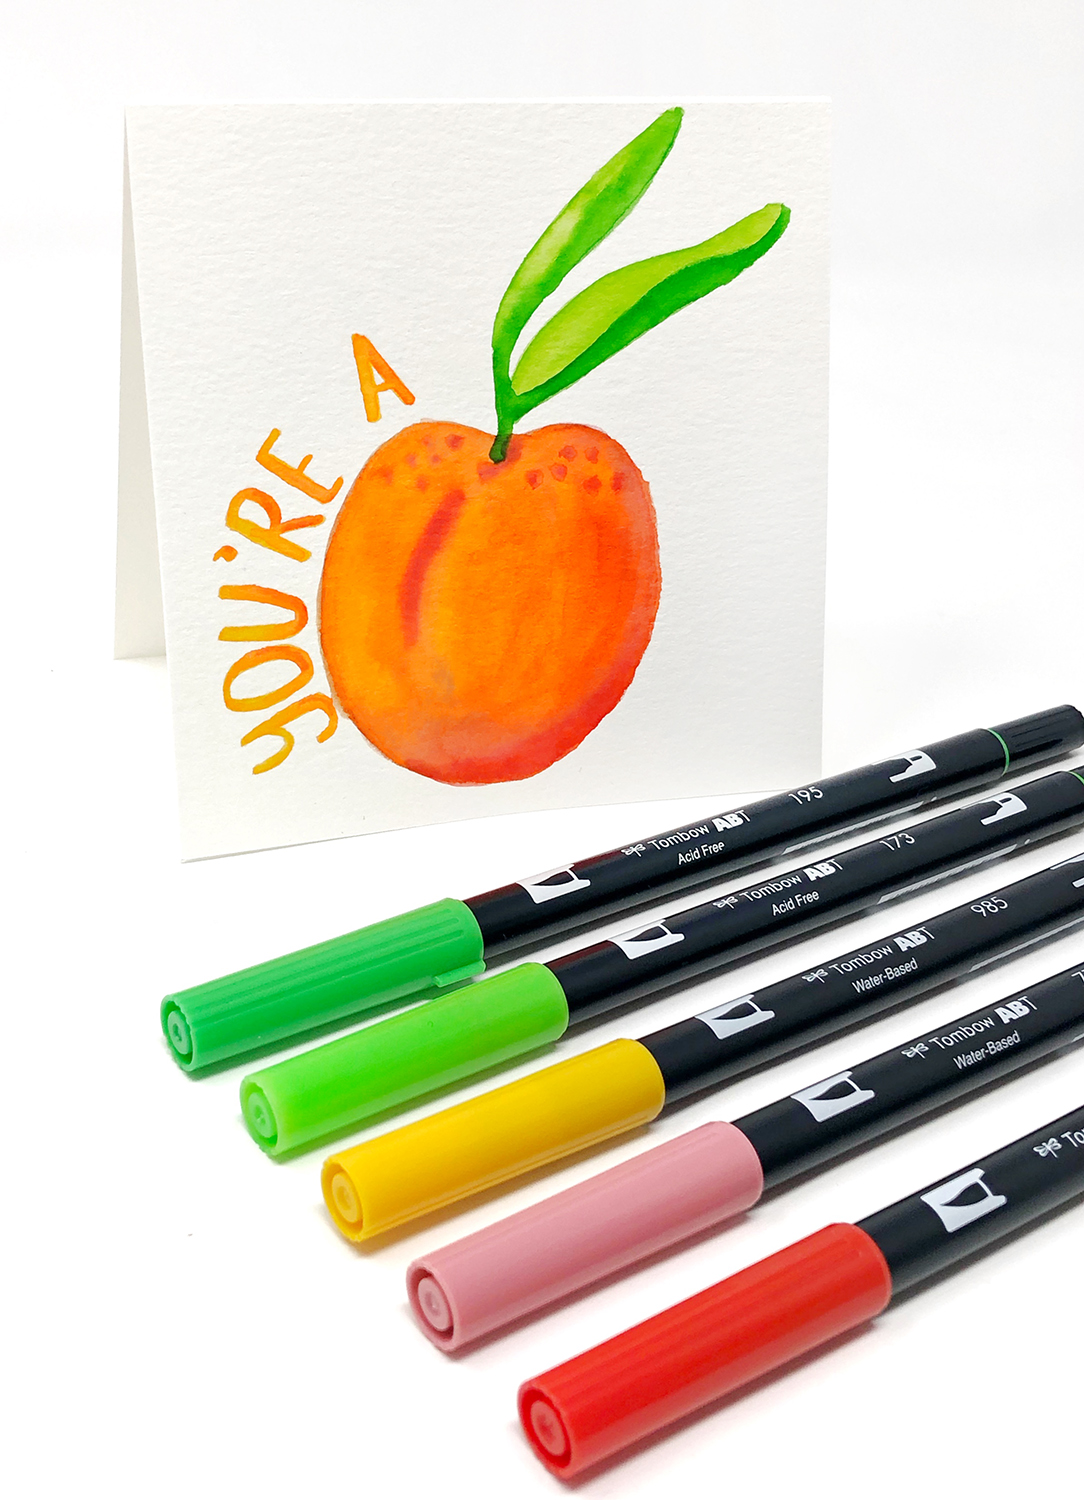
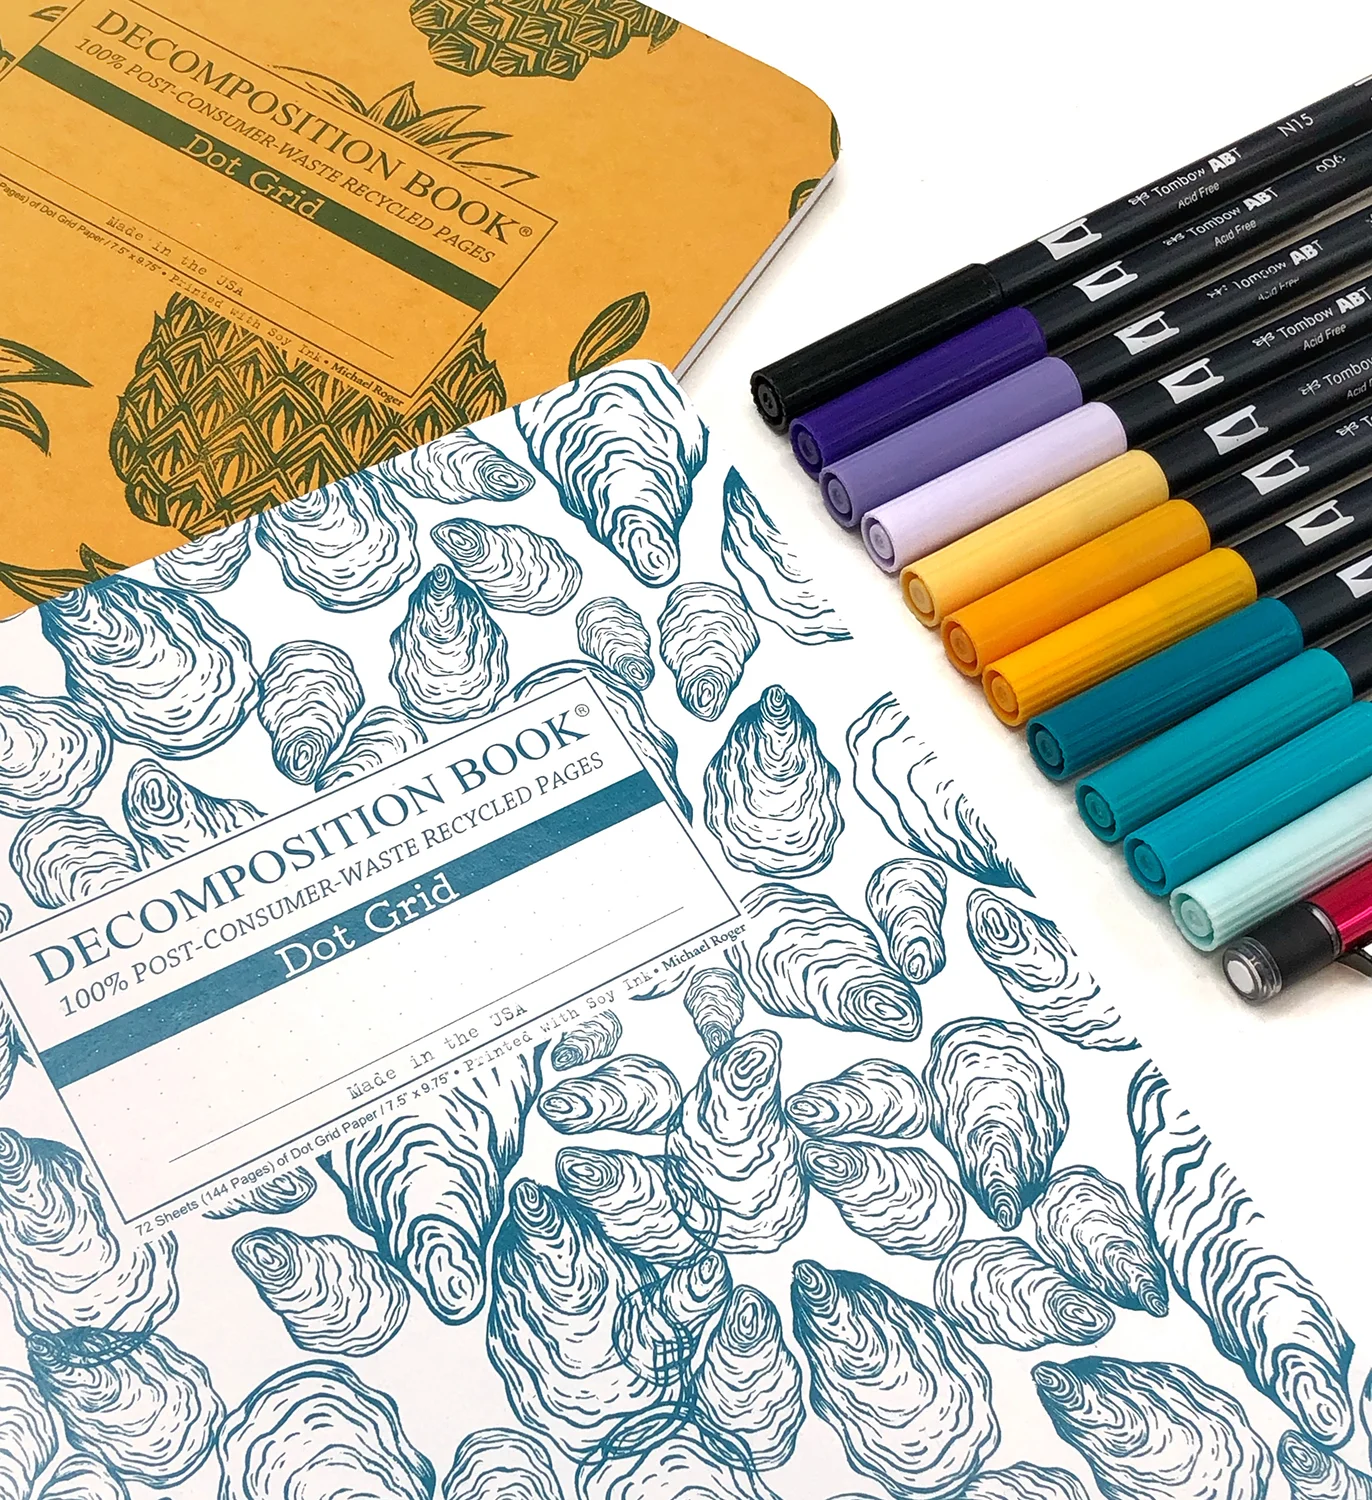
Here’s an easy way to make an art journal page with markers! Water soluble markers are vibrant and versatile and can give you a huge variety of different effects! Here's what you'll need to get started.
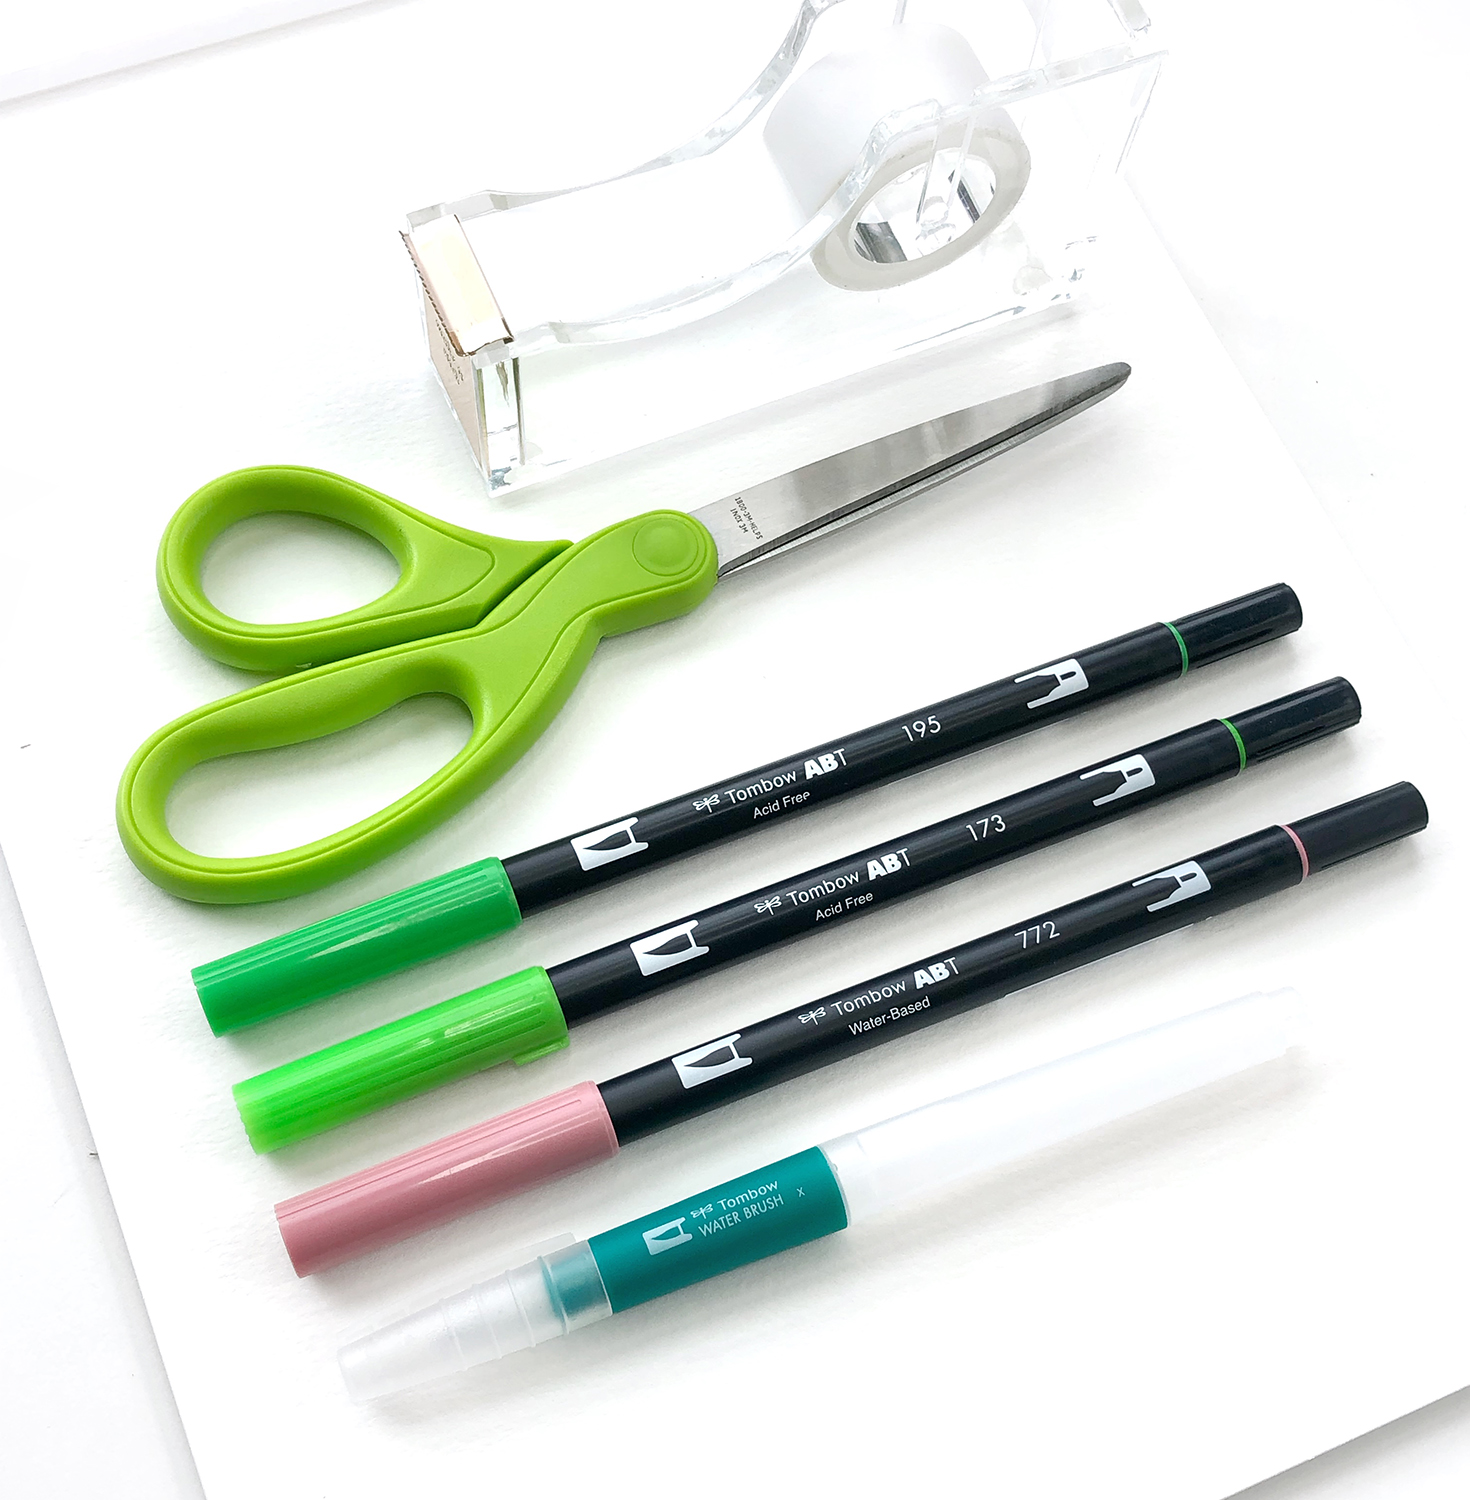
SUPPLIES:

  • Tombow Dual Brush Pens

  • Watercolor Paper or sketchbook

  • Tombow Water Brush

  • Fudenosuke Brush Pen (hard tip)

  • MONO Air Correction Tape

public.jpeg

Step 1: Create a Background

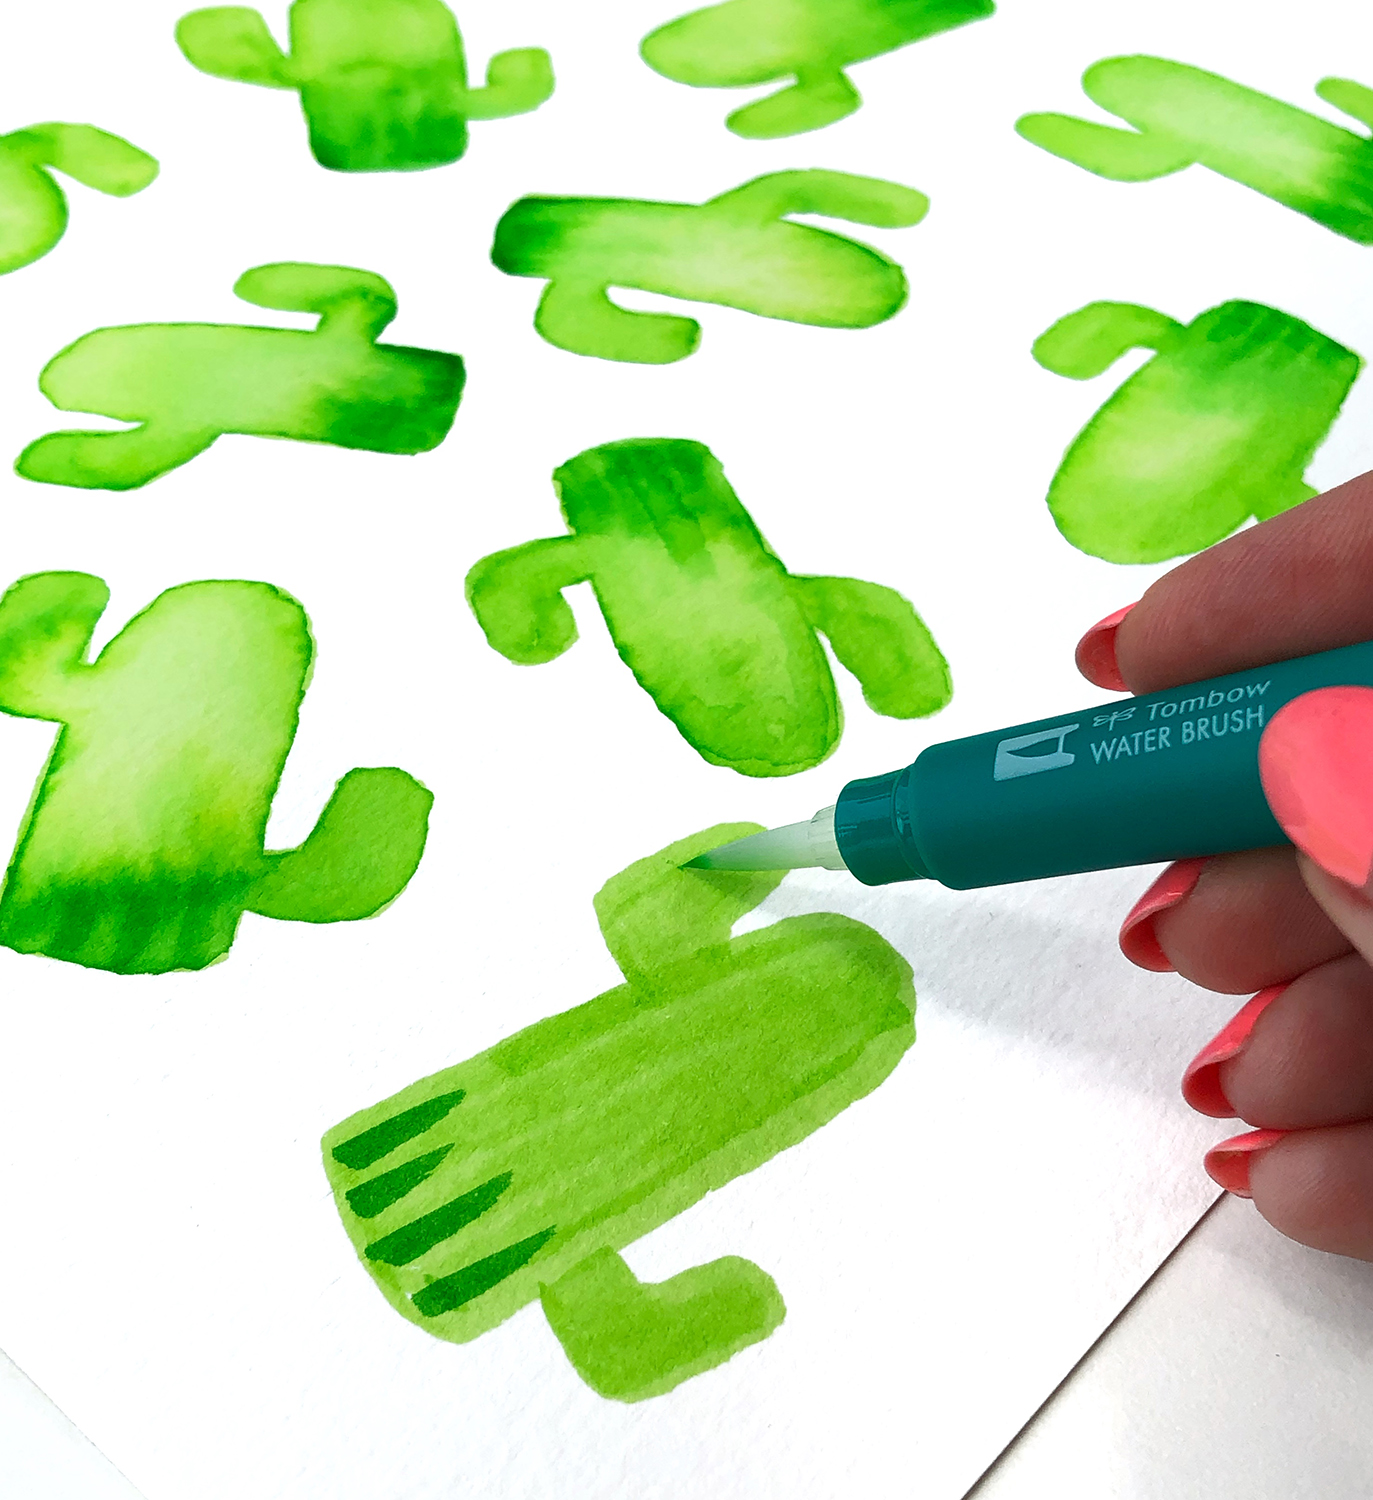
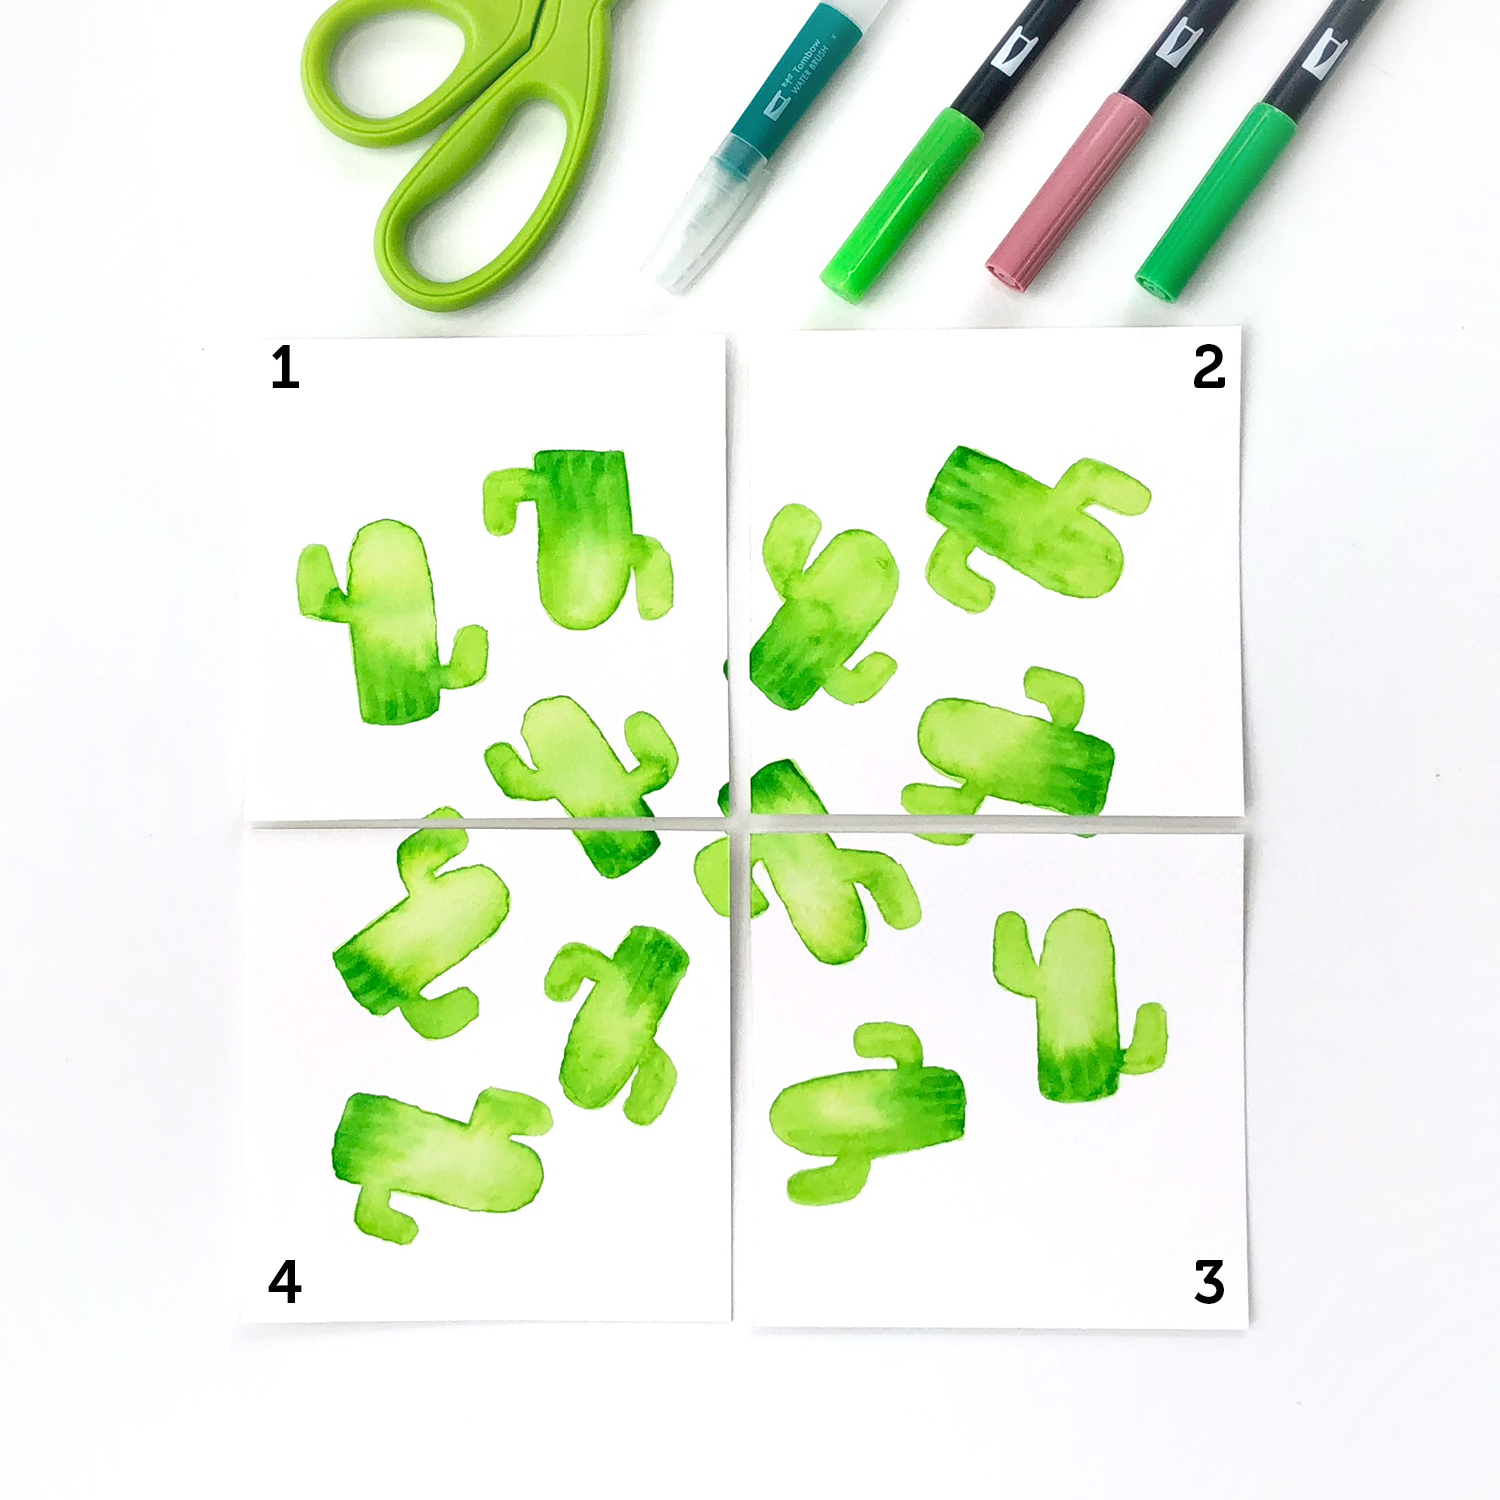
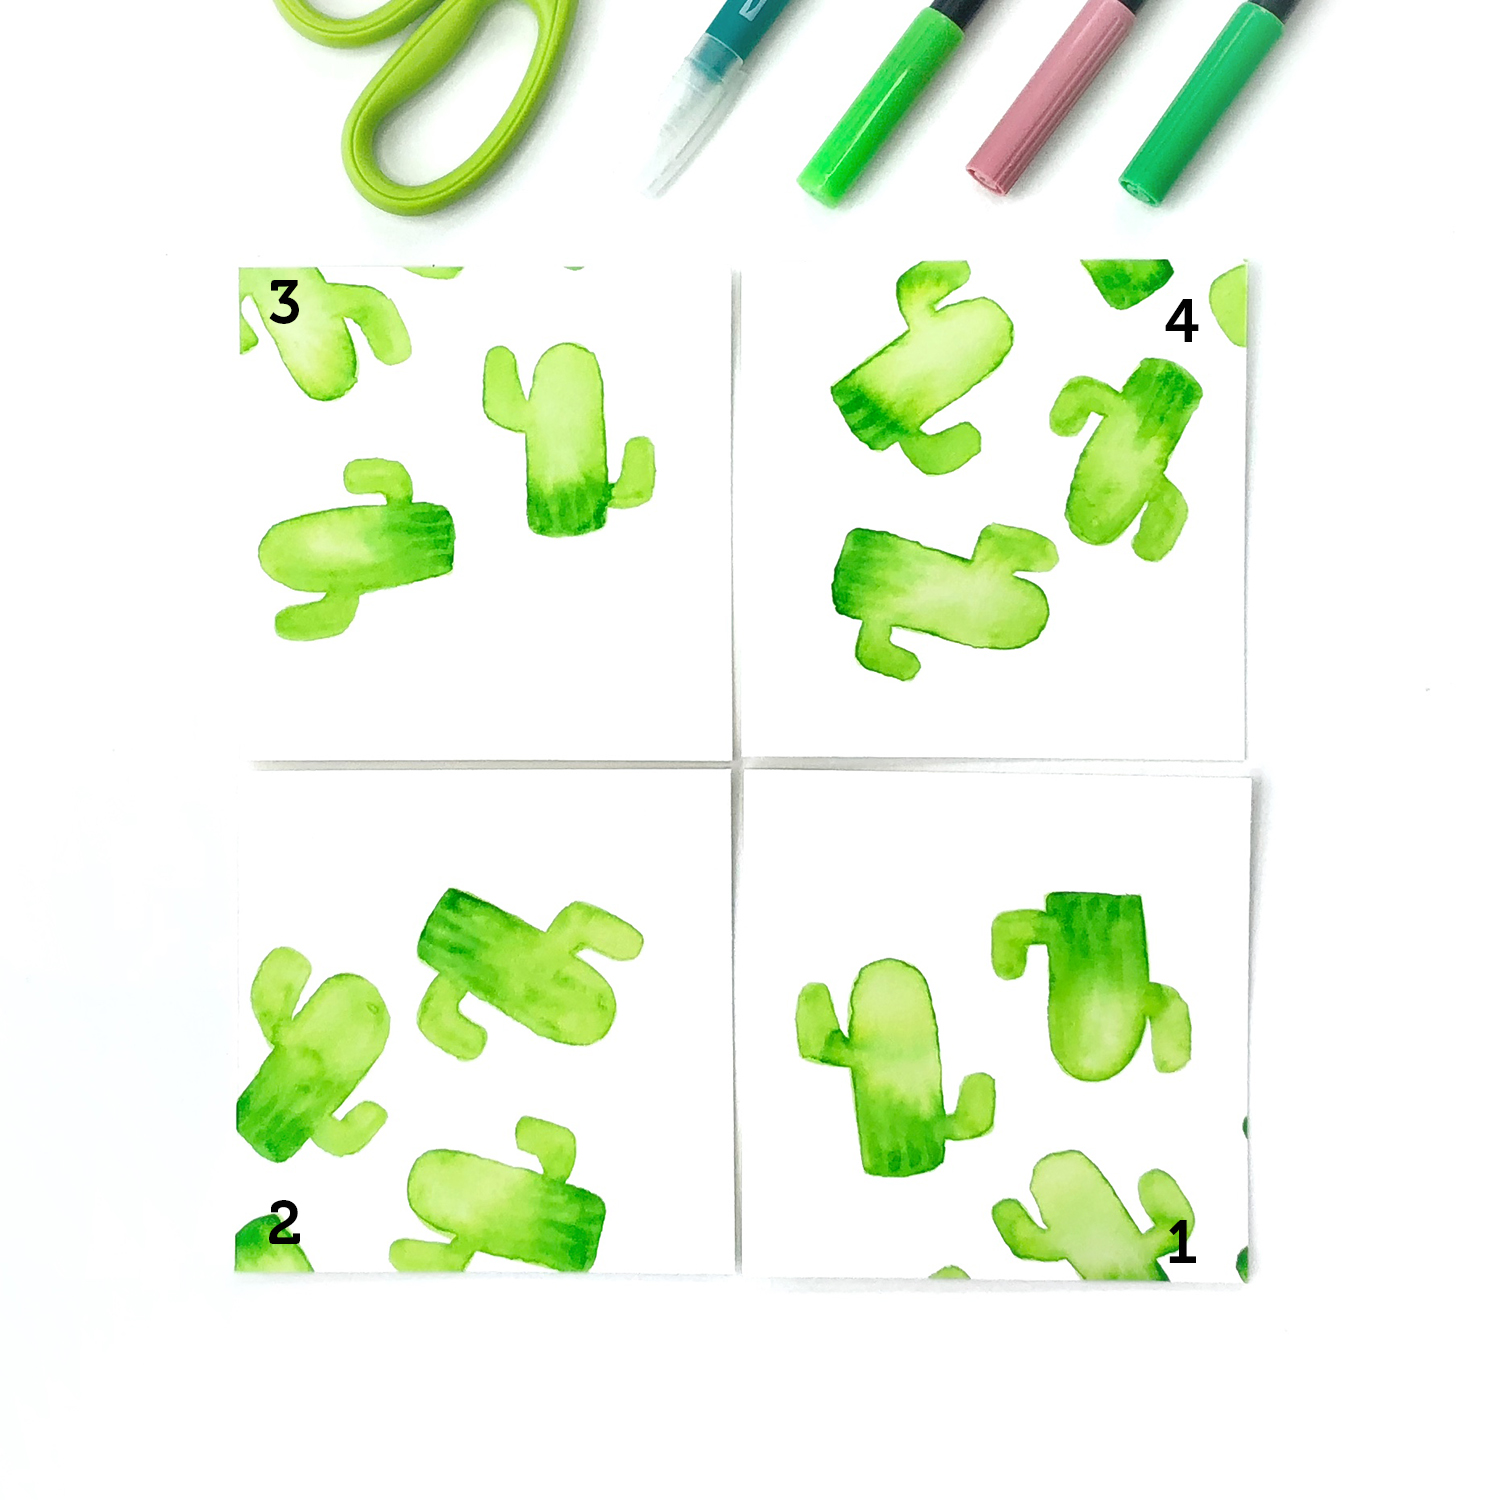
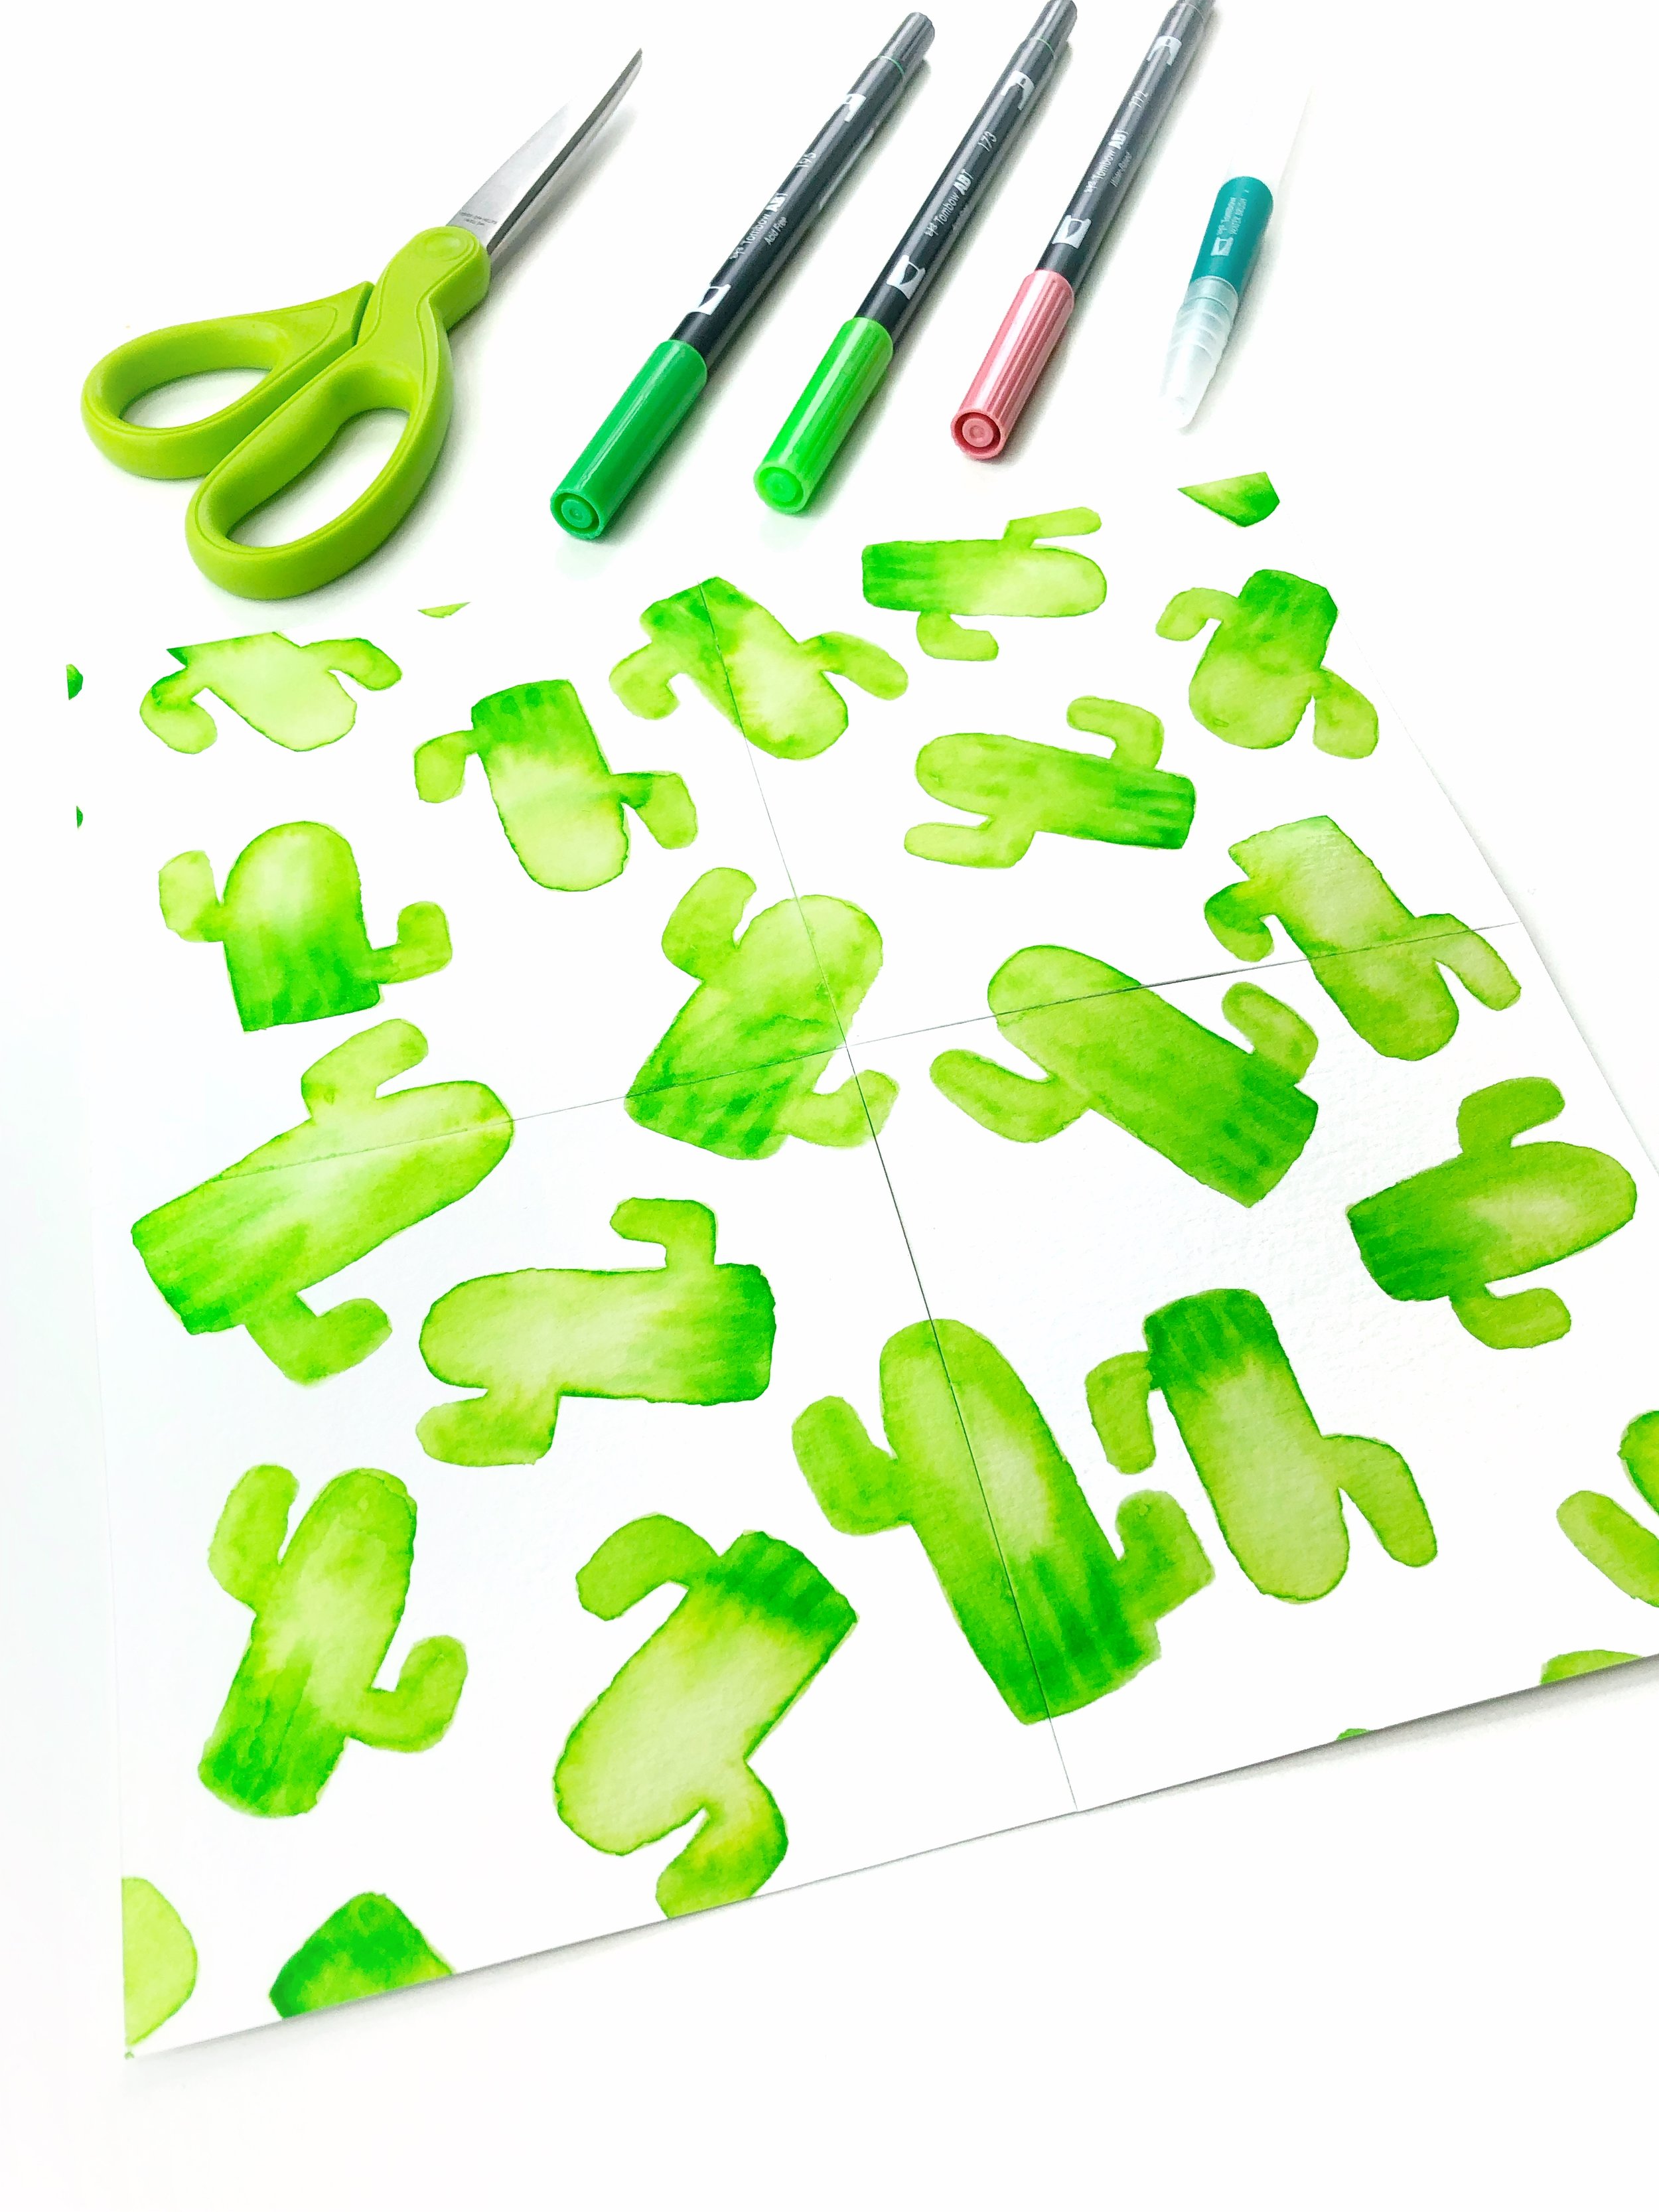
Scribble ink onto the page with your Dual Brush Pens, choosing colors that will blend together nicely (greens and blues, or oranges and pinks for example).

Next, use your Water Brush to blend the ink together.

Step 2: Add Background Pattern

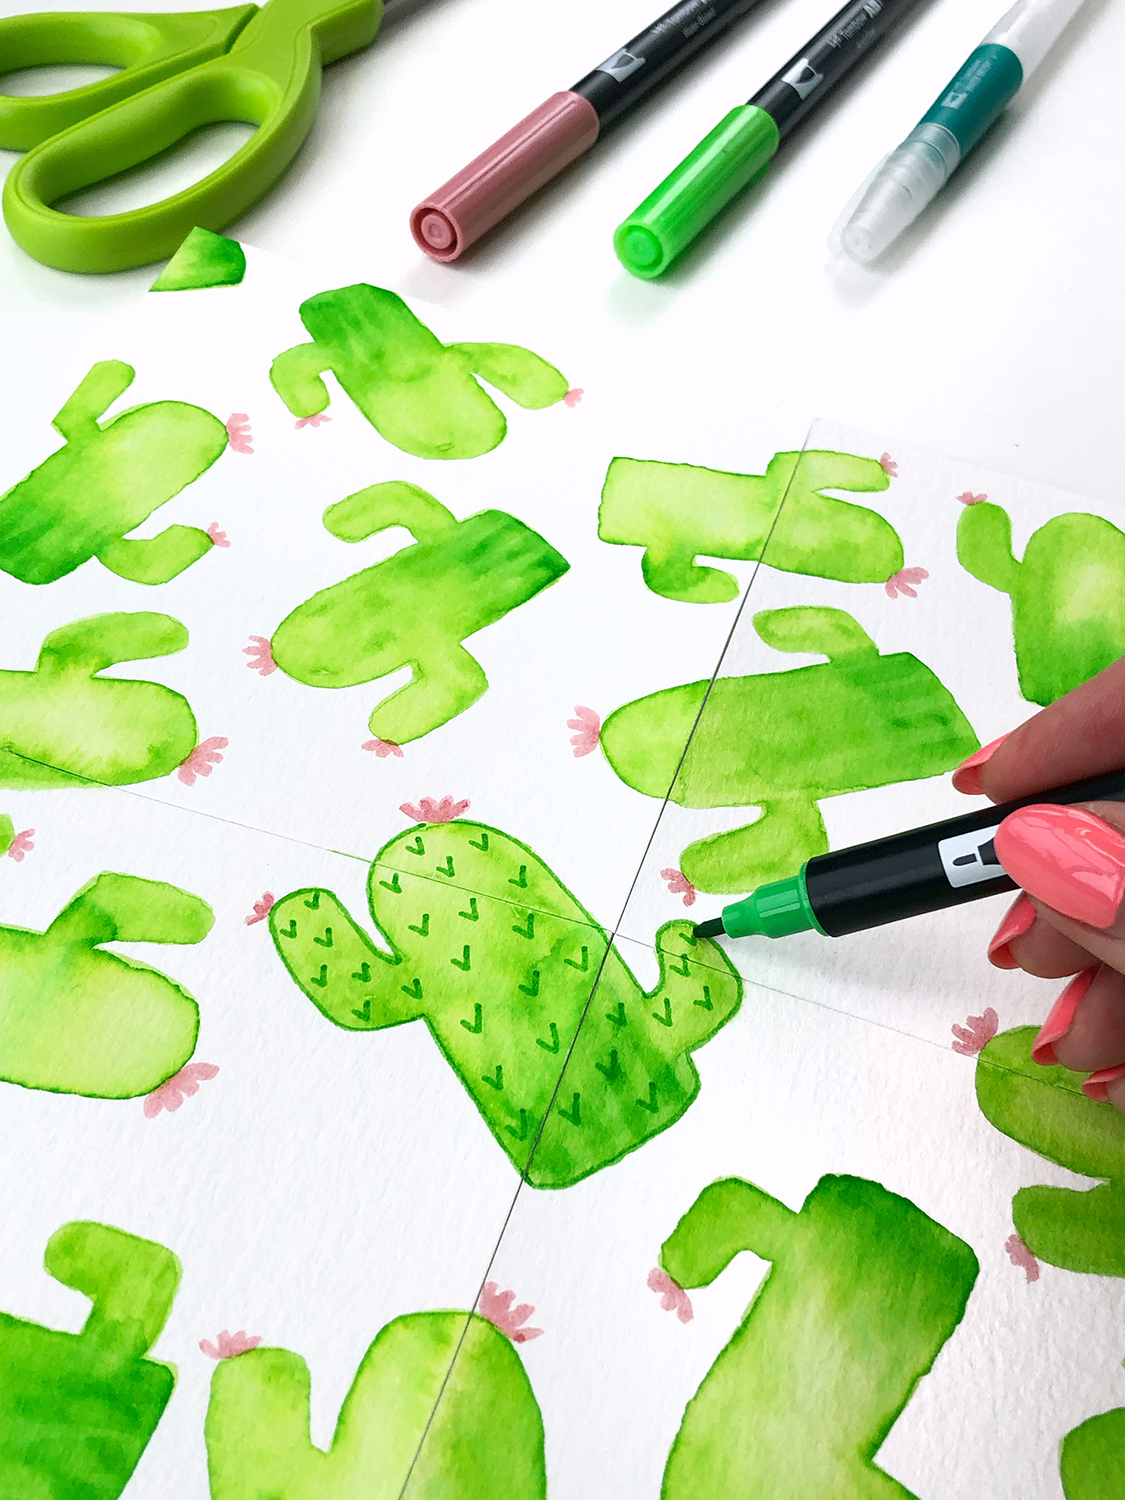
Once the background color is dry, it’s time to add a pattern to your art journal page. Use the bullet tip of your markers to create a repeating pattern. I did scales, but you could use anything: Stars, hearts, flowers, leaves, shapes etc.

public.jpeg

Step 3: Add a Quote

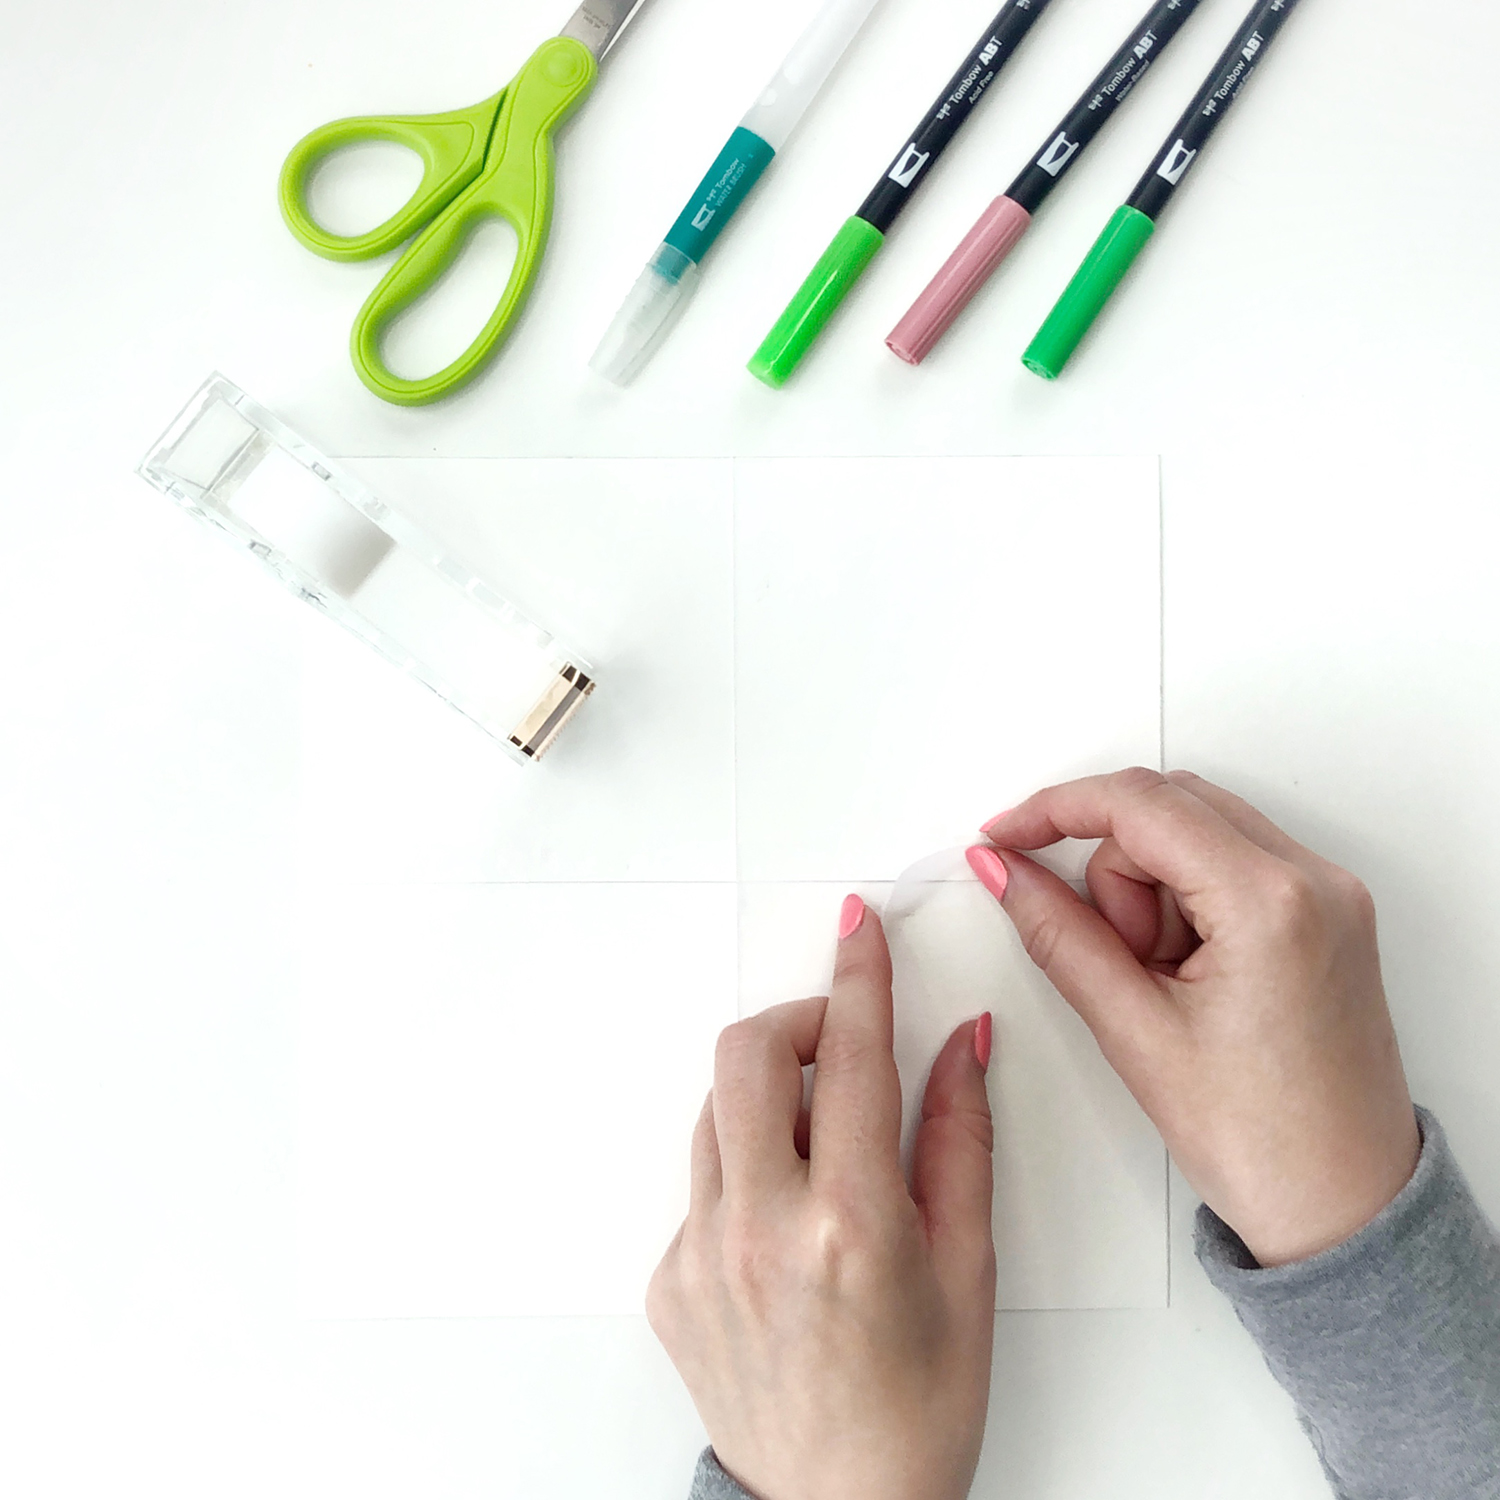
The next step is to use your correction tape to create white lines for you to write on, then use your Fudenosuke Pen to add your favorite quote, or some words of your own!

public.jpeg

Do you have a favorite quote? Let me know in the comments!

In Ink, May 2019, Pattern, Tutorial, Type, Watercolor
4 Comments
How to Make a Repeat Pattern on Paper by Jessica Mack of BrownPaperBunny

How to Make a Repeat Pattern on Paper

July 15, 2019

Please note: This blog post contains affiliate links, which help pay for the upkeep of this site. That being said, I will never, ever promote anything I am not 100% in love with!

----------

Today I’m going to show you how to turn the cactus emoji into a repeat pattern on paper. The cactus emoji is one of my personal favorites, and it's so simple to draw that you'll easily be able to do it over and over to get a repeating pattern. Here's what you'll need to get started.

Supplies:

  • Tombow Dual Brush Pens

  • Watercolor Paper

  • Tombow Water Brush

  • Scissors

  • Tape

  • A Phone, Camera, or Scanner 

How to Make a Repeat Pattern on Paper by Jessica Mack of BrownPaperBunny

Step 1: Draw Your Cactus

Starting in the middle of your watercolor paper, draw cactus emojis facing in different directions. I used Dual Brush Pen 173 for the first layer, but you can use any color you like. Then use a darker color (I used 195) to draw some lines at the bottom of each cactus, before using your Tombow Water Brush to blend the ink together. Leave white space around the outside edges of the paper, we'll fill those in later.

How to Make a Repeat Pattern on Paper by Jessica Mack of BrownPaperBunny

Step 2: Cut Your Paper in Quarters

Once the ink is dry on your cactus emojis, cut your paper into four even quarters. Be sure to get the measurements exact or your repeat pattern won't work at the end. To prepare for the next step it helps to put a small number on the back of each quarter in case they get mixed up.

How to Make a Repeat Pattern on Paper by Jessica Mack of BrownPaperBunny

Step 3: Shift Each Quarter

This bit seems a bit tricky but just follow the numbers if you get confused. Move your top two quarters to the bottom, then move your left two quarters to the right side. Here's what you'll end up with. All of your cacti should be around the outsides and the middle of your paper should be blank.

How to Make a Repeat Pattern on Paper by Jessica Mack of BrownPaperBunny

Step 4: Tape Everything Back Together

Carefully turn over your drawing, making sure the quarters stay in the same order. Line up the edges and tape it back together.

How to Make a Repeat Pattern on Paper by Jessica Mack of BrownPaperBunny

Step 5: Fill in the Middle

Using the same technique as in Step 1, draw more cacti to fill in the middle space of your paper.

How to Make a Repeat Pattern on Paper by Jessica Mack of BrownPaperBunny

Step 6: Add Extra Details

This step is optional, but if you'd like to make your cacti look a little fancier, use the bullet tips on your Dual Brush Pens to add some small details. Cactus needles, flowers etc.

How to Make a Repeat Pattern on Paper by Jessica Mack of BrownPaperBunny

Step 7: Photograph or Scan

Using your phone, camera or scanner, digitize your repeat pattern tile. If you're taking a photo make sure you've got good, bright lighting. Adjust the brightness until the cut marks are minimized.

Step 8: Put it on Everything

You can frame your finished artwork, or upload the digital copy to any number of web services that will let you put it on mugs, t-shirts, throw cushions, rugs and more! Here are just a few examples I made, using Society6.

How to Make a Repeat Pattern on Paper by Jessica Mack of BrownPaperBunny

I’d love to see what you make, tag @BrownPaperBunny on social media!


In Illustrations, Ink, May 2019, Pattern, Tutorial, Watercolor
9 Comments
Paint a Watercolor Peach with markers. By Jessica Mack of BrownPaperBunny.

Paint a Watercolor Peach

June 30, 2019

Please note: This blog post contains affiliate links, which help pay for the upkeep of this site. That being said, I will never, ever promote anything I am not 100% in love with!

----------

Today I'm going to show you how to use Dual Brush Pens to paint a watercolor peach that you can use on recipe cards, greeting cards, or in your planner or art journal. Here's what you'll need to get started.

Watercolor Peach Supplies:

  • Tombow Dual Brush Pens

  • Watercolor Paper

  • Tombow Water Brush

You can choose whichever Dual Brush Colors you like, but for this project I used 772, 885, and 985 for the peach and 173 and 195 for the leaves.

Paint a Watercolor Peach with markers. By Jessica Mack of BrownPaperBunny.

Step 1: Draw Your Peach

Use your first color to draw a rough peach shape. The pink I'm using here is 772.

Paint a Watercolor Peach with markers. By Jessica Mack of BrownPaperBunny.

Step 2: Color Your Peach

Use your other colors (I'm using 985 and 885 here) to fill in the rest of your peach shape. There's no need to be precise with this stage because you're going to blend the colors together in the next step.

Paint a Watercolor Peach with markers. By Jessica Mack of BrownPaperBunny.

Step 3: Blend With Water

Use your Tombow Water Brush to blend the colors together on your watercolor peach. I like to start with the lighter color and then move over to the darker shades. Keep blending gently until you have a result you like, but don't scrub too much because the paper becomes more fragile when it's wet.

Paint a Watercolor Peach with markers. By Jessica Mack of BrownPaperBunny.

Step 4: Draw the Leaves

Use your lightest green shade to draw in a long, skinny peach leaf. Then use the water brush to go over it and blend the ink together.

Paint a Watercolor Peach with Markers. By Jessica Mack of BrownPaperBunny.

Step 5: Add Details to Your Watercolor Peach

Once your peach and leaves are dry you can add details with the bullet tip end of your Dual Brush Pens.

Paint a Watercolor Peach with Markers. By Jessica Mack of BrownPaperBunny.

Voila, you've got a fun watercolor peach which you can turn into a greeting card, use on a recipe card, in your planner etc.

Paint a Watercolor Peach with Markers. By Jessica Mack of BrownPaperBunny.
In Illustrations, Ink, May 2019, Tutorial, Watercolor
Comment
Fashion Illustration Inspired by Food. By Jessica Mack of BrownPaperBunny.

Fashion Illustrations Inspired by Food

June 17, 2019

After I created this fashion illustration, inspired by Starbucks’ Dragon Drink (made from Dragonfruit) someone suggested I create a whole series, inspired by food and drink. What a great idea! So here are the first few I’ve done so far.

View this post on Instagram

A post shared by Jessica 🎨 Seattle Artist (@brownpaperbunny) on May 30, 2019 at 1:23pm PDT

This summer romper was inspired by a strawberry glazed donut covered in rainbow sprinkles.

View this post on Instagram

A post shared by Jessica 🎨 Seattle Artist (@brownpaperbunny) on Jun 7, 2019 at 7:01am PDT

This business casual outfit was inspired by watermelon.

View this post on Instagram

A post shared by Jessica 🎨 Seattle Artist (@brownpaperbunny) on Jun 9, 2019 at 4:49pm PDT

This one was inspired by a Café Latte.

Fashion Illustration inspired by coffee. By Jessica Mack of BrownPaperBunny.

What food or drink do you think I should use as my inspiration next?

In Fashion Illustration, Illustrations, Ink, May 2019, Portraits, Sketchbook
5 Comments
Geometric Bullet Journal Month Page by Jessica Mack on BrownPaperBunny.

Geometric Bullet Journal Month Page

June 17, 2019

Please note: This blog post contains affiliate links, which help pay for the upkeep of this site. That being said, I will never, ever promote anything I am not 100% in love with!

----------

Today I’m going to show you how to create an easy geometric bullet journal month page for July. It's a great way to mark the start of a new month in a pretty way. Here's what you'll need to get started.

Supplies:

  • Tombow Dual Brush Pens

  • Dot Grid Notebook (I'm using a Michael Roger Dot Grid Decomposition Notebook)

  • Tombow MONO Graph Mechanical Pencil

I love Michael Roger's Decomposition notebooks because they use 100% recycled post-consumer waste recycled paper and although the paper is nice and thin, Tombow Dual Brush Pens still don't bleed through to the other side, so they're the perfect companions!

Geometric Bullet Journal Month Page by Jessica Mack on BrownPaperBunny.

Step 1: Write the Month

Use your MONO Graph Mechanical Pencil to write the month (and year if you'd like) onto the page of your task journal. You can use the dot grid to help you map out where the letters should go.

Geometric Bullet Journal Month Page by Jessica Mack on BrownPaperBunny.

Step 2: Pick a Shape

The great thing about the dot grid pattern is that you can use it to easily draw out little geometric shapes. Try triangles, chevrons, rectangles etc. Geometric task journal pages look great and are super easy to make. In this example, I used the dot grid to create a squished hexagon pattern using purples, yellows, and teals.

Alternate the different shades for a bit of variety.

Geometric Bullet Journal Month Page by Jessica Mack on BrownPaperBunny.

Step 3: Add Additional Colors

Move down the page, adding new colors as you go. Experiment with working from the top down, sideways, or at an angle for a different look.

Geometric Bullet Journal Month Page by Jessica Mack on BrownPaperBunny.

Once you've finished the whole page you can either leave it there or move on to the next, optional, step.

Geometric Bullet Journal Month Page by Jessica Mack on BrownPaperBunny.

Step 4: Color in the Text (optional)

This step is optional, but if you don't want any paper showing through on the page you can go over your month with Dual Brush Pen as well.

Geometric Bullet Journal Month Page by Jessica Mack on BrownPaperBunny.
In Ink, May 2019, Tutorial, Type
1 Comment
Fashion Illustration inspired by Dragonfruit drink at Starbucks. By Jessica Mack of BrownPaperBunny.

Inspired by Dragonfruit

May 30, 2019

@Starbucks challenged me to show them how I was inspired by dragonfruit, to celebrate their new Dragon Drink. It's a bold, sweet, and refreshing flavor so I illustrated an outfit that I felt embodied that. Plus y'all know how much I love pink!

Starbucks Dragon Drink. Photo by Jessica Mack of BrownPaperBunny

Now it's your turn, show me your dragonfruit-inspired creations, whether that means art, photography, fashion, nail art, makeup, or any other way you feel inspired! Tag #dragonfruitinspired so we can see!

In Fashion Illustration, Illustrations, May 2019
8 Comments
FullSizeRender.jpg

'60s Inspired Art Journal Page

May 27, 2019

Please note: This blog post contains affiliate links, which help pay for the upkeep of this site. That being said, I will never, ever promote anything I am not 100% in love with!

----------

This week I’m creating projects with a retro vibe, so I’m going to show you how to make an art journal page that looks like a ‘60s band poster.

SUPPLIES:

  • Tombow Dual Brush Pens

  • MONO Drawing Pens

  • MONO Graph Mechanical Pencil

  • Art Journal or Sketchbook

FullSizeRender.jpg

Step 1: Draw Your Outlines

The first step is to draw (or trace) a face profile, use your own for a fun self portrait. Then fill in the whole page with wavy hair.

FullSizeRender.jpg

Step 2: Add Some Lettering

Next, use some retro lettering to write words into the hair (I wrote things that make me happy). Fill blank hair sections with doodles of hearts, and daisies.

FullSizeRender.jpg

Step 3: Add Color

Using a retro color palette it’s time to use your Dual Brush Pens to color each section of the hair and lettering. To get a watercolor look you can blend the ink in each section with a damp paintbrush. What words would you write into the hair?

FullSizeRender.jpg
FullSizeRender.jpg

Step 4: Pull Out Details

Once you’ve finished coloring your journal page, you can go over the facial features with the bullet tip of one of your Dual Brush Pens for more definition. Voila, you have a ‘60s inspired journal page!

FullSizeRender.jpg

Let me know what your favorite decade is and why in the comments! 

In Tutorial, Type, Ink, May 2019, Illustrations, Watercolor
4 Comments
The Printed Letter Bookshop by Katherine Reay. Review by Jessica Mack on BrownPaperBunny.

The Printed Letter Bookshop

May 24, 2019

I'm not going to lie, I'm a sucker for a book with a cool cover. So I was particularly thrilled when BookSparks sent me a copy of Katherine Reay's new book. It's about new beginnings, friendship, and of course, a bookshop.

My mom owns a bookshop in Australia, and I've grown up around bookshops my whole life. So I can't wait to dive into this story! Grab a copy of this book for yourself: http://bit.ly/letterbookshop or check out all my book reviews over on Latest Book Crush.

Synopsis:

One of Madeline Cullen’s happiest childhood memories is of working with her Aunt Maddie in the quaint and cozy Printed Letter Bookshop. But by the time Madeline inherits the shop nearly twenty years later, family troubles and her own bitter losses have hardened Madeline’s heart toward her once-treasured aunt—and the now struggling bookshop left in her care.

While Madeline intends to sell the shop as quickly as possible, the Printed Letter’s two employees have other ideas. Reeling from a recent divorce, Janet finds sanctuary within the books and within the decadent window displays she creates. Claire, though quieter than the acerbic Janet, feels equally drawn to the daily rhythms of the shop and its loyal clientele, finding a renewed purpose within its walls. When Madeline’s professional life takes an unexpected turn, and when a handsome gardener upends all her preconceived notions, she questions her plans and her heart. She begins to envision a new path for herself and for her aunt’s beloved shop—provided the women’s best combined efforts are not too little, too late.

The Printed Letter Bookshop is a captivating story of good books, a testament to the beauty of new beginnings, and a sweet reminder of the power of friendship.

In May 2019, Book Review
Comment
Create Watercolor Flowers Using Markers by Jessica Mack of BrownPaperBunny.

Create Watercolor Flowers Using Markers

May 20, 2019

I love the look of watercolor, but I also love the portability and vibrancy of markers. So in my latest Skillshare class I’ll teach you how to create watercolor-look flowers using markers.

The class is perfect for beginners, or more experienced artists looking to try some new techniques.

I’ll walk you through the three main techniques I use with the markers, and blending with water, then for the class project you’ll create your very own floral wreath!

Create Watercolor Flowers Using Markers by Jessica Mack of BrownPaperBunny.

Tombow has been kind enough to give students of the class a 15% off all products, and if you are new to Skillshare you can get your first two months for free by using this link! I can’t wait to see what you make!

View the Class
In May 2019, Watercolor, Tutorial, Illustrations, Ink
9 Comments
← Newer Posts

Subscribe

Sign up to receive social media tips, freebies, special promotions, and art tutorials!

Thank you!

Please click confirm in the email you were just sent!

Directory of Illustration Jessica Mack

Shop my work on Society6

Watercolor World Map by Jessica Mack of BrownPaperBunny

Follow on Instagram

For the 100 Days Project this year I’m keeping it super low pressure. I’ve got a very busy couple of months coming up and want to set myself up to be able to stick with it, while still making sure I do something creative every day. You ca

See my classes on Skillshare

Skillshare Classes by Jessica Mack

Popular Posts

Popular Posts
CRL-Horizontal-Laptop-Beige-Floral-Painting.jpg
Creative Retreat Live
Rainbow-Watercolor-Wreath-Using-Markers.JPG
Rainbow Wreath Tutorial
15 Ways to Journal by Jessica on BrownPaperBunny
15 Ways to Journal
Tombow Brush Pen Markers and Colored Pencils
Brown Paper Bunny

Privacy + Terms of Use

Shop

Watercolor with Markers Book

Classes

Art Tutorials

Art & Illustration Portfolio

About

Contact

Custom Book Print

Custom Book Mug

How to Paint Watercolor Flowers Using Markers

Free Fashion Croquis

Start an Art Journal

6 Easy Flowers to Draw with Tombow Markers

Make Your Own Watercolor Bookmarks