Please note: This blog post contains affiliate links, which help pay for the upkeep of this site. That being said, I will never, ever promote anything I am not 100% in love with!
----------
This week I'm going to show you how to create your own mini art journal from scratch. There are lots of reasons to make your own journal: you get exactly the size, number of pages, and type of paper you want. Plus the book itself can be a work of art, and can save you some money too! I was inspired by my fellow design teammate Katie Smith, who makes beautiful hand-bound art journals AND is a big fan of Bob Ross!
Here's what you'll need to get started...
Supplies:
- Paper (I'm using 140 lb watercolor paper but you can use any paper you like)
- Cardboard for the cover
- Large needle
- Strong nylon thread
- Bone folder
- Ruler
- Pencil
- Scissors
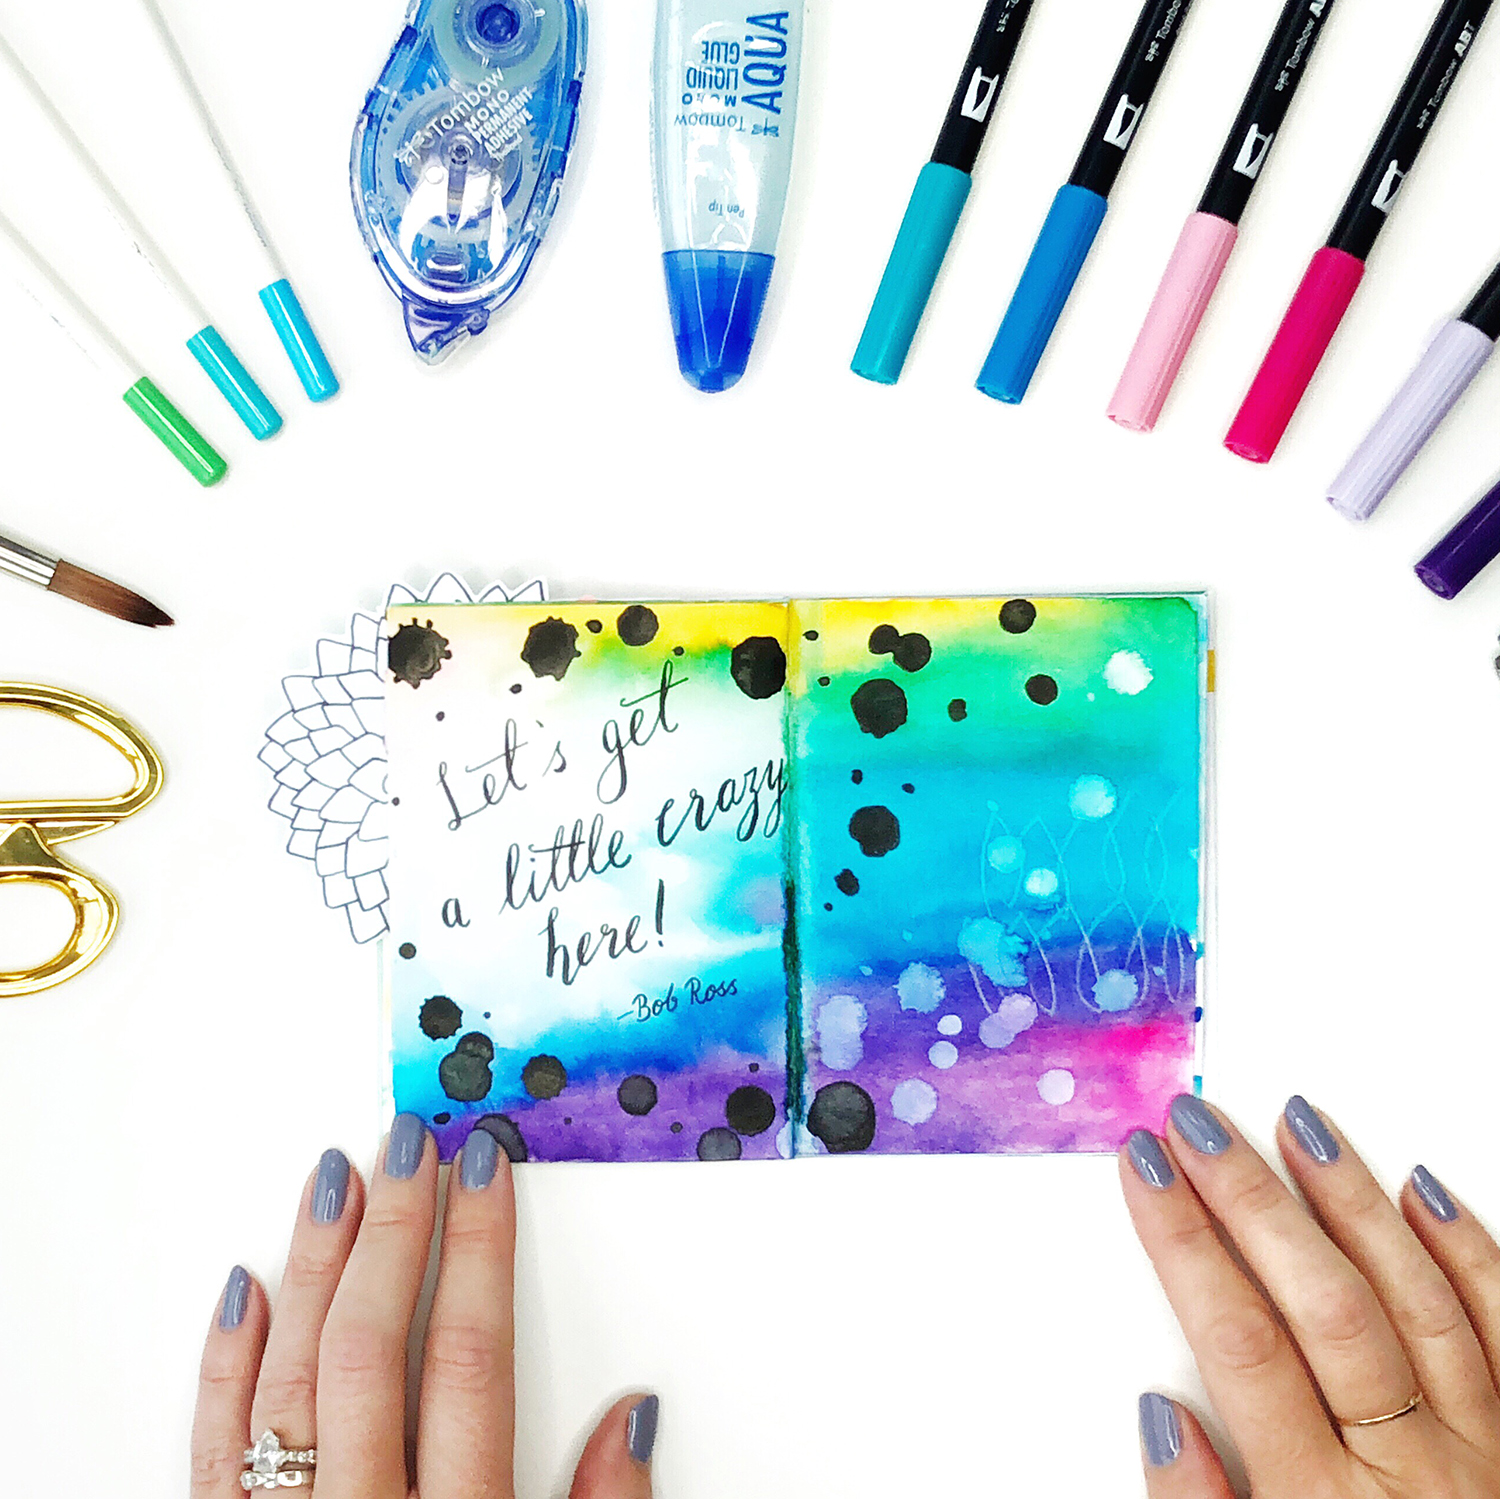
Supplies to decorate your journal: (I used the following Tombow products, but you can use whatever you like)

Step 1: Prepare Your Art Journal Pages
The first step is to cut your paper and journal cover to the size you want (if they aren't already), then you're going to score a line down the middle of each page and the cover using your ruler and bone folder. This helps the paper fold neatly and evenly, especially if you're using thick watercolor paper or cardboard. If you don't have a bone folder you can use anything pointy but not sharp (the back of a butter knife for example).
Along the center of one of your pages measure out where you're going to put your five holes, starting with the middle hole and working outwards. You could put more holes if you're making a large book, just make sure you always use an odd number.
If your paper is thick you'll want to pre punch the holes using a bookbinders awl, a large needle, or even a metal kitchen skewer. Punch the holes on one page then use it as a template for the rest. Stack all of your prepared pages together inside the cover and you're ready for Step 2!

Step 2: Stitch Your Pages Together
To stitch your pages together using a saddle stitch, thread your needle but don't tie a knot in the end. Start on the inside of your art journal pushing the needle through the center hole. Leave yourself a thread 'tail' about three inches long. You can either go left or right but sew your way through all of the holes until you get to one of the edges, then turn around and sew through the holes to the opposite edge.
Once you get to the second edge, sew your way back until your needle and your tail are on the inside of your art journal.
Tie the two ends together with a secure knot and trim the ends off. Here's a quick video showing all of the steps.
Step 3: Decorate Your Art Journal
Now that your journal is sewn together you're ready to decorate it. Taking my inspiration from Katie, I filled my journal with lots of color, and quotes from Bob Ross. You could use your journal for anything: drawing your dreams, everything you ate that day, things you see on a walk, lists of your favorite things, a book of maps, poems, pictures of cats...the list is endless!
On a lot of the pages I created a background using Dual Brush Pens and a wet paintbrush, then used collage and MONO Drawing Pens over the top. The video below shows a time-lapse of some of my pages coming together, and you can see all of the finished pages at the end.
I'd love to see some of your art journal pages, tag @BrownPaperBunny on social media so I can take a look! And in the comments tell me your favorite thing to journal about!