• Book
    • Watercolor with Brush Pens
    • Watercolor Flowers Using Markers
    • Paint a Watercolor Galaxy Butterfly with Markers
    • Paint Watercolor Galaxy Bookmarks using Markers
    • Timelapse Video for Artists
  • Shop
  • Society6 Store
  • Blog
  • Portfolio
  • About
  • Contact
Menu

Brown Paper Bunny Studio

Art & Fashion Illustration
  • Book
  • Classes
    • Watercolor with Brush Pens
    • Watercolor Flowers Using Markers
    • Paint a Watercolor Galaxy Butterfly with Markers
    • Paint Watercolor Galaxy Bookmarks using Markers
    • Timelapse Video for Artists
  • Shop
  • Society6 Store
  • Blog
  • Portfolio
  • About
  • Contact
FullSizeRender.jpg

Lunchtime Illustrations

May 9, 2019

I carry around little scraps of watercolor paper and a tiny travel watercolor tin I made, so that when an opportunity to sketch or paint presents itself I can take advantage. Today it was too sunny to be indoors so I made this little watercolor sketch while eating my lunch in the sun, between running errands.

Do you carry art supplies around with you too? 

In Dec 2018, Illustrations, Watercolor, Fashion Illustration
5 Comments
Watercolor Flowers Using Tombow Dual Brush Pens by Jessica Mack of BrownPaperBunny

Watercolor Flowers Using Tombow Dual Brush Pens

April 25, 2019

Please note: This blog post contains affiliate links, which help pay for the upkeep of this site. That being said, I will never, ever promote anything I am not 100% in love with!

----------

Over on Instagram I’ve been creating a lot of watercolor flowers using Tombow Dual Brush Pens lately — in case you can’t tell from my blog, using Dual Brush Pens to make a watercolor effect is one of my favorite things.

View this post on Instagram

A post shared by Jessica 🎨 Seattle Artist (@brownpaperbunny) on Apr 21, 2019 at 7:06pm PDT

For these flowers and leaves I mixed several colors together to provide greater variation and also because I just really enjoy mixing whole new colors. I also waited for each layer to dry before adding another on top to give it a bit more depth.

View this post on Instagram

A post shared by Jessica 🎨 Seattle Artist (@brownpaperbunny) on Apr 22, 2019 at 7:15pm PDT

Have you ever used water soluble markers before? (Tombow Dual Brush Pens or something else) Would you like me to post some tutorials in how to use them to create different watercolor-look florals? Let me know in the comments!

View this post on Instagram

A post shared by Jessica 🎨 Seattle Artist (@brownpaperbunny) on Apr 23, 2019 at 7:06am PDT

In Dec 2018, Ink, Illustrations, Sketchbook, Tutorial, Watercolor
10 Comments
How to Make an Abstract Collage by Jessica Mack of BrownPaperBunny

How to Make an Abstract Collage

April 10, 2019

Please note: This blog post contains affiliate links, which help pay for the upkeep of this site. That being said, I will never, ever promote anything I am not 100% in love with!

----------

World Art Day is coming up (April 15) so I’m going to show you an easy and fun way to make some abstract art for your walls. Here’s what you’ll need to get started:

Supplies:

  • Tombow Dual Brush Pens

  • Watercolor Paper

  • Paintbrush

  • Blending Palette

  • Scissors

  • MONO Multi XL Liquid Glue

How to Make an Abstract Collage by Jessica Mack of BrownPaperBunny

Step 1: Make Color Blocks

The first step for making your abstract art is to use the Blending Palette and a wet paintbrush to transfer Dual Brush Pen ink onto your watercolor paper (watch the video below to see how I do it).

Step 2: Cut Out Shapes

Once all of your color blocks are dry, start cutting out shapes. Try geometric shapes, some squiggles, flowers etc. Go with your first instincts...do you find yourself gravitating towards circles? Maybe triangles are more your thing?

How to Make an Abstract Collage by Jessica Mack of BrownPaperBunny

Step 3: Arrange The Shapes

Once all of your shapes are cut out, start arranging them on a new piece of paper until you have a combination you like. Try a minimalist layout with just two or three shapes, then try one with lots of shapes and colors.

Step 4: Glue Everything Down

Once you have a layout you like, use your MONO Multi XL Liquid Glue to stick all the pieces down. Once everything is dry you can frame your masterpiece and hang it on the wall!

How to Make an Abstract Collage by Jessica Mack of BrownPaperBunny

Comment below and tell me if you have any of your own art hanging up at home. If not, why not?!

In Ink, Tutorial, Dec 2018, Watercolor
9 Comments
How to Make a Watercolor Easter Card by Jessica Mack of BrownPaperBunny

How to Make a Watercolor Easter Card

April 4, 2019

Please note: This blog post contains affiliate links, which help pay for the upkeep of this site. That being said, I will never, ever promote anything I am not 100% in love with!

----------

Today I’m going to show you how to make a watercolor Easter card in pastel Dual Brush Pen colors. We're also going to use embossing powder because it resists ink nicely to give you white outlines. Here's what you'll need to get started.

Supplies:

  • Tombow Dual Brush Pens Pastel Palette

  • White Embossing Pen & Powder

  • Heat Gun

  • Watercolor Paper (140lb)

  • Tombow MONO Graph Mechanical Pencil

  • Paint Brush & Water

How to Make a Watercolor Easter Card by Jessica Mack of BrownPaperBunny

Step 1: Bunnies

Start by drawing a bunny template on a plain piece of paper. Think of them as snowmen with ears...a big circle for the body and a smaller one for the head, then two ears and a fluffy tail. Use your template to trace bunnies onto the right-hand side of your watercolor paper (when you fold it that will be the front) using your MONO Graph Mechanical Pencil. This is a good time to write a greeting on the front too. I chose a simple Happy Easter.

How to Make a Watercolor Easter Card by Jessica Mack of BrownPaperBunny

Step 2: Embossing

Follow the directions for your particular embossing pen, powder and heat gun. The general steps are usually to draw / write with the pen, sprinkle the powder on top of the ink, shake off any excess then heat with the gun for around 15 seconds until the powder melts and looks 'embossed'. Emboss over all of your pencil lines for the bunnies and your greeting.

Step 3: Adding Color

This is the really fun step. You get to choose how you'll color your bunnies. Will you pick one color for each, or blend all of the pastel colors to make a rainbow? I choose to pair up the pinks, yellows, blues and purples to make each bunny two-tone, and used the green for the greeting at the bottom. You can color directly onto your watercolor paper, right over the embossing once it is cool. Then to get the watercolor look, use a damp paintbrush to go over the ink and blend it together.

How to Make a Watercolor Easter Card by Jessica Mack of BrownPaperBunny

And there you go, once your ink is dry your card can hop on over to its intended recipient!

How to Make a Watercolor Easter Card by Jessica Mack of BrownPaperBunny

I’d love to see your card, share it with me by tagging @BrownPaperBunny on social media!

In Dec 2018, Illustrations, Ink, Tutorial, Watercolor
8 Comments
Spring Flower Letters with Tombow Dual Brush Pens by Jessica Mack of BrownPaperBunny

Spring Flower Letters with Tombow Dual Brush Pens

March 18, 2019

Please note: This blog post contains affiliate links, which help pay for the upkeep of this site. That being said, I will never, ever promote anything I am not 100% in love with!

----------

Are you as excited as I am about spring?! I'm so excited that I've been creating lots of spring flower letters with Tombow Dual Brush Pens and I want to show you how to make them. Here's what you'll need to get started.

Supplies:

  • Tombow Dual Brush Pens

  • Watercolor Paper (140lb)

  • Tombow MONO Drawing Pens

  • A small paintbrush

  • A pencil

Spring Flower Letters with Tombow Dual Brush Pens by Jessica Mack of BrownPaperBunny

Step 1: Draw Your Letter Shape

Start by drawing the shape of your letter, lightly, in pencil. You can choose to draw either an uppercase or lowercase letter. Next, add your first spring flower. I like to draw one larger flower near the top of my letter as a focal point. Keep it nice and loose, starting with the lightest color first. Add small amounts of different shades to give it some variety. The colors I chose were 873 Coral, 991 Light Ochre, 723 Pink, 761 Carnation, 195 Light Green, and 245 Sap Green). 

Spring Flower Letters with Tombow Dual Brush Pens by Jessica Mack of BrownPaperBunny

Step 2: Draw Your Stems

Next, draw flower stems along the penciled shape of your letter, leaving some spaces for smaller flowers and buds to be drawn in between them.

Spring Flower Letters with Tombow Dual Brush Pens by Jessica Mack of BrownPaperBunny

Step 3: Add Buds and Smaller Flowers

Start filling in the spaces at the ends of the stems with flower bud shapes and small, slightly open flowers. Follow the same approach as you did for the first flower, by adding different colors to each flower for variety. Don't worry if they don't look much like flowers at this stage, and it's ok if they're a little messy. After all your flowers have been drawn you can fill in any gaps with leaves.

Spring Flower Letters with Tombow Dual Brush Pens by Jessica Mack of BrownPaperBunny

Step 4: Add Water

Next, it's time to add water. Start with either the stems and leaves or the flowers, but don't do everything at once or it will run together into a muddy mess! With a damp paintbrush gently brush over the ink, blending colors together a little until you have a watercolor look. Once your first part is dry then you can start on the next bit.

Spring Flower Letters with Tombow Dual Brush Pens by Jessica Mack of BrownPaperBunny

Step 5: Adding Detail

If you'd like you can leave your spring letter at the last, watercolor stage. But if you'd like to add some small details, grab your MONO Drawing Pens and add thin lines to suggest where the petals are, and which direction they are going in. You can add some lines to the outsides of the stems and leaves as well. To keep it looking loose and fresh I recommend not closing all of the petal and leaf shapes completely, but leaving some gaps here and there.

Spring Flower Letters with Tombow Dual Brush Pens by Jessica Mack of BrownPaperBunny

Voila, you're finished! Now you can frame it and hang it on your wall, or give it as a gift! I’d love to see your spring flower letters, so be sure to tag @BrownPaperBunny if you share them on social media!

In Dec 2018, Ink, Illustrations, Tutorial, Watercolor
3 Comments
Blog Cover BrownPaperBunny.jpg

Watercolor Portrait Using Markers

March 11, 2019

Please note: This blog post contains affiliate links, which help pay for the upkeep of this site. That being said, I will never, ever promote anything I am not 100% in love with!

----------

This week I’m redoing an old watercolor portrait from 2011, using skills and knowledge I’ve learned since then to try and improve upon it.

I’ve always loved messy watercolor portraits with ink lines so I wanted to re-do that style. If you’d like to create along with me, here are the materials I’m using:

  • MONO Graph Mechanical Pencil

  • Tombow Dual Brush Pens

  • MONO Drawing Pens

  • Fudenosuke Brush Pen (hard tip)

  • Watercolor paper

  • A Paintbrush

Re-doing a watercolor portrait from 2011 by Jessica Mack of BrownPaperBunny

A few things I’ve learned since creating my 2011 portrait are not to mix too many different colors or everything will get muddy and brown. I’ve also learned that using different line weights gives you more interest. AND I discovered that if you color across the whites of someone’s eyes they look really weird and creepy.

So I’m using a limited color palette, I’ve got my 01, 03, 05 MONO Drawing Pens and Fudenosuke Brush Pen for the line work, and I’m avoiding washes near the eyes.

Re-doing a watercolor portrait from 2011 by Jessica Mack of BrownPaperBunny

To start, sketch out your portrait in pencil, then either transfer ink from a Blending Palette with a wet paintbrush (like I did for the cheeks and lips) or use the Dual Brush Pens directly onto the watercolor paper then go back and wet it. I made sure to let the color run together a little, and added some extra water splotches. You can watch each step in the video below.

What do you think, did I improve on my 2011 effort? Have you ever recreated an old project? Or is there one you’d like to re-do? Let me know in the comments!

Re-doing a watercolor portrait from 2011 by Jessica Mack of BrownPaperBunny

If you’re new here, I’m Jessica — a watercolor artist and fashion illustrator, living in Seattle. I’d love to connect on social media, come say hi on Instagram, Facebook or Twitter @BrownPaperBunny! 

You might also like these blog posts:

Featured
Make a Watercolor Planner Bookmark by Jessica Mack on BrownPaperBunny
Make a Watercolor Planner Bookmark
Fashion Illustration Inspired by Food. By Jessica Mack of BrownPaperBunny.
Fashion Illustrations Inspired by Food
Watercolor portrait by Jessica Mack of BrownPaperBunny using different watercolor techniques
Watercolor Techniques
In Watercolor, Illustrations, Ink, Dec 2018, Tutorial
8 Comments
Loose Watercolor Florals in Living Coral by Jessica Mack of BrownPaperBunny

Loose Watercolor Florals in Living Coral

March 4, 2019

Please note: This blog post contains affiliate links, which help pay for the upkeep of this site. That being said, I will never, ever promote anything I am not 100% in love with!

----------

Howdy! Today I’m going to show you how to create some loose watercolor florals in living coral (try saying that five times fast). Living Coral is the Pantone Color of the Year for 2019. These florals are super easy to make and I'll be showing you how to use Tombow Dual Brush Pens to get a watercolor look and add line work. Here's what you'll need to get started.

Supplies:

  • Tombow Dual Brush Pens

  • Round Paintbrush (Size 8)

  • Tombow Blending Palette

  • Watercolor Paper (140 lb)

Loose Watercolor Florals in Living Coral by Jessica Mack of BrownPaperBunny

Step 1: Mix Your Colors

The first step is to scribble some ink onto your blending palette. Dual Brush Pen 905 is pretty close to the color Living Coral already, but I wanted to add a little punch of pink so I used a touch of 815 in the mix. Experiment with blending different quantities of each color until you get a shade you love.

Loose Watercolor Florals in Living Coral by Jessica Mack of BrownPaperBunny

Once you've got your ink onto the blending palette wet it with your paintbrush.

Loose Watercolor Florals in Living Coral by Jessica Mack of BrownPaperBunny

Step 2: Create Loose Petal Shapes

Using your paintbrush, transfer ink from the blending palette onto your watercolor paper. Start making loose flower petal shapes around in a circle. Leave a little white space so the paper can show through. And don't worry if it looks pretty messy at this stage, we're going to add detail at the end, and they are meant to be loose florals after all. ;)

Loose Watercolor Florals in Living Coral by Jessica Mack of BrownPaperBunny

Step 3: Drop in a Third Color

To add a little more variety to your base color, drop in a few dots of yellow ink using the same technique as before. Let them spread into the living coral color while it is still wet.

Loose Watercolor Florals in Living Coral by Jessica Mack of BrownPaperBunny

Step 4: Add a Stem and Leaves

On your blending palette, mix up some green for the stem and leaves. I used colors 177 and 228. Using your paintbrush, transfer the ink from the blending palette to create a stem and leaves coming down from your flowers.

Loose Watercolor Florals in Living Coral by Jessica Mack of BrownPaperBunny

Here's what mine looks like so far.

Loose Watercolor Florals in Living Coral by Jessica Mack of BrownPaperBunny

Step 5: Adding Detail

Once the ink is completely dry, use your Dual Brush Pens to add detail to the petals and leaves. Experiment with the brush tip and the bullet tip and see which you're more comfortable with.

Loose Watercolor Florals in Living Coral by Jessica Mack of BrownPaperBunny

And voila, you've got some loose florals in living coral. These would make a nice framed art piece, or look great in your journal, or on a card to someone special.

Loose Watercolor Florals in Living Coral by Jessica Mack of BrownPaperBunny

I’d love to see your flowers! Share them on social media and tag @BrownPaperBunny so I can see!

In Dec 2018, Illustrations, Watercolor, Tutorial, Ink
19 Comments
Art Cruise by Jessica Mack of BrownPaperBunny

Creative Cruise!

February 28, 2019

Yep, you read that right…we’re going on a cruise, AND holding creative classes in lettering, watercolor florals etc. on days when we’re not in port.

And the best part?! We want you to come with us! You can find all of the details on The Lettering Companion’s website, but the basics are:

  • When: December 15-22, 2019

  • Cruise line: Royal Caribbean Cruises

  • Ship: Harmony of the Seas

  • Destinations:
    - Leaving from Orlando, Florida
    - Philipsburg, St. Maarten
    - San Juan, Puerto Rico
    - Cococay, Bahamas
    - Returning to Orlando, Florida

While the cruise isn’t for a few months, spots are filling up fast. You can put down a deposit with our travel agent and then you don’t have to pay the remainder until closer to departure. We’d love to have you, so if you’re interested, get over to The Lettering Companion’s site for all the details!

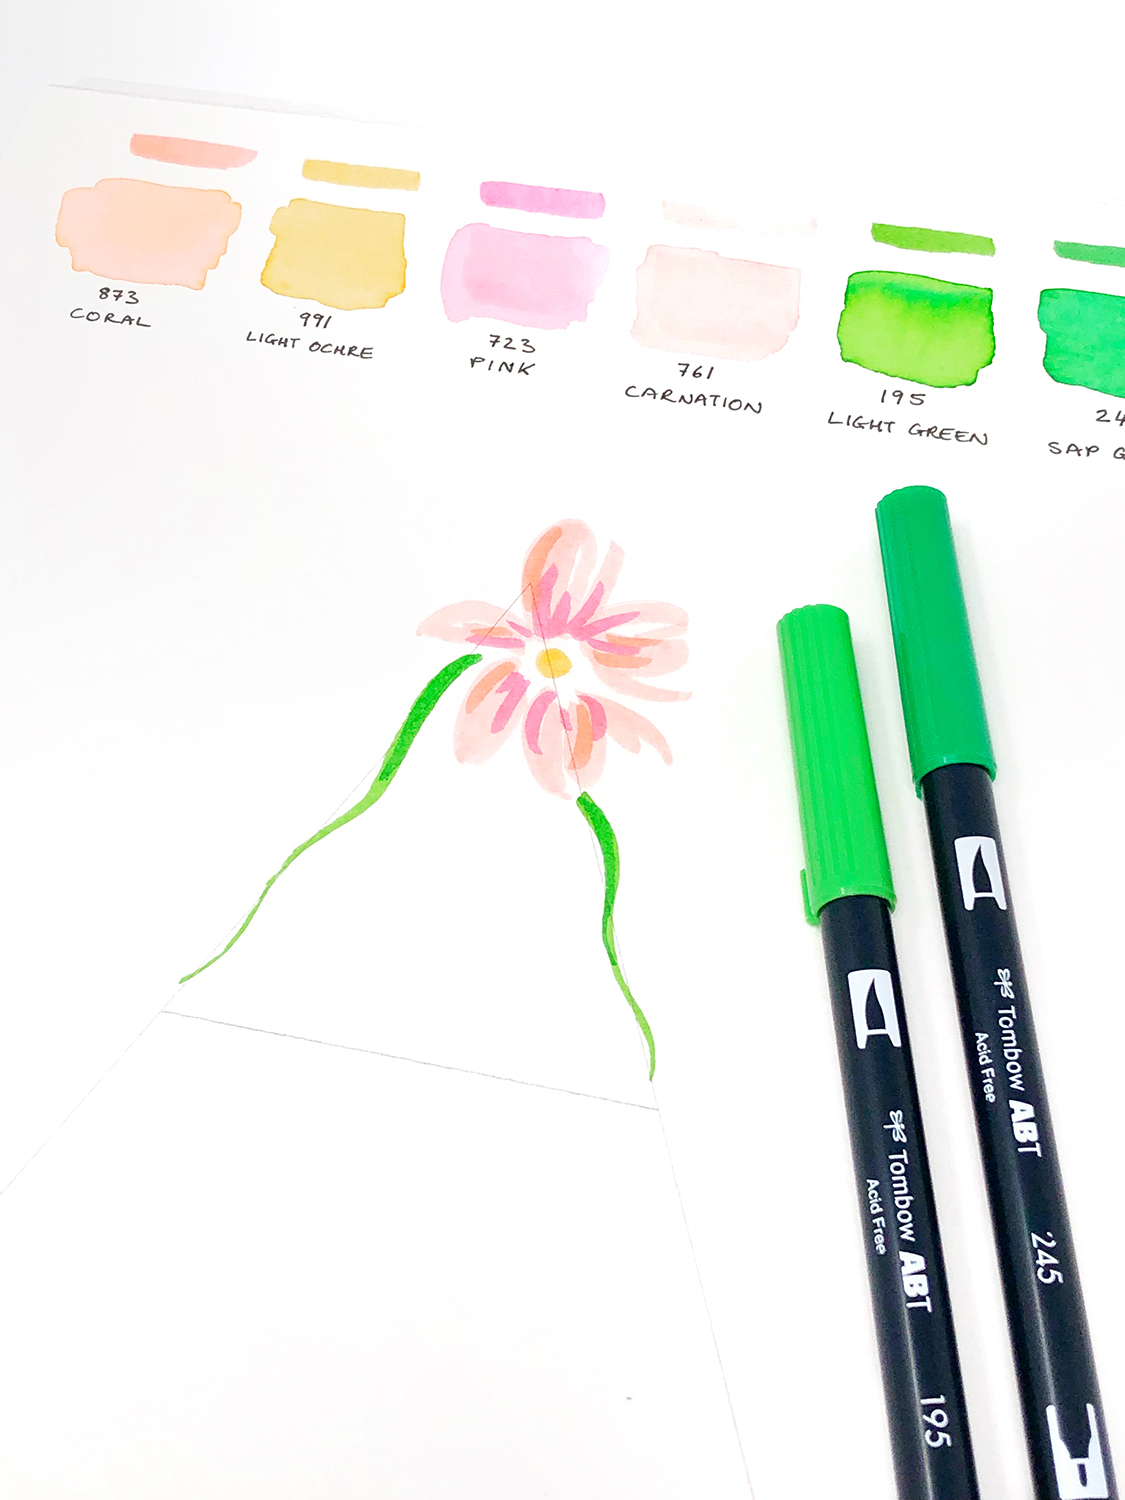
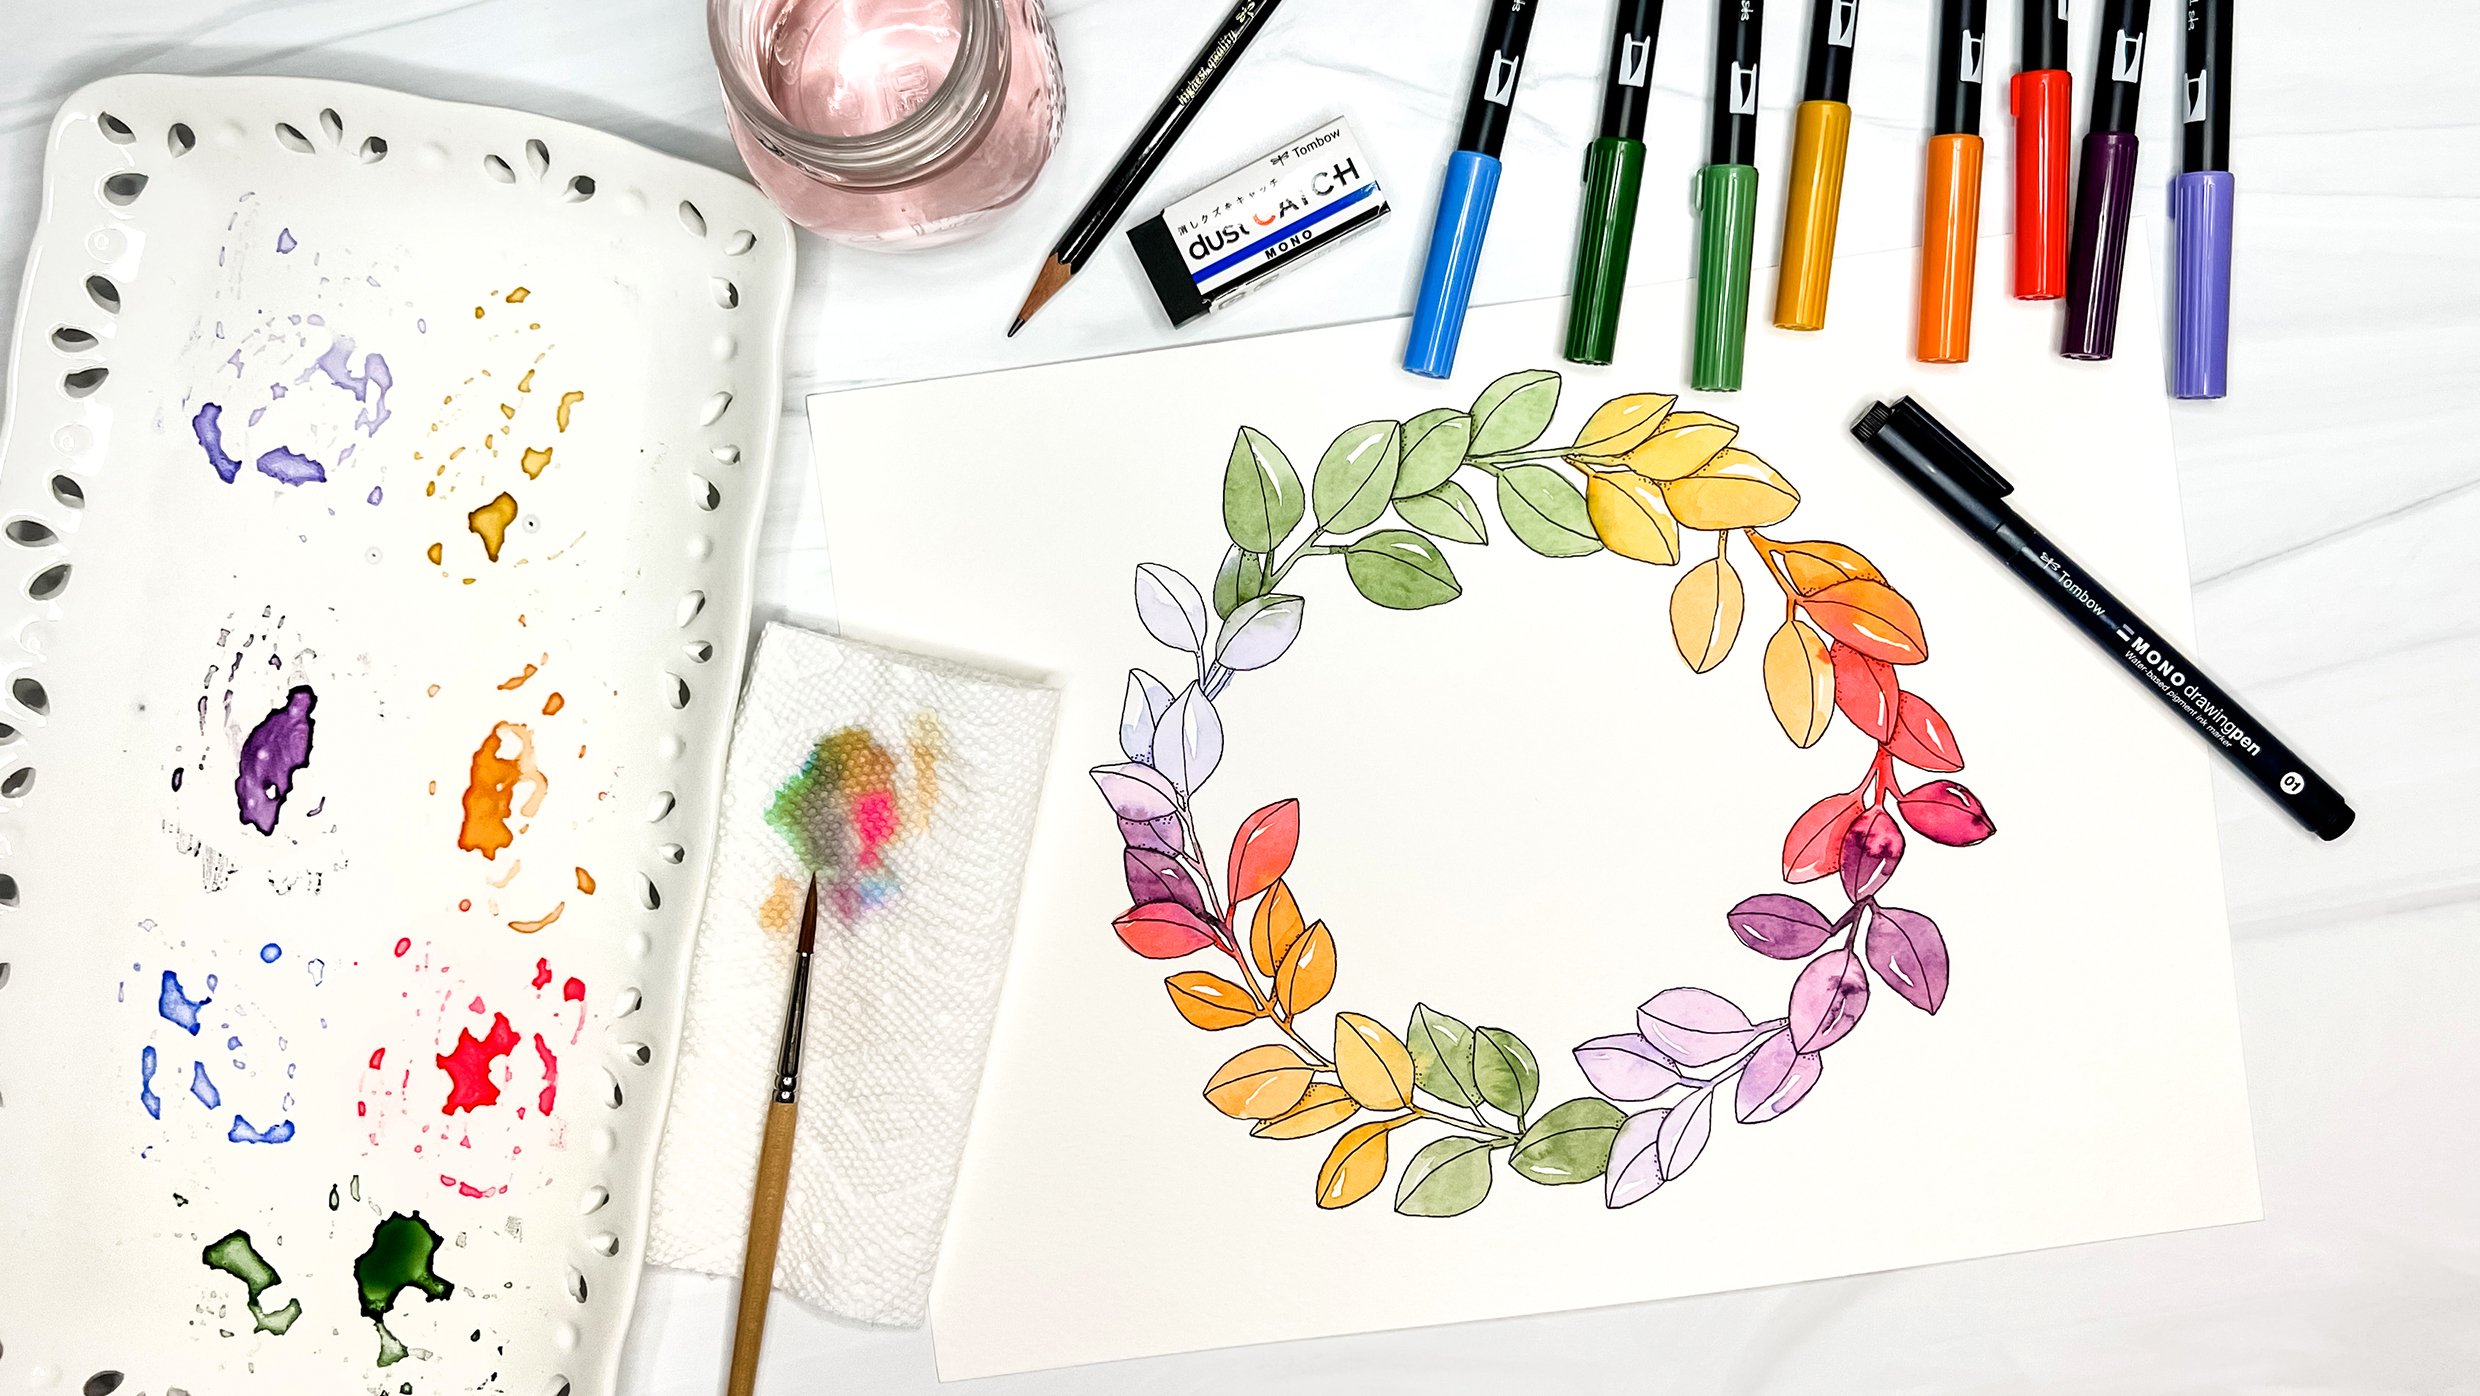
Naturally, I’m so excited that I had to paint a watercolor piece to celebrate. I used Prima’s Tropicals Watercolor Confection Set (you can still get 15% off their products with my code BrownPaperBunny15%), on Canson XL Watercolor paper.

Just think, that could be you standing on a gorgeous beach, with a bag full of art supplies, ready to relax and create! ;)

In Dec 2018, Tutorial, Watercolor
11 Comments
Free Downloadable Fashion Illustration Figure Croquis by Jessica Mack of BrownPaperBunny

Free Fashion Croquis

February 23, 2019

I’ve been working on getting faster with my fashion illustrations, and the best way to cut time off each sketch is to use a fashion illustration croquis or figure. Croquis are also a great way to get started illustrating fashion if you aren’t confident drawing figures yet.

With awards season in full swing, one of my favorite things is to illustrate outfits from the red carpet. With the Oscars around the corner I thought it would be fun to share a set of my fashion illustration croquis so you can illustrate the red carpet with me.

Enter your email to download and print this set of free croquis. Then use the figure croquis to illustrate your favorite outfits. Tag @BrownPaperBunny and #BPBcroquis on Instagram so I can see your finished sketches!

Download Croquis

Enter your email to get the download link for these free croquis

I respect your privacy, and rarely send emails (but when I do I promise they’ll be fun)!

Download Fashion Illustration Croquis

Fine print: These croquis are for your own personal use and not for licensing, resale, or commercial use.

If you’d like to see some of my fashion illustrations for inspiration, check out these posts.

Featured
Fashion Illustration with Collage by Jessica Mack of BrownPaperBunny
Fashion Illustration with Collage
Fashion from Found Objects by Jessica Mack on BrownPaperBunny
Fashion From Found Objects
Free Fashion Flatlay Coloring Pages by Jessica Mack on BrownPaperBunny
Free Coloring Pages: Fashion Flatlays
Free Coloring Pages: Shoes by Jessica Mack on BrownPaperBunny
Free Coloring Pages: Shoes
Live+Fashion+Illustration+by+Jessica+Mack
Live Fashion Illustration: How To
Bloomtober 2019 Day 1 Portrait by Jessica Mack of BrownPaperBunny
Bloomtober 2019
Fall Fashion Illustration by Jessica Mack of BrownPaperBunny
Fall Fashion Illustration
Exclusive Tombow Dual Brush Pen Packs for Michael's by Jessica Mack of BrownPaperBunny
Exclusive Tombow Dual Brush Pen Packs for Michael's
Fashion Illustration Inspired by Food. By Jessica Mack of BrownPaperBunny.
Fashion Illustrations Inspired by Food
Fashion Illustration inspired by Dragonfruit drink at Starbucks. By Jessica Mack of BrownPaperBunny.
Inspired by Dragonfruit
FullSizeRender.jpg
Lunchtime Illustrations

(c) BrownPaperBunny

In Fashion Illustration, Dec 2018, Illustrations, Free Downloads, Watercolor
Comment
Watercolor portrait by Jessica Mack of BrownPaperBunny using different watercolor techniques

Watercolor Techniques

February 21, 2019

This week I was challenged to use multiple watercolor techniques in one portrait. I took that challenge and not only used multiple techniques but as many as I could think! Can you spot them all in my portrait above? Let me know, in the comments, if you think of any I missed!

Salt with Watercolor

Dropping kosher salt into almost-dry watercolor paint gives you a fun starburst effect. You have to experiment a little because if the paint is too wet or too dry it won’t work.

Watercolor and Salt by Jessica Mack of BrownPaperBunny

Wet on Wet Watercolor

This technique is fairly self explanatory. You wet your paper first, then add wet paint onto the wet paper, and watch it spread in a deliciously unpredictable way!

Wet on Wet Watercolor by Jessica Mack of BrownPaperBunny

Wet on Dry Watercolor

Wet paint, onto dry paper gives you a controlled, precise finish.

Wet on dry watercolor by Jessica Mack of BrownPaperBunny

Flat Wash

Flat washes give you a nice even area of color. I usually create mine with a really wet brush, onto dry paper.

Flat Wash Watercolor by Jessica Mack of BrownPaperBunny

Watercolor Fade Technique

This technique has a few different names, but I like the term ‘fade’. It’s where you add a little wet paint to your dry paper, then rinse your brush and use it to pull the paint down the paper. You can then rinse and repeat until the color is faded completely.

Watercolor Fade Technique by Jessica Mack of BrownPaperBunny

Graduated Wash

A graduated wash can be achieved via wet-on-wet and controlling the spread of paint by tilting the paper or blotting with paper towel. Or you can get this look by similarly to the fade technique but by using more water and rinsing your brush less in between each cross stroke (more of a dip than a rinse).

Graduated Wash using Watercolor by Jessica Mack of BrownPaperBunny

Glazing

A watercolor glaze is a thin wash applied over dry paint. It’s useful in unifying a painting with a similar color, or if you need to reduce the contrast of an area etc.

Watercolor Glazing by Jessica Mack of BrownPaperBunny

Scumbling

Watercolor scumbling is a technique I only learned recently, and it’s great for adding texture — especially to your underpainting. Scumbling is basically scribbling, or loose dots which let some of the paper show through.

Watercolor Scumbling by Jessica Mack of BrownPaperBunny

Crosshatching with Watercolor

Most used with pencil or ink, crosshatching can either be a fun or madening watercolor technique. Too wet and it turns into a muddy mess, but just a little bleeding together can make for a very cool effect and give you lots of texture.

Crosshatching with Watercolor by Jessica Mack of BrownPaperBunny

Here’s an example of an entire portrait I created using watercolor crosshatching.

View this post on Instagram

A post shared by Jessica 🎨 Seattle Artist (@brownpaperbunny) on Feb 1, 2019 at 7:19am PST

Doodling with Watercolor Paint

If you have a fine brush, doodling on a painting can be really fun and is a great way to add some detail or areas of interest.

Doodling with Watercolor by Jessica Mack of BrownPaperBunny

Using Masking Fluid

Masking fluid is a liquid rubber that once dry can be painted over, preserving (masking) the area underneath until it is removed. It’s great for highlights or details you want to keep while applying a wash or big area of color to the rest of your paper. Make sure you dip your brush in soap before you use it with masking fluid, and clean it immediately afterwards or else it will dry and in your brush and ruin it. You can also use masking fluid pens or dip a toothpick into it instead of risking your brushes.

Masking Fluid with Watercolor by Jessica Mack of BrownPaperBunny

Lifting off

Lifting off is great if you want a lighter area, or you made a mistake. It can be done with a clean dry brush (or paper towel) into almost dry paint, or you can gently use a sand eraser or razor blade to remove areas of dried paint (these last two will damage the paper though and you won’t be able to paint over the top).

Lifting off Watercolor by Jessica Mack of BrownPaperBunny

I often get asked what brands of watercolor, paper, and brushes I use, so I created a list for you here.


More watercolor tutorials:

Featured
CRL-Horizontal-Laptop-Beige-Floral-Painting.jpg
Creative Retreat Live
Rainbow-Watercolor-Wreath-Using-Markers.JPG
Rainbow Wreath Tutorial
JessicaMack-Mothers-Day-Art-8.jpg
Make Your Own Mother's Day Art
In Tutorial, Illustrations, Watercolor, Dec 2018, Portraits
12 Comments
Invisible Ink Invitations by Jessica Mack of BrownPaperBunny

Invisible Ink Invitations

February 21, 2019

Please note: This blog post contains affiliate links, which help pay for the upkeep of this site. That being said, I will never, ever promote anything I am not 100% in love with!

----------

In honor of our little girl’s upcoming birthday I’m going to show you how to get an invisible ink effect with Tombow’s new Fudenosuke Colors Brush Pens. I don’t know about you but when I was a kid I was obsessed with invisible ink, codes, and spy gadgets. I guess I never grew up because I still love those things! Recently, I discovered that you can use Fudenosuke Brush Pens under water-soluble ink (such as Dual Brush Pens) to create hidden text and drawings that can be revealed later. Here’s how!

Supplies:

  • Tombow Fudenosuke Colors 10-Pack

  • Watercolor Paper (140lb works best)

  • Tombow Dual Brush Pens in matching colors

  • Paintbrush and water 

Invisible Ink Invitations by Jessica Mack of BrownPaperBunny

Step 1: Create Your Hidden Layer

Use your Fudenosuke Colors Brush Pens to create your hidden text, drawing, or designs on the watercolor paper. This technique would be a fun way to write a letter to someone, create an invitation, a birthday card, a little note or a drawing. 

Invisible Ink Invitations by Jessica Mack of BrownPaperBunny

Step 2: Create Your Top Layer

Let your first layer dry completely. Then use Dual Brush Pens in colors that match the Fudenosukes to cover the first layer. The Dual Brush Pen colors I found that matched well were: 856 for Red, 946 for Orange, 055 for Yellow, 195 for Green, 476 for Blue, 636 for Purple, 725 for Pink, 969 for Brown, N65 for Grey, and N15 for Black.

If you can still see the Fudenosuke ink through the first layer of Dual Brush Pen, let it dry completely and add a second layer.

Invisible Ink Invitations by Jessica Mack of BrownPaperBunny

Step 3: The Big Reveal

You’re finished, and you can send your creation off with instructions to wet each color with a paintbrush and water. Here’s what the rainbow invitation looked like after I wet each top layer color and the Fudenosuke ink emerged.

Invisible Ink Invitations by Jessica Mack of BrownPaperBunny
In Dec 2018, Ink, Tutorial, Watercolor
8 Comments
Watercolor flowers by Jessica Mack of BrownPaperBunny

Valentine's Watercolor Flowers

February 14, 2019

Happy Valentine’s Day! Don’t you just love love!? Whether you’re spending today with a partner, friend, or showing yourself some love I hope you are having a wonderful day.

These little flowers were painted using Prima’s Pastel Watercolor Confection set. If you’d like a discount on your own set, use the code ‘BrownPaperBunny15%’ to get 15% off Prima products here.

Watch the time-lapse video below to see how it all comes together.

In Dec 2018, Illustrations, Watercolor
6 Comments
How to Make a Valentine's Day Wreath by Jessica Mack of BrownPaperBunny

How to Make a Valentine's Day Wreath

January 28, 2019

Please note: This blog post contains affiliate links, which help pay for the upkeep of this site. That being said, I will never, ever promote anything I am not 100% in love with!

----------

Don’t you just love love?! Today I’m going to show you how to create a Valentine’s Day wreath that you could use on a card, or as a gift for someone special. Here’s what you’ll need to get started:

Supplies

  • Tombow Dual Brush Pens

  • Mono Graph Mechanical Pencil

  • Mono Knock Eraser

  • Watercolor Paper

  • Mono Drawing Pens

  • Paintbrush

How to Make a Valentine's Day Wreath by Jessica Mack of BrownPaperBunny

Step 1: Pencil Outlines

The first step in drawing your Valentine’s wreath is to trace a circle (I used an upside-down bowl) then start drawing flowers and leaves around the circle, using your Mono Graph Mechanical Pencil.

Step 2: First Layer of Color

Next, add your lightest color of Dual Brush Pen on the outlines of your flower petals, and use a wet paintbrush to blend it. This will give you a nice soft background color. Watch the time-lapse video below to see how it all comes together.

Step 3: Layers of Color

Once the first layer of ink is dry you can repeat with darker shades in certain areas. I chose to draw stylized chrysanthemums, what’s your favorite flower? Let me know in the comments!

Step 4: Finishing Touches

I added a quote to the center, and outlined the flowers and leaves using Mono Drawing Pens. Do you have a favorite quote or saying about love?

How to Make a Valentine's Day Wreath by Jessica Mack of BrownPaperBunny
In Watercolor, Ink, Dec 2018, Illustrations, Tutorial
13 Comments
Blending Markers with Water by Jessica Mack of BrownPaperBunny

Blending Markers with Water

January 10, 2019

Please note: This blog post contains affiliate links, which help pay for the upkeep of this site. That being said, I will never, ever promote anything I am not 100% in love with!

----------

One of my absolute favorite things is blending markers with water (specifically Tombow Dual Brush Pens) to create soft backgrounds you can draw over. Let me show you how I do it.

Supplies:

  • Tombow Dual Brush Pens

  • Watercolor Paper

  • Tombow Mono Drawing Pencil

  • Paintbrush

  • Tombow Blending Palette

Blending Markers with Water by Jessica Mack of BrownPaperBunny

Step 1: Blend Your Colors

Start by scribbling some Dual Brush Pen colors, that you'd like to blend, onto your blending palette. Then wet your paintbrush and blend the colors together until you have the shade you want. Next, use the paintbrush to paint the ink from your blending palette onto your watercolor paper to create a soft, watercolor-look background.

Blending Markers with Water by Jessica Mack of BrownPaperBunny

Step 2: Add More Color

If you want a little more variation in your background color, repeat step one with a different shade of the same color, or a color you think will go nicely with the first color you painted onto the paper. I used yellow, blues and greens for my leaves and pinks and yellow for my flowers. Add your new color to your existing ink on the paper while it is still wet, and watch the colors blend together!

Blending Markers with Water by Jessica Mack of BrownPaperBunny

Step 3: Add Details

Once your background colors are dry go back in with either the bullet or the brush tip of your Dual Brush Pen and add details over the top. This adds some nice contrast to the soft background. And there you have it — I hope blending markers with water will become one of your favorite ways to create too!

Blending Markers with Water by Jessica Mack of BrownPaperBunny

I’d love to see what you create, tag @BrownPaperBunny on social media so I can take a look!

Blending Markers with Water by Jessica Mack of BrownPaperBunny
In Pattern, Ink, Watercolor, Tutorial, Dec 2018, Illustrations
7 Comments
Watercolor Fashion Illustration from the Golden Globes red carpet by Jessica Mack of BrownPaperBunny

Watercolor Fashion Sketches

January 10, 2019

The weather here in Seattle has been particularly rainy of late, so I’ve been spending a lot more time inside. It’s not all gloomy though, more time at home means more time to create art! So I’ve been doing a lot more watercolor fashion illustrations to warm up, and thought I’d share a couple of them with you.

These first two were loosely inspired by Blaire Eadie, who I’ve been following on Instagram for years now.

View this post on Instagram

A post shared by Jessica 🎨 Seattle Artist (@brownpaperbunny) on Jan 8, 2019 at 10:19am PST

I painted these next two while watching the Golden Globes. I would have painted every single dress that walked down the red carpet if I’d had the time, they were all so lovely!

View this post on Instagram

A post shared by Jessica 🎨 Seattle Artist (@brownpaperbunny) on Jan 9, 2019 at 8:27am PST

Did you watch the Golden Globes this year?

Because I so often paint with Prima Watercolor Confections set they’ve given me a 15% off coupon to share with you. I believe it works on all Prima products, so use the code ‘BrownPaperBunny15%’ on your next purchase to save some dollars!

In Dec 2018, Fashion Illustration, Illustrations, Watercolor
8 Comments
New Year's Resolution Cards by Jessica Mack of BrownPaperBunny

New Year's Resolution Cards

December 13, 2018

Please note: This blog post contains affiliate links, which help pay for the upkeep of this site. That being said, I will never, ever promote anything I am not 100% in love with!

----------

With New Year's just around the corner, there are lots of parties being planned and resolutions being made. So why not combine the two?! Set up a table with these cute New Year's Resolution Cards so people can write theirs down and mail it to themselves (so it doesn't get lost in all the merriment). Here's what you'll need to get started.

Supplies:

  • Tombow Dual Brush Pen

  • Watercolor paper or card

  • Tombow Fudenosuke Colored Pen Set

  • Envelopes + Stamps

  • Tombow Mono Aqua Liquid Glue

  • Ruler

  • Tombow XL Blending Palette

  • Scissors

  • Water spritzer

  • Glitter 

New Year's Resolution Cards by Jessica Mack of BrownPaperBunny

Step 1: Create a Watercolor Background

Scribble some ink onto your XL Blending Palette, using your favorite color Dual Brush Pen. Then spritz the ink with water and lay your piece of watercolor paper down on top of the ink. Carefully pull it off and leave it ink-side-up to dry. You can watch a video of this technique over on my Instagram account.

New Year's Resolution Cards by Jessica Mack of BrownPaperBunny

Step 2: Cut Out Your New Year's Resolution Cards

Once your watercolor-look paper is dry you can either repeat the process on the back, or leave it white. Then cut your paper up into any size cards you'd like, just be sure they fit into the envelopes you have.

New Year's Resolution Cards by Jessica Mack of BrownPaperBunny

Step 3: Write on the Front

Use your colored Fudenosuke pens to write on the front of the cards. You can write 'My 2019 Resolutions' like I have, or come up with something different. Leave the 2019 blank, or just in pencil, ready for the next step. 

New Year's Resolution Cards by Jessica Mack of BrownPaperBunny

Step 4: Add the Glitter!

Use your Mono Aqua Liquid Glue to write 2019, then sprinkle some glitter over the glue. Wait until it has dried completely before you shake and brush off any excess glitter.

New Year's Resolution Cards by Jessica Mack of BrownPaperBunny

Step 5: Draw Lines on the Back

Once the glue on the front is completely dry, turn the cards over and use the small end of your Dual Brush Pen and a ruler to draw lines on the back. This will make it easier for people to write their resolutions.

New Year's Resolution Cards by Jessica Mack of BrownPaperBunny

Step 6: Set up a Resolutions Table

Now you're ready to set up a resolutions table at your party! Stock it with your New Year's resolution cards, envelopes, cute stamps, and pens. If you have some extra time, wrap a shoebox in gift-wrap, and cut a slot in the top for people to put their sealed envelopes. The next day, after a sleep-in and you have suitably recovered from all the party merriment, mail off the cards to everyone.

New Year's Resolution Cards by Jessica Mack of BrownPaperBunny
In Ink, Tutorial, Watercolor, Dec 2018
7 Comments
Watercolor Gift Tags by Jessica Mack of BrownPaperBunny

Watercolor Gift Tags

December 6, 2018

Please note: This blog post contains affiliate links, which help pay for the upkeep of this site. That being said, I will never, ever promote anything I am not 100% in love with!

----------

This week I wanted to show you how to use Tombow Dual Brush Pens to make some cute watercolor-look tags for your holiday gifts. You’ll need the following supplies to get started.

Supplies:

  • Dual Brush Pens

  • XL Blending Palette

  • Water Mister

  • Scissors

  • Watercolor paper or card

  • Hole punch

Watercolor Gift Tags by Jessica Mack of BrownPaperBunny

Step 1: Applying the Color

To make your watercolor-look gift tags, start by putting some ink down on your XL Blending Palette using your Dual Brush Pens. Try some different color combinations. Then spray the ink with water. Lay your watercolor paper or card on top and give it a good smush to make sure the ink blends.

Carefully lift the paper off and let it dry. Watch the video below to see the steps in action.


Step 2: Trace Your Tags

Using a light pencil, trace gift tag outlines onto the paper. I used a store-bought tag I had lying around.

Step 3: Cut Out Your Tags

Cut around each of your traced tags and voila, you’re ready to wrap!

You could get really creative with your color combinations, no need to stick to traditional holiday colors!

Do you have any gift-wrapping secrets? Share them with me in the comments!

In Ink, Tutorial, Aug 2017, Watercolor
8 Comments
Draw a Fall Wreath in Jewel Tones by Jessica Mack of BrownPaperBunny

Draw a Fall Wreath in Jewel Tones

November 16, 2018

Please note: This blog post contains affiliate links, which help pay for the upkeep of this site. That being said, I will never, ever promote anything I am not 100% in love with!

----------

Hello hello! Today I’m going to show you how to draw a fall wreath in jewel tones. While I love the colors of changing leaves at this time of year I thought it would be fun to branch out (pun intended) and try some brighter jewel tones that are a little less associated with fall. This wreath is super easy to draw and looks great on cards, your art journal, or in your planner. Here's what you'll need to get started.

Supplies:

  • Tombow Dual Brush Pens (I chose 312, 346, 528, 606, and 946)

  • Watercolor paper or thick paper or card

  • Tombow Mono Drawing Pencil (2H or 4H)

  • Paintbrush

  • Water

Draw a Fall Wreath in Jewel Tones by Jessica Mack of BrownPaperBunny

Step 1: Sketch Your Wreath in Pencil

The first step is to sketch out your wreath, using a pencil. I chose a 4H pencil because it is super light. You can sketch in some flowers, leaves, and fruit at this stage, or just draw the basic circle you plan to follow.

Step 2: Create a Soft First Layer

Next you're going to use your lighter colors to draw in some lose branch shapes around the wreath. These are going to end up being your background branches to add depth to your drawing.

Draw a Fall Wreath in Jewel Tones by Jessica Mack of BrownPaperBunny

Go over them with a wet paintbrush to soften them and blend the ink together a little.

Draw a Fall Wreath in Jewel Tones by Jessica Mack of BrownPaperBunny

Step 3: Add Your Largest Leaves and Shapes

Once your background branches are dry, it's time to start adding your larger shapes. These can be flowers, large leaves, fruit etc. If you want to have a watercolor-look you can use your wet paintbrush to go over these shapes as well, to blend your marker strokes together. To see how I do this, watch the time-lapse video at the end of this blog post. 

Draw a Fall Wreath in Jewel Tones by Jessica Mack of BrownPaperBunny

Step 4: Creating Details

Once everything is dry it's time to go back in and add more details. You can use the brush or the fine tip of your Dual Brush Pens to create more leaves, branches, add detail to your flowers etc.

Draw a Fall Wreath in Jewel Tones by Jessica Mack of BrownPaperBunny

Step 5: Lettering

The final step is to add some lettering to the middle of your wreath. You could simply write the word 'Fall' like I did, or add your favorite quote, someone's name, or a holiday greeting.

Draw a Fall Wreath in Jewel Tones by Jessica Mack of BrownPaperBunny

Watch the video below to see how this wreath all came together. And share your own wreath on social media! Tag @BrownPaperBunny so I can see!

In Watercolor, Illustrations, Aug 2017, Tutorial, Ink, Type
3 Comments
Make Fall Leaf Place Cards with Jessica Mack of BrownPaperBunny

Make Fall Leaf Place Cards

September 21, 2018

Please note: This blog post contains affiliate links, which help pay for the upkeep of this site. That being said, I will never, ever promote anything I am not 100% in love with!

----------

Fall is the perfect season to host lots of cozy dinner parties, so today I’m going to show you how to make some fun fall-themed place cards.  But first, you'll need to gather a few supplies. 

Supplies:

  • A pencil

  • Watercolor paper

  • Tombow Dual Brush Pens

  • Tombow Mono Drawing Pens

  • A paintbrush

  • Scissors

To create your fall-themed place cards start by using your pencil to draw a mason jar and some leaf shapes onto your watercolor paper.

Make Fall Leaf Place Cards with Jessica Mack of BrownPaperBunny

Next, color in your leaves with Dual Brush Pens, and use a wet paintbrush over the ink to get a watercolor effect. Once they are dry you can add lines and detail with your Mono Drawing pens, then cut everything out. Check out the time-lapse video below to see each step, sped up.

To finish off your place cards write your guest's name on the jar and fall-themed questions on the back of each leaf as conversation starters, then make a slit in the top of your mason jar, and arrange the leaves in the top.

Make Fall Leaf Place Cards with Jessica Mack of BrownPaperBunny

The cards look great laid on top of a plate or held up in a place-card holder.

What’s your favorite fall dish to have at a dinner party or pot-luck? 

In Aug 2017, Ink, Tutorial, Watercolor
6 Comments
Create a Floral Self-Portrait with Jessica Mack of BrownPaperBunny

Create a Floral Self-Portrait

September 15, 2018

Please note: This blog post contains affiliate links, which help pay for the upkeep of this site. That being said, I will never, ever promote anything I am not 100% in love with!

----------

Hello hello! Today I'm going to show you how to create an easy floral self-portrait. You could make one for all the members of your family and hang them on the wall together!

Here are the supplies you'll need to get started.

Supplies:

  • Tombow Dual Brush Pens
  • Watercolor Paper
  • Tombow Mono Drawing Pen
  • Pencil
  • Paintbrush
Create a Floral Self-Portrait with Jessica Mack of BrownPaperBunny

Step One: Draw Your Silhouette

An easy way to capture your profile silhouette is to sit near a wall with a lamp on your other side and have a friend or family member trace your shadow onto the paper. Once your silhouette has been captured you can go over it with Mono Drawing Pen to make it stand out.

Create a Floral Self-Portrait with Jessica Mack of BrownPaperBunny

Step Two: Fill Your Silhouette with Loose Floral Shapes

Using your Dual Brush Pens fill your silhouette with loose florals. Then, with your wet paintbrush, go over the ink to give it a soft watercolor effect. 

Create a Floral Self-Portrait with Jessica Mack of BrownPaperBunny

You can leave some white space, or fill everything in completely.

Create a Floral Self-Portrait with Jessica Mack of BrownPaperBunny

Step Three: Outline Your Flowers

This step is optional, but if you want to add a little more definition to your flower shapes, use your Mono Drawing Pen to add in some lines and details. 

Create a Floral Self-Portrait with Jessica Mack of BrownPaperBunny

Voila, you're ready to frame your self-portrait and hang it on the wall! And if flowers aren't your thing, you could fill your silhouette with patterns, fruit, or anything else that feels like you! If you really like tennis, fill it with tennis rackets and balls. Maybe books are more your thing, you could fill it with all your favorite titles. Tell me in the comments what you'd fill yours with!

I'd love to see your finished self-portrait, so share it on social media and tag @BrownPaperBunny!

In Portraits, Ink, Illustrations, Aug 2017, Tutorial, Watercolor
10 Comments
← Newer Posts Older Posts →

Subscribe

Sign up to receive social media tips, freebies, special promotions, and art tutorials!

Thank you!

Please click confirm in the email you were just sent!

Directory of Illustration Jessica Mack

Shop my work on Society6

Watercolor World Map by Jessica Mack of BrownPaperBunny

Follow on Instagram

For the 100 Days Project this year I’m keeping it super low pressure. I’ve got a very busy couple of months coming up and want to set myself up to be able to stick with it, while still making sure I do something creative every day. You ca

See my classes on Skillshare

Skillshare Classes by Jessica Mack

Popular Posts

Popular Posts
CRL-Horizontal-Laptop-Beige-Floral-Painting.jpg
Creative Retreat Live
Rainbow-Watercolor-Wreath-Using-Markers.JPG
Rainbow Wreath Tutorial
15 Ways to Journal by Jessica on BrownPaperBunny
15 Ways to Journal
Tombow Brush Pen Markers and Colored Pencils
Brown Paper Bunny

Privacy + Terms of Use

Shop

Watercolor with Markers Book

Classes

Art Tutorials

Art & Illustration Portfolio

About

Contact

Custom Book Print

Custom Book Mug

How to Paint Watercolor Flowers Using Markers

Free Fashion Croquis

Start an Art Journal

6 Easy Flowers to Draw with Tombow Markers

Make Your Own Watercolor Bookmarks